1. Important Safety Information
Please read and understand all instructions and safety warnings before assembly and use of this carport. Failure to follow these instructions may result in injury or damage to the product.
- Anchoring: Always ensure the carport is securely anchored to the ground using the provided stakes and tensioning system. In windy conditions, additional anchoring may be required.
- Weather Conditions: This carport is designed for protection against light rain, UV, and debris. It is not intended for use in extreme weather conditions such as heavy snow, strong winds, or severe storms. Disassemble or reinforce the structure during such conditions.
- Assembly: Assembly requires at least two adults. Wear appropriate safety gear, such as gloves, during assembly.
- Location: Choose a level, clear area for installation, away from power lines, trees, or other structures that could cause damage.
- Maintenance: Regularly inspect the frame, cover, and anchoring points for wear or damage. Replace worn parts immediately.
2. Package Contents
Verify that all components are present before beginning assembly. If any parts are missing or damaged, contact customer support.
- Galvanized Steel Frame Pipes (various lengths and connectors)
- Polyethylene (PE) Fabric Cover
- Ground Stakes
- Ratchet Tension Straps
- Assembly Hardware (bolts, nuts, washers)
- Instruction Manual

Image: The carport is typically shipped in two packages. Ensure both packages are received before starting assembly.
3. Setup and Assembly Instructions
Follow these steps carefully for proper assembly. It is recommended to have at least two people for assembly.
- Unpack and Identify Parts: Lay out all frame pipes, connectors, and the fabric cover. Refer to the parts list in the manual to identify each component.
- Assemble the Frame: Connect the galvanized steel pipes according to the diagrams in your detailed manual. Ensure all connections are secure.
- Attach the Cover: Carefully drape the polyethylene fabric cover over the assembled frame. Ensure it is centered and aligned correctly.
- Secure the Cover: Fasten the cover to the frame using the integrated straps or ties. Ensure the cover is taut to prevent water pooling and wind damage.
- Install Ground Stakes: Hammer the ground stakes through the designated holes in the feet of the frame. Bury the extended edges of the cover deep into the soil for added stability.

Image: Detail of the stable standing system, showing how to hammer ground stakes through the frame's feet and bury the cover's edges for enhanced stability.
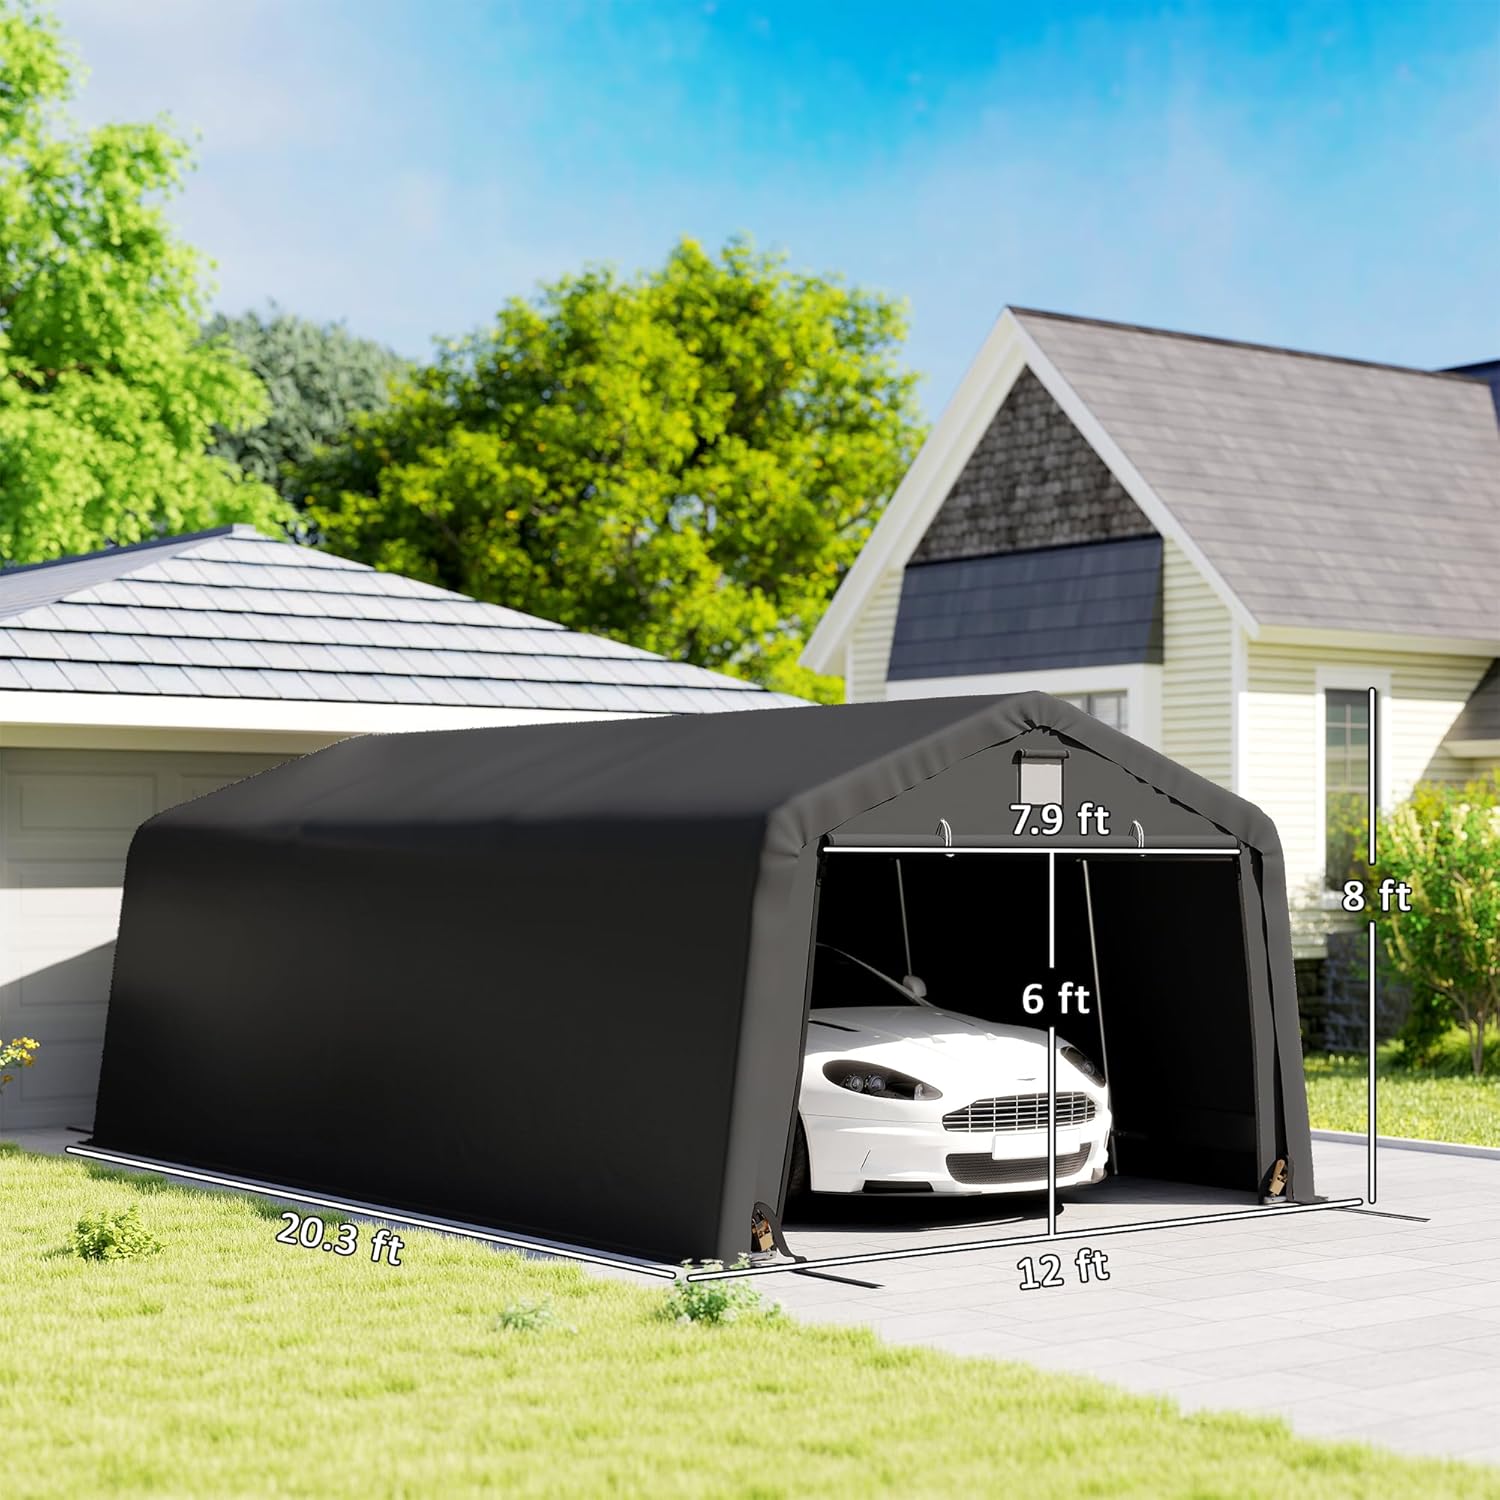
Image: The cover tensioning system uses straps to ensure the cover remains securely attached to the frame, providing better protection and a neat appearance.
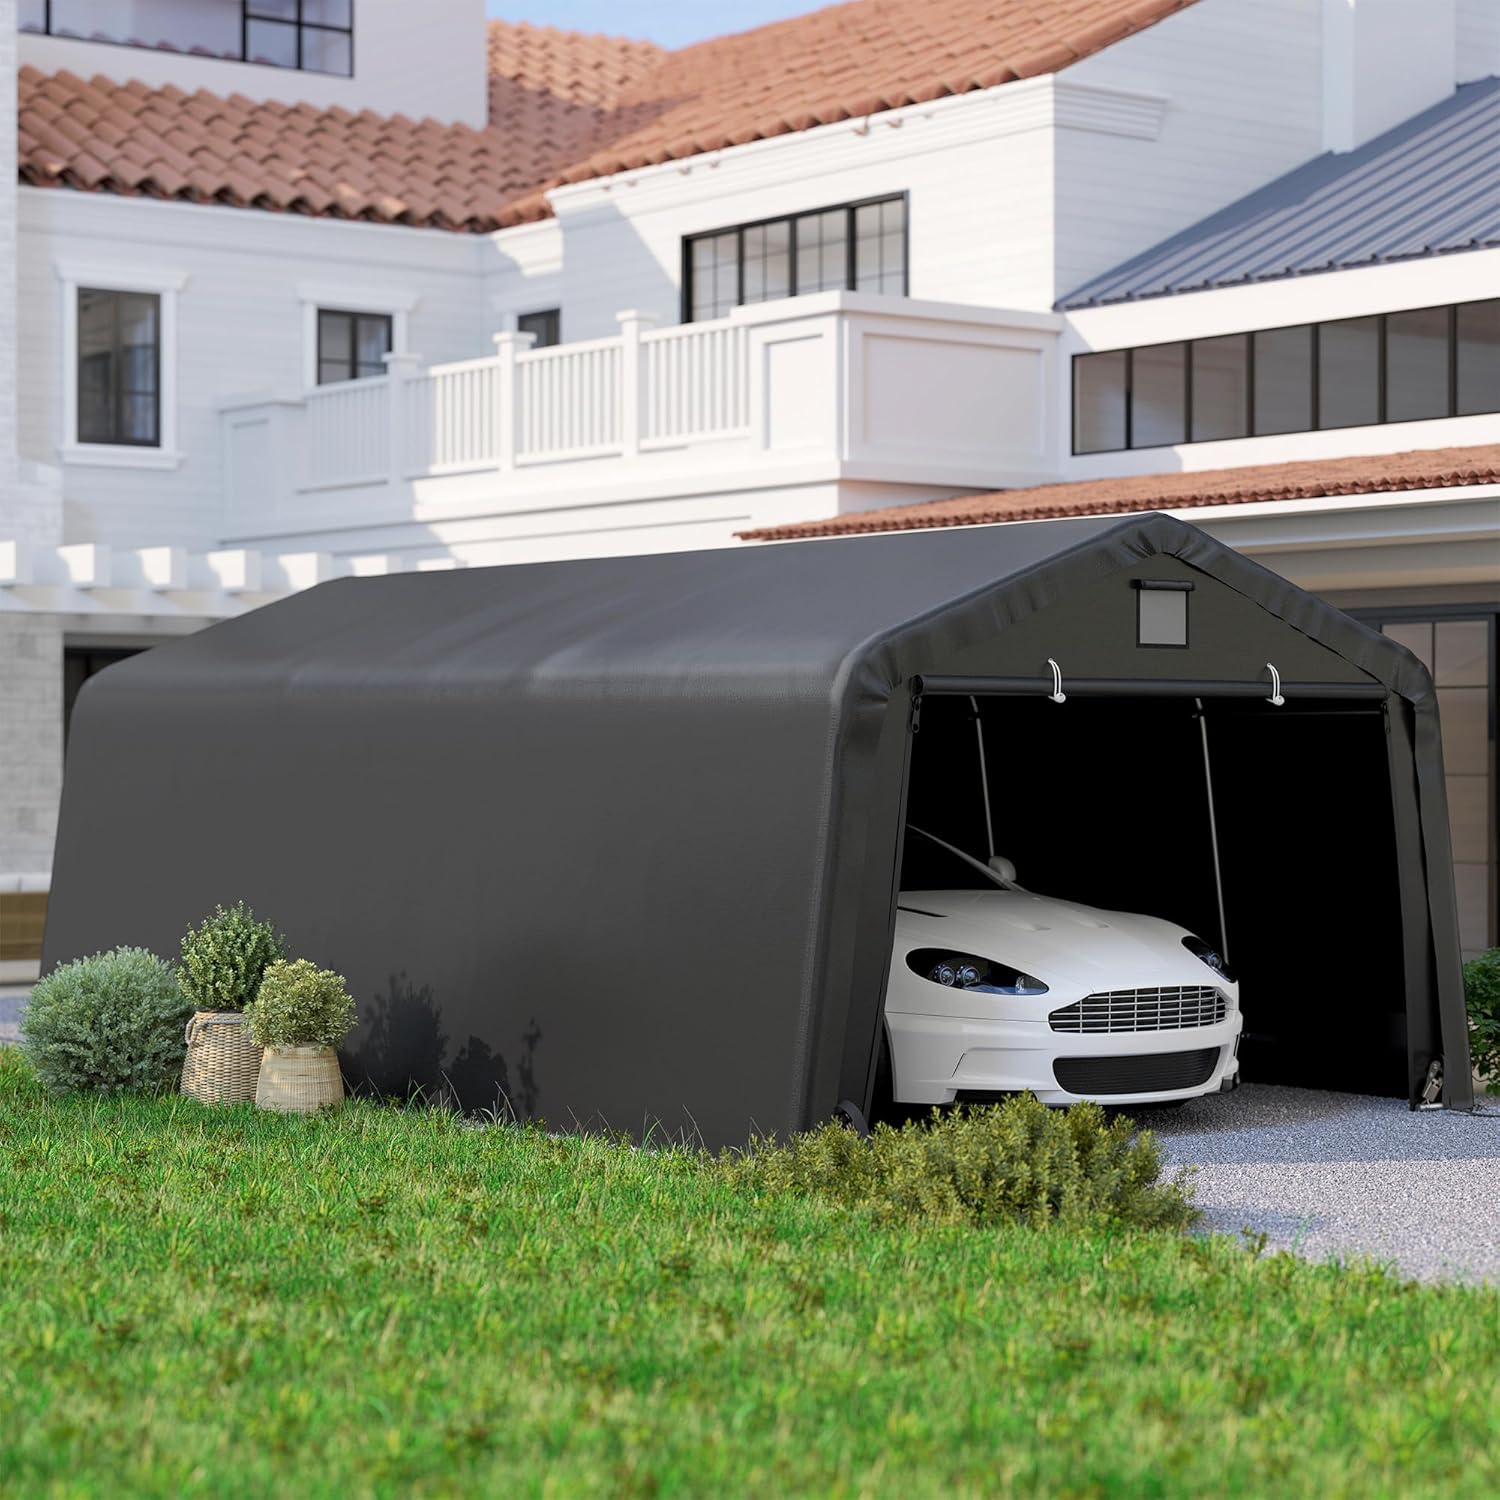
Image: The fully assembled Outsunny carport providing shelter for a vehicle in a residential setting.
Video: This video demonstrates the assembly process and key features of the carport, providing a visual guide for installation.
4. Operating Instructions
This carport is designed for ease of use and versatility.
- Large Zippered Door: The front panel features a large zippered door for convenient access. Roll up the door and secure it with the attached ties to allow vehicles to enter or exit easily.
- Ventilation Windows: The carport includes two ventilation windows. These can be rolled up to allow for air circulation, reducing condensation and heat buildup, or rolled down for increased wind resistance and protection.

Image: The large zippered door provides easy access for vehicles, making it simple to park or retrieve your car.

Image: The two ventilation windows can be rolled up for air circulation or rolled down for wind resistance, optimizing internal conditions.
5. Maintenance
Regular maintenance will extend the life of your carport.
- Cleaning: Clean the fabric cover periodically with mild soap and water. Avoid harsh chemicals or abrasive cleaners that could damage the material.
- Frame Inspection: Annually inspect the galvanized steel frame for any signs of rust, bending, or loose connections. Tighten any loose bolts.
- Cover Inspection: Check the polyethylene cover for tears, punctures, or excessive wear. Small tears can often be repaired with a suitable patch kit.
- Anchoring Check: Regularly verify that all ground stakes and tensioning straps are secure, especially after strong winds or heavy rain. Re-anchor if necessary.
- Snow Removal: In areas with snow, promptly remove any accumulation from the carport roof to prevent structural collapse.
6. Troubleshooting
Refer to this section for common issues and their solutions.
| Problem | Possible Cause | Solution |
|---|---|---|
| Carport is unstable or sways in wind. | Insufficient anchoring; loose frame connections. | Ensure all ground stakes are fully inserted and tensioning straps are tight. Check and tighten all frame bolts. Consider additional anchoring in very windy areas. |
| Water pools on the roof. | Cover not taut enough; improper frame assembly. | Adjust tensioning straps to make the cover tighter. Verify frame assembly is correct and not sagging. |
| Cover tears or rips. | Extreme weather conditions; sharp edges on frame; material fatigue. | Avoid use in severe weather. Inspect frame for sharp points and cover with tape if found. For small tears, use a repair kit. For large tears, replacement cover may be needed. |
| Zipper on door sticks or breaks. | Dirt/debris in zipper; excessive force. | Clean zipper teeth. Apply a zipper lubricant. Operate zipper gently. |
7. Specifications
Detailed product specifications for the Outsunny 12' x 20' Heavy Duty Carport.
- Brand: Outsunny
- Model Number: 84C-451V00BK
- Material: Alloy Steel (Frame), Polyethylene (PE) (Cover)
- Color: Black
- Overall Dimensions: 243.25" L x 143.75" W x 95.75" H (20.27 ft L x 11.98 ft W x 7.98 ft H)
- Eaves Height: 75.5" H (6.29 ft H)
- Floor Area: Approximately 243.3 Square Feet
- Item Weight: 123 Pounds
- UV Protection: Yes
- Water Resistance Level: Water Resistant
- Assembly Required: Yes
- UPC: 196393036488

Image: Visual representation of the carport's dimensions, including length, width, and height.
8. Warranty and Support
For warranty information, replacement parts, or technical support, please contact Outsunny customer service. Refer to your purchase documentation for specific contact details or visit the official Outsunny website.
Please have your model number (84C-451V00BK) and proof of purchase available when contacting support.


