
1. Safety Instructions
Read all instructions carefully before using the charger. Failure to follow these instructions may result in property damage, injury, or death.
- WARNING: Do not leave batteries unattended when charging. Always monitor the charging process.
- Use this charger only with 2-cell (7.4V) or 3-cell (11.1V) LiPo/Li-Ion batteries. Attempting to charge other battery types may cause damage or fire.
- Ensure the charger is placed on a non-flammable surface, away from flammable materials.
- Do not charge damaged, swollen, or punctured batteries. Dispose of damaged batteries properly.
- Keep the charger away from water, moisture, and extreme temperatures.
- Do not attempt to disassemble or modify the charger. This will void the warranty and may cause a safety hazard.
- Keep out of reach of children.
- Unplug the charger from the power outlet when not in use.
2. Product Overview
The Lancer Tactical B3 Pro Compact Balance Charger is designed for safely charging and balancing 2-cell (7.4V) and 3-cell (11.1V) LiPo/Li-Ion batteries. It features automatic peak detection and multiple safety protections.
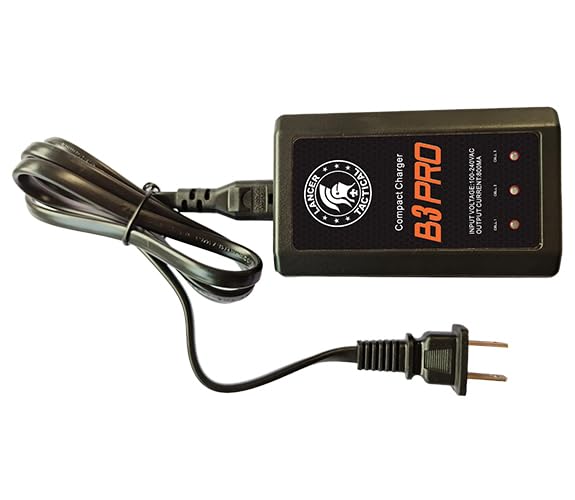
Figure 2.1: Lancer Tactical B3 Pro Compact Balance Charger. This image shows the compact black charger unit with its power cord and battery balance port.
Key Features:
- Automatically stops charging at battery's peak for optimized battery conditioning.
- Safely charges and balances 2-cell (7.4V) or 3-cell (11.1V) LiPo/Li-Ion batteries.
- Equipped with a charging status LED indicator.
- Includes Short Circuit Protection, Over-Charge Protection, and Over-Current Protection.
- Certified with CE, FCC, ROHS, and LVD standards.
3. Setup
- Unpack the Charger: Carefully remove the Lancer Tactical B3 Pro charger from its packaging. Inspect for any visible damage.
- Choose a Charging Location: Select a safe, non-flammable, and well-ventilated area for charging. Ensure it is away from direct sunlight, heat sources, and flammable materials.
- Connect to Power: Plug the AC power cord into the charger's input port, then plug the other end into a standard 100-240V AC wall outlet. The charger's LED indicator may briefly illuminate.
4. Operating Instructions
Follow these steps to safely charge your LiPo/Li-Ion battery:
- Identify Battery Type: Ensure your battery is a 2-cell (7.4V) or 3-cell (11.1V) LiPo/Li-Ion battery. This charger is not compatible with other battery types.
- Connect Battery: Locate the balance port on your LiPo/Li-Ion battery. This is typically a small white connector with multiple wires. Plug the battery's balance connector into the corresponding 2S or 3S balance port on the charger. Ensure the connector is inserted correctly and fully seated.
- Begin Charging: Once the battery is connected, the charger will automatically begin the charging and balancing process. The LED indicator will show the charging status:
- Red LED: Battery is charging.
- Green LED: Charging is complete, and the battery is balanced.
- Monitor Charging: Always monitor the battery during the charging process. If you notice any swelling, overheating, or unusual odors, immediately disconnect the battery from the charger and unplug the charger from the power outlet.
- Charging Completion: When the LED indicator turns green, the battery is fully charged and balanced.
- Disconnect Battery: Carefully disconnect the battery's balance connector from the charger. Then, unplug the charger from the wall outlet.
Note: The charger automatically detects the battery's cell count (2S or 3S) and adjusts the charging parameters accordingly.
5. Maintenance
- Cleaning: Keep the charger clean and free from dust and debris. Use a soft, dry cloth to wipe the surface. Do not use liquid cleaners or solvents.
- Storage: Store the charger in a cool, dry place when not in use. Avoid storing it in areas with extreme temperatures or high humidity.
- Cable Inspection: Periodically inspect the power cord and battery connectors for any signs of damage, fraying, or corrosion. Do not use the charger if any cables are damaged.
6. Troubleshooting
| Problem | Possible Cause | Solution |
|---|---|---|
| Charger LED does not light up. | No power supply; faulty power cord; charger malfunction. | Ensure the power cord is securely plugged into both the charger and the wall outlet. Try a different outlet. If the issue persists, the charger may be faulty. |
| LED remains red (charging) for an extended period. | Battery is deeply discharged; high capacity battery; faulty battery. | Allow more time for charging. If charging takes excessively long or the battery does not reach full charge, the battery may be faulty or at the end of its life. |
| LED does not turn green after connecting battery. | Battery not properly connected; battery is already fully charged; faulty battery. | Ensure the balance connector is fully and correctly inserted. Check if the battery is already charged. If not, the battery may be faulty. |
| Battery becomes hot or swells during charging. | Faulty battery; incorrect battery type. | Immediately disconnect the battery and charger. Do not use the battery again. Dispose of it safely. Ensure you are charging a compatible LiPo/Li-Ion battery. |
7. Specifications
- Model: B3 Pro
- Input Voltage: 100-240V AC, 50/60Hz
- Output Current: 0.8A
- Battery Compatibility: 2-cell (7.4V) and 3-cell (11.1V) LiPo/Li-Ion batteries
- Dimensions: 3.54 x 2.36 x 1.38 inches (90 x 60 x 35 mm)
- Weight: 4 ounces (113 grams)
- Certifications: CE, FCC, ROHS, LVD
- Protection Features: Short Circuit Protection, Over-Charge Protection, Over-Current Protection
8. Warranty and Support
Lancer Tactical products are manufactured to high-quality standards. For warranty information or technical support, please refer to the official Lancer Tactical website or contact your retailer. Please retain your proof of purchase for warranty claims.
For further assistance, visit the Lancer Tactical Store on Amazon.