
1. Introduction
This manual provides essential information for the safe and efficient operation, maintenance, and troubleshooting of your CREWORKS 1.5-30mm Electric Wire Stripping Machine. This automatic wire stripper is designed to remove plastic and rubber insulation from old electrical wires, facilitating copper recovery. It features a 180W motor, capable of stripping wires at speeds up to 30 meters per minute, with a low noise level of 25 dB. The machine is equipped with 5 distinct feed channels, accommodating wire widths from 1.5 mm to 30 mm, making it suitable for a wide range of common wire sizes. Its durable construction, featuring a reinforced aluminum alloy frame and steel blades, ensures long-term reliability. A built-in cooling fan prevents overheating during extended use. Please read this manual thoroughly before operating the machine.

Figure 1: CREWORKS 1.5-30mm Electric Wire Stripping Machine.
2. Safety Instructions
Always adhere to the following safety guidelines to prevent injury and damage to the machine:
- Read the Manual: Understand all instructions and warnings before operation.
- Personal Protective Equipment (PPE): Always wear safety glasses, gloves, and appropriate work attire. Avoid loose clothing or jewelry that could get caught in moving parts.
- Work Area: Ensure your work area is clean, well-lit, and free from obstructions. Keep children and bystanders away from the machine during operation.
- Electrical Safety: Connect the machine to a properly grounded power outlet. Do not operate in wet conditions or with wet hands. Inspect the power cord for damage before each use.
- Blade Safety: The blades are extremely sharp. Exercise extreme caution when adjusting or cleaning them. Always disconnect power before performing maintenance.
- Emergency Stop: Familiarize yourself with the location and function of the emergency stop button.
- Wire Compatibility: Only strip wires within the specified diameter range (1.5 mm to 30 mm).
- Ventilation: Ensure adequate ventilation to prevent motor overheating. The integrated cooling fan assists in this.
- Secure Placement: Anchor the machine to a stable workbench or surface before use to prevent movement during operation.
3. Package Contents
Verify that all items are present in the package:
- 1 x CREWORKS Electric Wire Stripping Machine
- 1 x User Manual
- 2 x Hex Wrenches (for adjustments)
- 1 x Ventilation Plug
- 2 x Protective Gloves
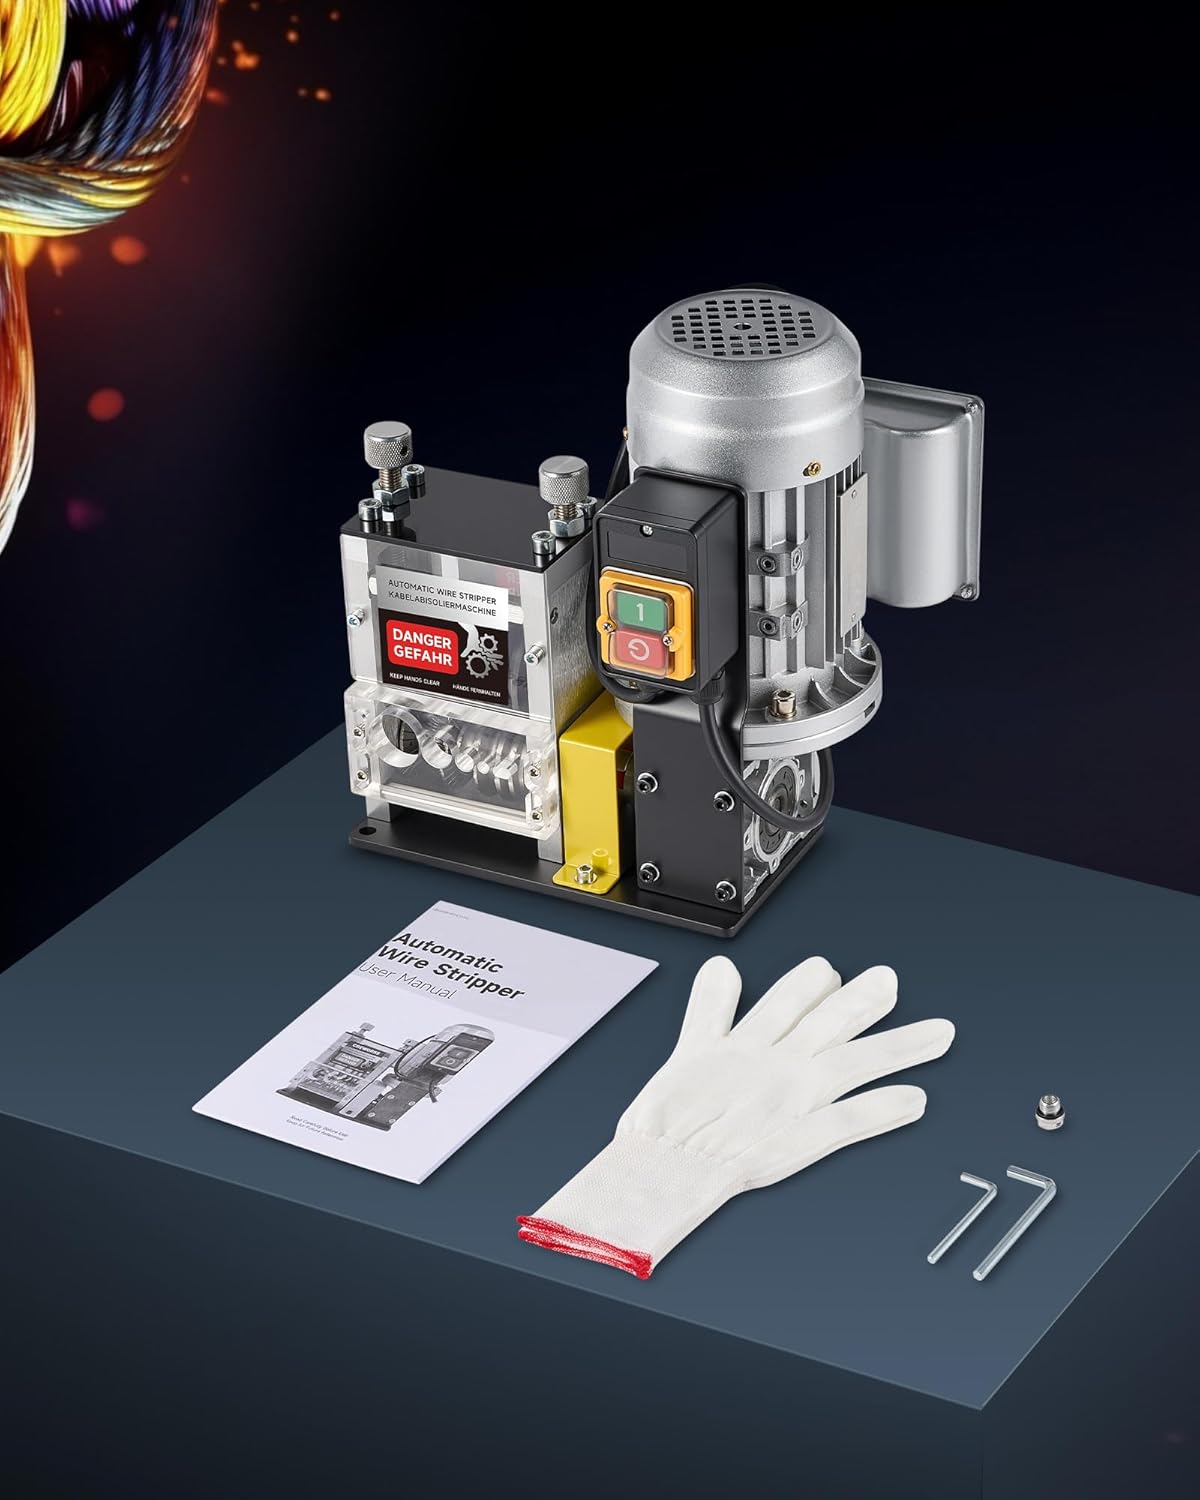
Figure 2: Package contents of the wire stripping machine.
4. Product Overview
Familiarize yourself with the components of the wire stripping machine:

Figure 3: Product Diagram with labeled parts.
- Motor: Provides power for the stripping mechanism.
- Blade Adjustment Knobs: Used to precisely set the blade height for different wire diameters.
- Observation Window: Allows visual inspection of the stripping process.
- Blade Support: Holds the stripping blades in place.
- Blade: The cutting component that removes wire insulation.
- Roller: Guides the wire through the stripping mechanism.
- Feed Hole Plate: Features multiple channels for various wire sizes.
- Stop Button (Red): Immediately halts machine operation.
- Start Button (Green): Initiates machine operation.
- Power Cord: Connects the machine to the electrical supply.

Figure 4: Five distinct feed channels for various wire sizes.
5. Setup
- Unpacking: Carefully remove the machine and all accessories from the packaging. Retain packaging for future storage or transport.
- Placement: Place the wire stripping machine on a stable, level, and secure workbench. Use the mounting holes on the base to anchor the machine if prolonged or heavy-duty use is anticipated.
- Power Connection: Ensure the machine's power switch is in the 'OFF' position. Connect the power cord to a suitable grounded electrical outlet (refer to specifications for voltage requirements).
- Blade Height Adjustment: Before stripping, adjust the blade height using the adjustment knobs. Select the appropriate feed channel for your wire diameter. Turn the adjustment knob until the blade just touches the insulation of the wire without cutting into the copper conductor. Test with a small piece of wire first.

Figure 5: Close-up of the ultra-sharp blades and V-shaped rollers.
6. Operating Instructions
Follow these steps for safe and effective wire stripping:
- Prepare Wire: Ensure the wire is straight and free of kinks or bends.
- Select Channel: Choose the feed channel that best matches the diameter of the wire you intend to strip.
- Adjust Blade: Fine-tune the blade height using the adjustment knob for the selected channel. The blade should score the insulation without damaging the conductor.
- Start Machine: Press the green 'Start' button to power on the machine.
- Feed Wire: Carefully insert the end of the insulated wire into the chosen feed hole. The rollers will automatically pull the wire through the machine.
- Collect Stripped Wire: The stripped insulation will separate from the copper conductor, which will exit from the rear of the machine. Collect the stripped copper.
- Emergency Stop: In case of any malfunction or emergency, immediately press the red 'Stop' button.
- Power Off: After use, press the red 'Stop' button and disconnect the machine from the power supply.

Figure 6: Easy-to-follow steps for operating the wire stripping machine.

Figure 7: The machine handles various wire types and sizes.
7. Maintenance
Regular maintenance ensures optimal performance and extends the lifespan of your machine:
- Cleaning: After each use, disconnect the power and clean the machine. Remove any accumulated insulation debris from the blades, rollers, and feed channels using a brush or compressed air.
- Blade Inspection: Periodically inspect the blades for wear, dullness, or damage. Sharp blades are crucial for efficient stripping. Replace dull or damaged blades promptly.
- Lubrication: Apply a small amount of light machine oil to moving parts, such as the blade adjustment mechanism and rollers, as needed to ensure smooth operation.
- Cooling Fan: Ensure the cooling fan is free from dust and debris to maintain effective heat dissipation.
- Storage: Store the machine in a dry, clean environment when not in use.

Figure 8: The powerful cooling fan helps prevent overheating.
8. Troubleshooting
Refer to this section for common issues and their solutions:
| Problem | Possible Cause | Solution |
|---|---|---|
| Machine does not start | No power supply; Emergency stop engaged; Faulty power cord/switch | Check power connection; Release emergency stop; Inspect power cord/switch, contact support if necessary |
| Wire not stripping cleanly | Incorrect blade height; Dull or damaged blades; Wrong feed channel selected | Adjust blade height; Replace blades; Select appropriate feed channel |
| Wire gets stuck or jams | Wire is bent/kinked; Debris in feed channel; Rollers are dirty | Straighten wire; Clean feed channels; Clean rollers |
| Excessive noise or vibration | Loose components; Lack of lubrication; Motor issue | Check for loose screws and tighten; Lubricate moving parts; Contact support for motor issues |
9. Specifications
| Specification | Detail |
|---|---|
| Brand | CREWORKS |
| Model Number | WSM-NM30-DE |
| Product Dimensions (L x W x H) | 22 x 17 x 0.1 cm |
| Item Weight | 9.8 Kilograms |
| Material | Aluminum Alloy, Steel, Plastic |
| Color | Black with silver accents |
| Cutting Width (Wire Diameter Range) | 1.5 - 30 mm |
| Motor Power | 180W |
| Stripping Speed | Up to 30 m/min |
| Noise Level | 25 dB |
| Number of Feed Channels | 5 |
| Compliant Specifications | CE |
| Specific Product Uses | DIY, construction sites, electrical maintenance |
| Country of Origin | China |
10. Warranty and Support
For warranty information, please refer to the documentation included with your purchase or contact the retailer. For technical support, spare parts, or service inquiries, please contact CREWORKS customer service through their official website or the contact information provided in your purchase documentation. Please have your model number (WSM-NM30-DE) and purchase date available when contacting support.
