1. Introduction and Safety Information
Thank you for purchasing the JOCCA 7L Air Fryer. This manual provides important instructions for the safe operation, maintenance, and troubleshooting of your appliance. Please read this manual thoroughly before first use and keep it for future reference.
Important Safety Precautions
- Always place the appliance on a stable, heat-resistant surface, away from walls and other appliances to ensure proper ventilation.
- Do not immerse the main unit, cord, or plug in water or any other liquid.
- Ensure the voltage indicated on the appliance matches your local power supply before connecting.
- Supervise children closely when the appliance is in use. This appliance is not intended for use by persons with reduced physical, sensory, or mental capabilities unless supervised.
- Do not operate the appliance if the plug, power cord, or the appliance itself is damaged. Contact authorized service personnel for repair.
- Unplug the appliance from the outlet when not in use and before cleaning. Allow it to cool down completely before handling.
- Do not fill the basket with oil or other liquids, as this may cause a fire hazard.
- Hot air is released through the air outlet vent. Keep your hands and face at a safe distance from the vents.
- Do not cover the air inlet or outlet vents during operation.
- The outer surfaces of the appliance may become hot during use. Use oven mitts when handling hot components.
- Do not place anything on top of the appliance.
2. Product Overview
The JOCCA 7L Air Fryer is designed for healthy cooking with minimal oil. It features a powerful 1700W heating system and a user-friendly touch control panel.
Components
- Main Unit with Control Panel
- Removable Cooking Basket
- Grill Plate
- Vegetable Basket
- Casserole Dish
- Cleaning Brush
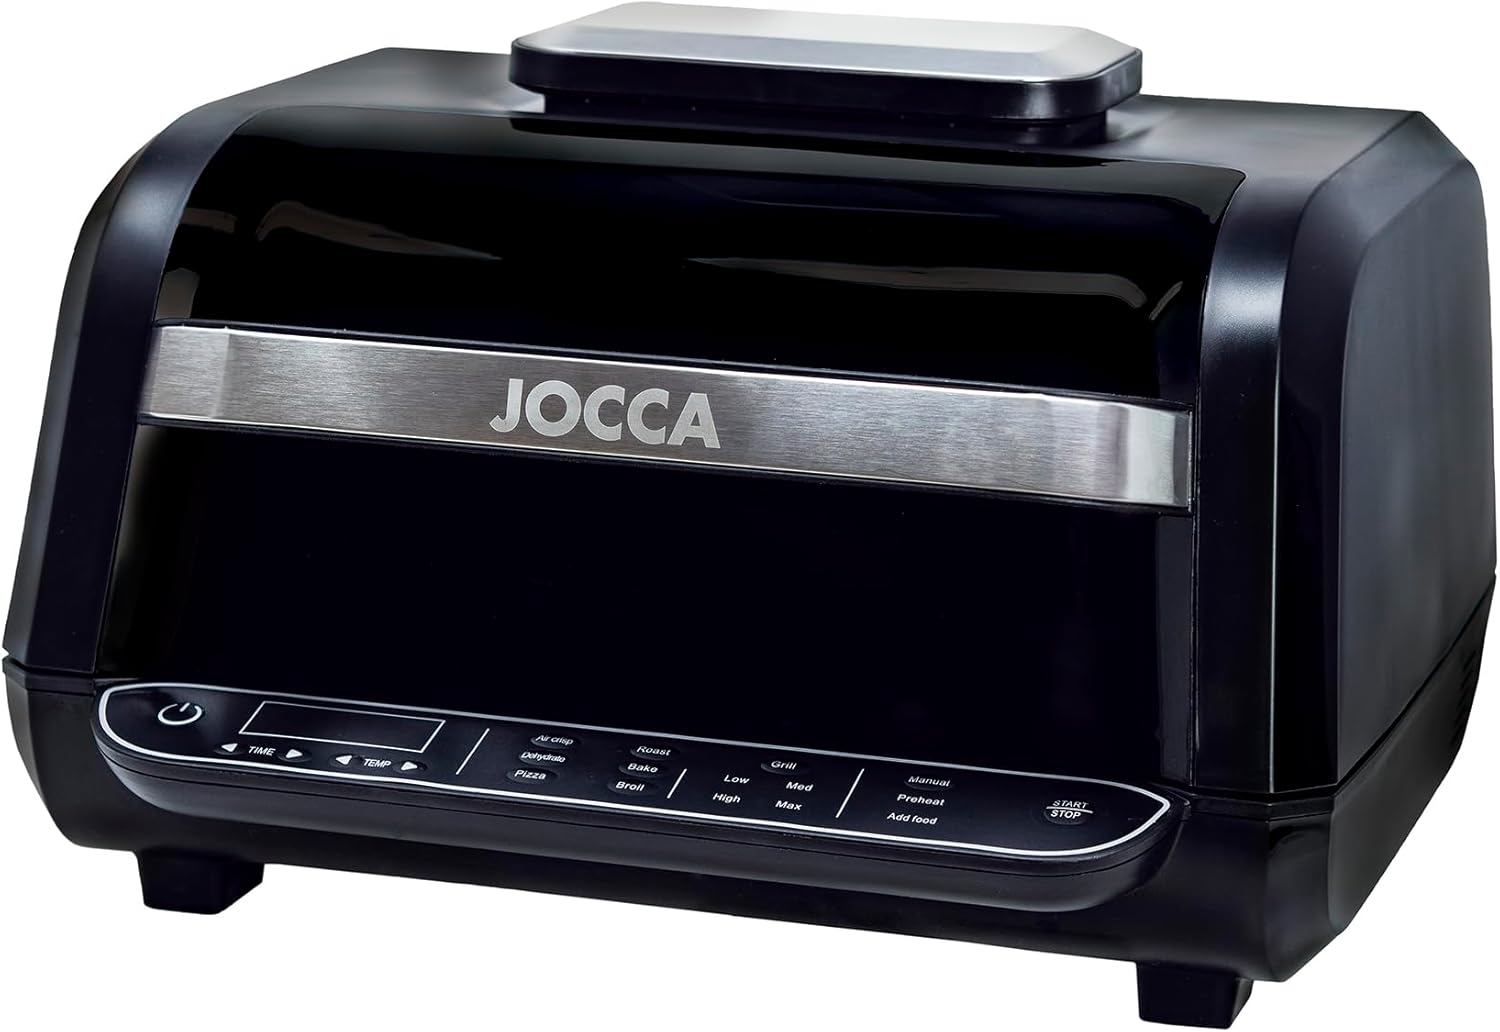
Figure 2.1: Front view of the JOCCA 7L Air Fryer, showcasing the main unit and control panel.

Figure 2.2: The air fryer with its lid open, revealing the interior cooking chamber and the removable basket.

Figure 2.3: Included accessories: grill plate, vegetable basket, casserole dish, and cleaning brush.
Control Panel Features
The intuitive LED touch screen allows for easy control of cooking settings.
- Power Button: To turn the appliance on/off.
- Time/Temperature Adjustment: Buttons to increase or decrease cooking time and temperature.
- Predefined Programs: 8 preset functions for common dishes (e.g., Air Crisp, Roast, Bake, Grill, Dehydrate, Pizza, Broil).
- Grill Settings: Low, Medium, High, Max for precise grilling.
- Preheat Function: To preheat the cooking chamber.
- Add Food Indicator: Alerts when to add food.
- Start/Stop Button: To begin or pause cooking.
3. Setup and First Use
Unpacking
- Remove all packaging materials from the appliance and its accessories.
- Check that all components listed in the "Product Overview" section are present and undamaged.
- Retain packaging for future storage or disposal.
Initial Cleaning
- Wipe the main unit with a damp cloth. Do not immerse it in water.
- Wash the cooking basket, grill plate, vegetable basket, and casserole dish with warm, soapy water. Rinse thoroughly and dry completely.
- Ensure all parts are dry before use.
Placement
- Place the air fryer on a flat, stable, and heat-resistant surface.
- Ensure there is at least 10 cm (4 inches) of clear space around the back and sides of the appliance for adequate air circulation.
- Do not place the appliance near flammable materials or heat sources.
4. Operating Instructions
Basic Operation
- Plug the power cord into a grounded electrical outlet. The appliance will beep, and the power button will illuminate.
- Press the Power button to turn on the display.
- Place your desired accessory (e.g., grill plate, basket) into the cooking chamber.
- Add your food to the accessory. Do not overfill.
Using Predefined Programs
The air fryer comes with 8 predefined programs for convenience:
- Air Crisp
- Roast
- Bake
- Grill
- Dehydrate
- Pizza
- Broil
- Manual
- Press the desired program icon on the touch screen. The default time and temperature for that program will display.
- If needed, adjust the time and temperature using the TIME and TEMP adjustment buttons.
- Press the Start/Stop button to begin cooking.
- A sound signal will indicate when cooking is complete. The appliance will automatically stop.
Manual Settings
- Press the Manual program icon.
- Adjust the desired cooking time and temperature using the TIME and TEMP adjustment buttons.
- Press the Start/Stop button to begin cooking.
Grill Settings
When using the grill function, you can select from four intelligent grill settings:
- Low
- Medium
- High
- Max
Select the appropriate grill setting based on your food and desired level of doneness.
Preheat Function
For best results, especially with certain recipes, preheating the air fryer is recommended.
- Press the Preheat button.
- Adjust the desired preheat temperature and time if necessary.
- Press Start/Stop. The appliance will signal when preheating is complete, and the "Add Food" indicator may light up.
Cooking Tips
- For even cooking, shake the basket halfway through the cooking time for smaller items like fries or nuggets.
- Lightly brush or spray food with oil for crispier results.
- Do not overload the basket to ensure proper air circulation and even cooking. Cook in batches if necessary.
- The cool-touch handle allows safe opening and closing of the appliance during cooking.

Figure 4.1: The air fryer shown with a variety of prepared dishes, illustrating its versatility.
5. Cleaning and Maintenance
Regular cleaning ensures optimal performance and extends the lifespan of your air fryer.
Before Cleaning
- Always unplug the appliance from the power outlet.
- Allow the air fryer to cool down completely before disassembling or cleaning any parts.
Cleaning the Main Unit
- Wipe the exterior of the main unit with a soft, damp cloth.
- Do not use abrasive cleaners or scouring pads, as they may damage the surface.
- Never immerse the main unit in water or any other liquid.
Cleaning Accessories (Basket, Grill Plate, etc.)
- The cooking basket, grill plate, vegetable basket, and casserole dish are dishwasher safe.
- Alternatively, wash them with warm, soapy water using a non-abrasive sponge.
- For stubborn food residue, soak the parts in warm water for about 10-15 minutes before cleaning.
- Use the provided cleaning brush for hard-to-reach areas.
- The removable splash guard can also be cleaned with warm, soapy water.
- Rinse all parts thoroughly and dry completely before storing or reassembling.
Storage
- Ensure the appliance is clean and dry before storing.
- Store the air fryer in a cool, dry place, away from direct sunlight and moisture.
- Keep the power cord neatly coiled and avoid wrapping it too tightly around the appliance.
6. Troubleshooting
If you encounter any issues with your JOCCA Air Fryer, please refer to the following table before contacting customer support.
| Problem | Possible Cause | Solution |
|---|---|---|
| Appliance does not turn on. |
|
|
| Food is not cooked evenly. |
|
|
| White smoke coming from the appliance. |
|
|
| Food is not crispy. |
|
|
7. Technical Specifications
| Feature | Specification |
|---|---|
| Model | B0CZNYSGZP |
| Brand | JOCCA |
| Power Output | 1700 Watts |
| Capacity | 7 Liters |
| Dimensions (L x W x H) | 38 cm x 36 cm x 29 cm |
| Control Method | Touch |
| Material | Plastic |
| Special Feature | Programmable |
| Recommended Uses | Bake, Fry, Gratin, Defrost |
8. Warranty and Customer Support
Warranty Information
The JOCCA 7L Air Fryer comes with a 2-year warranty from the date of purchase, covering manufacturing defects. Please retain your proof of purchase for warranty claims. This warranty does not cover damage caused by misuse, neglect, unauthorized repairs, or normal wear and tear.
Customer Support
For further assistance, technical support, or warranty claims, please contact JOCCA customer service. Refer to the product packaging or the JOCCA official website for contact details specific to your region.


