1. Introduction
Thank you for purchasing the WINGBO 54 Inch Ceiling Fan. This manual provides essential information for the safe installation, operation, and maintenance of your new ceiling fan. Please read these instructions thoroughly before beginning installation and keep them for future reference.
2. Safety Information
To reduce the risk of electric shock, fire, or personal injury, always follow these basic safety precautions:
- Read all instructions and safety information before installing your fan and save these instructions.
- All wiring must be in accordance with national and local electrical codes. If you are unfamiliar with wiring, consult a qualified electrician.
- Ensure the installation site allows the fan blades to rotate without obstruction. Maintain a minimum clearance of 7 feet from the floor to the blade trailing edge.
- The outlet box and support structure must be securely mounted and capable of reliably supporting a minimum of 35 lbs (15.9 kg). Use only UL Listed outlet boxes marked "FOR FAN SUPPORT."
- Do not operate the fan if any part is damaged.
- Avoid placing objects in the path of the fan blades.
- Turn off power at the circuit breaker or fuse box before installation or servicing.
3. Package Contents
Carefully unpack your fan and check the contents. You should have the following items:
- Fan Motor Assembly
- 4 Plywood Blades
- Downrods (4.5 inch and 12 inch)
- Mounting Bracket
- Canopy
- Remote Control with Wall Mount
- LED Light Kit
- Hardware Pack (screws, washers, wire nuts)
4. Setup and Installation
Before installation, ensure the power is turned off at the circuit breaker. Follow these steps for proper assembly and mounting.
4.1 Mounting Options
Your fan supports both standard downrod mount and sloped ceiling mount (up to 15 degrees).

Figure 4.1: Downrod and Sloped Ceiling Mounting Options. Note: Sloped ceiling mount is suitable for angles up to 15 degrees.

Figure 4.2: Included Downrods (4.5 inch and 12 inch). Additional sizes may be available separately.
4.2 General Installation Steps
- Mounting Bracket Installation: Secure the mounting bracket to the ceiling outlet box using the provided hardware. Ensure the bracket is firmly attached and can support the fan's weight.
- Downrod Assembly: Select the desired downrod (4.5" or 12"). Feed the motor wires through the downrod. Attach the downrod to the fan motor assembly.
- Hanging the Fan: Carefully lift the fan assembly and hang it from the mounting bracket hook.
- Wiring Connections: Connect the fan wires to the household wiring according to the wiring diagram in the full instruction manual (not provided here). Ensure all connections are secure with wire nuts.
- Canopy Installation: Slide the canopy up to the ceiling and secure it to the mounting bracket, covering the wiring connections.
- Blade Attachment: Attach the four plywood blades to the fan motor housing using the provided screws.
- Light Kit Installation: Connect the LED light kit wires to the fan motor assembly wires. Secure the light kit to the bottom of the fan.
5. Operating Instructions
Your WINGBO ceiling fan is operated via the included remote control. Ensure the remote has working batteries.

Figure 5.1: Remote Control Features for the WINGBO Ceiling Fan.
5.1 Remote Control Functions
- Power On/Off: Press the power button to turn the fan on or off.
- Fan Speed: Use the speed buttons (1-6) to adjust the fan speed. Level 1-2 for low/comfortable wind, Level 3-4 for medium/natural wind, and Level 5-6 for high/cooling wind.
- Light On/Off: Press the light button to turn the LED light on or off.
- Light Dimming: Press and hold the light button to dim or brighten the light.
- Color Temperature (CCT) Adjustment: Press the CCT button to cycle through 3000K (Warm Light), 4500K (Natural Light), and 6000K (Cool Light).
- Reversible Function (Summer/Winter Mode): Press the F/R button to change the blade rotation direction. In summer, blades rotate counter-clockwise to push air down. In winter, blades rotate clockwise to draw air up.
- Timer Setting: Use the 1H, 4H, or 8H buttons to set the fan to turn off automatically after 1, 4, or 8 hours.
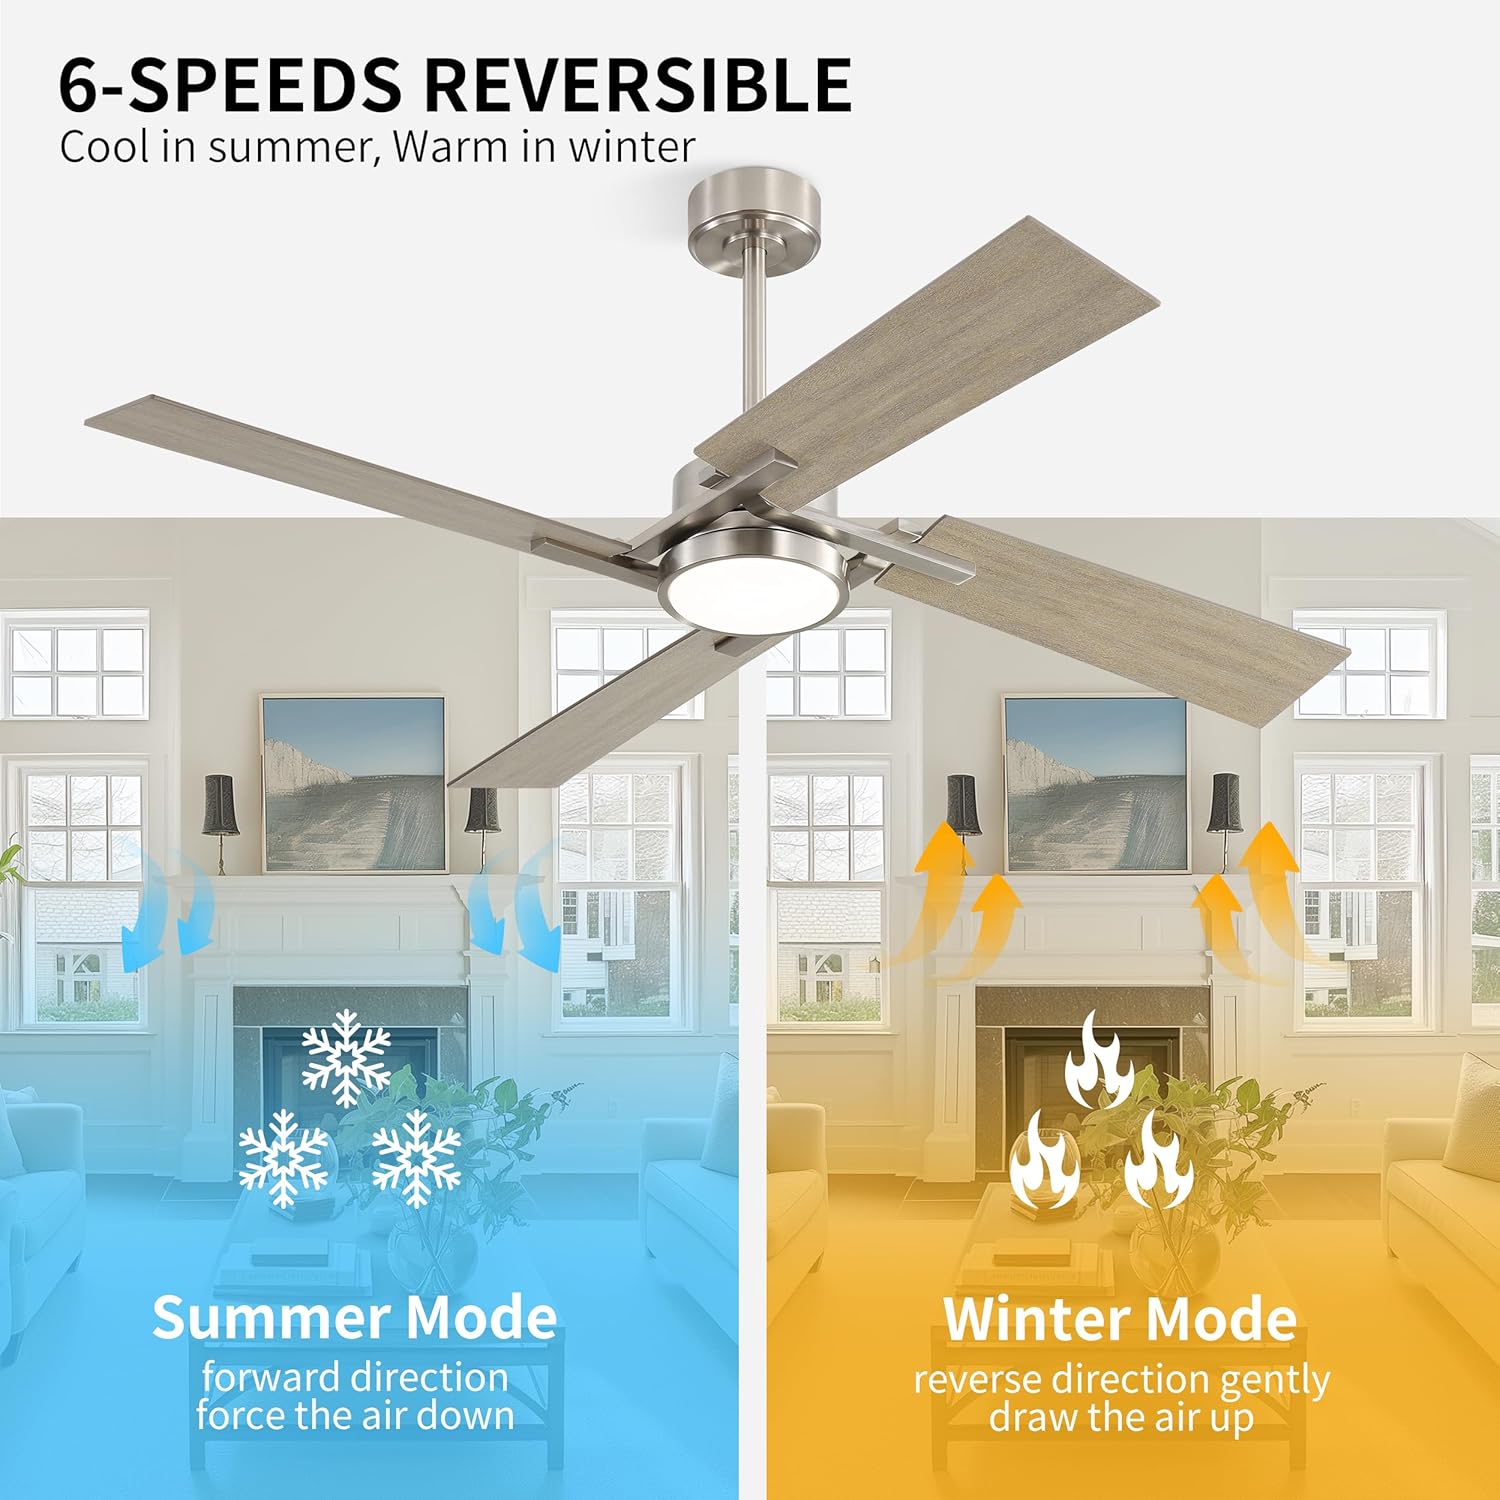
Figure 5.2: Reversible DC Motor for Year-Round Comfort.

Figure 5.3: Dimmable Light and 3 Color Temperature Settings.
6. Maintenance
Regular maintenance ensures optimal performance and longevity of your ceiling fan.
- Cleaning: Periodically clean the fan with a soft, damp cloth. Do not use abrasive cleaners or solvents, as these may damage the finish or blades.
- Blade Inspection: Check the blade screws periodically to ensure they are tight. Loose blades can cause wobbling and noise.
- Light Kit: The integrated LED module is designed for long life and typically does not require replacement. If issues arise, contact customer support.
- Motor: The DC motor is sealed and requires no lubrication.
7. Troubleshooting
Before attempting any repairs, ensure the power is disconnected at the circuit breaker.
| Problem | Possible Cause | Solution |
|---|---|---|
| Fan does not start | No power to the fan; Loose wire connections; Remote control battery low. | Check circuit breaker/fuses; Verify all wire connections; Replace remote control battery. |
| Fan wobbles | Loose blade screws; Improperly mounted blades; Mounting bracket not secure. | Tighten all blade screws; Ensure blades are installed correctly; Verify mounting bracket is secure. |
| Light does not work | Loose wire connection to light kit; LED module failure. | Check light kit wiring; Contact customer support if LED module is suspected to be faulty. |
| Remote control not working | Low battery; Incorrect pairing. | Replace battery; Refer to the full manual for remote pairing instructions. |
8. Specifications
| Feature | Detail |
|---|---|
| Model Number | SYCF5408 |
| Blade Span | 54 inches |
| Number of Blades | 4 |
| Blade Material | Plywood |
| Motor Type | DC Motor (6-speed, reversible) |
| Light Kit | Integrated Dimmable 24W LED Module |
| Lumen Output | 1600 lumens |
| Color Temperature (CCT) | 3000K / 4500K / 6000K |
| Control Method | Remote Control |
| Timer Function | 1H, 4H, 8H |
| Air Flow Capacity | 7366 Cubic Feet Per Minute (on high) |
| Wattage | 40 watts (high), 4 watts (low) |
| Mounting Type | Downrod Mount (4.5" and 12" downrods included) |
| Sloped Ceiling Compatibility | Up to 15 degrees |
| Recommended Room Size | 12'x12' to 18'x18' |
| Product Dimensions | 54"D x 54"W x 19"H |
| Item Weight | 18.41 pounds |

Figure 8.1: Fan Dimensions.
9. Warranty
The WINGBO 54 Inch Ceiling Fan comes with a 10-year motor warranty and 3-year accessories warranty. Please retain your proof of purchase for warranty claims.
10. Support
For technical assistance, replacement parts, or any questions regarding your WINGBO ceiling fan, please contact WINGBO customer support. Contact information can typically be found on the product packaging or the official WINGBO website.