1. Introduction
This manual provides detailed instructions for the installation, operation, and maintenance of your Haofy MPPT Solar Controller. This device is designed to efficiently manage power flow from your solar panels to your battery bank, ensuring optimal charging and system protection. Please read this manual thoroughly before use to ensure proper function and safety.
2. Safety Instructions
- Ensure all connections are correct and secure before powering on the controller.
- Do not connect capacitive loads directly to the controller's load output. Examples include inverters, electric drills, and devices that may produce large currents during startup. These should be connected directly to the battery bank.
- Always disconnect the solar panel and battery power before installing or adjusting the controller.
- Install the controller in a well-ventilated area, away from flammable materials and direct sunlight.
- This controller is designed for 12V/24V battery systems. Ensure your battery voltage matches the controller's auto-adaptation range.
3. Product Overview
The Haofy MPPT Solar Controller features advanced Maximum Power Point Tracking (MPPT) technology to maximize solar energy harvesting. It includes multiple working modes and comprehensive protection features for reliable operation.
Key Features:
- Advanced MPPT Charging Technology: Enhances charging efficiency by 10% to 30% compared to PWM controllers.
- DC Load Output Support: Designed for resistive load outputs, suitable for LED lights and cameras.
- Four Working Modes: Manual, Light Control, Light Control On and Time Control Off, and Real-Time Control.
- Comprehensive Charging Protection: Includes short circuit, overcurrent, and reversed polarity prevention.
- Wide Battery Compatibility: Supports Sealed, Gel, Open, and Lithium Iron Phosphate (LFP) batteries with customizable charging parameters.
- Negative Ground Design: Ensures compatibility with various systems.
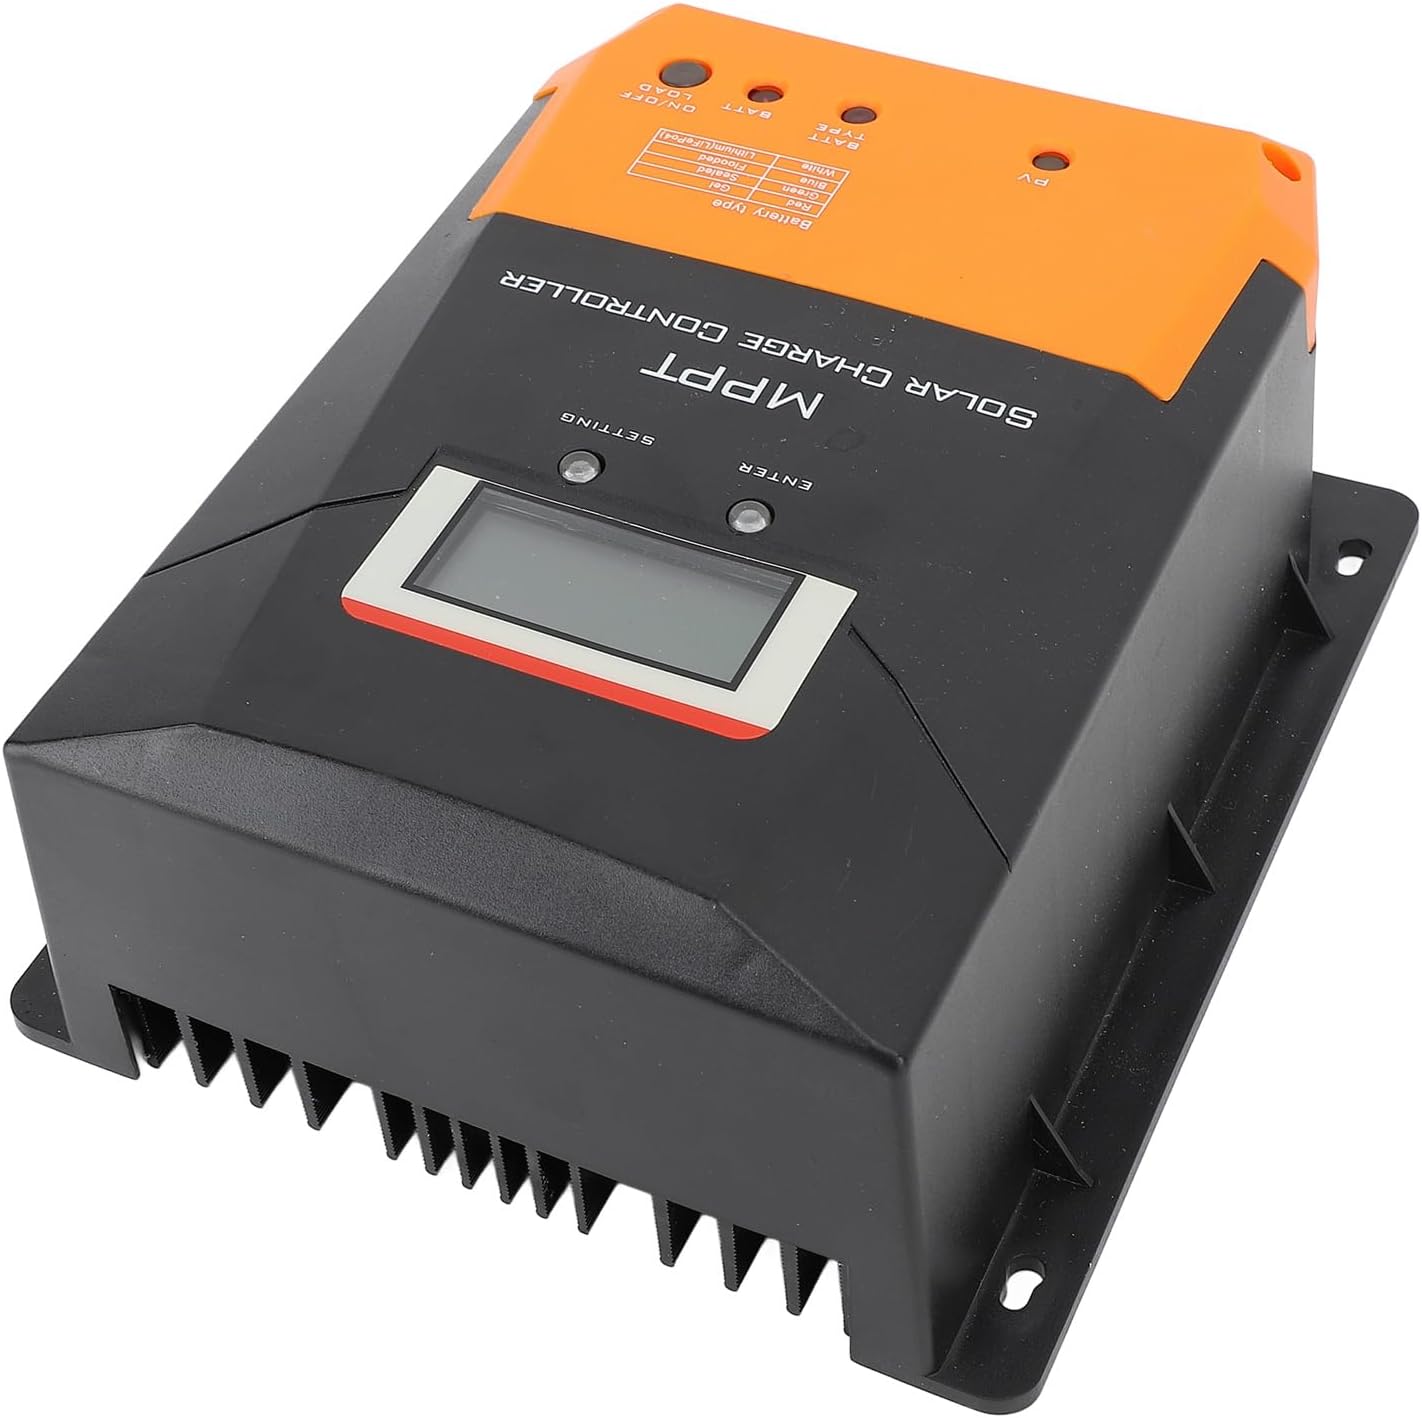
Figure 3.1: Front view of the Haofy MPPT Solar Controller, showing the display and control buttons.

Figure 3.2: Top view of the controller, illustrating the connection terminals for solar panels, battery, and load, along with the temperature sensor port and COM port.
4. Technical Specifications
| Parameter | Value |
|---|---|
| Battery Voltage | 12V / 24V Auto Adaptation |
| Maximum Solar Panel Power (12V System) | 260W |
| Maximum Solar Panel Power (24V System) | 520W |
| Maximum Solar Panel Voltage | 100V |
| Maximum Charging Current | 20A |
| Maximum Discharge Current | 20A |
| Supported Battery Types | Sealed, Gel, Open, Lithium Iron Phosphate (LFP) |
| Work Modes | Manual, Light Control, Light Control On and Time Control Off, Real Time Control |
| Charging Technology | MPPT |
| Product Size | Approx. 197x172x82mm (7.8x6.8x3.2in) |
| Item Weight | Approx. 1485g (3.28 lbs) |
| Model Number | Haofyum79e651gr |
5. Setup and Installation
Follow these steps for safe and correct installation of your MPPT solar controller:
- Prepare the Installation Site: Choose a dry, well-ventilated location, protected from direct sunlight, high temperatures, and moisture. Ensure sufficient space around the controller for air circulation.
- Connect the Battery: First, connect the battery to the controller. Ensure correct polarity (positive to positive, negative to negative). The controller will automatically detect the battery voltage (12V or 24V).
- Connect the Solar Panel: Next, connect the solar panel to the controller. Ensure correct polarity. The controller will begin charging the battery if solar power is available.
- Connect the DC Load: Finally, connect your DC loads (e.g., LED lights, cameras) to the load terminals. Ensure correct polarity. Important: Do not connect inverters or other capacitive/inductive loads directly to the controller's load output. Connect these directly to the battery.
- Verify Connections: Double-check all connections for tightness and correct polarity before powering on the system.

Figure 5.1: Example installation of the solar controller with a solar panel in an outdoor setting.
6. Operating Instructions
The controller features an LCD display and control buttons for setting parameters and monitoring system status.
Display and Buttons:
Figure 6.1: Close-up of the controller's LCD display and control buttons (SETTING and ENTER).
Working Modes:
The controller offers four distinct working modes to suit various application needs:
- Manual Mode: The load output can be manually turned on or off using the controller's buttons.
- Light Control Mode: The load output automatically turns on at dusk and off at dawn, based on solar panel voltage detection.
- Light Control On and Time Control Off Mode: The load output turns on at dusk and remains on for a user-defined period (e.g., 2 hours, 4 hours) before turning off.
- Real-Time Control Mode: The load output follows a specific schedule set by the user, allowing for precise control over load operation times.
Refer to the on-screen menu and the included user manual (physical copy) for detailed instructions on how to navigate the settings and configure each working mode and battery type.
Battery Type Selection:
The controller is compatible with various battery types. You can select the appropriate battery type through the controller's settings to ensure correct charging parameters. The supported types are Sealed, Gel, Open, and Lithium Iron Phosphate (LFP).

Figure 6.2: Top view showing the battery type indicators and corresponding colors (Red: Gel, Green: Sealed, Blue: Flooded, White: Lithium (LiFePO4)).
7. Maintenance
To ensure the longevity and optimal performance of your Haofy MPPT Solar Controller, follow these maintenance guidelines:
- Regular Inspection: Periodically check all wiring connections for tightness and corrosion. Ensure no wires are frayed or damaged.
- Cleanliness: Keep the controller clean and free from dust and debris. Use a dry cloth to wipe the exterior. Do not use liquid cleaners.
- Ventilation: Ensure the installation area remains well-ventilated to prevent overheating. Clear any obstructions around the controller's heat sink.
- Environmental Conditions: Avoid exposing the controller to extreme temperatures, direct water spray, or corrosive environments.
8. Troubleshooting
If you encounter issues with your solar controller, refer to the following common problems and solutions:
| Problem | Possible Cause | Solution |
|---|---|---|
| No display/Controller not powering on | Battery not connected or low voltage; reversed battery polarity; damaged fuse. | Check battery connections and voltage. Ensure correct polarity. Check and replace fuse if necessary. |
| Battery not charging | Solar panel not connected or reversed polarity; insufficient sunlight; solar panel voltage too low; damaged solar panel. | Check solar panel connections and polarity. Ensure adequate sunlight. Verify solar panel voltage is within specifications. Inspect solar panel for damage. |
| Load not working | Load output off (manual mode); battery voltage too low (LVD); load short circuit; overcurrent protection activated. | Check load output setting. Charge battery. Check load for short circuits. Reduce load current. |
| Overheating | Poor ventilation; excessive load/charging current. | Ensure proper airflow around the controller. Reduce load or charging current if consistently overheating. |
If the problem persists after attempting these solutions, please contact customer support.
9. Warranty and Support
Your Haofy MPPT Solar Controller is covered by a standard manufacturer's warranty. Please refer to the warranty card included with your product for specific terms and conditions.
For technical support, troubleshooting assistance, or warranty claims, please contact Haofy customer service through the retailer where you purchased the product or visit the official Haofy website for contact information.
Manufacturer: Haofy
Model Number: Haofyum79e651gr