1. Introduction and Overview
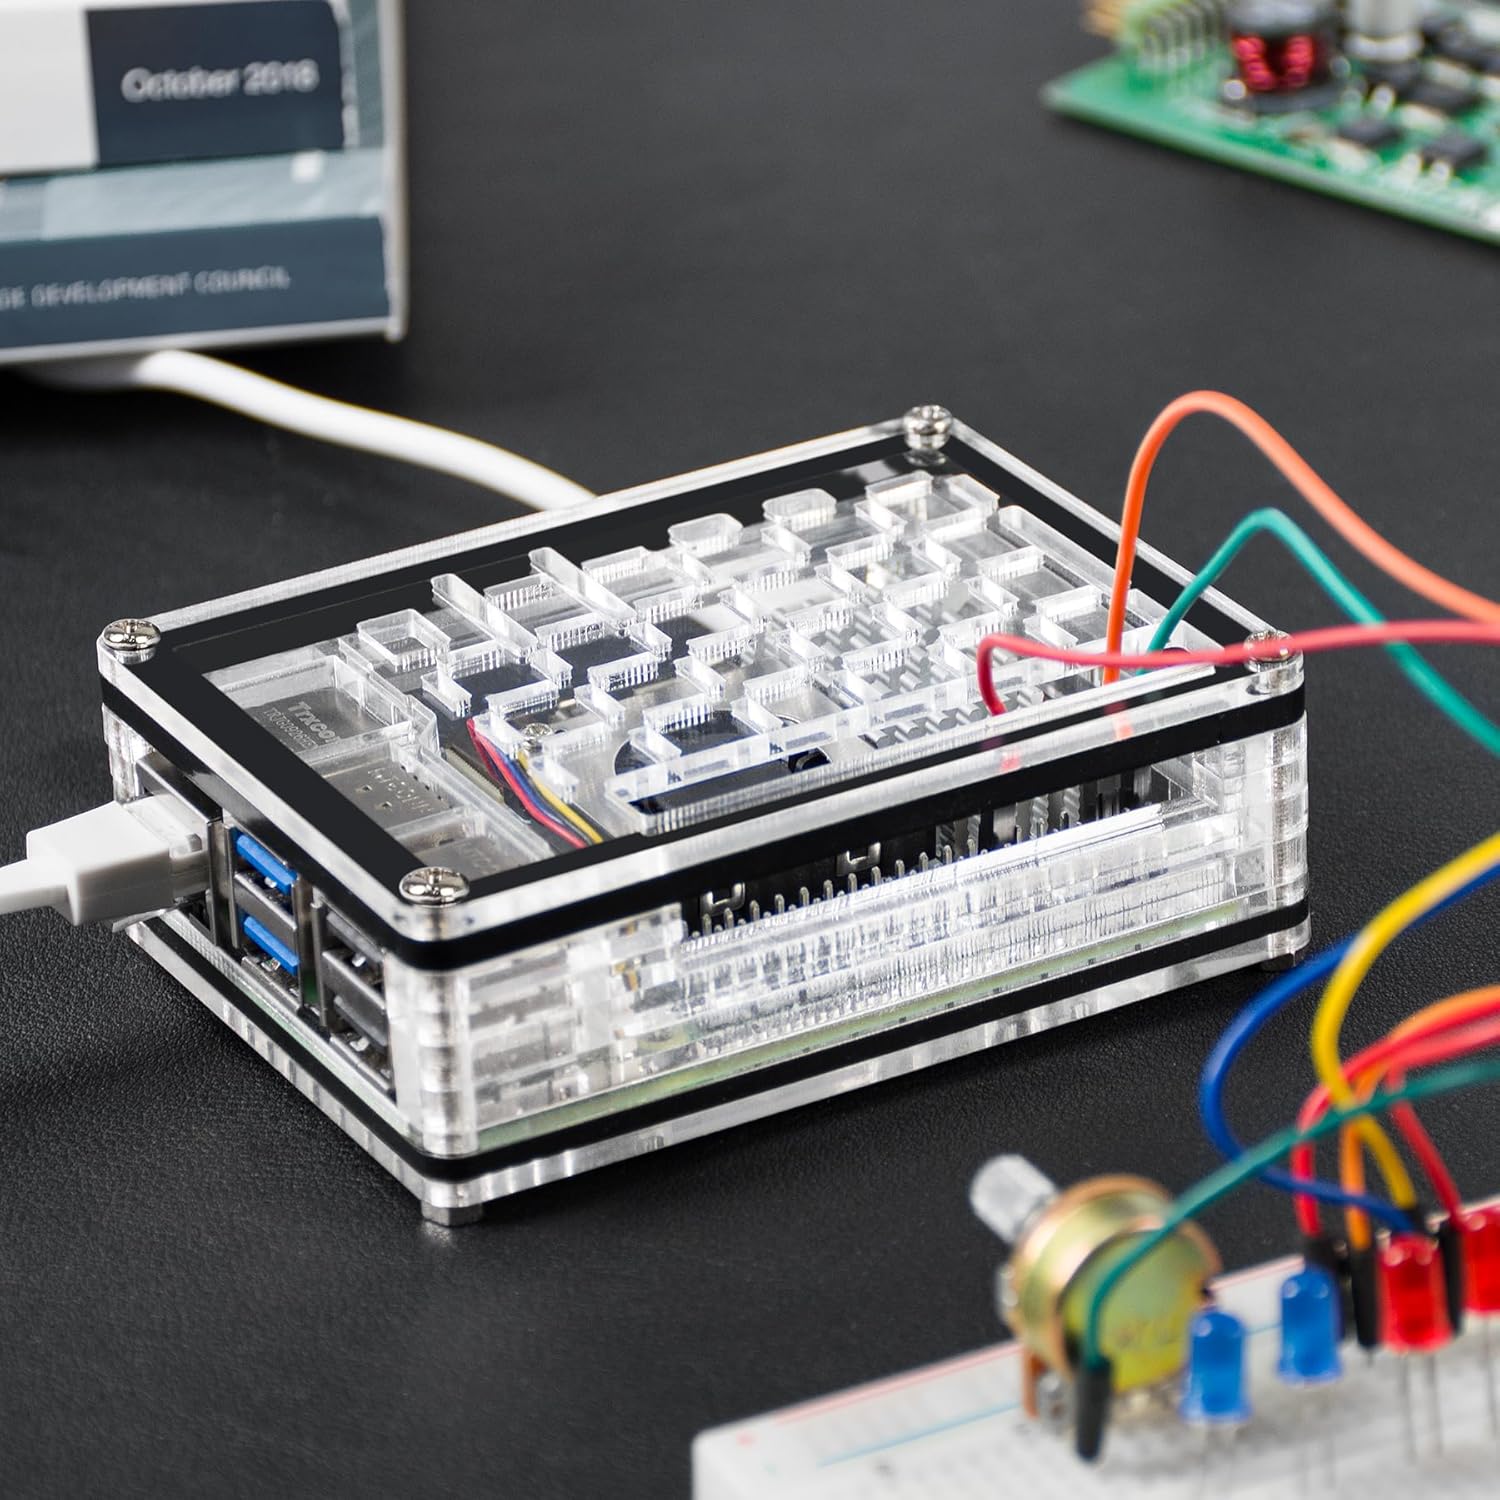
This manual provides detailed instructions for the assembly, operation, and maintenance of your Miuzei Transparent Acrylic Case for Raspberry Pi 5. This kit includes a transparent acrylic enclosure, an official active cooler, and a 27W USB-C power supply, designed to protect your Raspberry Pi 5 board while ensuring optimal cooling and stable power delivery.
2. Package Contents
Please verify that all the following items are included in your package:
- 1 x Miuzei Transparent Acrylic Case for Raspberry Pi 5
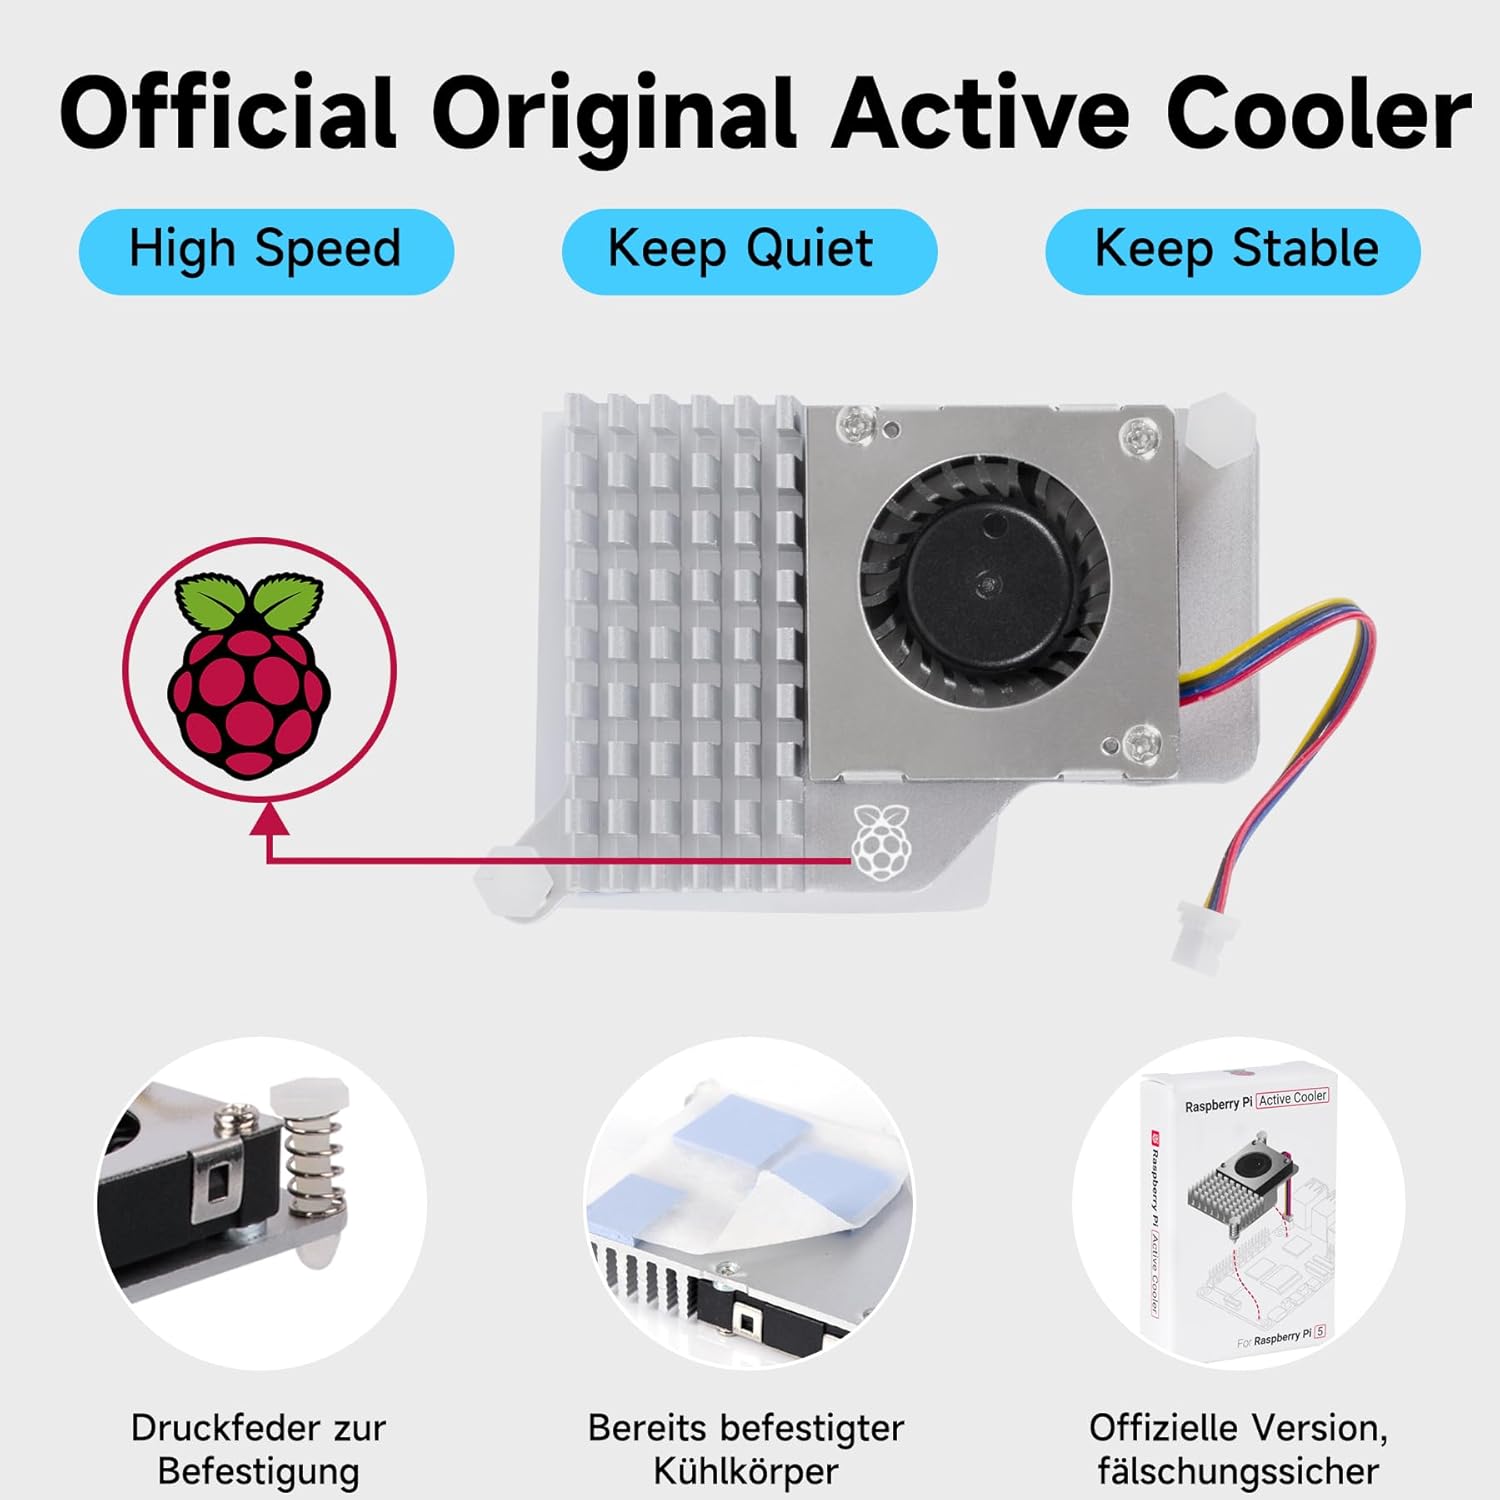
- 1 x Raspberry Pi 5 Official Active Cooler
- 1 x 27W USB-C Power Adapter (5.1V/5A)
- Assembly hardware (screws, standoffs)
3. Setup Instructions
Follow these steps to assemble your Raspberry Pi 5 with the Miuzei case and active cooler.
3.1. Prepare the Case Components
The acrylic case may come with protective films on both sides of each panel. Carefully peel off these films before assembly. Separate the acrylic layers and identify the top, bottom, and side panels.
3.2. Install the Raspberry Pi 5 Board
Place your Raspberry Pi 5 board onto the bottom acrylic panel, aligning the mounting holes. Secure it using the provided screws and standoffs. Ensure the board is seated correctly and all ports align with the case cutouts.

3.3. Install the Official Active Cooler
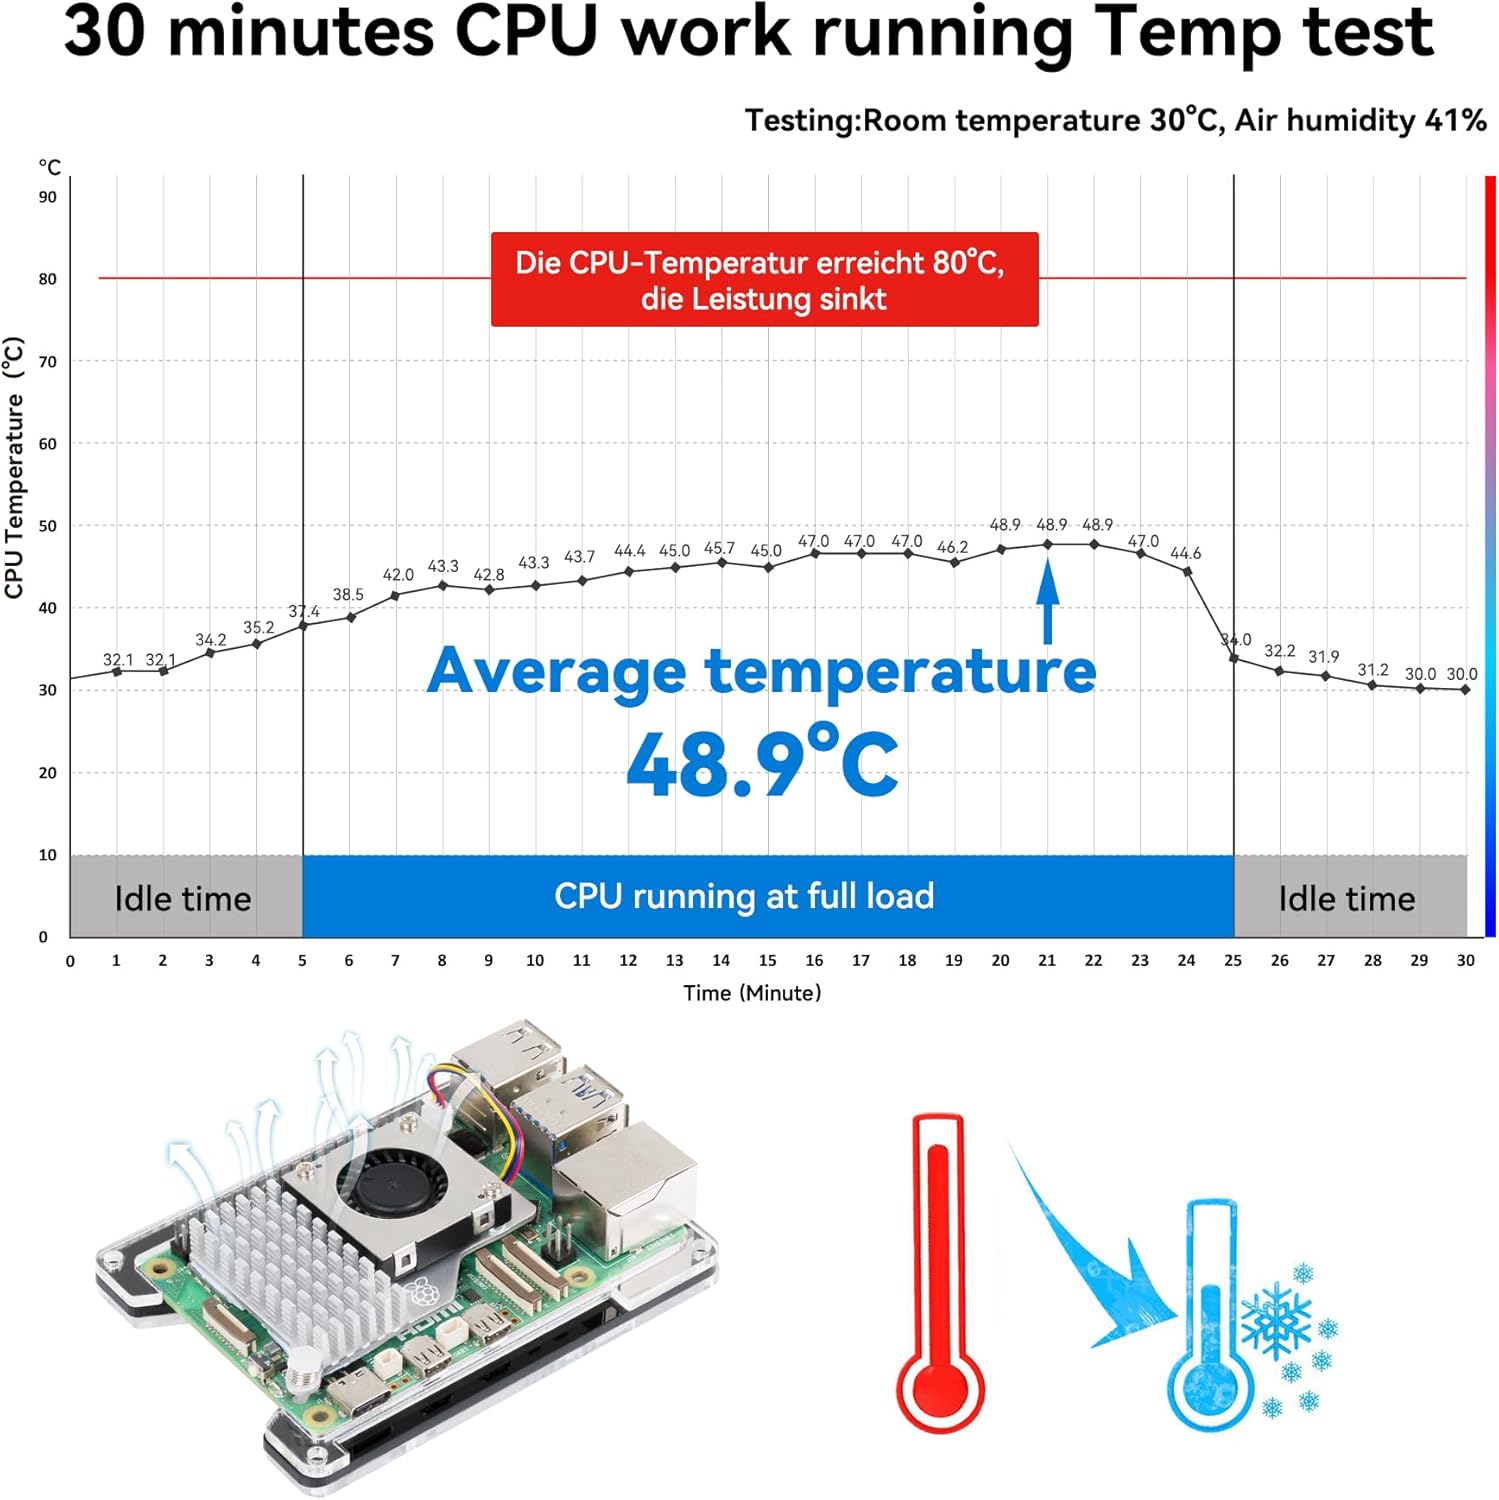
The official active cooler is designed for efficient heat dissipation. Ensure the thermal pads are correctly positioned on the cooler's heatsink. Gently press the cooler onto the Raspberry Pi 5's CPU, aligning the mounting pins. Connect the cooler's fan cable to the dedicated fan header on the Raspberry Pi 5 board. This allows the operating system to control the fan speed based on CPU temperature.

3.4. Assemble the Case
Once the Raspberry Pi 5 and active cooler are installed on the base, carefully stack the remaining acrylic layers around the board. Secure the top panel using the remaining screws. Ensure all layers fit snugly and the case provides robust protection.
3.5. Connect the 27W USB-C Power Supply
Connect the provided 27W USB-C power adapter to the USB-C power port on your Raspberry Pi 5. This power supply is specifically designed to meet the power requirements of the Raspberry Pi 5, ensuring stable operation.

3.6. Additional Connections
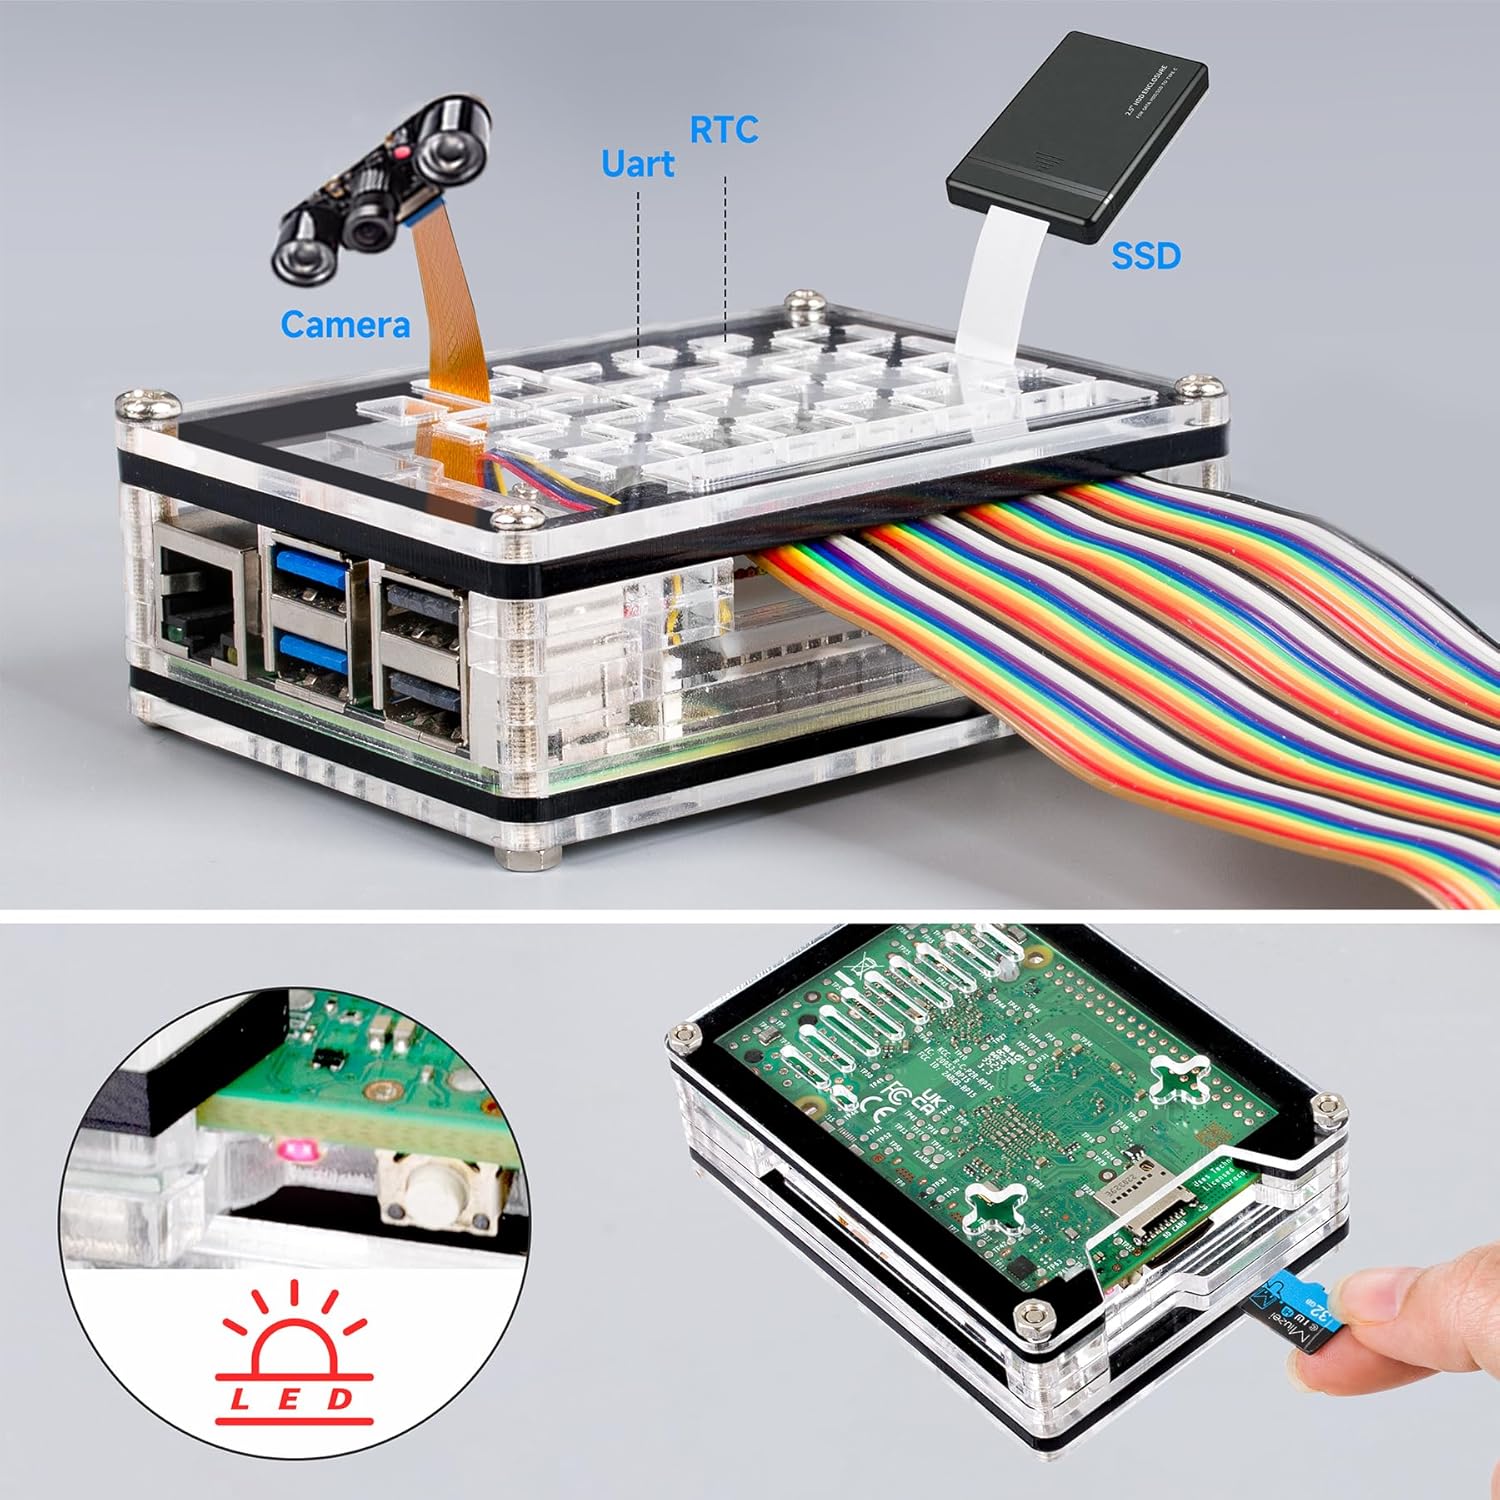
The case provides access to all Raspberry Pi 5 ports, including GPIO, MIPI DSI/CSI for cameras and displays, and an RTC battery connector. You can connect peripherals as needed.
4. Operating Instructions
4.1. Powering On/Off
Once the power supply is connected, the Raspberry Pi 5 will typically power on automatically. To safely shut down the system, use the operating system's shutdown function. The Raspberry Pi 5 also features a dedicated power button accessible through the case.
4.2. Active Cooler Operation
The active cooler's fan is controlled by the Raspberry Pi 5's operating system. It will automatically adjust its speed to maintain optimal CPU temperatures, ensuring efficient cooling during various workloads.
5. Maintenance
5.1. Cleaning the Case
To clean the transparent acrylic case, use a soft, damp cloth. Avoid abrasive cleaners or solvents, as these can scratch or damage the acrylic. For stubborn dust, a soft brush or compressed air can be used.
5.2. Fan Inspection
Periodically inspect the active cooler's fan for dust accumulation. Excessive dust can impede airflow and reduce cooling efficiency. If necessary, gently clean the fan blades with a soft brush or compressed air while the Raspberry Pi is powered off.
6. Troubleshooting
6.1. Overheating Issues
If your Raspberry Pi 5 experiences high temperatures, ensure the active cooler is properly installed and its fan cable is securely connected to the board. Verify that there is adequate airflow around the case and that the fan is not obstructed by dust.
6.2. Power Supply Problems
If the Raspberry Pi 5 does not power on, check that the 27W USB-C power adapter is correctly plugged into both the wall outlet and the Raspberry Pi 5's power port. Ensure the power outlet is functional.
6.3. Port Access Issues
If you encounter difficulty accessing any ports, re-check the case assembly to ensure all acrylic layers are correctly aligned and secured. Incorrect assembly can obstruct port access.
7. Specifications
| Brand | Miuzei |
| Model Number | CN-D-YA-MC70 |
| Color | Transparent |
| Material | Acrylic |
| Cooling Method | Air (with Active Cooler) |
| Compatible Devices | Raspberry Pi 5 (4GB, 8GB) |
| Power Supply Output | 5.1V / 5A (27W) |
| Case Dimensions (L x W x H) | 9.5 cm x 7 cm x 3 cm |
8. Warranty Information
Specific warranty information for this product is not provided in the available product details. Please refer to the retailer's return policy or contact Miuzei directly for warranty inquiries.
9. Support
For technical assistance or further questions regarding your Miuzei Raspberry Pi 5 case, active cooler, or power supply, please visit the official Miuzei website or contact your point of purchase for support.


