Introduction
Welcome to the KitchenAid Go™ Cordless Bundle. This kit includes a Cordless Hand Mixer, Food Chopper, and Kitchen Vacuum, all powered by a 12V Max removable battery. This manual provides essential information for the safe and efficient use of your new appliances. Please read all instructions carefully before use.

Figure 1: The KitchenAid Go Cordless Bundle, featuring the hand mixer, food chopper, and kitchen vacuum.
Important Safety Information
Always follow basic safety precautions when using electrical appliances to reduce the risk of fire, electric shock, and personal injury. Keep this manual for future reference.
- Read all instructions before using the appliance.
- Do not immerse the appliance base in water or other liquids.
- Keep hands, hair, and clothing, as well as spatulas and other utensils, away from moving parts during operation to prevent injury and/or damage to the appliance.
- Ensure the battery is fully charged before first use.
- Use only attachments recommended or sold by KitchenAid.
Setup and Charging
Battery Charging
The KitchenAid Go™ Cordless Bundle is powered by a 12V MAX removable lithium-ion battery. For optimal performance, fully charge the battery before initial use.
- Locate the battery pack at the base of each appliance.
- Press the release buttons on the sides of the battery pack and slide it out.
- Connect the USB-C charging cable to the battery pack and a suitable power source.
- The indicator lights on the battery will show the charging status. All lights illuminated indicate a full charge.
- Once charged, reinsert the battery pack into the appliance until it clicks securely into place.

Figure 2: The 12V Max battery pack being charged via USB-C cable. Indicator lights show charging progress.
Attaching Accessories
Ensure the appliance is turned off and the battery is securely inserted before attaching or detaching accessories.
- Hand Mixer: Insert the stainless steel Turbo Beater II accessories into the designated slots until they click. Ensure the correct beater is inserted into the correct slot as indicated by the diagram on the mixer.
- Food Chopper: Place the multi-purpose stainless steel blade onto the center post inside the 5-cup BPA-free bowl. For whisking, attach the whisking accessory. Secure the lid onto the bowl.
- Kitchen Vacuum: Attach the crevice attachment or the 2-in-1 wide mouth/scraper attachment directly to the vacuum nozzle as needed.
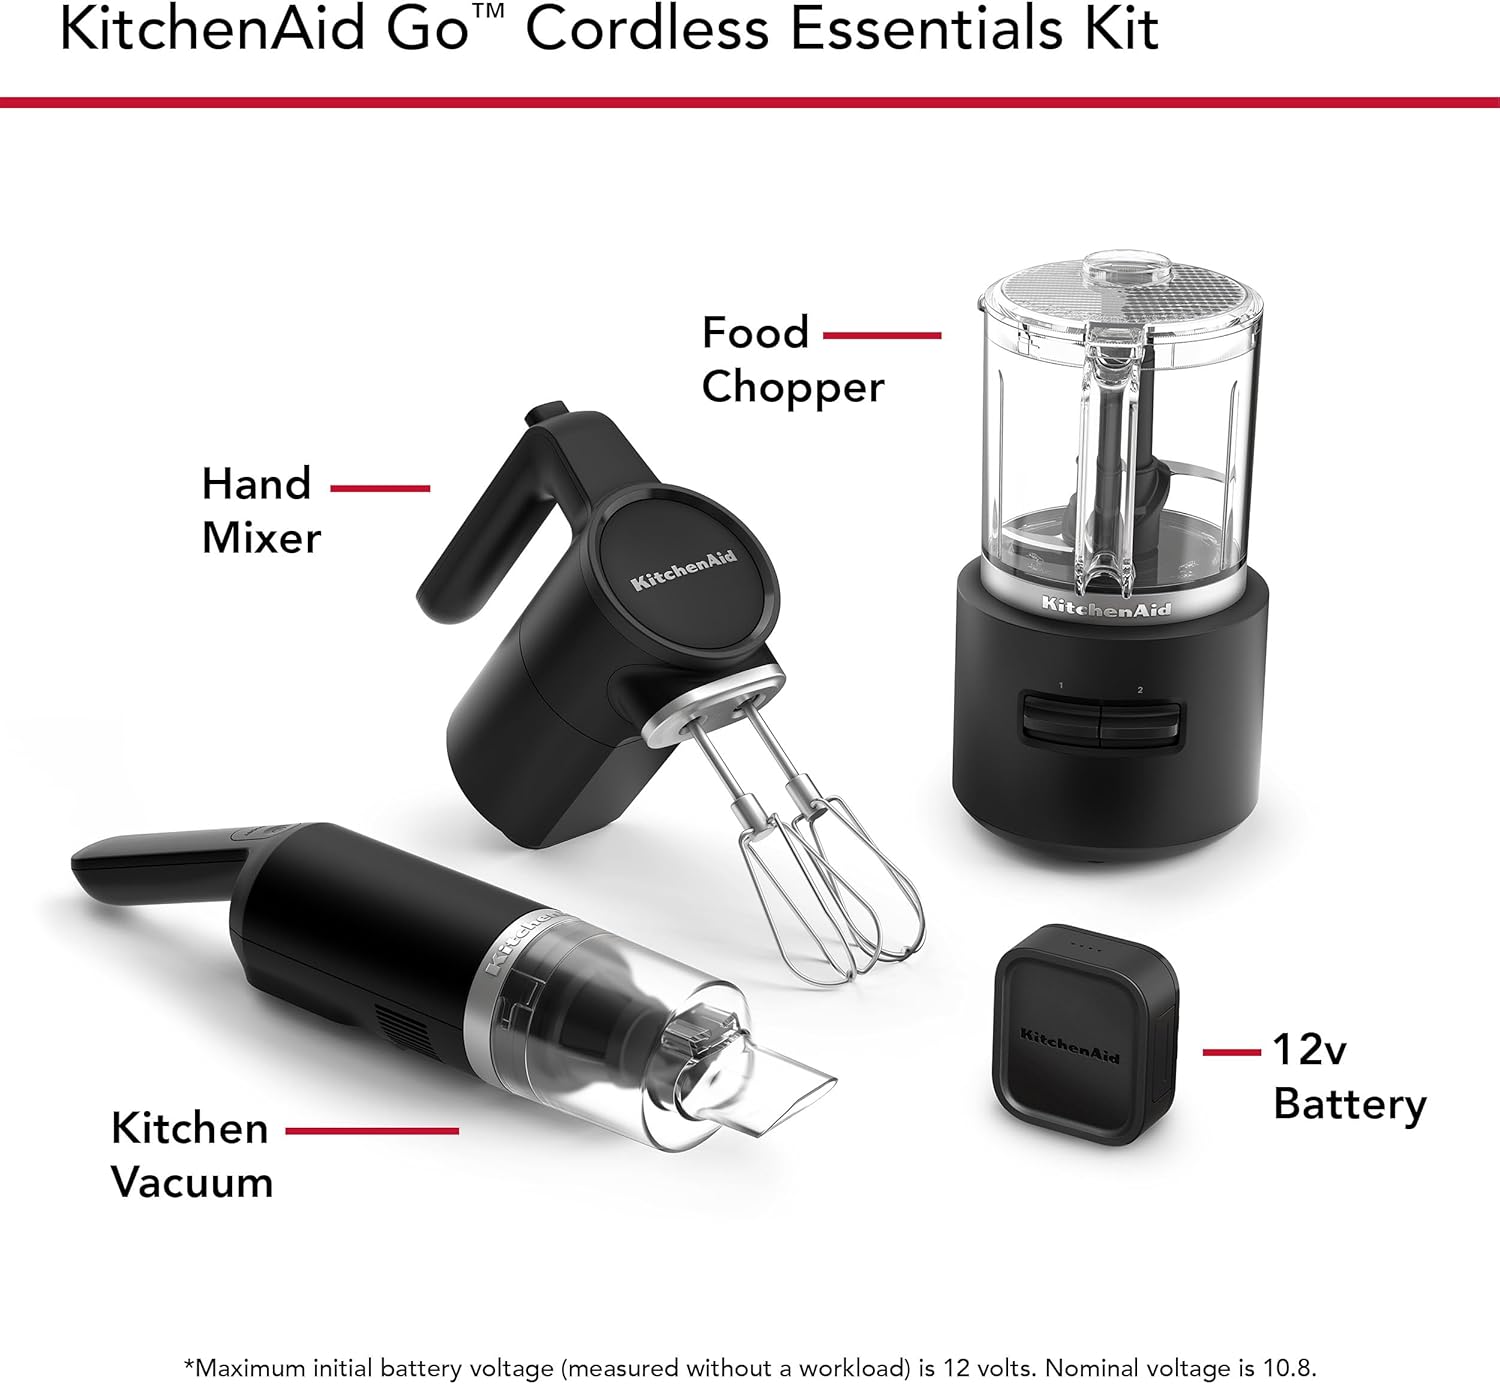
Figure 3: The KitchenAid Go Cordless Hand Mixer with its stainless steel beaters securely in place.
Operating Instructions
Cordless Hand Mixer
The 7-speed cordless hand mixer is designed for various mixing tasks, from gently stirring to whipping.
- Attach the desired beaters.
- Place the beaters into the ingredients in your bowl.
- Slide the speed control to the desired setting (1-7). The Soft Start feature gradually increases speed to prevent splattering.
- Mix until desired consistency is achieved.
- To stop, slide the speed control to '0' (off).
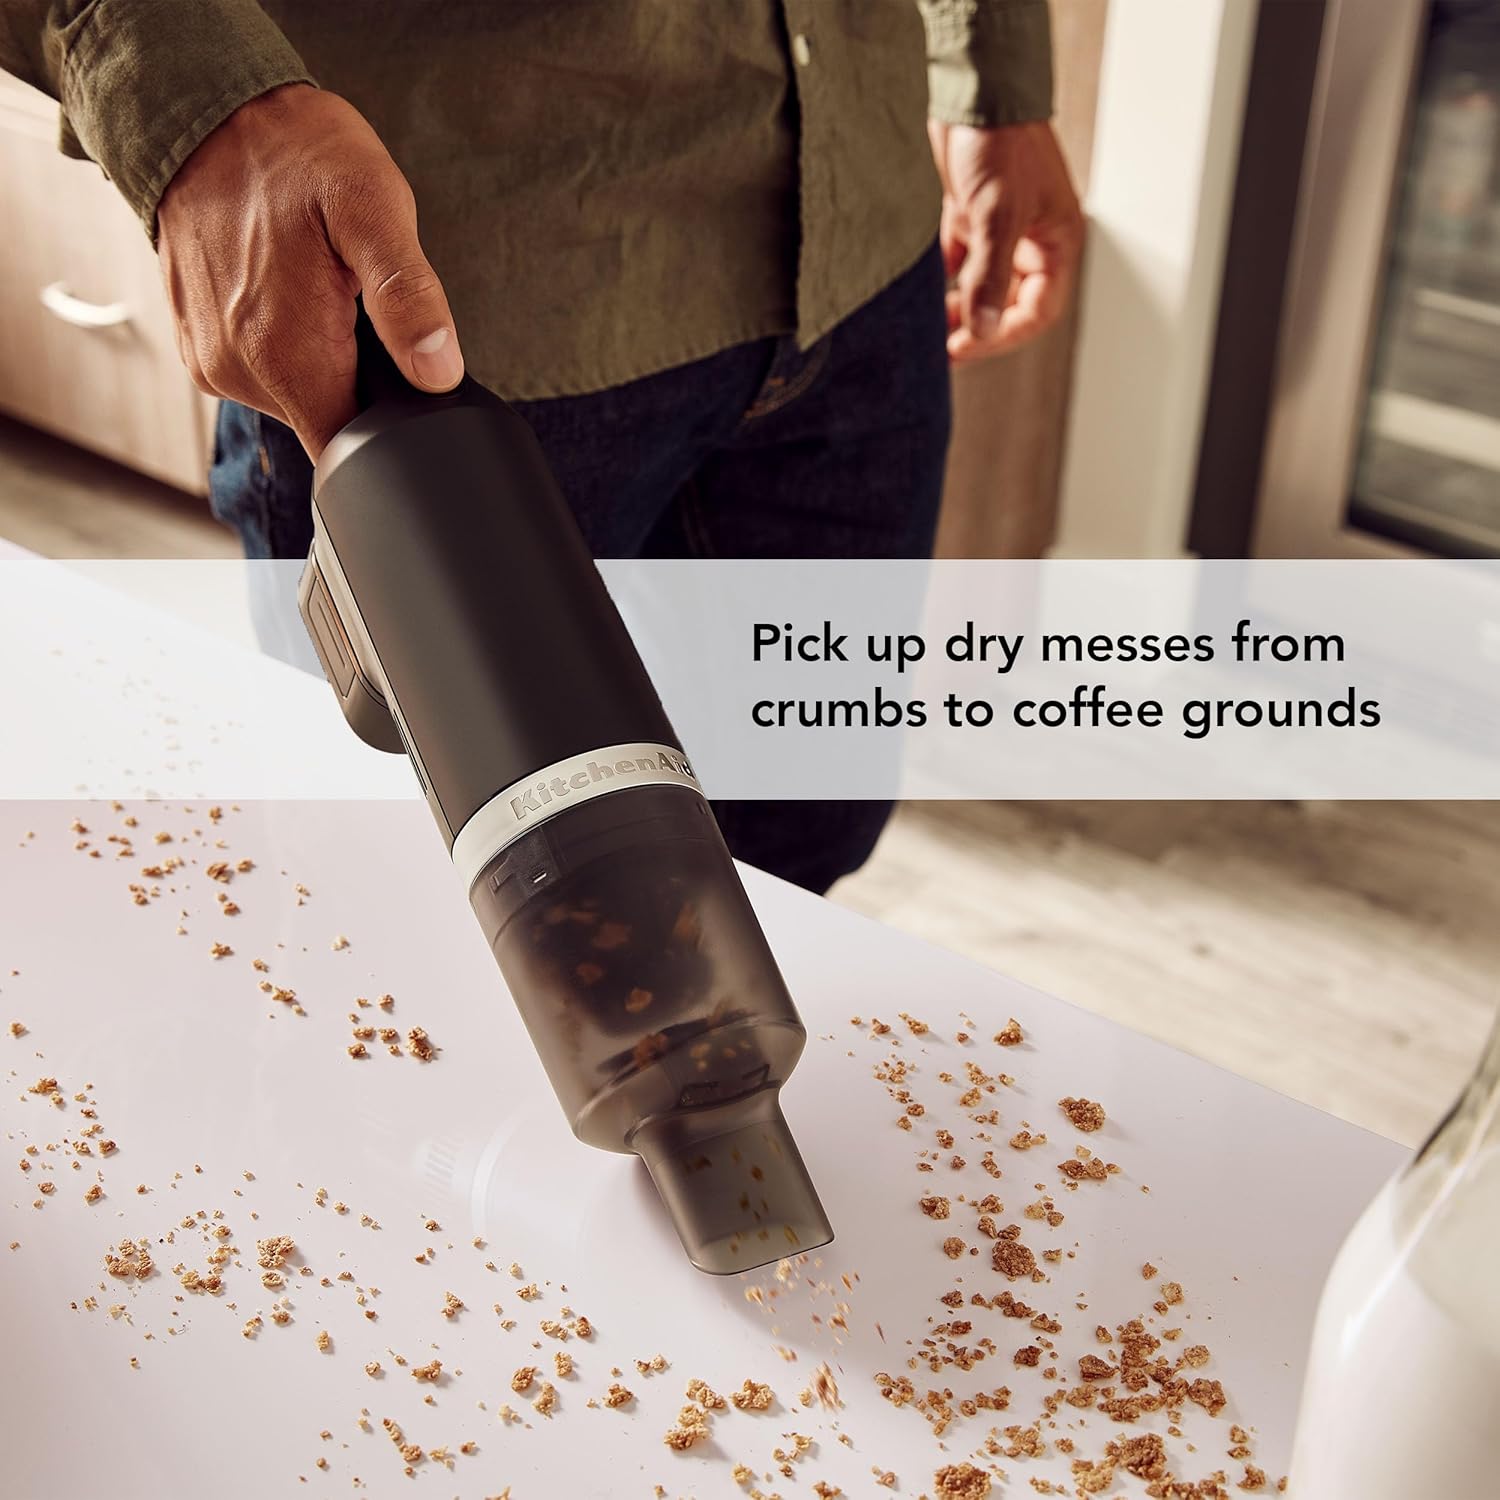
Figure 4: Cordless Hand Mixer in action, demonstrating its ease of use without a power cord.
Cordless Food Chopper
The 2-speed cordless food chopper is ideal for coarse or fine chopping, and whisking.
- Assemble the food chopper with the desired blade or whisking accessory.
- Add ingredients to the bowl and secure the lid.
- Select speed 1 for coarse chopping or speed 2 for fine chopping/whisking.
- Press and hold the power button to operate. Release to stop.

Figure 5: The Food Chopper processing ingredients, highlighting its compact and cordless design.
Cordless Kitchen Vacuum
The cordless kitchen vacuum provides quick cleanup for dry messes.
- Attach the appropriate nozzle (crevice or 2-in-1 wide mouth/scraper).
- Press the power button to turn on the vacuum.
- Vacuum dry spills and crumbs.
- Press the power button again to turn off.
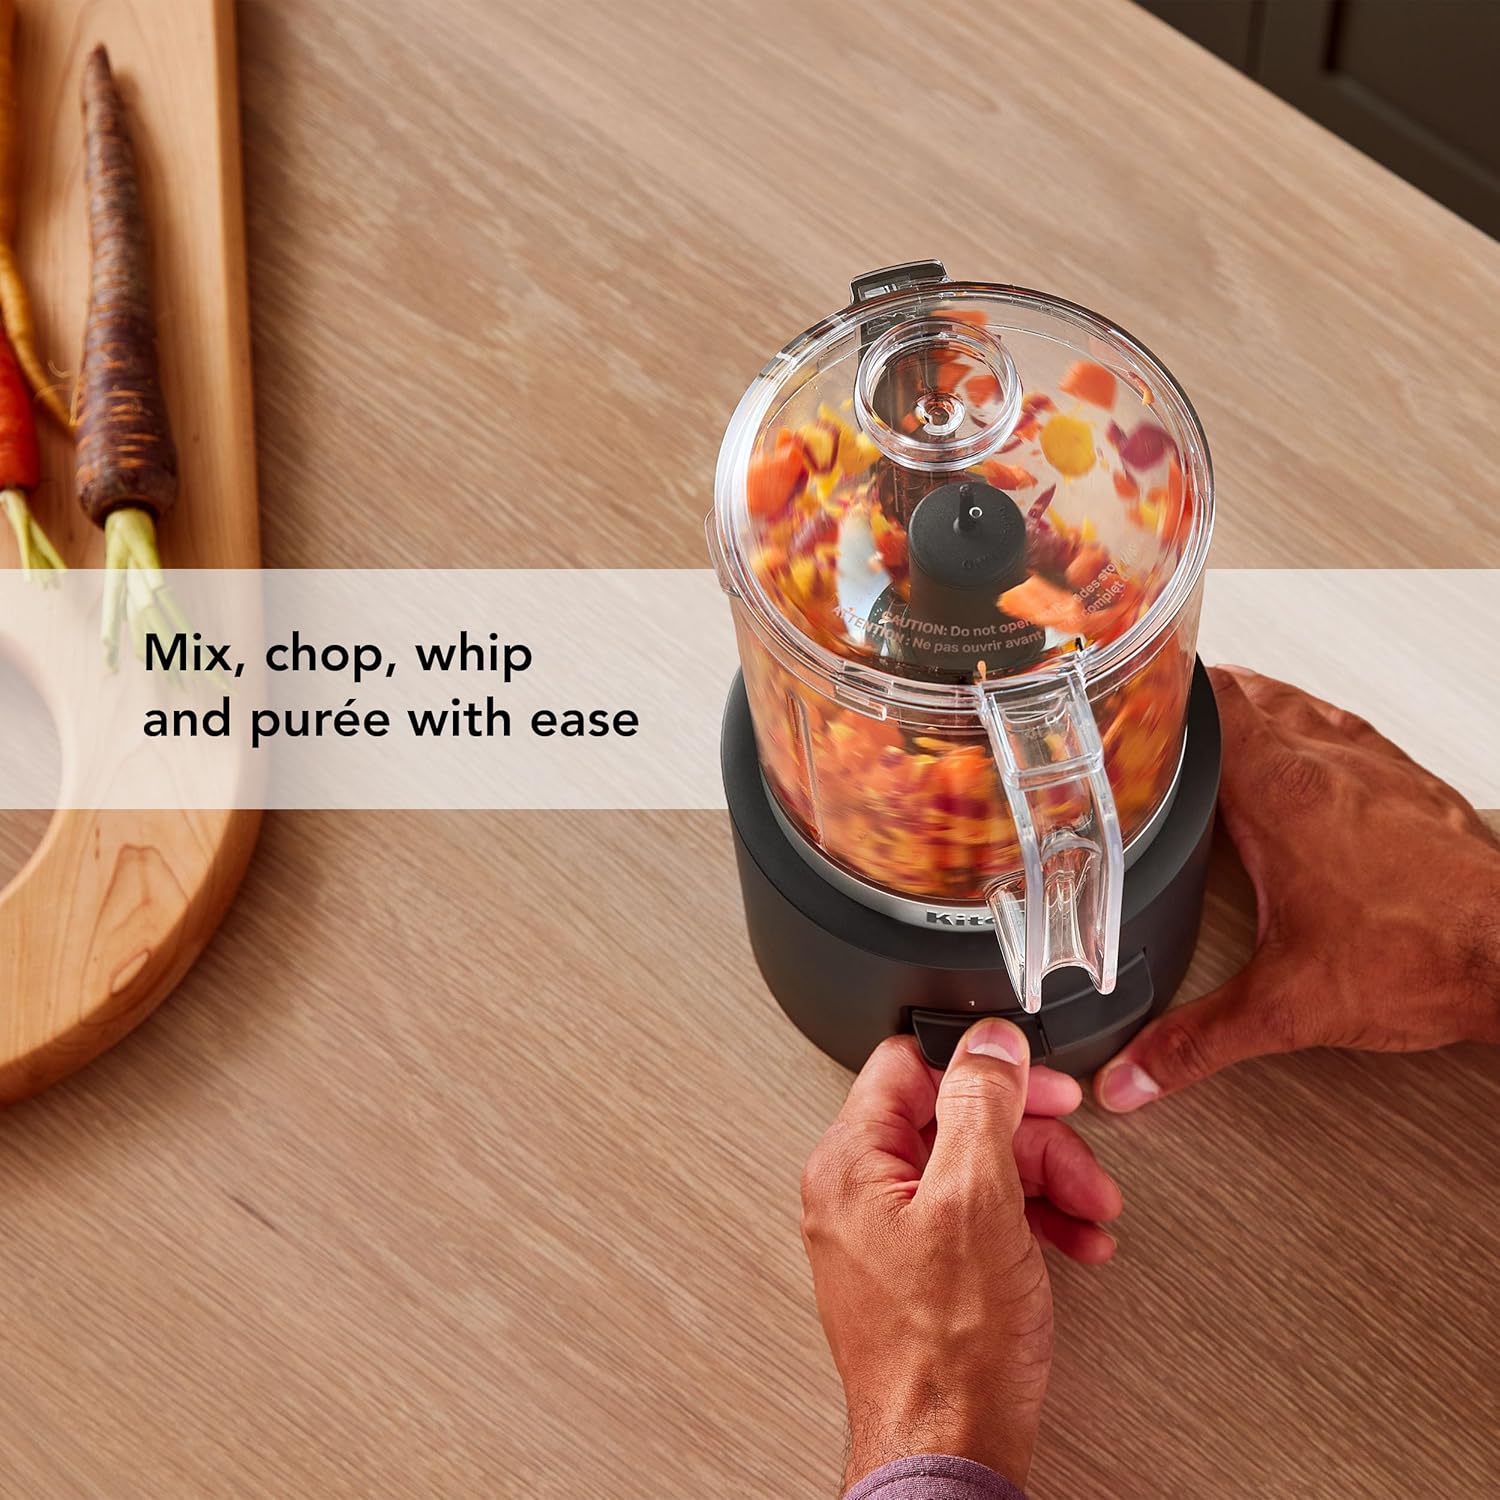
Figure 6: The Kitchen Vacuum effectively cleaning dry debris from a kitchen surface.
Care and Maintenance
Cleaning
Always unplug the appliance (remove battery) before cleaning.
- Hand Mixer: Eject beaters by pressing the release button. Wash beaters in warm, soapy water or in the dishwasher. Wipe the mixer body with a damp cloth.
- Food Chopper: Remove the blade/whisking accessory and bowl lid. Wash all removable parts in warm, soapy water or in the dishwasher. Wipe the motor base with a damp cloth.
- Kitchen Vacuum: Empty the dust cup regularly. Wash the dust cup and filter in warm, soapy water. Ensure all parts are completely dry before reassembling. Wipe the vacuum body with a damp cloth.
Battery Care
- Store the battery in a cool, dry place away from direct sunlight.
- Avoid fully discharging the battery frequently to prolong its lifespan.
- If storing for an extended period, charge the battery to approximately 50% capacity.
Troubleshooting
- Appliance not turning on: Ensure the battery is fully charged and securely inserted. Check that the speed/power switch is in the 'on' position.
- Reduced performance: The battery may be low. Recharge the battery. For mixers, ensure attachments are correctly inserted.
- Attachments not fitting: Refer to the diagrams on the appliance for correct insertion of accessories. Do not force attachments.
Specifications
| Feature | Detail |
|---|---|
| Brand | KitchenAid |
| Model Name | KitchenAid Go Cordless System |
| Model Number | KBUR131 |
| Color | Matte Black |
| Power Source | 12V MAX Lithium-Ion Battery (included) |
| Hand Mixer Speeds | 7 Speeds |
| Food Chopper Capacity | 5 Cups (1.18 L) |
| Food Chopper Speeds | 2 Speeds |
| Kitchen Vacuum Runtime | Up to 20 minutes (actual runtime varies) |
| Hand Mixer Runtime | Up to 60 minutes (actual runtime varies) |
| Food Chopper Runtime | Up to 25 minutes (actual runtime varies) |
| Charging | USB-C Charging Cable |
| Material | Plastic, Stainless Steel |
| Product Dimensions | 18.9"D x 17.5"W x 29.7"H |
| Item Weight | 10.03 pounds |
Warranty and Support
For warranty information, product registration, or technical support, please visit the official KitchenAid website or contact KitchenAid customer service. Keep your purchase receipt for warranty claims.
Online Support: www.kitchenaid.com


