1. Introduction
The SPEEDY BEE 7-Inch Portable FPV Monitor is designed to provide a real-time video return for First Person View (FPV) applications. Featuring a 5.8GHz 40-channel receiver, DVR functionality, and a high-brightness LCD screen, this monitor offers a clear and stable viewing experience. Its built-in battery and versatile power options make it suitable for various field monitoring needs.
The SPEEDY BEE 7-Inch FPV Monitor in use, displaying a clear aerial view of a city.
2. Package Contents
Verify that all items listed below are included in your package:
- 1 x 7" FPV Monitor
- 2 x 5.8G Antenna
- 1 x AV Cable
- 1 x Charger
- 1 x User Manual

All components included in the SPEEDY BEE 7-Inch FPV Monitor package.
3. Product Features
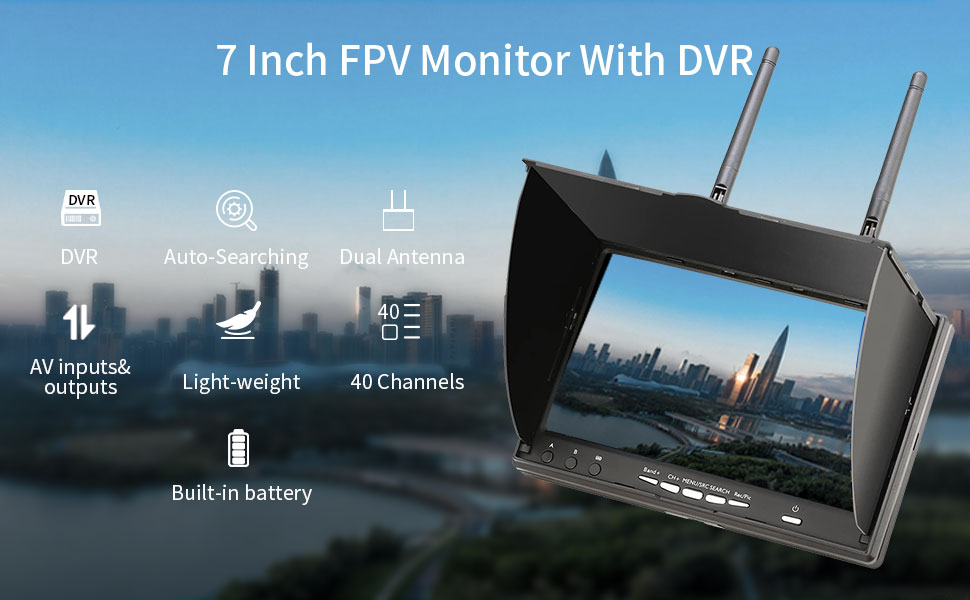
- 5.8GHz 40-Channel Receiver: Built-in super sensitive 5.8GHz 40-channel receiver for real-time video return with low latency.
- DVR Functionality: Record videos anytime and anywhere with the integrated DVR function and SD card slot (supports up to 32G, C10 SD Card).
- High-Definition Screen: 7-inch TFT LCD screen with 800x480 resolution and 600cd/m2 brightness for clear visibility.
- Dual Antenna Reception: Enhances signal stability for improved video feed.
- Built-in Battery: Equipped with a 7.4V/2000mAh high-capacity Li-ion polymer battery.
- Universal USB Charging: Convenient charging via a universal USB interface.
- Wide Voltage Support: Operates on DC 7-16V.
- Video Input and Output: Supports external video sources and output to other displays.
- Auto-Searching: Features a one-key auto-search function for frequency scanning.

The monitor features a 7-inch 800x480 high-definition screen.

The monitor supports 40 channels and features a one-click automatic search function.
4. Setup
4.1. Antenna Installation
- Locate the two RP-SMA female connectors on the top of the monitor.
- Carefully screw the two provided 5.8G antennas onto these connectors. Ensure they are finger-tight to secure a good connection.
4.2. Powering the Monitor
The monitor can be powered in two ways:
- Internal Battery: The monitor has a built-in 7.4V/2000mAh Li-ion polymer battery. Ensure it is charged before first use.
- External Power: Connect the provided charger to the DC 7-16V input port on the monitor.
4.3. Initial Power-On
Press and hold the 'Power' button located on the side of the monitor until the screen illuminates. The monitor will display a static screen if no FPV signal is detected.

Overview of the monitor's ports and control buttons.
5. Operating Instructions
5.1. Auto-Searching FPV Signal
To find an FPV signal from your transmitter:
- Ensure your FPV transmitter is powered on and transmitting.
- Press the 'Search' button on the monitor. The monitor will automatically scan through the 40 available 5.8GHz channels to find the strongest signal.
- Once a signal is found, the monitor will lock onto that channel and display the live FPV feed.
5.2. Manual Channel Selection
If auto-search does not yield the desired result, you can manually select channels:
- Use the 'Band+' and 'CH+' buttons to cycle through bands and channels respectively.
- The current band and channel will be displayed on the OSD (On-Screen Display).
5.3. DVR Function (Recording & Playback)
The monitor features a Digital Video Recorder (DVR) for capturing your FPV footage:
- Insert SD Card: Insert a compatible micro SD card (up to 32GB, Class 10 recommended) into the TF card slot.
- Start Recording: Press the 'Rec/Pic' button once to start recording. A recording indicator will appear on the screen.
- Stop Recording: Press the 'Rec/Pic' button again to stop recording. The video file will be saved to the SD card in AVI format.
- Playback: Access the menu (using 'MENU/SRC' button) to navigate to the playback function and review recorded footage.
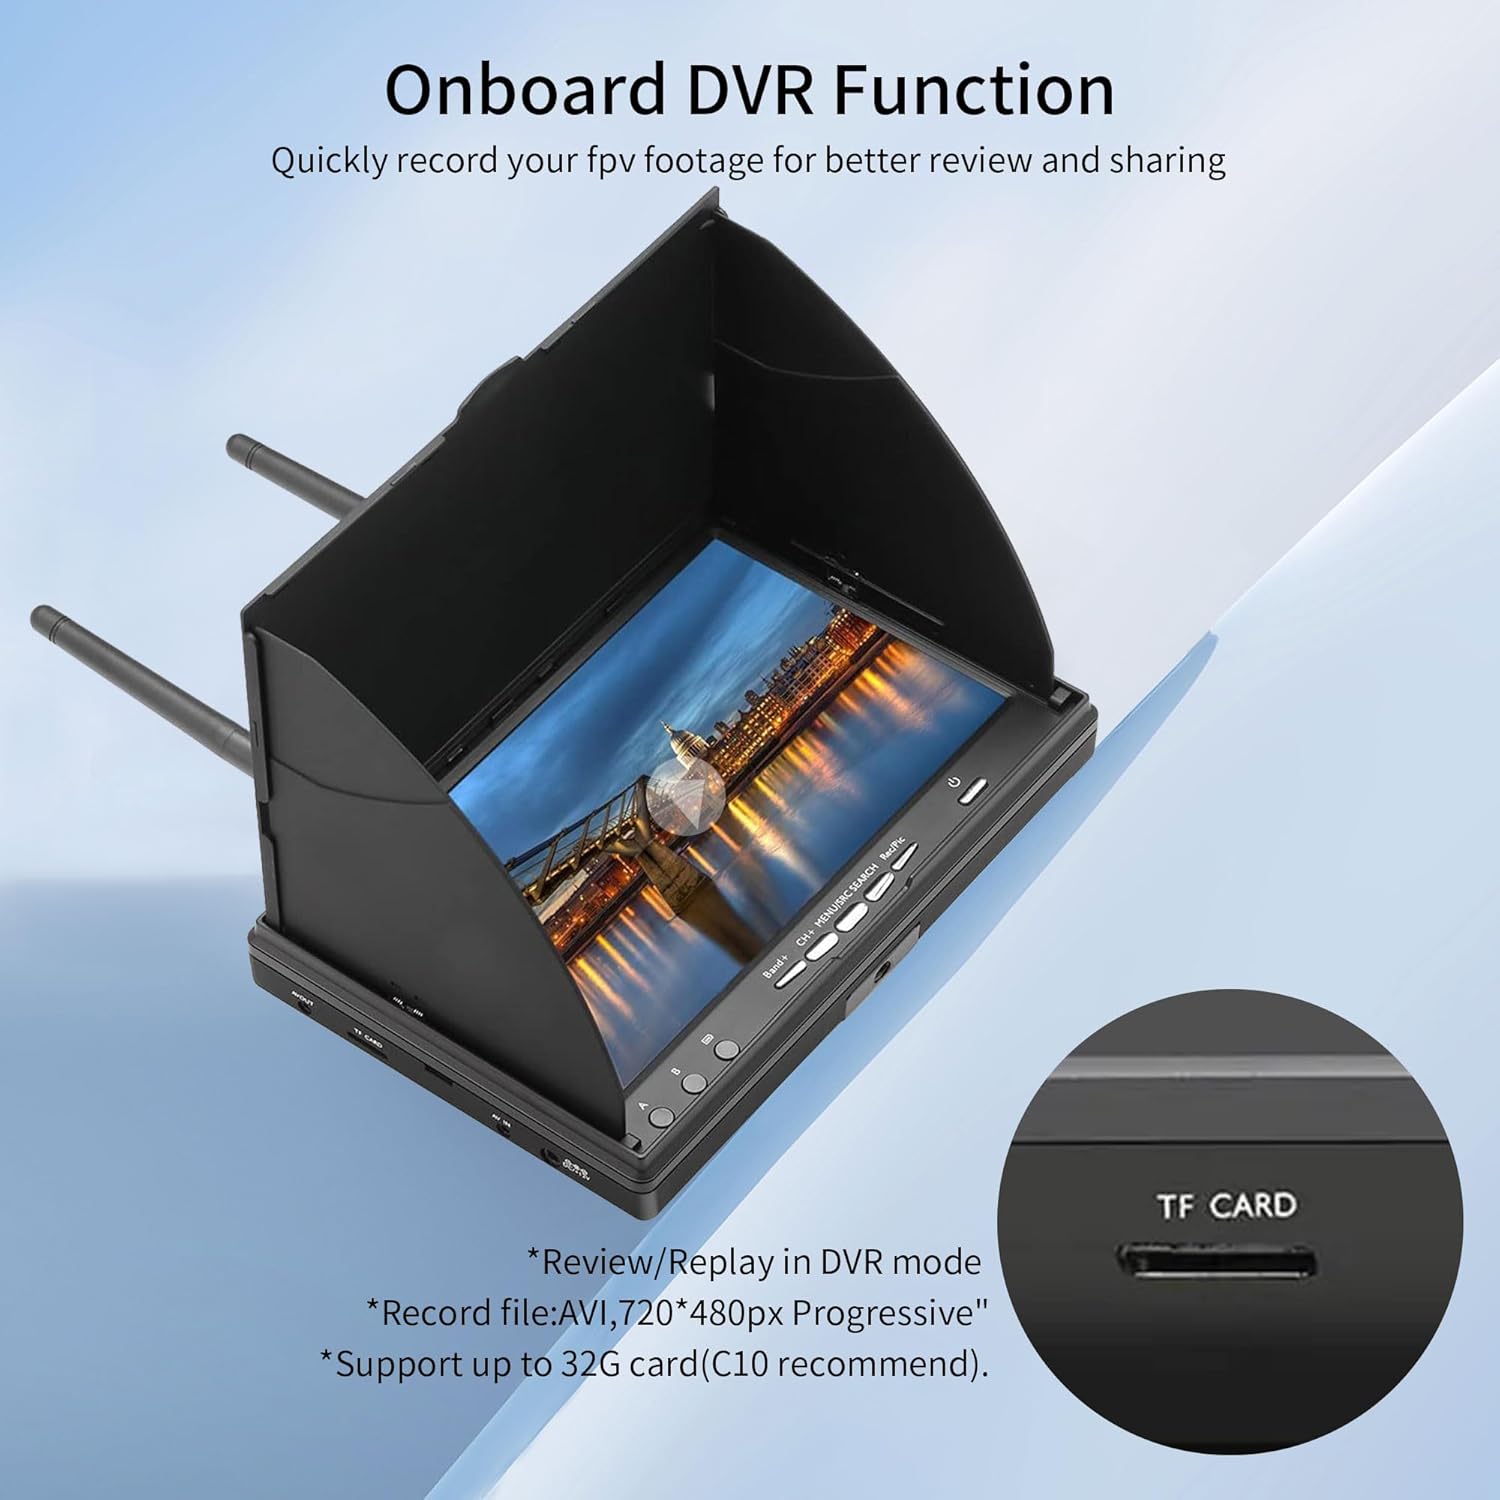
The monitor's onboard DVR function allows quick recording of FPV footage to a micro SD card.
5.4. Video Input and Output
The monitor supports external video connections:
- AV IN: Connect an external analog video source to the AV IN port. Use the 'MENU/SRC' button to switch to AV input mode.
- AV OUT: Output the current video feed (either FPV reception or AV IN) to another display device via the AV OUT port.
6. Specifications
| Feature | Specification |
|---|---|
| Screen Size | 7 inches |
| Screen Type | TFT LCD Screen / Long life, LED backlight |
| Resolution | 800 x 480 |
| Brightness | 600cd/m2 |
| View Angle | 140/120 degrees (Horizontal/Vertical) |
| Receiver | Built-in super sensitiveness 5.8GHz 40ch receiver |
| DVR Format | JPEG, AVI |
| SD Card Support | Up to 32G, C10 SD Card |
| Built-in Battery | 2000mAH/7.4V Li-ion polymer |
| Working Voltage | DC 7~16V |
| Power Consumption | Max 650 mA @12V |
| Battery Charging Current | 850mA @12V (max) |
| Working Temperature | -10℃~+65℃ |
| Connectors | RP-SMA female (outer needle) |
| Antennas Connectors | RP-SMA male (inner hole) |
| Dimensions | 180mm x 120mm x 50mm (Sunshield height: 28mm) |
| Item Weight | 1.74 pounds |

Key dimensions of the SPEEDY BEE 7-Inch FPV Monitor.
7. Maintenance
- Cleaning: Use a soft, dry cloth to clean the monitor screen and body. Avoid using harsh chemicals or abrasive materials.
- Storage: Store the monitor in a cool, dry place away from direct sunlight and extreme temperatures. Remove the antennas during storage or transport to prevent damage.
- Battery Care: For optimal battery life, avoid fully discharging the battery frequently. Charge the battery regularly, even if not in use, to maintain its health.
8. Troubleshooting
- No Signal/Static Screen:
- Ensure antennas are securely attached.
- Verify your FPV transmitter is powered on and operating on the correct 5.8GHz frequency.
- Use the 'Search' function to automatically find the signal or manually adjust bands and channels. - Poor Video Quality/Interference:
- Check for obstructions between the FPV transmitter and the monitor.
- Ensure both antennas are oriented correctly for optimal reception.
- Move away from other 5.8GHz devices or sources of electromagnetic interference. - DVR Not Recording:
- Ensure a compatible micro SD card (Class 10, up to 32GB) is inserted correctly.
- Check if the SD card has sufficient free space.
- Format the SD card if issues persist (refer to the on-screen menu for formatting options). - Monitor Not Powering On/Charging:
- Ensure the charger is properly connected and receiving power.
- Check the charging cable for any damage.
- If using external DC power, verify the voltage is within the 7-16V range.
9. Warranty and Support
For warranty information and technical support, please refer to the official SPEEDY BEE website or contact your retailer. Keep your purchase receipt as proof of purchase for any warranty claims.


