
1. Introduction
Thank you for choosing the LIFERUN 138" x 71" Retractable Side Awning. This product is designed to provide privacy and protection from sun and wind for your outdoor spaces such as patios, balconies, gardens, and courtyards. Constructed with durable aluminum alloy and PU-coated polyester fabric, it offers robust performance and ease of use. Please read this manual thoroughly before installation and operation to ensure safe and efficient use.
2. Safety Information
- Drilling Required: Installation of this retractable side awning requires drilling into both the wall and the ground. Ensure your installation conditions meet these requirements.
- Measure Before Purchase: Always measure your space area before purchasing to ensure the correct size and avoid installation issues.
- Weather Conditions: In case of strong winds, blizzards, or heavy rain, please retract the awning to prevent damage.
- Anchoring: Ensure proper anchoring of the awning to the wall and the ground for stability.
- Minimum Clearance: Maintain a minimum clearance of 80 inches from any obstructions.
- Support Bar Angle: The support bar is designed to be slightly inclined (88.5°) to stretch the fabric better.
- Baseplate Screws: Over-tightening the screws during shipping may result in uneven edges of the baseplate. This can be smoothed out with a hammer.
3. Package Contents
Please verify that all components are present before beginning installation:
- Main Awning Unit (with retractable fabric)
- Wall Mounting Brackets
- Ground Mounting Posts/Brackets
- Handle for Retraction
- Fixing Screws and Wall Plugs (for concrete/brick)
- Instruction Manual
4. Installation Guide
The LIFERUN Retractable Side Awning is designed for easy installation on various surfaces. Follow these steps carefully.
4.1. Prepare for Installation
- Choose a suitable location. The awning requires a sturdy wall for the main unit and a stable ground surface for the receiving post.
- Ensure the wall height is sufficient (minimum 71 inches for the awning height).
- Avoid installing on incompatible walls such as those with insufficient height (<62.2 inches), thin walls (<1.2 inches thickness), or walls with brick ledges/water tables that prevent flush mounting.

Image: LIFERUN Retractable Side Awning providing privacy on a patio.

Image: Examples of incompatible walls for awning installation.
4.2. Wall Mounting (Main Unit)
- Attach the mounting brackets to the main awning unit using the provided screws.
- Position the main awning unit against the desired wall. Use a pencil to mark the drilling points through the bracket holes.
- Drill holes at the marked points. Insert the wall plugs (if necessary for your wall type, e.g., concrete or brick).
- Secure the main awning unit to the wall using the provided screws. Ensure it is level and firmly attached.

Image: Easy installation steps for the LIFERUN Side Awning.
4.3. Ground Mounting (Receiving Post)
- Extend the awning fabric to its full length to determine the position of the receiving post.
- Mark the drilling points for the receiving post's baseplate on the ground.
- Drill holes at the marked points. Insert the appropriate anchors for your ground surface (concrete, hardwood, patio surfaces).
- Secure the receiving post to the ground using the provided screws.
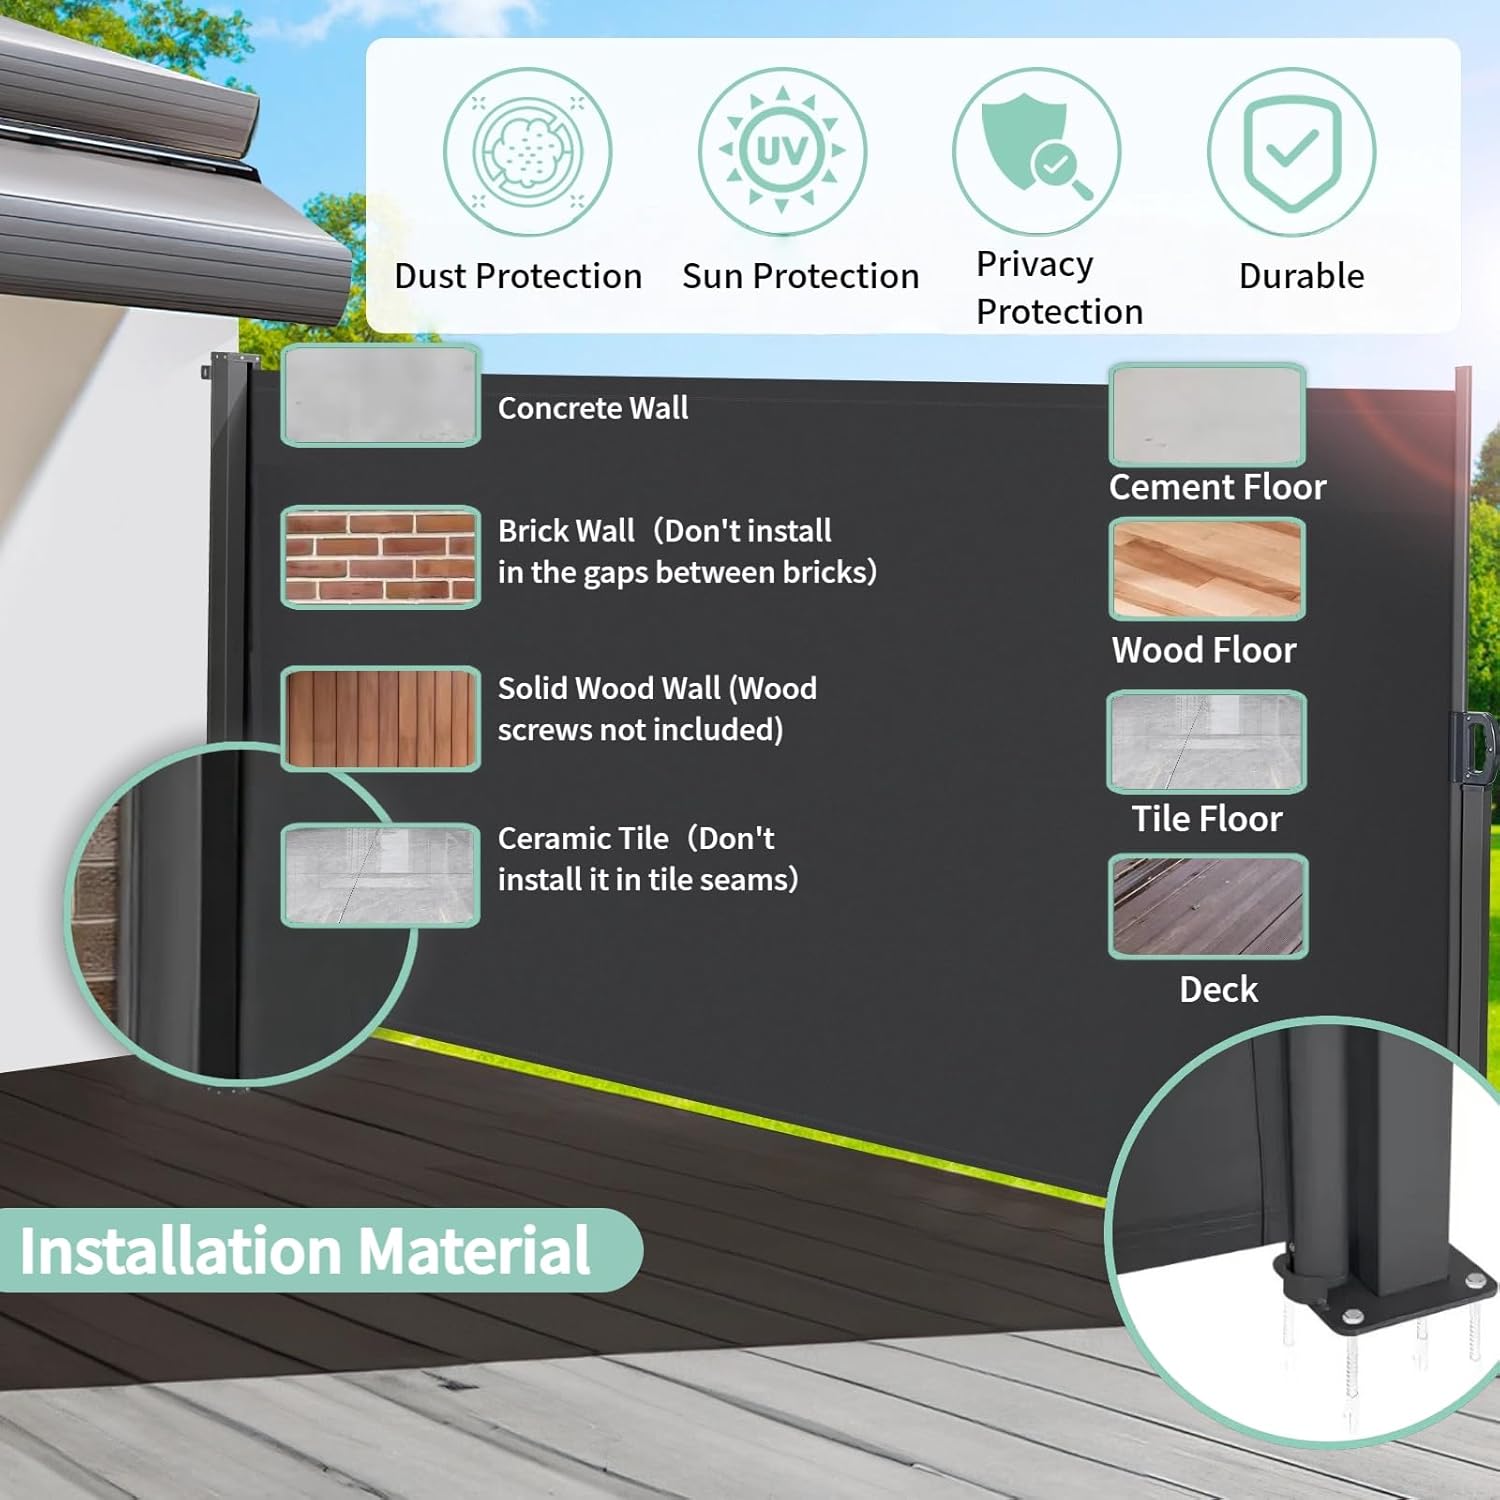
Image: Suitable installation surfaces for the awning.
4.4. Installation Videos
Video: LIFERUN Retractable Side Awning overview and installation demonstration.
Video: Detailed side awning installation demonstration.
5. Operation
The LIFERUN Retractable Side Awning features a telescopic spring mechanism for easy extension and retraction.
- To Extend: Grasp the handle on the retractable post. Pull the fabric horizontally from the main unit towards the receiving post. Secure the handle into the locking mechanism on the receiving post.
- To Retract: Release the handle from the receiving post's locking mechanism. Guide the retractable post back towards the main unit. The spring mechanism will smoothly retract the fabric.

Image: Awning extended for privacy on a patio.
6. Maintenance
To ensure the longevity and optimal performance of your LIFERUN Retractable Side Awning, follow these maintenance guidelines:
- Cleaning: The high-density polyester fabric with PU coating is waterproof and easy to clean. Use a mild soap solution and a soft brush or cloth to clean the fabric. Rinse thoroughly with water and allow it to air dry completely before retracting.
- Frame Care: The aluminum alloy frame is rust-resistant. Wipe it down periodically with a damp cloth to remove dirt and debris.
- Winter Storage: In areas with harsh winters, it is recommended to keep the awning retracted when not in use for extended periods to protect it from heavy snow and ice.
- Regular Inspection: Periodically check all screws and mounting points to ensure they remain tight and secure.
7. Troubleshooting
- Awning not retracting smoothly: Check for any obstructions in the path of the fabric or the retractable post. Ensure the spring mechanism is not damaged.
- Fabric appears loose or wrinkled: Ensure the receiving post is installed at the correct distance and the support bar is angled correctly (88.5°) to maintain tension.
- Awning feels unstable: Re-check all wall and ground mounting screws and anchors to ensure they are securely fastened.
8. Specifications
| Feature | Detail |
|---|---|
| Brand | LIFERUN |
| Model Number | B0CZ71PRKC |
| Size | 138" (Width) x 71" (Height) |
| Projection Distance | 138 Inches |
| Minimum Clearance | 80 Inches |
| Material | Aluminum, Metal, Polyester |
| Fabric Type | Polyester (PU-coated) |
| Color | Dark Grey |
| Item Weight | 22 Pounds |
| Operation Mode | Manual |
| Assembly Required | Yes |

Image: Dimensions of the LIFERUN Retractable Side Awning.

Image: UV-resistant and waterproof fabric features.
9. Warranty and Support
LIFERUN is committed to providing high-quality products. This product comes with a standard manufacturer's warranty against defects in materials and workmanship. For specific warranty details, claims, or technical support, please refer to the warranty card included with your purchase or contact LIFERUN customer service through the retailer where the product was purchased.