
Tiskgg Drop Safe for Money
Contents
Tiskgg 5.8 cu ft Large Drop Safe Box User Manual
Model: Drop Safe for Money
1. Introduction
This manual provides detailed instructions for the safe and efficient use of your Tiskgg 5.8 cu ft Large Drop Safe Box. Designed for businesses, offices, retail stores, and homes, this heavy-duty safe offers secure storage for cash, documents, and other valuables with its anti-theft features, digital keypad, and convenient drop slot. Please read this manual thoroughly before installation and operation to ensure proper functionality and security.

Image 1.1: The Tiskgg 5.8 cu ft Large Drop Safe Box, showcasing its robust design and key features.

Image 1.2: Illustrates the versatility of the safe for different environments including business, retail, office, and home use.
2. Safety Information
- Always keep emergency keys in a secure location away from the safe. Do not store them inside the safe.
- Ensure the safe is securely mounted to a wall or floor to prevent unauthorized removal.
- Do not attempt to force the safe open if the digital lock malfunctions. Use the emergency key or external power supply as instructed.
- This safe is designed for security against theft. It is NOT water resistant. Protect it from moisture and extreme temperatures.
- Keep children away from the safe to prevent accidental lockout or injury.
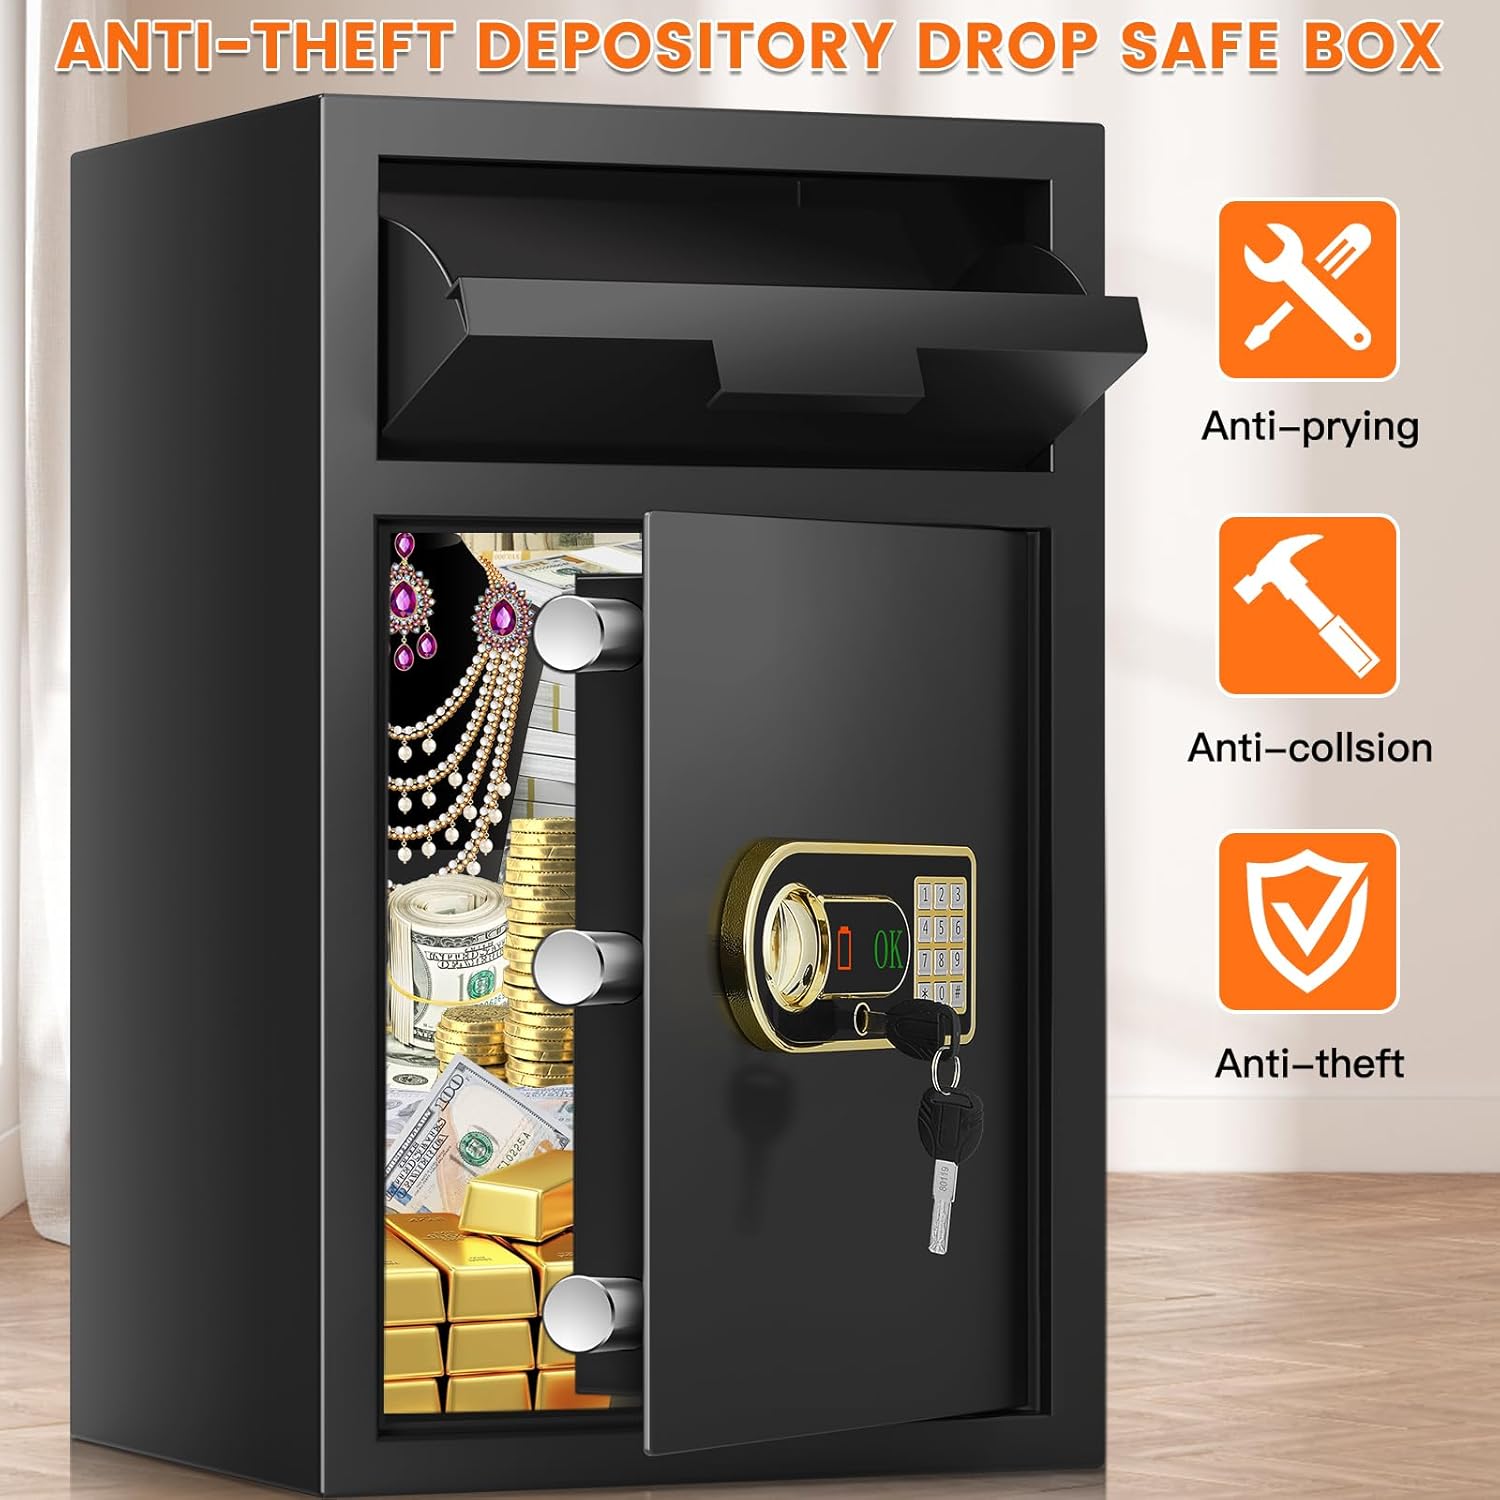
Image 2.1: Highlights the anti-prying, anti-collision, and anti-theft design elements of the safe.
3. Package Contents
Verify that all items are present in the package:
- Tiskgg 5.8 cu ft Drop Safe Box
- Digital Keypad (integrated)
- Emergency Keys (2)
- External Battery Box
- Mounting Hardware (Expansion Screws)
- Floor Mat/Cushion
- User Manual (this document)
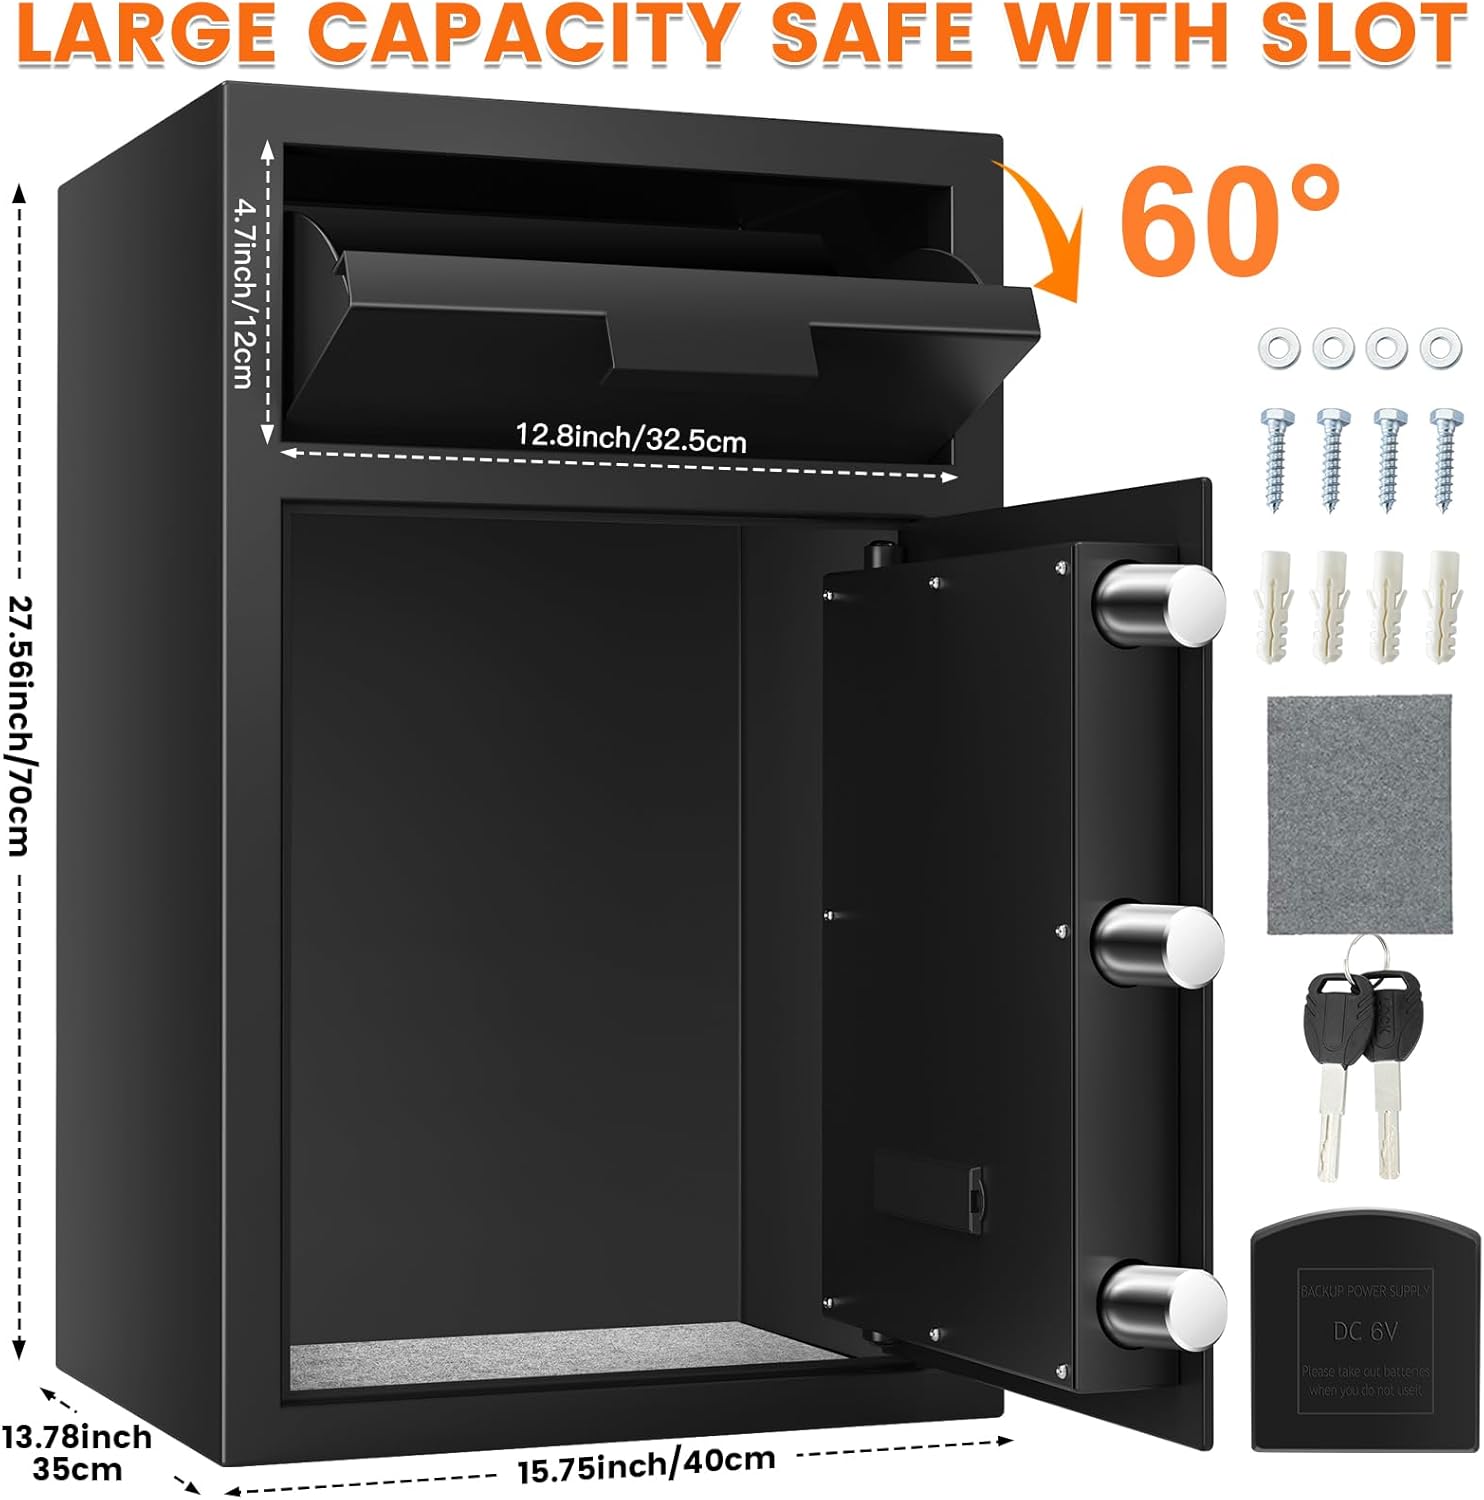
Image 3.1: Overview of the safe's dimensions and included accessories for installation and operation.
4. Setup
4.1 Initial Opening and Battery Installation
- Locate the emergency keys provided.
- Insert an emergency key into the keyhole behind the digital keypad cover and turn it. Simultaneously turn the knob to open the safe door.
- Inside the safe door, locate the battery compartment. Insert 4 AA batteries (not included) with correct polarity.
- Close the battery compartment.
4.2 Mounting the Safe
For enhanced security, it is highly recommended to bolt the safe to a wall or floor using the provided expansion screws.
- Choose a suitable location for the safe, ensuring it is stable and discreet.
- Mark the positions for the pre-drilled holes on the back or bottom of the safe onto the wall or floor.
- Drill pilot holes at the marked positions.
- Align the safe with the drilled holes and insert the expansion screws.
- Tighten the screws securely to fix the safe in place.

Image 4.1: Step-by-step guide for securely mounting the safe to a wall or floor.
5. Operating Instructions
5.1 Setting/Changing the Passcode
- With the safe door open, press the red reset button located on the inside of the door.
- The keypad will beep, and the indicator light will flash.
- Enter a new 3-8 digit passcode on the digital keypad.
- Press the "#" key to confirm your new passcode. The safe will beep again to confirm successful programming.
- Test the new passcode with the door open before closing it.
5.2 Opening the Safe with Passcode
- Enter your 3-8 digit passcode on the digital keypad.
- Press the "#" key to confirm.
- Within 5 seconds, turn the knob clockwise to open the safe door.
5.3 Using Emergency Keys
In case you forget your passcode or the batteries are depleted, you can use the emergency keys.
- Remove the digital keypad cover.
- Insert an emergency key into the keyhole.
- Turn the key and simultaneously turn the knob to open the safe door.
5.4 Using the External Battery Box
If the internal batteries are depleted and you do not have the emergency keys readily available, or prefer not to use them, an external battery box can power the keypad.
- Insert 4 AA batteries into the external battery box.
- Plug the external battery box into the port located on the digital keypad.
- Enter your passcode and press "#" to open the safe as usual.
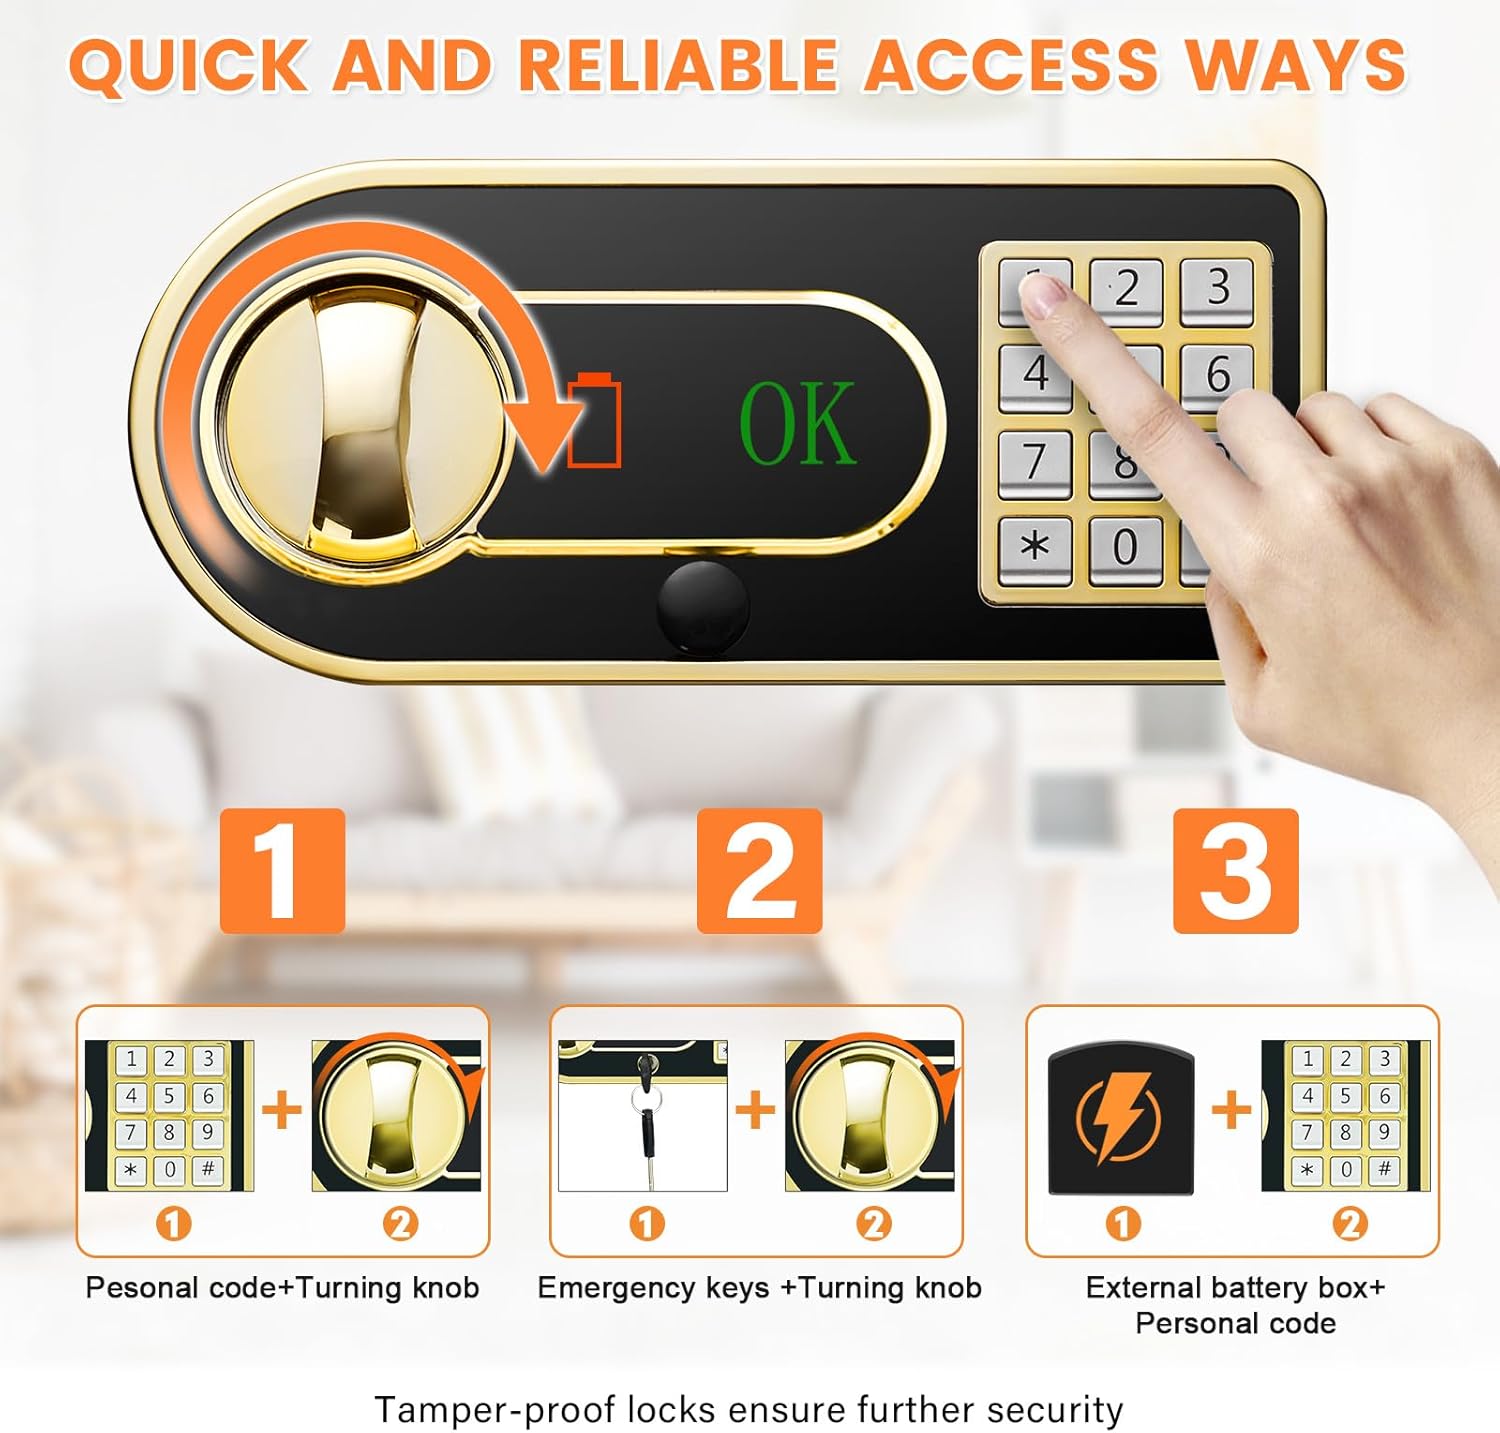
Image 5.1: Illustrates the multiple secure access methods for the safe.
5.5 Using the Drop Slot
The convenient drop slot allows for quick and secure deposits without opening the main safe door.
- Pull open the drop slot drawer located at the top of the safe.
- Place cash, checks, envelopes, or small documents into the drawer.
- Push the drawer back in. The items will fall into the main compartment of the safe.
- The drop slot features anti-theft serrations to prevent items from being fished out.
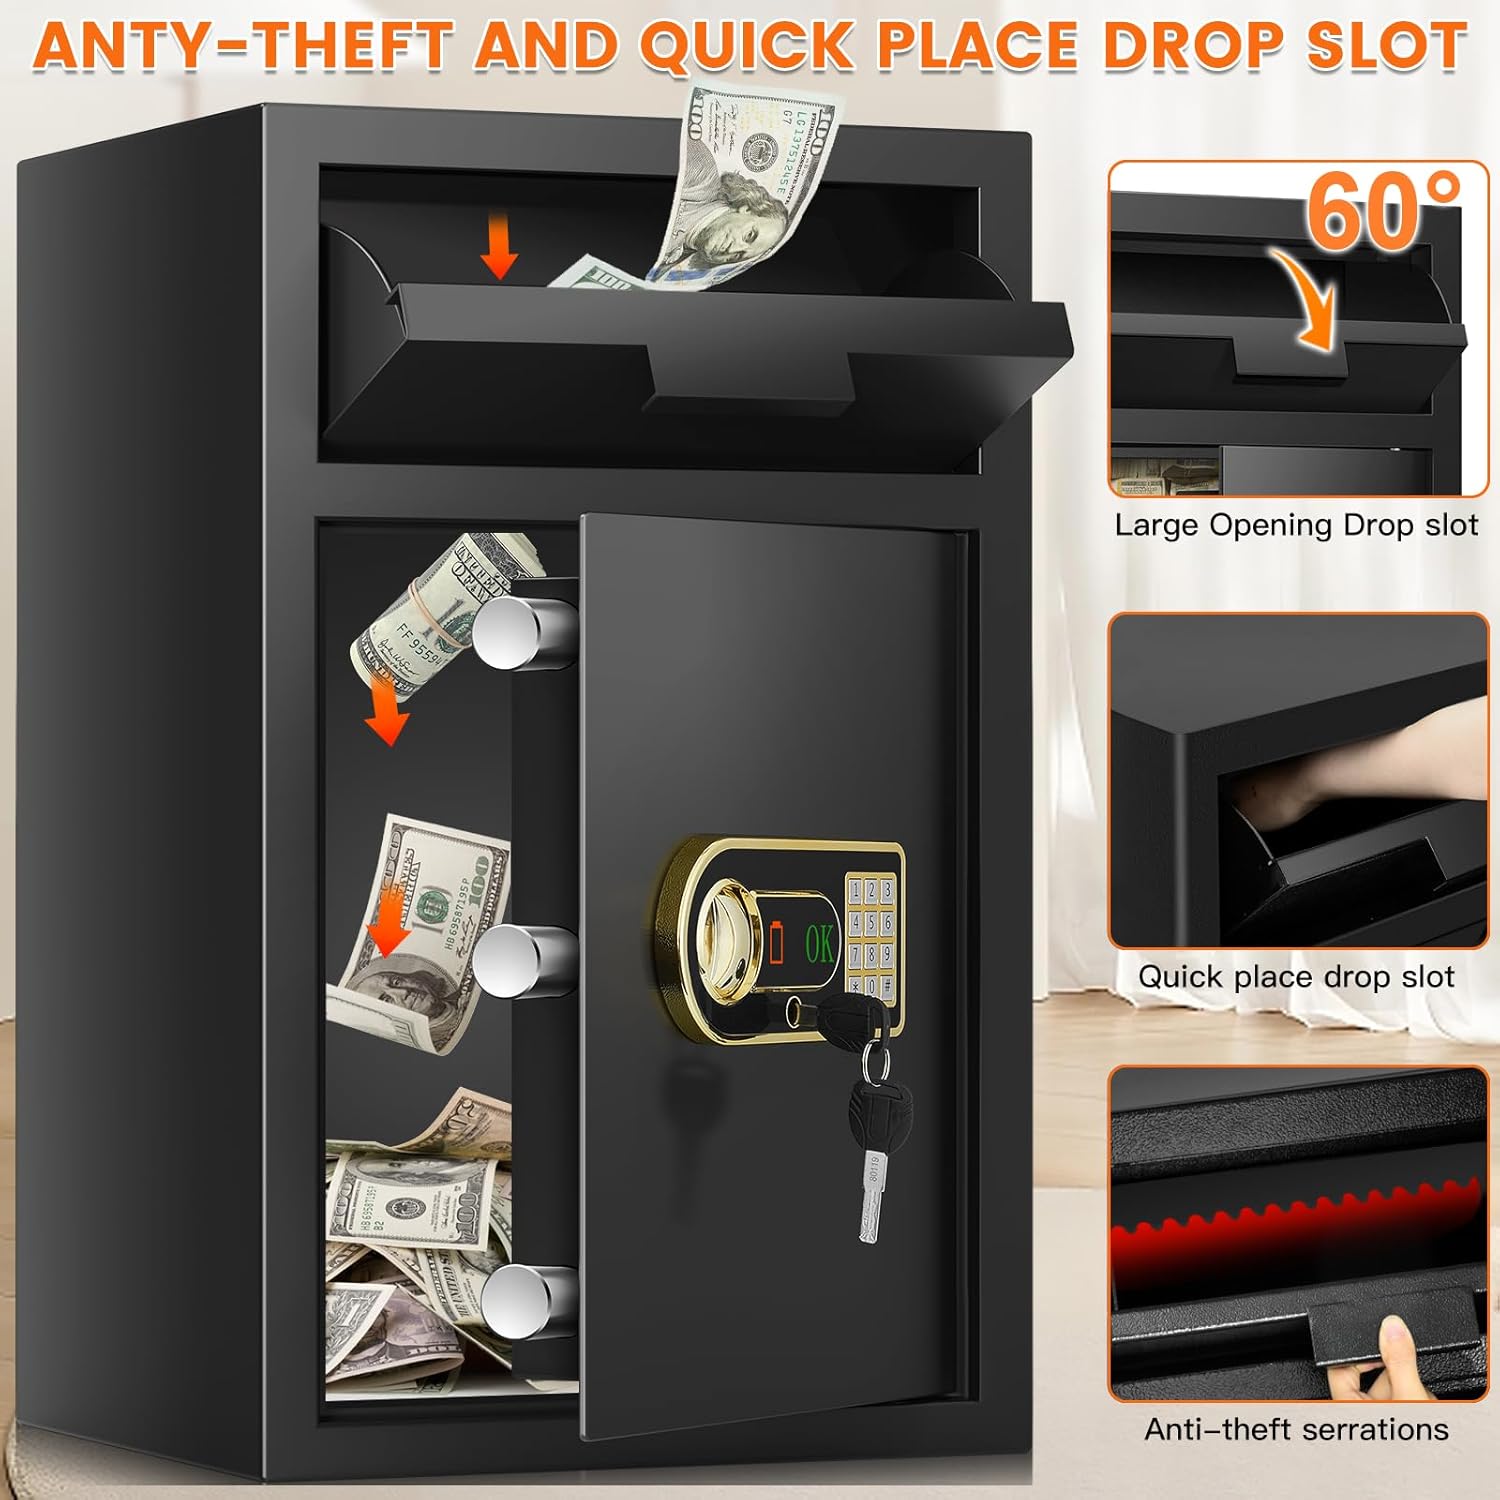
Image 5.2: Details the quick-place drop slot and its anti-theft serrations.
5.6 Alarm System
The safe is equipped with an alarm system to deter unauthorized access.
- If 3 incorrect passcodes are entered consecutively, the keypad will lock for 20 minutes.
- If 6 incorrect passcodes are entered consecutively, the keypad will lock for 300 minutes.
- A low battery reminder will also be indicated on the keypad.

Image 5.3: Explains the safe's alarm system and keypad lockout features.
6. Maintenance
- Regularly check the battery level and replace batteries when the low battery indicator appears.
- Clean the exterior of the safe with a soft, damp cloth. Avoid abrasive cleaners or solvents.
- Ensure the locking bolts and hinges are free from obstructions.
- Keep the emergency keys in good condition and store them safely.
7. Troubleshooting
| Problem | Possible Cause | Solution |
|---|---|---|
| Safe does not open with passcode. | Incorrect passcode entered; batteries depleted; knob not turned within 5 seconds. | Re-enter passcode carefully. Replace batteries or use external battery box. Ensure knob is turned immediately after correct passcode entry. |
| Keypad is unresponsive. | Batteries are dead; keypad is locked due to multiple incorrect entries. | Replace batteries or use external battery box. Wait for the lockout period to expire (20 or 300 minutes). Use emergency key if urgent. |
| Safe door cannot be closed. | Obstruction in the door frame; locking bolts are extended. | Check for any items blocking the door. Ensure the knob is in the open position so bolts are retracted before closing. |
| Items cannot be dropped through the slot. | Item is too large; obstruction in the slot. | Ensure items fit within the slot dimensions. Check for any foreign objects blocking the path. |
8. Specifications
| Feature | Detail |
|---|---|
| Brand | Tiskgg |
| Model Number | Drop Safe for Money |
| Capacity | 5.8 Cubic Feet |
| Product Dimensions (D x W x H) | 13.78"D x 15.75"W x 27.56"H |
| Material | Alloy Steel |
| Lock Type | Electronic Combination Lock |
| Special Features | Alarm System, Anti-Theft, Sensor Light, Drop Slot |
| Water Resistance Level | Not Water Resistant |
9. Warranty and Support
For warranty information or technical support, please refer to the contact details provided at the point of purchase or visit the official Tiskgg website. Keep your purchase receipt as proof of purchase for any warranty claims.
For further assistance, please contact customer service:
- Email: [Insert Customer Service Email Here]
- Phone: [Insert Customer Service Phone Number Here]
- Website: www.tiskgg.com (Example, replace with actual if available)
Ask a question about this manual
Ask about setup, troubleshooting, compatibility, parts, safety, or missing instructions. Manuals+ will review the question and use this page’s manual context to help answer it.