
GeRRiT Digital Alarm Clock (B0CYWWW18V)
Gerrit Digital Alarm Clock User Manual
Brand: GeRRiT | Model: Digital Alarm Clock (B0CYWWW18V)
Introduction
Thank you for purchasing the Gerrit Digital Alarm Clock. This manual provides detailed instructions for setting up, operating, and maintaining your new alarm clock. Please read this manual thoroughly before use to ensure proper functionality and to maximize your product experience.
Product Overview and Features
The Gerrit Digital Alarm Clock is designed to provide a peaceful environment for sleep while offering multiple functionalities. Its compact size makes it suitable for various locations such as bedrooms, bedside tables, nightstands, desks, shelves, and tables.
Key Features:
- Multiple Alarm Settings: Set up to 3 groups of alarm clocks with 3 working day modes (5 days, 6 days, or 7 days a week cycle).
- Adjustable Volume & Ringtones: Four volume levels and 25 classic music ringtones.
- Multifunction Display: Large LCD screen displays time, date, day of week, temperature, and alarm time.
- Backlight & Snooze: Features a backlight for clear viewing and a snooze function for extra sleep.
- USB Charging Port: Convenient USB charging port for external devices.
- Compact Design: Simple, easy-to-read, and compact design fits well in any room.
Product Views:

Figure 1: Front view of the Gerrit Digital Alarm Clock, showing the large digital display.

Figure 2: Front view of the alarm clock highlighting the low power indication light.

Figure 3: The alarm clock showcasing its 25 classic music options and adjustable volume feature.
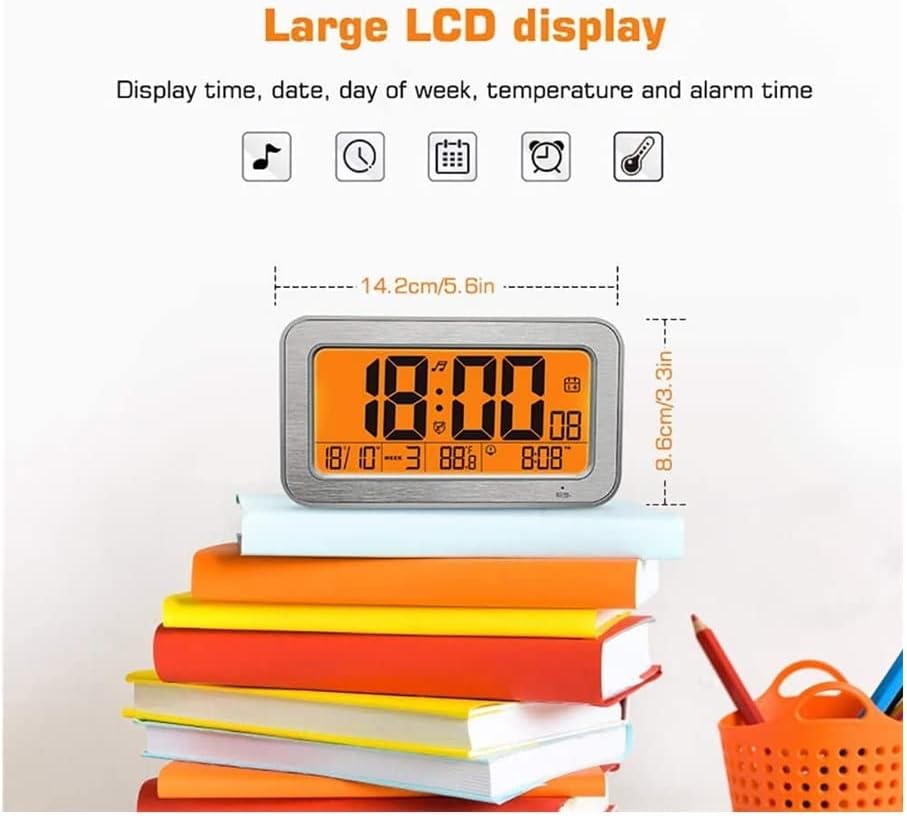
Figure 4: Illustration of the large LCD display showing time, date, day of week, temperature, and alarm time, with dimensions (14.2cm/5.6in width, 8.6cm/3.3in height).

Figure 5: The alarm clock demonstrating its snooze function, allowing for temporary silencing of the alarm.

Figure 6: The alarm clock illustrating its capability for 2 alarm settings with 3 alarm modes (5, 6, or 7 days a week).

Figure 7: The alarm clock featuring a touch night light function for easy illumination in the dark.
Setup
Package Contents:
- Gerrit Digital Alarm Clock
- USB Charging Cable (for power supply)
- User Manual (this document)
Powering On:
The alarm clock is powered by a Micro USB 5V power supply and includes a built-in 400mAh rechargeable lithium battery for backup. Connect the provided USB cable to the Micro USB DC 5V port on the back of the clock and plug the other end into a compatible USB power adapter (not included) or a USB port.

Figure 8: Back view of the alarm clock showing the Micro USB DC 5V port, buttons, and switches.
Operating Instructions
Refer to Figure 8 for button locations on the back of the clock.
1. Setting Time and Date:
- Press the SET button to enter time setting mode. The hour digits will flash.
- Use the UP (▲) or DOWN (▼) buttons to adjust the hour.
- Press SET again to move to minute setting. Adjust minutes using UP/DOWN.
- Continue pressing SET to cycle through Year, Month, and Date settings, adjusting each with UP/DOWN.
- Once all settings are complete, press SET to exit setting mode, or wait for 10 seconds for it to automatically exit.
2. 12/24 Hour Format Selection:
- Locate the 12/24HR switch on the back of the clock (near the top left).
- Slide the switch to select either 12-hour (with AM/PM indicator) or 24-hour format.
3. Setting Alarms (Alarm 1, Alarm 2, Alarm 3):
- Press the MODE button repeatedly until "ALARM 1" (or ALARM 2, ALARM 3) appears on the display.
- Press SET to enter alarm time setting for the selected alarm. The hour digits will flash.
- Use UP/DOWN to adjust the hour.
- Press SET again to move to minute setting. Adjust minutes using UP/DOWN.
- After setting the time, press SET to select the alarm mode:
- AL5DAYS: Alarm rings Monday-Friday.
- AL6DAYS: Alarm rings Monday-Saturday.
- AL7DAYS: Alarm rings Monday-Sunday.
- Press SET to confirm and exit alarm setting mode.
- To enable/disable an alarm, slide the corresponding alarm switch (ALARM 1/2/3) on the back of the clock to ON or OFF.
4. Adjusting Volume and Ringtones:
- To change the ringtone, press the TUNES button on the back of the clock. Cycle through the 25 available melodies.
- To adjust the volume, locate the Adjustable Volume slider on the back of the clock (bottom right). Slide it to increase or decrease the volume (four levels available).
5. Snooze Function:
- When the alarm rings, press the large button on the top of the clock (often marked with a 'Z' or snooze icon) to activate the snooze function. The alarm will temporarily stop and ring again after a few minutes (typical snooze duration is 5-9 minutes).
- To turn off the alarm completely, press any other button on the clock, or let it ring for its full duration.
6. Backlight and Brightness:
- The clock features a touch-sensitive area on the top (often marked with a sun icon) to activate the backlight. Touch this area to illuminate the display.
- The brightness of the display is adjustable. Refer to the Brightness control on the top panel (if available, otherwise it's automatic or touch-activated).
7. Temperature Display (°F/°C):
- Locate the °C/°F button on the back of the clock.
- Press this button to switch between Celsius and Fahrenheit temperature display.
Maintenance
- Cleaning: Wipe the clock's surface with a soft, dry cloth. Do not use abrasive cleaners or solvents, as they may damage the finish.
- Storage: If storing the clock for an extended period, ensure it is fully charged and stored in a cool, dry place.
- Battery Care: The built-in lithium battery is rechargeable. For optimal battery life, avoid fully discharging the battery frequently.
Troubleshooting
| Problem | Possible Cause | Solution |
|---|---|---|
| Clock display is blank or dim. | Not powered on; low battery; power cable loose. | Ensure the USB cable is securely connected and plugged into a power source. Check the low power indication light (Figure 2). Charge the clock if the battery is low. |
| Alarm does not sound. | Alarm not enabled; volume too low; incorrect alarm time/mode. | Verify the alarm switch (ALARM 1/2/3) is set to ON. Check the alarm time and ensure the alarm mode (5/6/7 days) is correctly set. Increase the volume using the adjustable volume slider. |
| Time is incorrect. | Time not set correctly; 12/24H format issue. | Re-set the time following the "Setting Time and Date" instructions. Check the 12/24HR switch. |
| Cannot change temperature unit. | Incorrect button pressed. | Ensure you are pressing the °C/°F button on the back of the clock. |
Specifications
| Brand | GeRRiT |
| Model | Digital Alarm Clock (B0CYWWW18V) |
| Color | Black |
| Display Type | Digital |
| Special Feature | Adjustable |
| Power Source | Corded Electric (Micro USB DC 5V) |
| Battery | 400mAh rechargeable lithium battery (included) |
| Age Range (Description) | Adult |
| Room Type | Bedroom |
| Shape | Rectangular |
| Theme | Music |
| Frame Material | Acrylonitrile Butadiene Styrene (ABS) |
| Alarm Clock Function | Yes (3 groups, 3 modes) |
| Watch Movement | Automatic |
| Operation Mode | Electrical |
| Manufacturer | Gerrit |
| ASIN | B0CYWWW18V |
| Date First Available | March 23, 2024 |
Warranty and Support
The Gerrit Digital Alarm Clock comes with a standard manufacturer's warranty. For specific warranty details, please refer to the product packaging or contact your retailer. If you encounter any issues or require technical assistance, please contact Gerrit customer support through the retailer's platform or the contact information provided with your purchase.
We are committed to providing high-quality products and support. If you have any questions or concerns, please do not hesitate to reach out.
Ask a question about this manual
Ask about setup, troubleshooting, compatibility, parts, safety, or missing instructions. Manuals+ will review the question and use this page’s manual context to help answer it.