
1. Introduction
Thank you for choosing PChero Flameless Rechargeable LED Votive Candles. This manual provides essential information for the safe and efficient use of your new candles. Please read these instructions thoroughly before use and retain them for future reference.
2. Package Contents
Verify that all items listed below are included in your package:
- 6 x PChero Rechargeable LED Votive Candles
- 1 x 12-Key Remote Control
- 1 x USB-C Charging Cable

Image 2.1: Contents of the PChero Flameless Candle package, including six candles, a remote control, and a multi-head USB charging cable.
3. Product Features
- Rechargeable Design: Equipped with a USB-C charging cable for repeated use, eliminating the need for disposable batteries.
- Extended Battery Life: A 2-hour charge provides over 52 hours of operation at medium brightness.
- Realistic Flame Effect: Features a 3D flame with a black candle wick, melted wave top, and smooth candle shell for an authentic appearance.
- Remote Control Functionality: A 12-key remote allows for power on/off, light mode changes (slow flash, fast flash, breathing flicker, steady light), brightness adjustment, and timer settings.
- Timer Options: Includes 2, 4, 6, and 8-hour auto-cycle timer settings.
- Standard Size: Tealight dimensions of 1.5"D x 2.28"H are compatible with most standard tea light holders and votive candle holders.
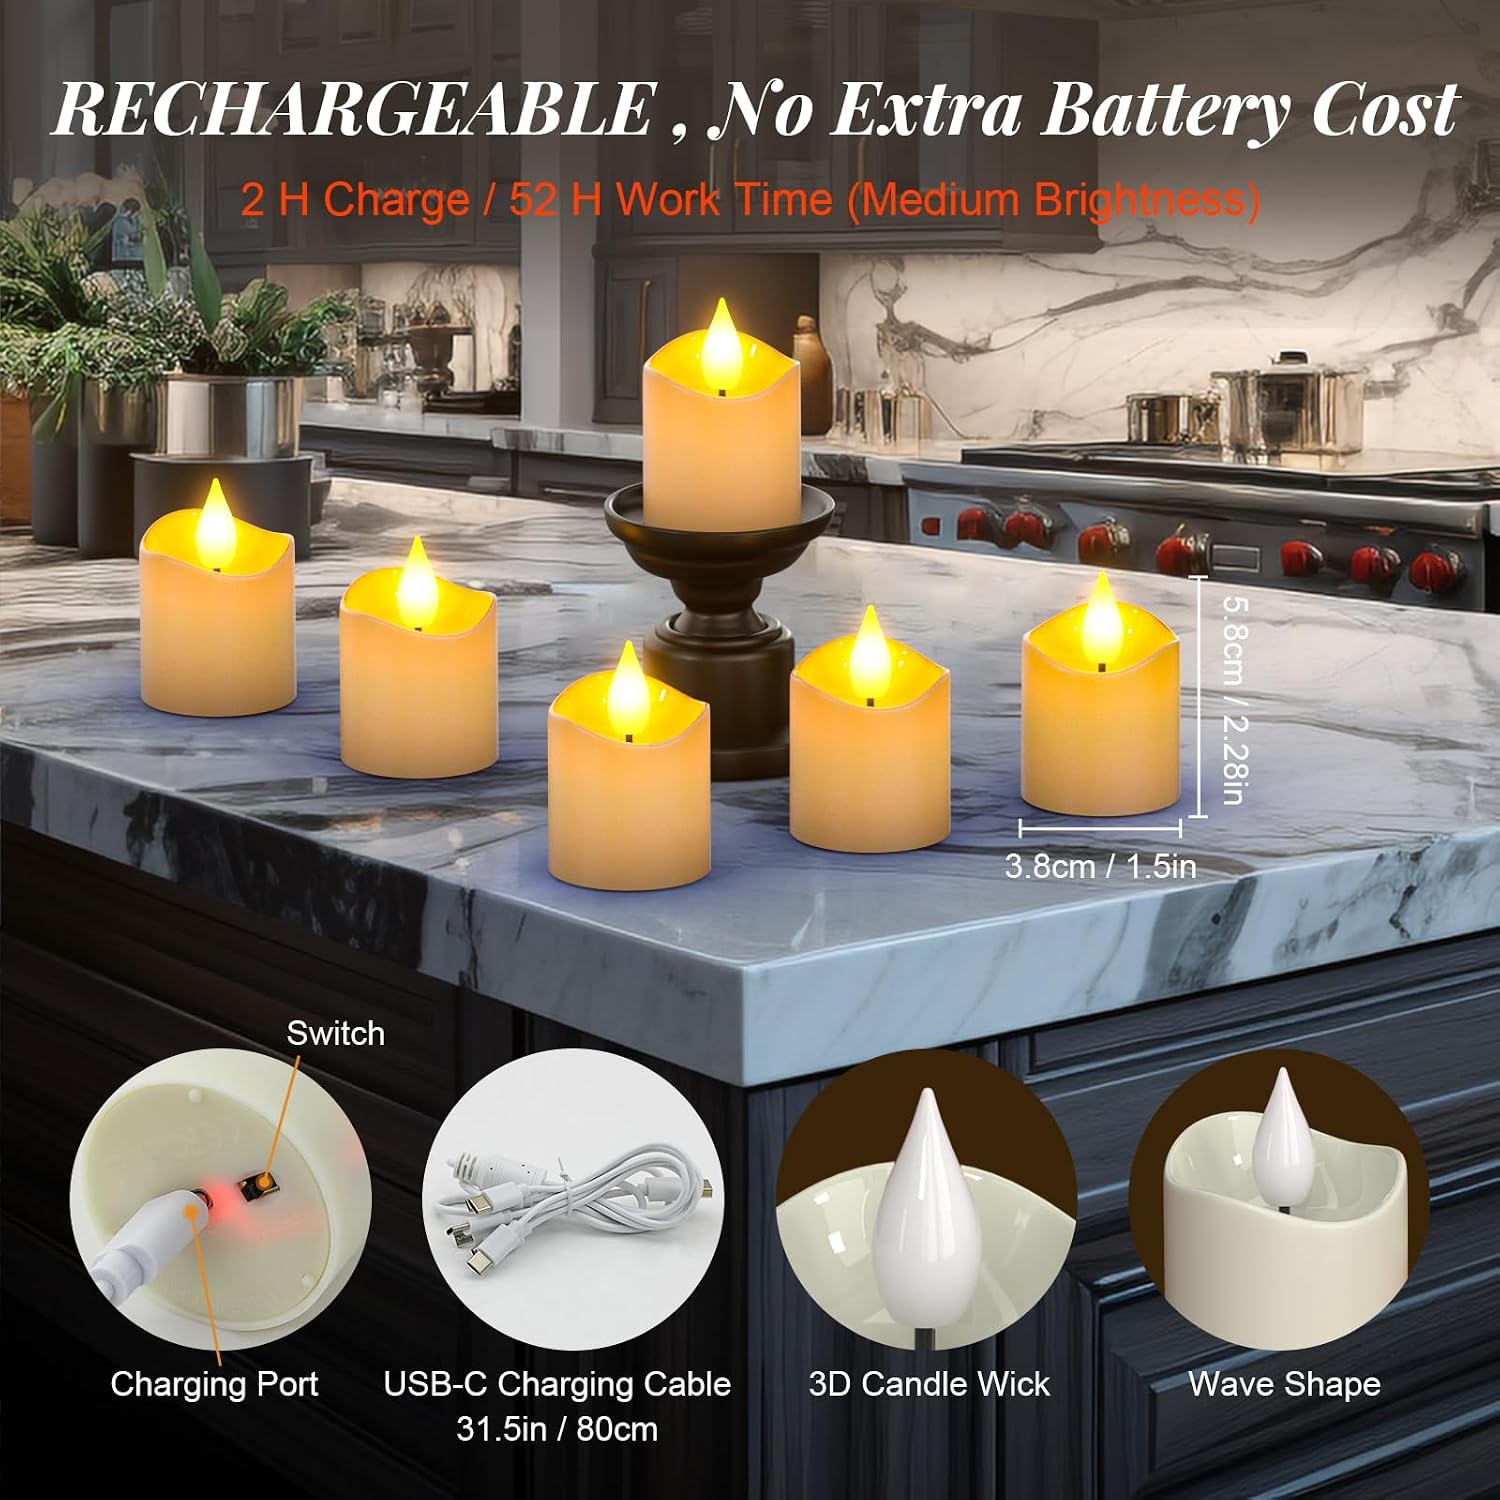
Image 3.1: Close-up view highlighting the candle's dimensions, USB-C charging port, 3D wick, and wave-shaped top design.
4. Setup
- Initial Charge: Before first use, fully charge all candles using the provided USB-C charging cable. Connect the cable to a USB power source (e.g., computer, wall adapter). The indicator light on the candle will be red during charging and turn off when fully charged.
- Power On: Locate the ON/OFF switch on the bottom of each candle and slide it to the 'ON' position. The candles will illuminate.
- Remote Activation: Ensure the remote control has a working battery. Point the remote directly at the candles for optimal response.

Image 4.1: Illustration of the candles being charged via the USB cable. A red light indicates active charging, which turns off upon completion.
5. Operation
Once the candles are switched ON from their base, use the remote control to manage their functions:
- Power ON/OFF: Press the ON or OFF buttons to turn all active candles on or off simultaneously.
- Adjust Luminosity: Use the + and - buttons under 'Luminosity' to increase or decrease the brightness.
- Change Mode: The 'Mode' section offers four options:
- SL (Slow Flash): Provides a gentle, slow flickering effect.
- FL (Fast Flash): Offers a more rapid flickering.
- BF (Breathing Flicker): Mimics the natural, subtle flicker of a real candle.
- Light (Steady Light): Maintains a constant, non-flickering illumination.
- Set Timer: Select from 2H, 4H, 6H, or 8H buttons under 'Timer'. Once activated, the candles will remain on for the selected duration and then automatically turn off. The timer will reset and activate at the same time each day.

Image 5.1: The 12-key remote control, illustrating its various functions for managing the flameless candles.
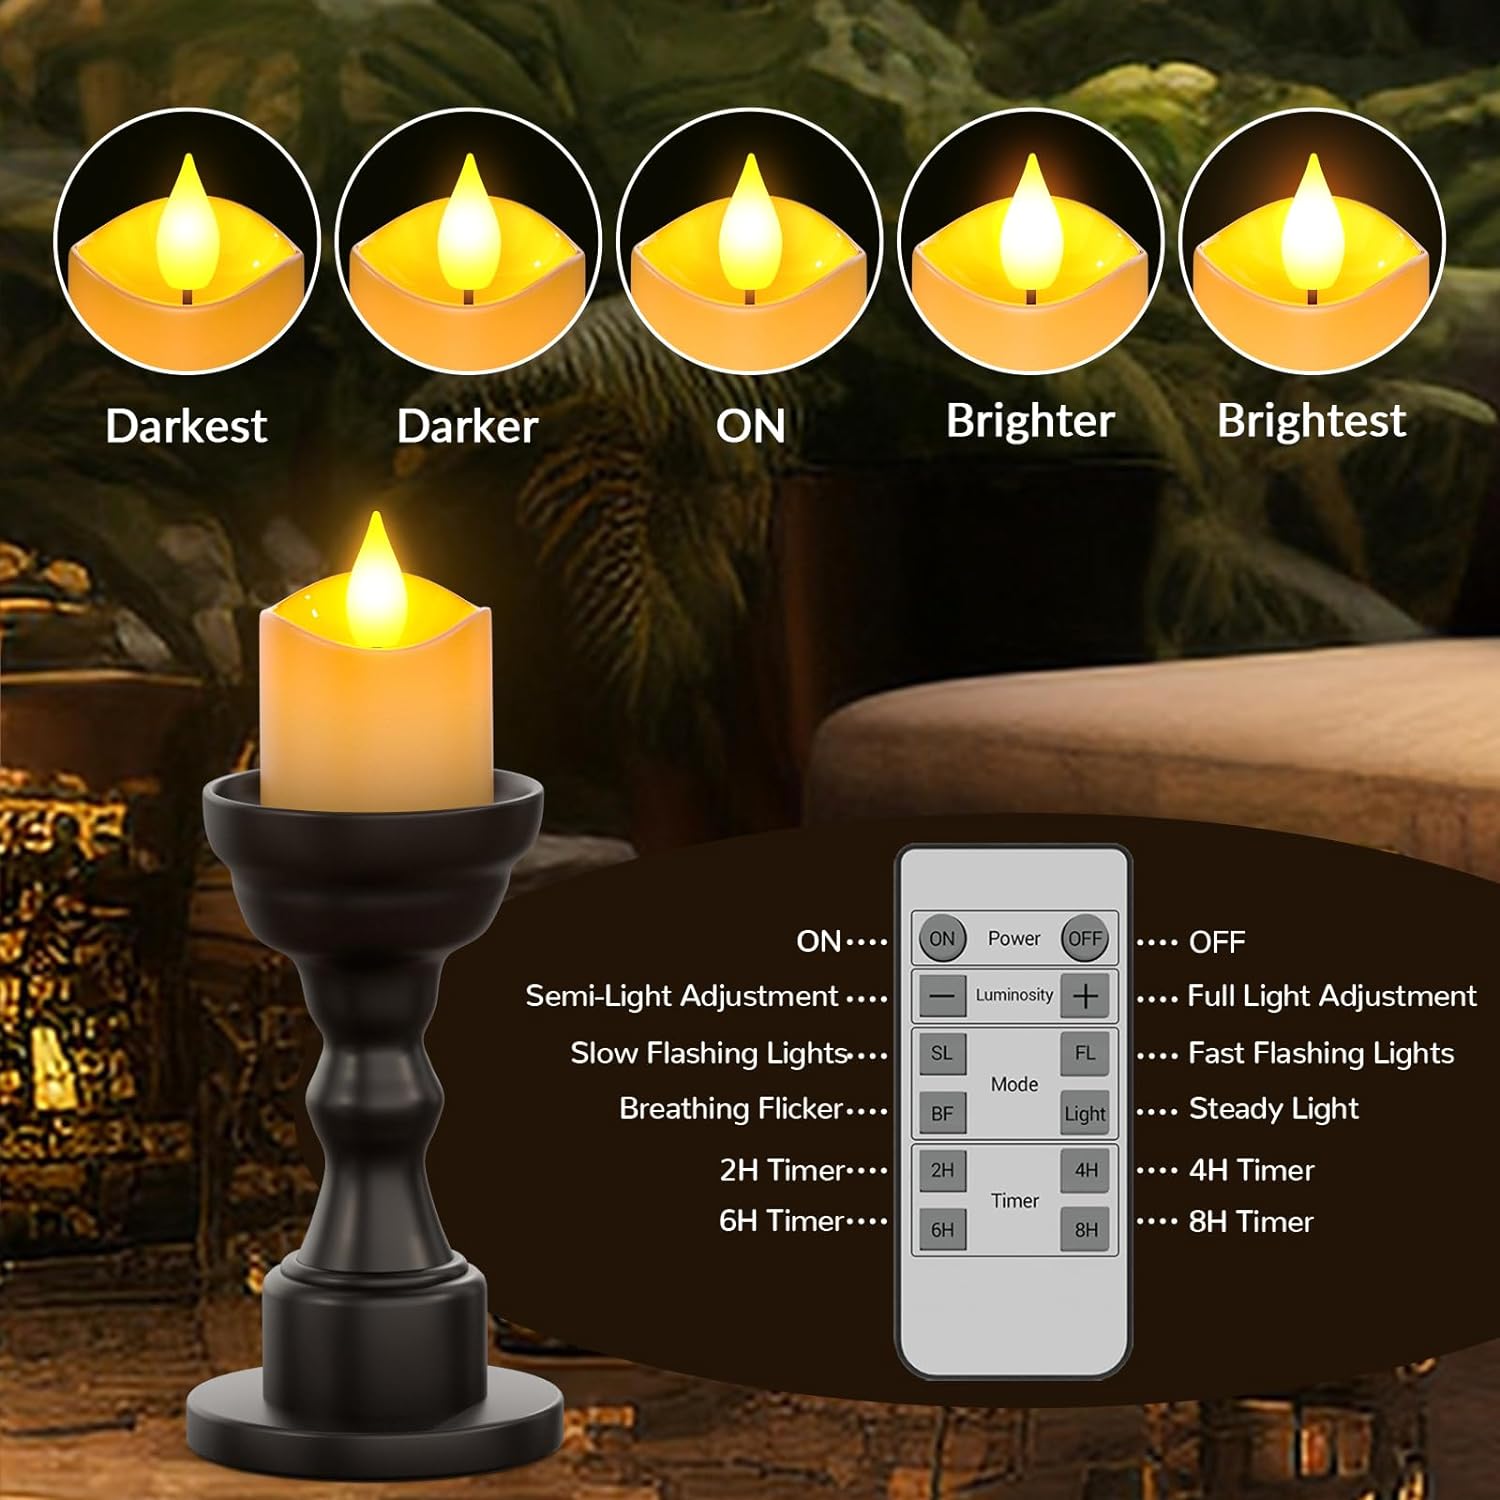
Image 5.2: Visual representation of the adjustable luminosity feature, showing candles at different brightness settings.

Image 5.3: Candles displayed on a shelf, demonstrating the automatic timer function for daily operation.
6. Maintenance
- Battery Care: For optimal battery lifespan, ensure the candles are fully charged before their first use. Subsequently, it is recommended to deplete the battery completely before recharging.
- Cleaning: Wipe the candles with a soft, dry cloth. Avoid using abrasive cleaners or solvents.
- Storage: Store candles in a cool, dry place when not in use.
7. Troubleshooting
- Candles not turning on: Ensure the physical switch on the bottom of each candle is in the 'ON' position. Verify that the candles are charged.
- Remote control not working: Check if the remote's battery needs replacement. Ensure there is a clear line of sight between the remote and the candles.
- Inconsistent flickering or brightness: Fully charge the candles. If issues persist, try resetting the candles by turning them off and then on again from the base switch.
- Charging indicator not working: Ensure the USB-C cable is securely connected to both the candle and the power source.
8. Specifications
| Feature | Detail |
|---|---|
| Brand | PChero |
| Model Number | LC003R |
| Product Dimensions | 1.5"D x 1.5"W x 2.28"H |
| Item Weight | 9.9 ounces (for 6pcs) |
| Material | Plastic |
| Light Source Type | LED |
| Light Color | Warm Yellow |
| Power Source | Battery Powered (6 Lithium Ion batteries included) |
| Control Method | Remote |
| Special Features | Cordless, Dimmable, 4 Timer Options, Flickering Adjustable, Realistic Flame |
| Indoor/Outdoor Usage | Indoor |
9. Warranty and Support
For warranty information or technical support, please refer to the product packaging or contact PChero customer service directly. Contact details can typically be found on the manufacturer's official website or through your purchase platform.