1. Important Safety Information
Please read and understand all instructions before beginning installation. Failure to follow these instructions could result in electric shock, fire, or serious personal injury.
- Ensure the power is turned off at the circuit breaker before installation or maintenance.
- All wiring must be in accordance with national and local electrical codes.
- The fan must be mounted to a ceiling joist or support structure capable of supporting a minimum of 35 lbs (15.9 kg).
- Do not operate the fan with damaged wiring or if the fan is visibly damaged.
- Keep hands, clothing, and other objects clear of the fan blades when the fan is in operation.
- This fan is designed for indoor use only.
2. Package Contents
Verify that all components are present before proceeding with installation.
- DC Motor Assembly
- 3 ABS Blades
- Remote Control
- Mounting Hardware (screws, wire nuts, etc.)
- Instruction Manual
3. Specifications
| Feature | Detail |
|---|---|
| Brand | Carro |
| Model Name | CFR523N4N-FM |
| Color | White |
| Electric Fan Design | Ceiling Fan |
| Power Source | DC |
| Product Dimensions | 10"D x 52"W x 52"H |
| Room Type | Bedroom, Dining Room, Kitchen, Living Room, Study Room |
| Special Feature | Speed Adjustable |
| Noise Level | 55 Decibels (max) |
| Wattage | 17 watts |
| Number of Blades | 3 |
| Air Flow Capacity | 3955 Cubic Feet Per Minute |
| Voltage | 120 Volts |
| Control Method | Remote |
| Number of Power Levels | 10 |
| Indoor/Outdoor Usage | Indoor |
| Mounting Type | Ceiling Mount (Flush Mount) |
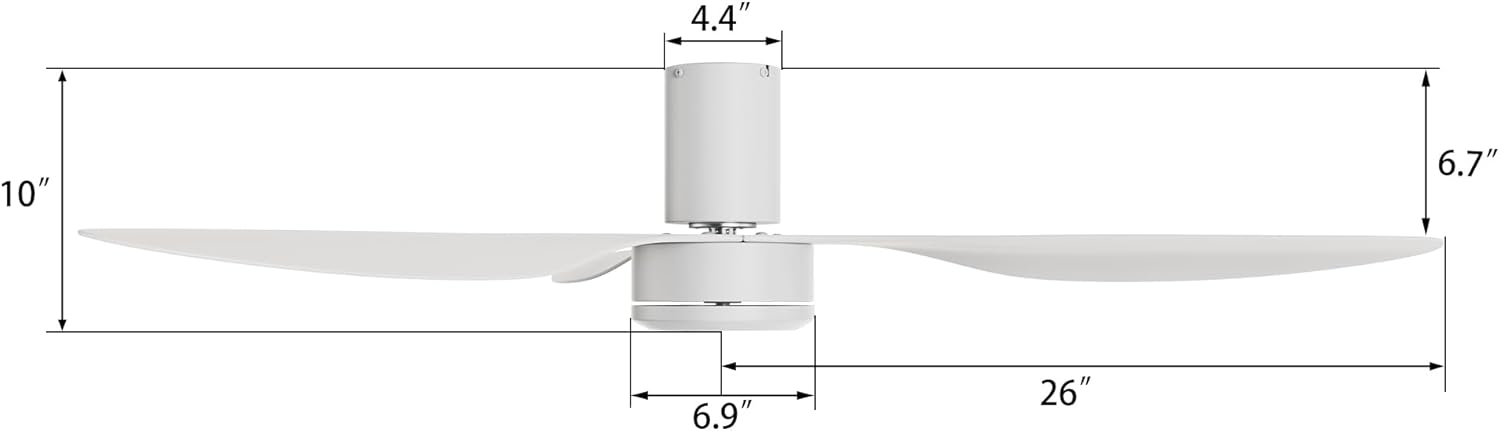
Figure 3.1: Fan Dimensions. Total height is 10 inches, motor housing is 4.4 inches wide, and blades extend 26 inches from the center.
4. Installation Guide
4.1 Pre-Installation Checks
- Ensure the ceiling is flat and capable of supporting the fan's weight. This fan is not adaptable for sloped ceilings.
- Confirm that the electrical box is securely mounted and rated for ceiling fan support.
- Turn off power at the main circuit breaker before starting any electrical work.
4.2 Wiring Instructions
Connect the fan's wiring to your household electrical system as follows:
- Connect the White (Neutral) wire from the fan to the neutral wire from the ceiling.
- Connect the Black/Red (Hot/Live) wire from the fan to the hot/live wire from the ceiling.
- Ensure all connections are secure using wire nuts.

Figure 4.1: Wiring Diagram and Flush Mount Compatibility. This fan is suitable for flat ceilings and requires connection of neutral and live wires.
4.3 Blade Attachment
Attach the three ABS blades to the motor housing using the provided screws. Ensure they are securely fastened.

Figure 4.2: Fan Blade and Motor Details. Illustrates the robust structure and ABS blade material.
5. Operating Instructions
5.1 Remote Control Functions
The fan is controlled via the included remote. Familiarize yourself with its buttons:
- ON/OFF: Turns the fan on or off.
- F/R (Forward/Reverse): Changes the direction of blade rotation for summer or winter mode.
- Speed Buttons (+/-): Adjusts fan speed across 10 levels.
- Natural Mode: Activates a varying speed setting to simulate natural breezes.

Figure 5.1: 10 Adjustable Fan Speeds. The fan offers a range of speeds from soft to cool wind.

Figure 5.2: Recommended Speed Settings for various activities.
5.2 Reversible DC Motor Function
The fan features a reversible DC motor, allowing for year-round use:
- Summer Mode (Downdraft): Press the "F/R" button to set blades to rotate counter-clockwise, creating a cooling breeze.
- Winter Mode (Updraft): Press the "F/R" button to set blades to rotate clockwise, circulating warm air trapped near the ceiling.
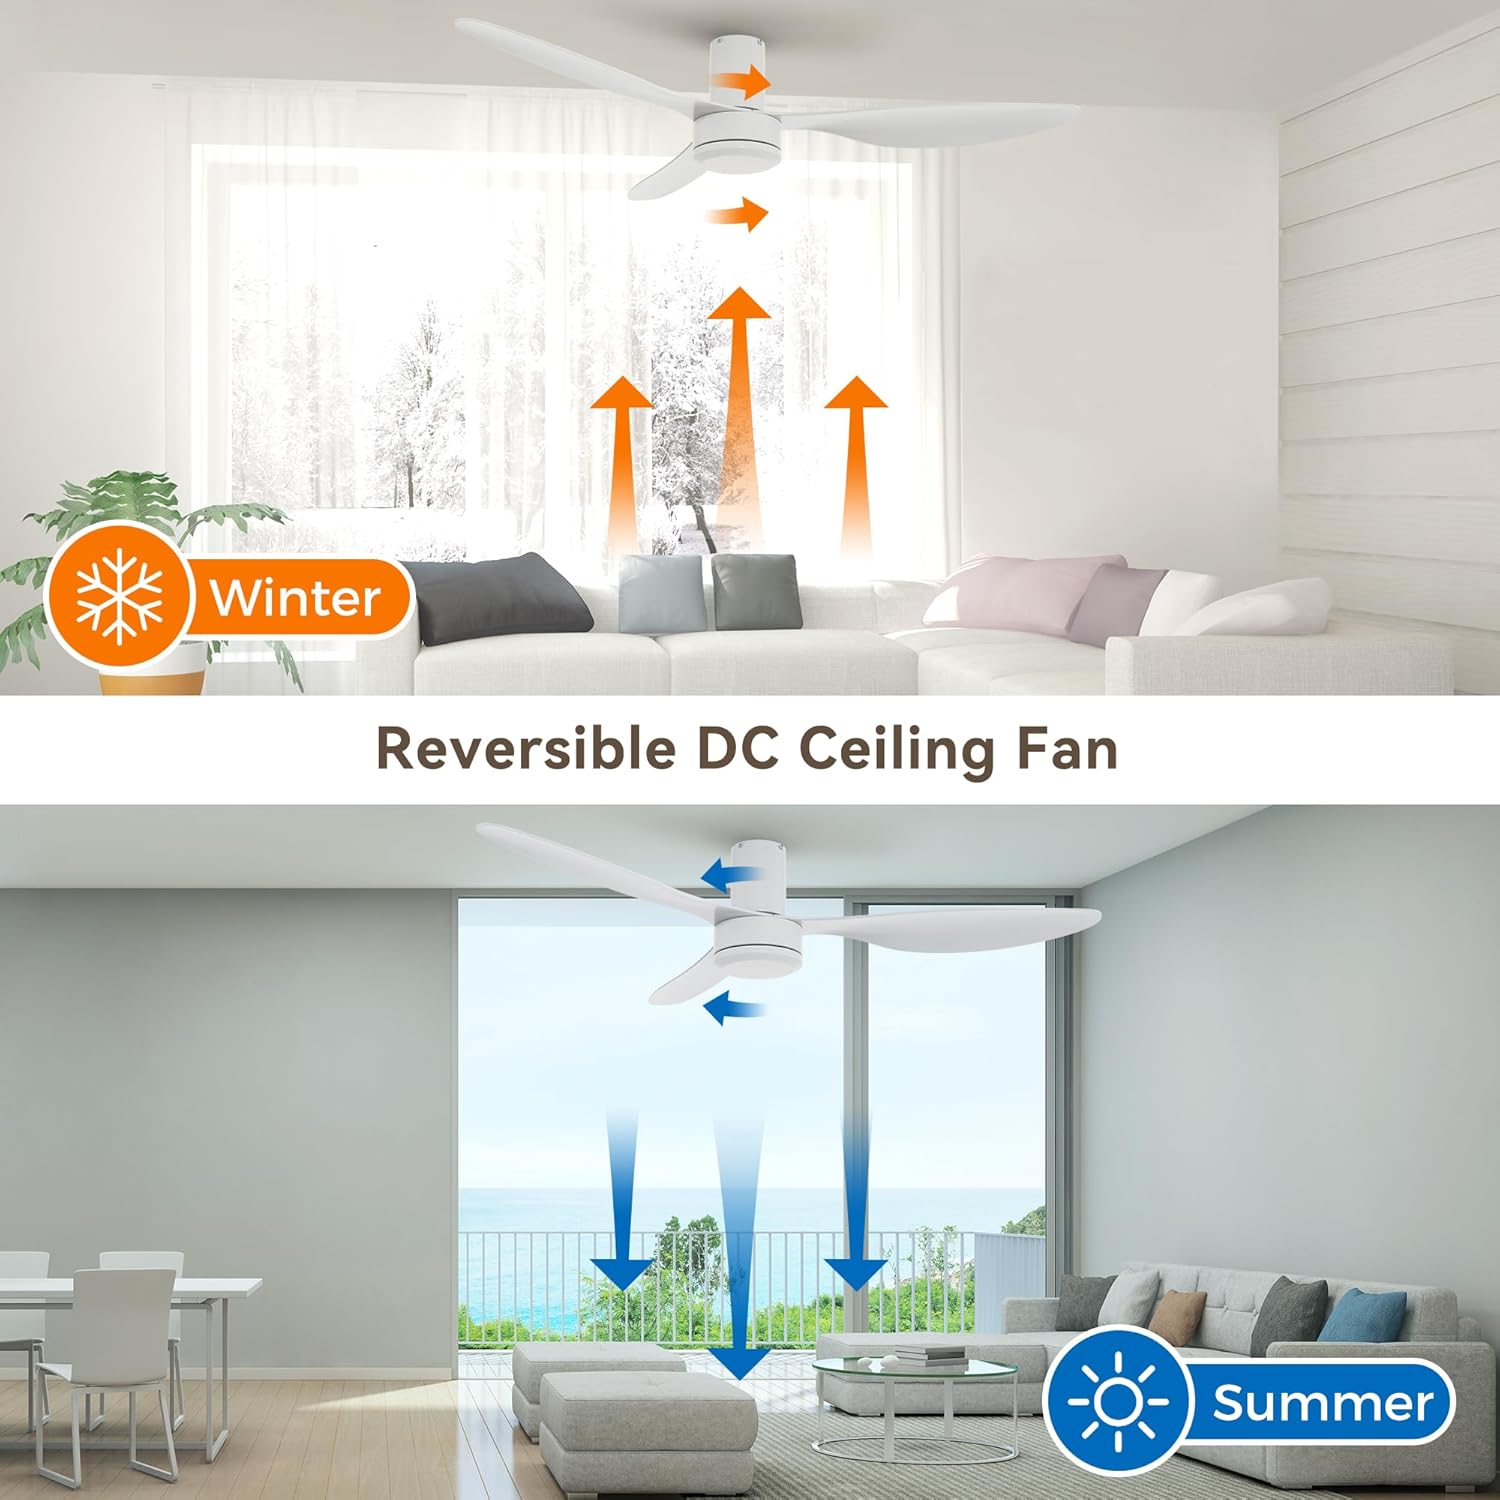
Figure 5.3: Reversible DC Motor Operation for Summer and Winter modes.
6. Maintenance
Regular maintenance ensures optimal performance and longevity of your ceiling fan.
- Cleaning: Periodically wipe the fan blades and motor housing with a soft, damp cloth. Do not use abrasive cleaners or solvents.
- Blade Balance: If the fan wobbles, check that all blade screws are tight and that blades are not bent or damaged.
- Motor Lubrication: The DC motor is permanently lubricated and does not require additional oiling.
- Power Off: Always turn off power at the circuit breaker before cleaning or performing any maintenance.
7. Troubleshooting
| Problem | Possible Cause | Solution |
|---|---|---|
| Fan does not start | No power to the fan; Loose wire connections; Remote control battery low or not paired. | Check circuit breaker; Verify all wire connections are secure; Replace remote battery or re-pair remote. |
| Fan makes excessive noise | Loose screws on blades or mounting bracket; Unbalanced blades. | Tighten all screws; Check blade balance and adjust if necessary. |
| Remote control not working | Low or dead battery; Remote not paired with fan; Obstruction between remote and receiver. | Replace battery; Follow pairing instructions (if applicable, typically power cycle fan and press remote button); Ensure clear line of sight. |
| Fan wobbles | Loose mounting bracket; Unbalanced blades; Blades not securely attached. | Ensure mounting bracket is tight; Use a balancing kit (not included) if needed; Tighten blade screws. |

Figure 7.1: Fan Noise Level Comparison. The Carro fan operates quietly, below 55dB.
8. Warranty and Support
8.1 Warranty Information
This Carro ceiling fan comes with a 12-month warranty from the date of purchase. This warranty covers manufacturing defects and material flaws under normal use.
The warranty does not cover damage caused by improper installation, misuse, accidents, or unauthorized repairs.
8.2 Customer Support
For any questions, technical assistance, or warranty claims, please contact Carro customer support. When contacting support, please have your order details and model number (CFR523N4N-FM) available.
All emails will be answered within 24 hours.
For more information, visit the official Carro website or refer to your purchase documentation.


