Product Overview
The Wpsoert 80 Pints Dehumidifier (Model WP06) is designed to efficiently remove excess moisture from large indoor spaces up to 5,500 square feet. It features intelligent humidity control, multiple operating modes, and user-friendly design elements for enhanced comfort and air quality.

Front view of the Wpsoert 80 Pints Dehumidifier, showing its compact design and digital display.
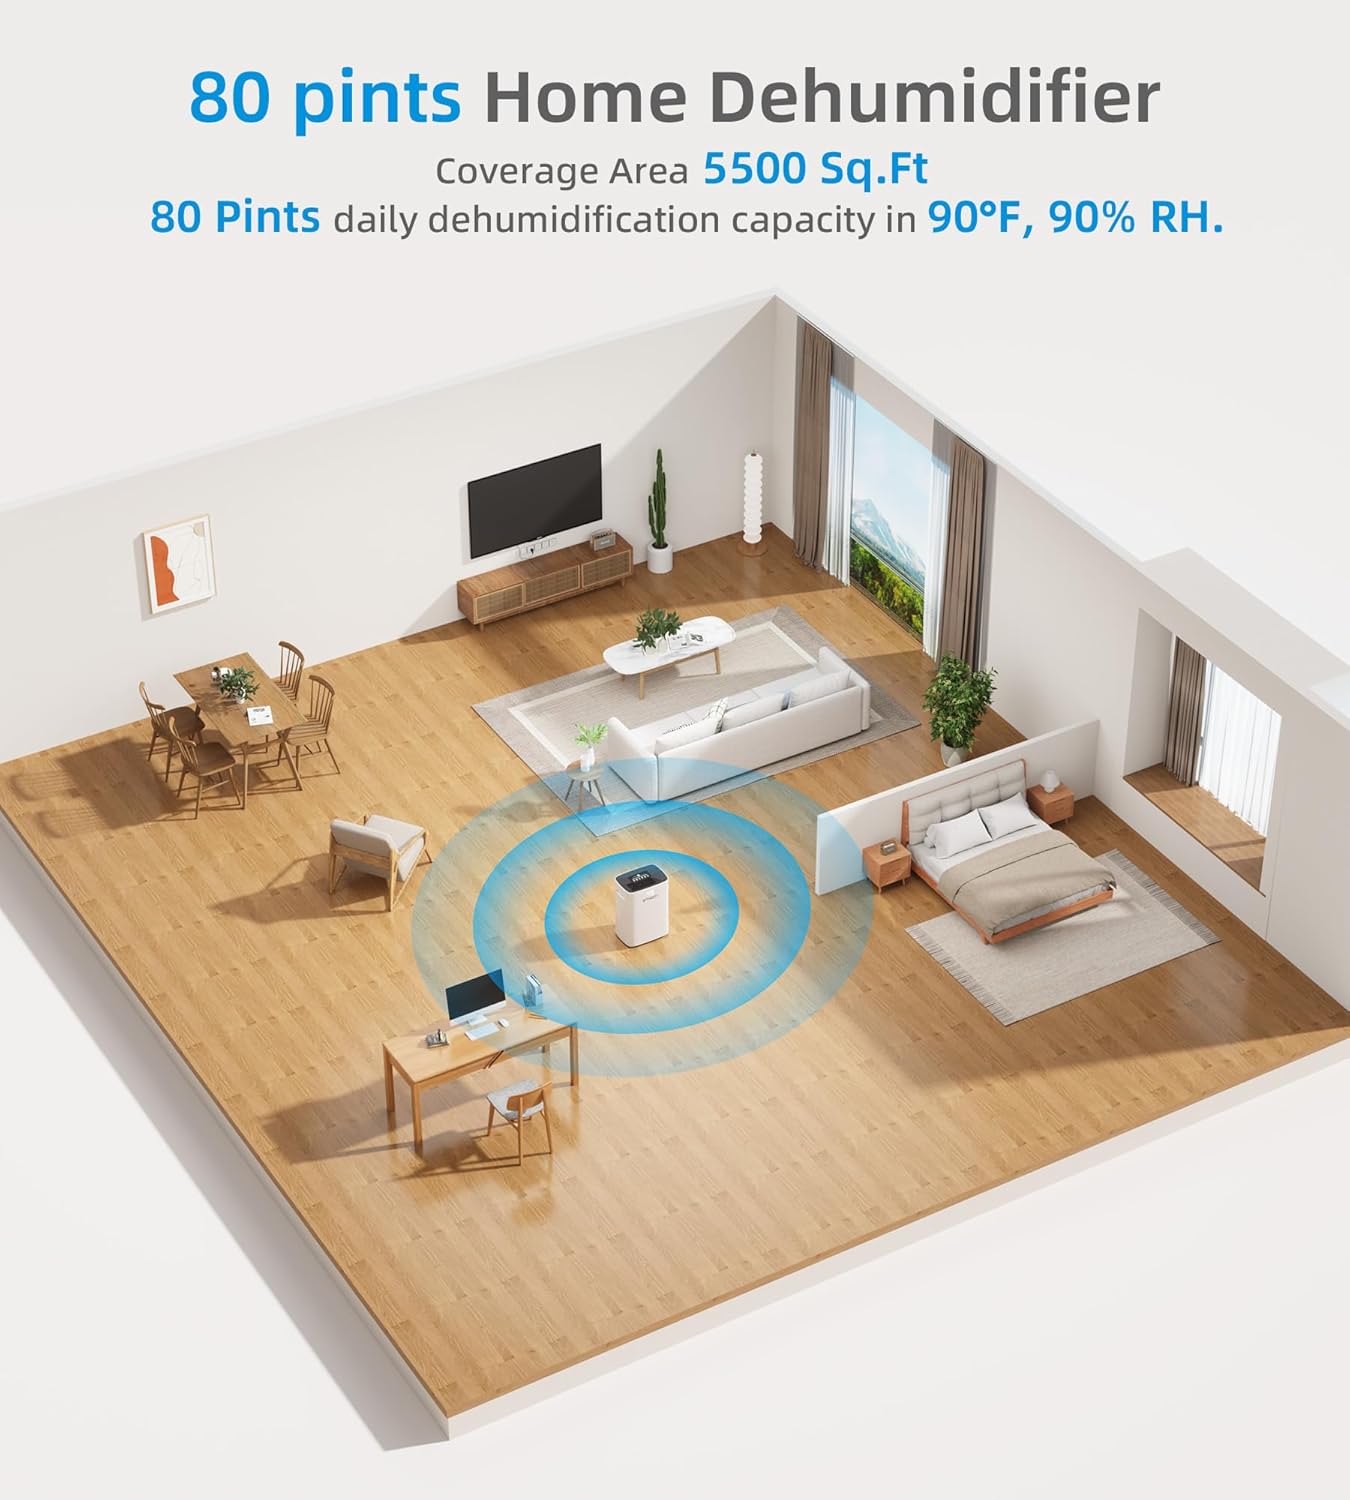
Diagram illustrating the dehumidifier's effective coverage area of up to 5,500 square feet in a home setting.

An internal view highlighting the compressor refrigeration technology, which efficiently removes moisture from the air.
Safety Instructions
- Always place the dehumidifier on a stable, level surface.
- Ensure proper clearance around the unit for adequate airflow (at least 8 inches from walls or furniture).
- Do not block air inlets or outlets.
- Keep the unit away from heat sources and direct sunlight.
- Do not operate the unit with a damaged power cord or plug.
- Unplug the unit before cleaning or performing any maintenance.
- Keep out of reach of children. Utilize the child lock feature to prevent accidental operation.
Setup and Installation
Unpacking
Carefully remove the dehumidifier from its packaging. Inspect the unit for any signs of damage. Retain the packaging for future storage or transport.
Placement
Place the dehumidifier in the desired location, ensuring it is on a firm, level surface. For optimal performance, position the unit away from walls and furniture to allow for unrestricted airflow.

The dehumidifier features 360° universal wheels and ergonomic handles for easy mobility and placement.
Drainage Options
The Wpsoert dehumidifier offers two drainage methods: manual drainage using the water tank or continuous drainage via the included drain hose.
Manual Drainage (1.58 Gallon / 6 L Water Tank)
When the water tank is full, the unit will automatically shut off and illuminate the "Full Water" indicator. Empty the tank by carefully pulling it out, discarding the collected water, and reinserting it until it clicks into place.
Continuous Drainage
For continuous operation without needing to empty the tank, connect the included drain hose. Locate the drain outlet on the back of the unit. Unscrew the outlet cap and remove the gray piston. Connect one end of the drain hose to the outlet and direct the other end to a suitable drain (e.g., floor drain, large bucket).

Visual guide demonstrating how to set up both manual drainage using the water tank and continuous drainage with the hose.

Step-by-step illustration for connecting the drain hose for continuous water removal, including removing the gray piston.
Operating Instructions
Control Panel Overview
The dehumidifier features an intelligent touch control panel for easy operation.

Close-up of the control panel, showing buttons for Lock, Speed, Timer, Humidity, Mode, and Power.
Power On/Off
- Press the Power button to turn the unit on or off.
Operating Modes
The unit offers three distinct operating modes:
- DEHU Mode: Dehumidification mode. The unit will automatically start and stop based on your set humidity level (30% to 80% RH).
- DRY Mode: Laundry drying mode. Operates at an ideal fan speed to assist in drying clothes.
- CONT Mode: Continuous mode. The unit runs continuously to minimize room humidity, regardless of the set humidity level.

Visual representation of the DEHU, DRY, and CONT modes and their typical applications in different room settings.
Setting Humidity Level (DEHU Mode)
- In DEHU mode, press the HUMI button to adjust the desired humidity level. The setting range is 30% to 80% Relative Humidity (RH).
Fan Speed Adjustment
- Press the SPEED button to cycle between low and high fan speeds.
Timer Function
- Press the TIMER button to set the auto-on or auto-off time from 1 to 24 hours.
- To activate the timer, set the desired hours, and the unit will turn off or on after that period.

The 24-hour timer function allows users to schedule operation for energy efficiency.
Child Lock
- Press and hold the LOCK button for 3 seconds to activate or deactivate the child lock. This prevents accidental changes to settings.

The child lock feature, activated by pressing the lock button for 3 seconds, prevents unintended operation by children.
Automatic Restart and Defrost
- Automatic Restart: The unit will automatically resume operation with previous settings after a power outage.
- Automatic Defrost: The dehumidifier is equipped with an auto-defrost function that activates when frost is detected on the coils, ensuring efficient operation in cooler environments.

Illustration of the automatic restart sequence, showing the unit resuming operation after a power interruption.

A visual representation of the automatic defrost function, which prevents ice buildup on the coils.
Optimizing Dehumidification
To maximize the dehumidification effect, ensure all doors and windows in the room are closed while the unit is operating.

A comparison showing improved dehumidification when windows and doors are closed, preventing outside humidity from entering.
Maintenance
Cleaning the Air Filter
The dehumidifier is equipped with a removable and washable filter to ensure clean air quality. Regularly clean the filter (every two weeks or as needed) to maintain optimal performance.
- Unplug the dehumidifier from the power outlet.
- Locate and remove the air filter from the back or side of the unit.
- Wash the filter with warm, soapy water. Rinse thoroughly.
- Allow the filter to air dry completely before reinserting it into the unit. Do not use a dryer or direct heat.
The washable filter component, easily removable for cleaning to maintain air quality.
Cleaning the Unit Exterior
Wipe the exterior of the dehumidifier with a soft, damp cloth. Do not use harsh chemicals, abrasives, or solvents, as these may damage the surface.
Water Tank Cleaning
Periodically clean the water tank to prevent mold or mildew growth. Remove the tank, wash it with mild detergent and water, rinse thoroughly, and dry before reinserting.
Troubleshooting
| Problem | Possible Cause | Solution |
|---|---|---|
| Dehumidifier does not turn on. | No power; Power cord not securely plugged in; Water tank full or not properly seated. | Check power outlet; Ensure power cord is fully inserted; Empty water tank and reinsert it correctly. |
| Unit runs but does not collect water. | Room humidity is already low; Air filter is clogged; Temperature is too low (below 41°F / 5°C); Unit is in DRY or CONT mode without sufficient humidity. | Check ambient humidity; Clean the air filter; Ensure room temperature is within operating range; Verify unit is in DEHU mode with a lower target humidity. |
| Unit is noisy. | Unit not on a level surface; Air filter clogged; Obstruction in fan. | Place on a level surface; Clean the air filter; Check for and remove any obstructions. |
| Water leaks from the unit. | Water tank not properly seated; Drain hose connection is loose or clogged; Gray piston not removed for continuous drainage. | Reinsert water tank correctly; Check drain hose connection and clear any blockages; Ensure gray piston is removed if using continuous drainage. |
| Child lock is active. | Buttons are unresponsive. | Press and hold the LOCK button for 3 seconds to deactivate. |
Specifications
- Brand: Wpsoert
- Model Name: WP06
- Capacity: 80 Pints per Day (at 95°F, 90% RH)
- Coverage Area: Up to 5500 Square Feet
- Water Tank Volume: 1.58 Gallons (6 Liters)
- Product Dimensions: 13.8"D x 9.8"W x 19.7"H
- Item Weight: 32 pounds
- Color: White
- Material: Acrylonitrile Butadiene Styrene (ABS)
- Wattage: 480 watts
- Air Flow Capacity: 220 CFPH
- Operation Modes: Dehumidification (DEHU), Continuous (CONT), Dryer (DRY)
- Special Features: Adjustable Humidity Control, Automatic Defrost, Automatic Moisture Removal, Automatic Restart, Automatic Shutoff, Child Lock, 24-Hour Timer, Removable & Washable Filter, Portable with Wheels and Handles.
- Included Components: Dehumidifier unit, Power Cord, Removable Water Tank, Removable Washable Filter, Drain Hose, User Manual.

Diagram showing the physical dimensions of the Wpsoert dehumidifier: 13.8"D x 9.8"W x 19.7"H.
Warranty and Support
For warranty information and customer support, please refer to the contact details provided in the included user manual or visit the official Wpsoert website. It is recommended to retain your purchase receipt for warranty claims.
Based on customer feedback, some users have reported issues with product longevity and manufacturer response to inquiries. While the product is designed for durability, please keep records of your purchase and any communication with support.
Note: The provided data does not contain specific warranty terms or direct support contact information. Please consult the physical user manual or manufacturer's website for the most accurate and up-to-date details.