
AZIJYV P21
AZIJYV P21 OBD2 Gauge Display User Manual
Model: P21
Brand: AZIJYV
1. Introduction
The AZIJYV P21 is a multi-functional dual-system car head-up display designed to provide essential vehicle and driving data directly on its screen, minimizing the need for drivers to look away from the road. It supports both OBD (On-Board Diagnostics) and GPS modes, offering comprehensive monitoring capabilities. This manual provides detailed instructions for installation, operation, and maintenance of your P21 device.

Figure 1.1: AZIJYV P21 OBD2 Gauge Display

Figure 1.2: P21 Dual System Overview
2. What's in the Box
Upon opening the package, please verify that all the following items are included:
- P21 HUD Unit
- Rotary Suction Cup Bracket
- OBD Cable
- Non-slip Mat
- User Manual

Figure 2.1: Package Contents
3. Setup and Installation
The P21 offers flexible installation options for optimal viewing and accessibility.
3.1. Choosing an Installation Location
You can install the P21 on the car's center console using the non-slip mat or on the windscreen using the suction cup bracket. The suction cup bracket allows for 360-degree rotation to adjust the viewing angle.

Figure 3.1: Multiple Installation Ways

Figure 3.2: 360° Rotatable Bracket
3.2. Connecting the OBD Cable
The P21 connects to your vehicle's OBD interface. This port is typically located under the dashboard on the driver's side.
- Locate your vehicle's OBD2 port.
- Connect the provided OBD cable to the P21 unit and then to the vehicle's OBD2 port.
- Route the cable neatly to avoid interference with driving controls.
Video 3.1: P21 Heads Up Display Installation Guide. This video demonstrates the physical installation of the P21 device, including connecting the OBD cable and positioning the unit on the dashboard.
4. Operating Instructions
4.1. Power On/Off
The P21 features automatic power on/off with your car's ignition. When the car starts, the device will power on; when the car is turned off, the device will power off.

Figure 4.1: Automatic Power On/Off
4.2. Button Functions
The P21 unit has several buttons for navigation and settings:
- Power Button: Turns the device on/off manually (if auto-off is disabled).
- Increase Button: Navigates up in menus or increases values.
- Decrease Button: Navigates down in menus or decreases values.
- Setting Button (M Button): Short press to switch display interfaces; long press to enter settings menu.

Figure 4.2: P21 Button Layout
4.3. Display Modes and Functions
The P21 supports two main modes: OBD and GPS. It features a 3.5-inch color LCD display with clear fonts and ambient lighting.
4.3.1. OBD Mode Functions
When connected via the OBD port, the P21 can display a wide range of vehicle data:
- Vehicle Speed
- Water Temperature
- Voltage
- Fuel Consumption
- Speed Clock (RPM)
- Single Driving Time
- Driving Distance (Single/Cumulative)
- Intake Pressure
- Oil Temperature
- Air-Fuel Ratio
- Turbine Pressure
- Altitude
- Driving Direction
- Throttle Valve
- Intake Temperature
- Transmission Temperature
- Engine Load
- Up/Down Slope Angle
- Left/Right Tilt Angle
- Acceleration Test
- Brake Test
4.3.2. GPS Mode Functions
For vehicles not compatible with OBD or for general use, the GPS mode provides data via satellite signals:
- Vehicle Speed
- Voltage
- Satellite Time
- Altitude
- Number of Satellites
- Driving Direction
- Single Mileage
- Driving Time
- Up/Down Slope Angle
- Left/Right Tilt Angle
- Acceleration Test
- Brake Test

Figure 4.3: Function Display Icons

Figure 4.4: 11 Display Interfaces

Figure 4.5: Switching Display Interfaces
4.4. Customization
- Speed Unit: Switch between MPH and KM/H.
- Language: The HUD tachometer supports 12 languages.
- Ambient Lights: Choose between blue, red, and purple ambient lights.

Figure 4.6: 12 Languages Supported
4.5. Alarm Functions
The P21 includes multiple alarm functions to enhance driving safety:
- Overspeed Alarm: Alerts when vehicle speed exceeds a set limit (50-200).
- Speed Alarm (RPM): Alerts when engine speed exceeds a set RPM (1000-8000).
- Water Temperature Alarm: Alerts if water temperature exceeds 120°C (setting range 50-200).
- Voltage Alarm: Alerts if voltage drops below a set threshold (10.0-15.0V).
- Tilt Alarm: Alerts if the vehicle's tilt angle is excessive.
- Fatigue Driving Reminder: Prompts for a break after extended driving.
- Fault Code Reminder: Notifies of detected engine fault codes.
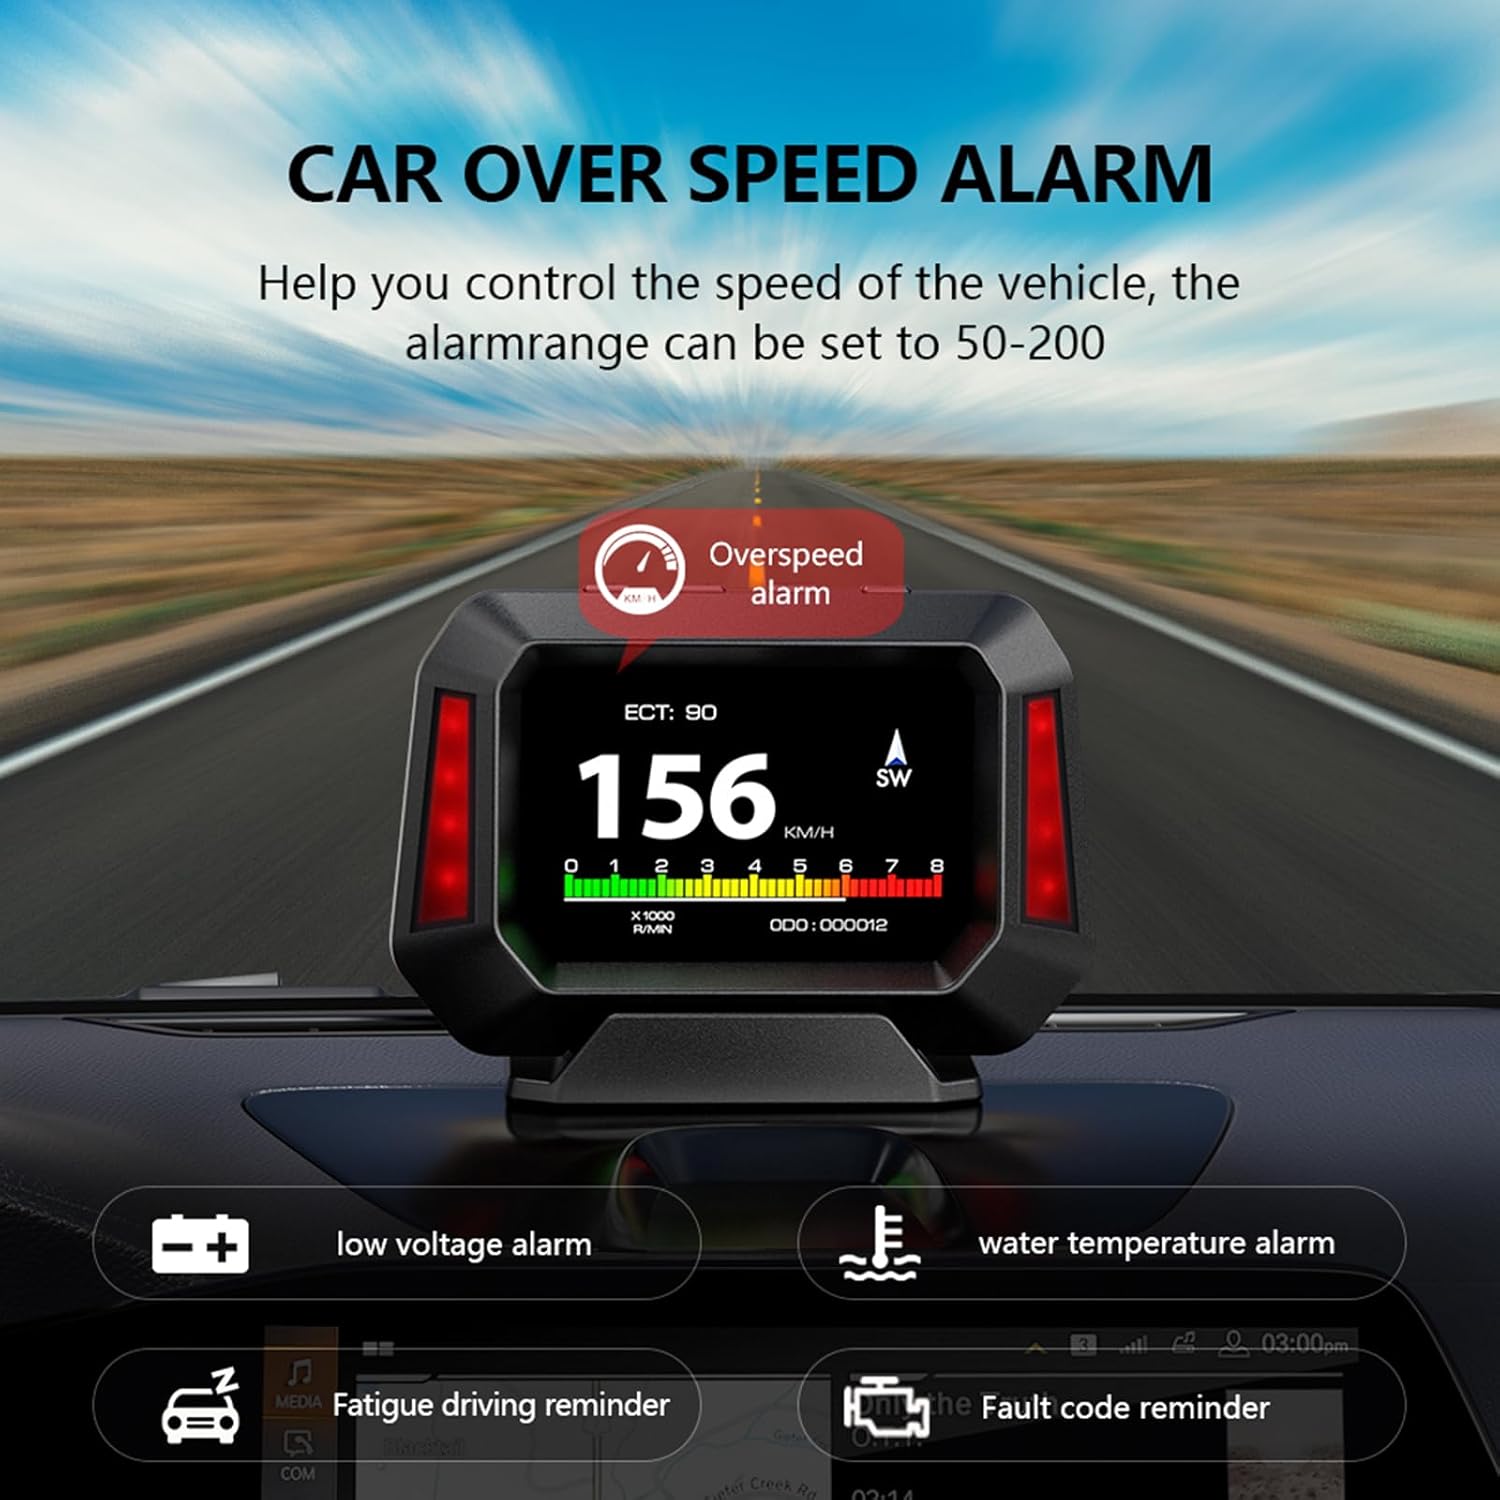
Figure 4.7: Multiple Alarm Functions

Figure 4.8: Detailed Alarm Types
4.6. Slope Meter Function
The P21 integrates a slope meter that monitors the vehicle's driving angle, including up/down slope and left/right tilt, in real-time. This function is available in both OBD and GPS modes, providing crucial information for off-road or uneven terrain driving.

Figure 4.9: Electronic Slope Meter
4.7. Diagnostic Tool
The P21 features enhanced display and scanning functions for automotive diagnostics. It allows vehicle owners to quickly read and delete DTCs (engine trouble codes) and view real-time data streams. This can help identify why the check engine light is on and clear trouble codes, potentially saving trips to an auto repair shop.
5. Compatibility
5.1. OBD System Compatibility
The OBD system is primarily applicable to gasoline vehicles manufactured after 2009 that support the OBD2 protocol and EU-OBD protocol. It is important to note the following limitations:
- Does not support JOBD and OBDI protocols.
- Does not support hybrid electric vehicles, diesel vehicles, pickup trucks, RVs, and computer modified vehicles.
- The following brands are generally not compatible with the OBD2 system: Renault, Peugeot, Citroen, Fiat, Jeep, Dodge, Jazz, RV, Hummer, etc.
If you intend to use OBD mode and are unsure about your car's compatibility, please confirm with the manufacturer before purchasing.
5.2. GPS System Compatibility
The GPS system is universally applicable to all vehicles, regardless of make, model, or year. If your vehicle is not compatible with the OBD system, you should switch to GPS mode for operation.
6. Maintenance
To ensure the longevity and optimal performance of your AZIJYV P21 HUD, follow these simple maintenance guidelines:
- Cleaning: Use a soft, dry cloth to clean the display screen and the device body. Avoid using abrasive cleaners or solvents that could damage the surface.
- Storage: If the device will not be used for an extended period, disconnect it from the OBD port and store it in a cool, dry place away from direct sunlight and extreme temperatures.
- Cable Care: Ensure the OBD cable is not pinched or excessively bent, which could damage the internal wires.
- Temperature: Avoid exposing the device to extreme hot or cold temperatures, as this can affect its electronic components.
7. Troubleshooting
If you encounter issues with your P21 HUD, please refer to the following common problems and solutions:
| Problem | Possible Cause | Solution |
|---|---|---|
| Device does not power on. | No power from OBD port; loose connection; vehicle not compatible with OBD mode. | Check OBD cable connection. Ensure vehicle ignition is on. If in OBD mode, try switching to GPS mode. Verify vehicle compatibility. |
| No data displayed in OBD mode. | Vehicle not OBD2 compliant; faulty OBD port; incorrect mode selected. | Confirm your vehicle is OBD2 compliant (gasoline, post-2009). Try GPS mode. Consult a mechanic to check the vehicle's OBD port. |
| Inaccurate speed reading. | Calibration needed; GPS signal interference. | Access settings to calibrate speed. Ensure clear view of the sky for GPS signal. |
| Display is too dim/bright. | Brightness settings; photosensitive component blocked. | Adjust brightness in settings. Ensure the photosensitive component (on top of the unit) is not covered. |
| Device reboots frequently. | Unstable power supply; software issue; compatibility problem. | Ensure stable OBD connection. Try switching to GPS mode if in OBD mode. If issues persist, contact customer support. |

Figure 7.1: Common Issues the P21 Helps Address
8. Specifications
| Feature | Detail |
|---|---|
| Model Number | P21 |
| Product Dimensions | 4.33 x 1.1 x 3.15 inches (110mm x 28mm x 80mm) |
| Item Weight | 1.41 ounces (40 grams) |
| Display Type | 3.5-inch Color LCD |
| Connectivity | OBD2, GPS, USB (for power/data) |
| Operating Modes | OBD Mode, GPS Mode |
| Supported Languages | 12 languages |
| Manufacturer | AZIJYV |
| Country of Origin | China |

Figure 8.1: Internal Chip Technology
9. Warranty and Support
For warranty information and technical support, please refer to the contact details provided with your product packaging or visit the official AZIJYV website. Keep your purchase receipt as proof of purchase for any warranty claims.
Ask a question about this manual
Ask about setup, troubleshooting, compatibility, parts, safety, or missing instructions. Manuals+ will review the question and use this page’s manual context to help answer it.