
SENTRY HPXBTA1000
SENTRY BT Pro Sq Headset User Manual
Model: HPXBTA1000
1. Introduction
Welcome to the user manual for your new SENTRY BT Pro Sq Headset with Active Noise Canceling. This manual provides essential information on setting up, operating, maintaining, and troubleshooting your headset to ensure optimal performance and longevity. Please read this manual thoroughly before using the product.
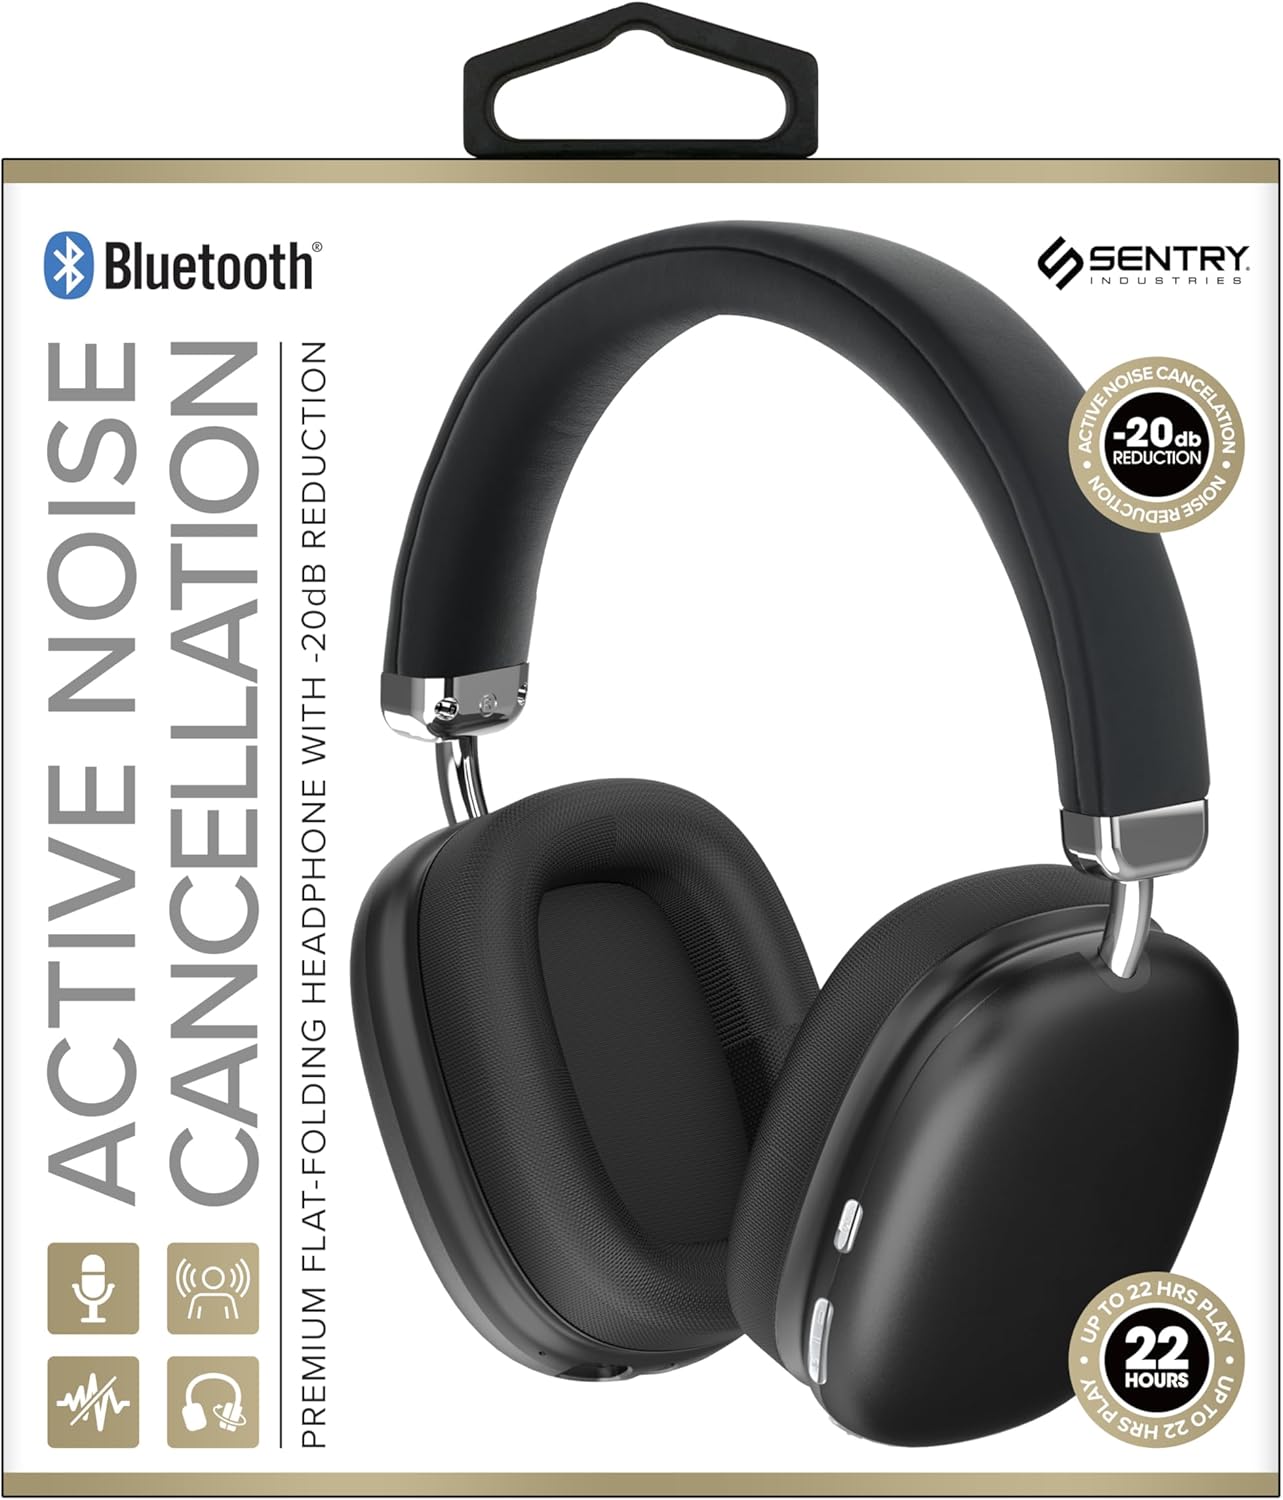
This image displays the SENTRY BT Pro Sq Headset in black, highlighting its over-ear design, adjustable headband, and the control buttons located on the earcups. The packaging indicates features such as Bluetooth connectivity, Active Noise Cancellation with -20dB reduction, and up to 22 hours of play time.
2. Important Safety Information
To ensure safe and proper operation, please observe the following guidelines:
- Do not expose the headset to extreme temperatures, humidity, or corrosive substances.
- Avoid dropping or subjecting the headset to strong impacts.
- Do not disassemble or attempt to repair the headset yourself. This will void the warranty.
- Clean the headset with a soft, dry cloth only. Do not use liquid cleaners.
- Prolonged listening at high volume levels can cause hearing damage. Adjust volume to a safe level.
- Do not use the headset in situations where inability to hear ambient sounds could be dangerous (e.g., driving, cycling, walking in traffic).
3. Package Contents
Please check the package for the following items:
- SENTRY BT Pro Sq Headset
- USB Charging Cable
- User Manual
4. Product Overview
The SENTRY BT Pro Sq Headset features an over-ear design with soft ear pads for comfort and noise isolation. It includes an adjustable folding headband for portability. Key components include:
- Earcups: House the audio drivers and provide passive noise isolation.
- Headband: Adjustable for a comfortable fit, designed to fold for compact storage.
- Control Buttons: Located on the earcups for power, volume, track control, and Active Noise Cancellation (ANC).
- Microphone: Built-in for hands-free calls.
- Charging Port: For connecting the USB charging cable.
Refer to the product image in the Introduction section for visual identification of these components.
5. Setup
5.1 Charging the Headset
- Connect the small end of the USB charging cable to the charging port on the headset.
- Connect the larger end of the USB charging cable to a USB power adapter (not included) or a computer's USB port.
- The LED indicator on the headset will illuminate to show charging status. It will change color or turn off when fully charged.
- A full charge typically takes approximately 2-3 hours.
5.2 Pairing with Bluetooth Devices
Before using the headset wirelessly, you must pair it with your Bluetooth-enabled device (smartphone, laptop, tablet, smart speaker, gaming console).
- Ensure the headset is fully charged.
- With the headset powered off, press and hold the Power button for approximately 5-7 seconds until the LED indicator flashes rapidly, indicating pairing mode.
- On your Bluetooth device, enable Bluetooth and search for new devices.
- Select "SENTRY BT Pro Sq" (or similar name) from the list of available devices.
- Once paired, the LED indicator on the headset will stop flashing and may turn solid blue or off, depending on the model.
- The headset will automatically attempt to reconnect to the last paired device when powered on.
6. Operating Instructions
6.1 Power On/Off
- Power On: Press and hold the Power button for 2-3 seconds. The LED indicator will light up.
- Power Off: Press and hold the Power button for 3-4 seconds. The LED indicator will turn off.
6.2 Active Noise Cancellation (ANC)
The headset features Active Noise Cancellation to reduce ambient noise.
- Activate ANC: Locate the ANC button (if separate) or press the designated control. The ANC indicator light will turn on.
- Deactivate ANC: Press the ANC button again. The ANC indicator light will turn off.
6.3 Media Control (Touch Control)
Control your audio playback directly from the headset:
- Play/Pause: Single tap the multi-function button.
- Volume Up: Tap the Volume Up button.
- Volume Down: Tap the Volume Down button.
- Next Track: Double tap the multi-function button.
- Previous Track: Triple tap the multi-function button.
6.4 Call Management
Manage phone calls with the built-in microphone:
- Answer Call: Single tap the multi-function button when a call comes in.
- End Call: Single tap the multi-function button during a call.
- Reject Call: Press and hold the multi-function button for 2 seconds when a call comes in.
7. Maintenance and Care
- Cleaning: Wipe the headset with a soft, dry, lint-free cloth. Do not use abrasive cleaners, alcohol, or chemical solvents.
- Storage: When not in use, store the headset in a cool, dry place, away from direct sunlight and extreme temperatures. Utilize the folding headband feature for compact storage.
- Battery Care: To preserve battery life, charge the headset regularly, even if not used for extended periods. Avoid fully discharging the battery frequently.
- Avoid Water: The headset is not waterproof. Keep it away from water and moisture.
8. Troubleshooting
If you encounter issues with your headset, please refer to the following common problems and solutions:
| Problem | Possible Solution |
|---|---|
| Headset does not power on. | Ensure the headset is fully charged. Connect to a power source and allow it to charge for at least 30 minutes before attempting to power on again. |
| Cannot pair with Bluetooth device. | Ensure the headset is in pairing mode (LED flashing rapidly). Make sure Bluetooth is enabled on your device and it is within range (10 meters). Try restarting both the headset and your device. |
| No sound from headset. | Check the volume level on both the headset and your connected device. Ensure the headset is properly paired and connected. Try playing audio from a different application or device. |
| Active Noise Cancellation (ANC) is not effective. | Ensure ANC is activated. Make sure the earcups are properly sealed around your ears. ANC is most effective against low-frequency, constant noise. |
| Microphone not working. | Ensure the headset is connected and selected as the input device on your computer or smartphone. Check privacy settings on your device that might restrict microphone access. |
9. Specifications
| Feature | Detail |
|---|---|
| Model Name | HPXBTA1000 |
| Connectivity Technology | Wireless (Bluetooth) |
| Noise Control | Active Noise Cancellation |
| Ear Placement | Over Ear |
| Form Factor | Over Ear |
| Control Type | Media Control, Touch |
| Frequency Range | 20 Hz to 20,000 Hz |
| Audio Driver Type | Dynamic Driver |
| Compatible Devices | Smartphones, Laptops, Tablets, Smart Speakers, Gaming Consoles |
| Color | Black |
| Item Weight | 1.2 pounds |
| UPC | 080068501503 |
| Manufacturer | SENTRY |
10. Warranty and Support
SENTRY products are designed and manufactured to the highest quality standards. For information regarding warranty coverage, technical support, or service inquiries, please refer to the warranty card included with your product or visit the official SENTRY website. Please retain your proof of purchase for warranty claims.
Related documentsHPXBTA1000


Ask a question about this manual
Ask about setup, troubleshooting, compatibility, parts, safety, or missing instructions. Manuals+ will review the question and use this page’s manual context to help answer it.