
1. Introduction
This manual provides comprehensive instructions for the installation, operation, and maintenance of your MekedeTech Android Car Radio Stereo GPS Navigation system. Please read this manual thoroughly before installation and use to ensure proper function and to prevent damage to the unit or your vehicle. Keep this manual for future reference.
2. Safety Information
- Always ensure the vehicle is parked safely before operating the device or making any adjustments.
- Do not attempt to disassemble or modify the unit. This may cause damage and void the warranty.
- Consult a professional for installation if you are unsure about any steps. Incorrect installation can lead to vehicle damage or malfunction.
- Keep the unit away from water, moisture, and extreme temperatures.
- Use only the provided accessories and cables to ensure compatibility and safety.
3. Package Contents
Before beginning installation, verify that all components are present in the package:
- MekedeTech Android Head Unit (8-Core 4+64G)
- Dash Kit (specific for Toyota RAV4 2013-2018)
- Power Cable Harness
- RCA Cable Set
- Reversing Camera Cable
- USB Cables
- GPS Antenna
- User Manual (this document)
4. Setup and Installation
This Android touch screen radio upgrade is designed for a Plug & Play fit for Toyota RAV4 models from 2013 to 2018. All necessary accessories for installation are included.
4.1 Pre-Installation Checks
- Ensure the vehicle's ignition is off and the battery is disconnected before starting installation.
- Familiarize yourself with your vehicle's dashboard layout and how to remove the original head unit.
4.2 Physical Installation
- Carefully remove the original car radio and dashboard trim. Refer to your vehicle's service manual for specific instructions.
- Connect the provided power cable harness, RCA cables, reversing camera cable, and USB cables to the corresponding ports on the new MekedeTech head unit.
- Connect the GPS antenna and position it in a location with a clear view of the sky (e.g., on the dashboard).
- Integrate the new head unit into the dash kit.
- Carefully slide the assembled unit into the dashboard opening, ensuring all cables are not pinched.
- Secure the unit in place and reattach any removed dashboard trim.

This image illustrates the visual transformation of the car's dashboard. The top-left panel shows the dashboard with the new MekedeTech Android head unit installed, displaying a modern interface with app icons. The bottom-left panel shows the original car radio before installation. The bottom-right panel shows the dashboard after installation, highlighting the seamless integration of the new larger screen.
4.3 Cooling Fan Installation (If Applicable)
Some configurations may include an external cooling fan to manage heat during prolonged operation. Follow the steps below to connect and activate it:
- Connect the cooling fan cable to the designated port on the head unit.
- Access the system settings on the head unit.
- Navigate to Device > Sound.
- Ensure the AMP ON/OFF setting is enabled.
- The cooling fan will activate automatically when needed to maintain optimal operating temperature.

This image provides an overview of the cooling fan support for the head unit. It shows a comparison between a unit without a cooling fan (high temperature) and one with a cooling fan (normal temperature). The image also details the setup steps for activating the cooling fan through the device's settings menu, specifically navigating to 'Device' then 'Sound' to enable the AMP function.
5. Operating Instructions
Your MekedeTech head unit runs on Android 13 OS, powered by an 8-Core A53 1.8GHz CPU with 4GB RAM and 64GB ROM, providing a responsive user experience on its 9-inch IPS touch screen with 1280*720 resolution.
5.1 Basic Functions
- Power On/Off: Press and hold the power button (if available) or turn on your vehicle's ignition.
- Volume Control: Adjust using the physical buttons on the unit, steering wheel controls, or the on-screen interface.
- Touch Screen: Navigate through menus and applications by tapping, swiping, and pinching on the 1280*720 IPS display.
5.2 Navigation
The unit comes with built-in GPS navigation. Access the navigation application from the main menu. Ensure the GPS antenna is properly installed for optimal signal reception.
5.3 Wireless CarPlay and Wired Android Auto
The head unit supports both wireless Apple CarPlay and wired Android Auto, allowing seamless integration with your smartphone for navigation, music, calls, and messages.
5.3.1 Wireless CarPlay (iOS System)
- Enable Bluetooth on your iPhone.
- On the head unit, open the CarPlay application and select 'Connect BT'.
- Pair your iPhone with the head unit via Bluetooth.
- Once paired, select 'Car Link' on the head unit and wait for the connection to establish.
- Alternatively, connect via a USB cable for a wired CarPlay connection.
5.3.2 Wired Android Auto (Android System)
- Enable Bluetooth on your Android phone.
- On the head unit, open the Android Auto application and select 'Connect BT'.
- Pair your Android phone with the head unit via Bluetooth.
- Once paired, select 'Car Link' on the head unit and wait for the connection to establish.
- Android Auto typically requires a USB cable connection for full functionality.

This image displays the 'Built-in Car-Play + Auto' feature. It shows the main interface with various app icons, similar to a smartphone. Below, there are detailed connection steps for both Wireless Car-Play (iOS system) and Wireless Auto (Android system), illustrating the process of connecting via Bluetooth and then selecting 'Car Link'.
5.4 4G LTE and WiFi Connectivity
The unit features built-in 4G LTE and WiFi modules for internet access.
- 4G LTE: Insert a 4G SIM card into the designated slot to access cellular data anytime, anywhere.
- WiFi: Connect to a WiFi hotspot (e.g., from your smartphone) to access the internet.
5.5 Bluetooth 5.0
Bluetooth 5.0 provides high-quality audio for calls and music streaming. Pair your smartphone to make hands-free calls and play audio wirelessly.
5.6 DSP Sound System
The built-in Digital Signal Processor (DSP) enhances audio quality, offering multi-dimensional surround sound effects. Access DSP settings through the audio menu to customize your sound experience.
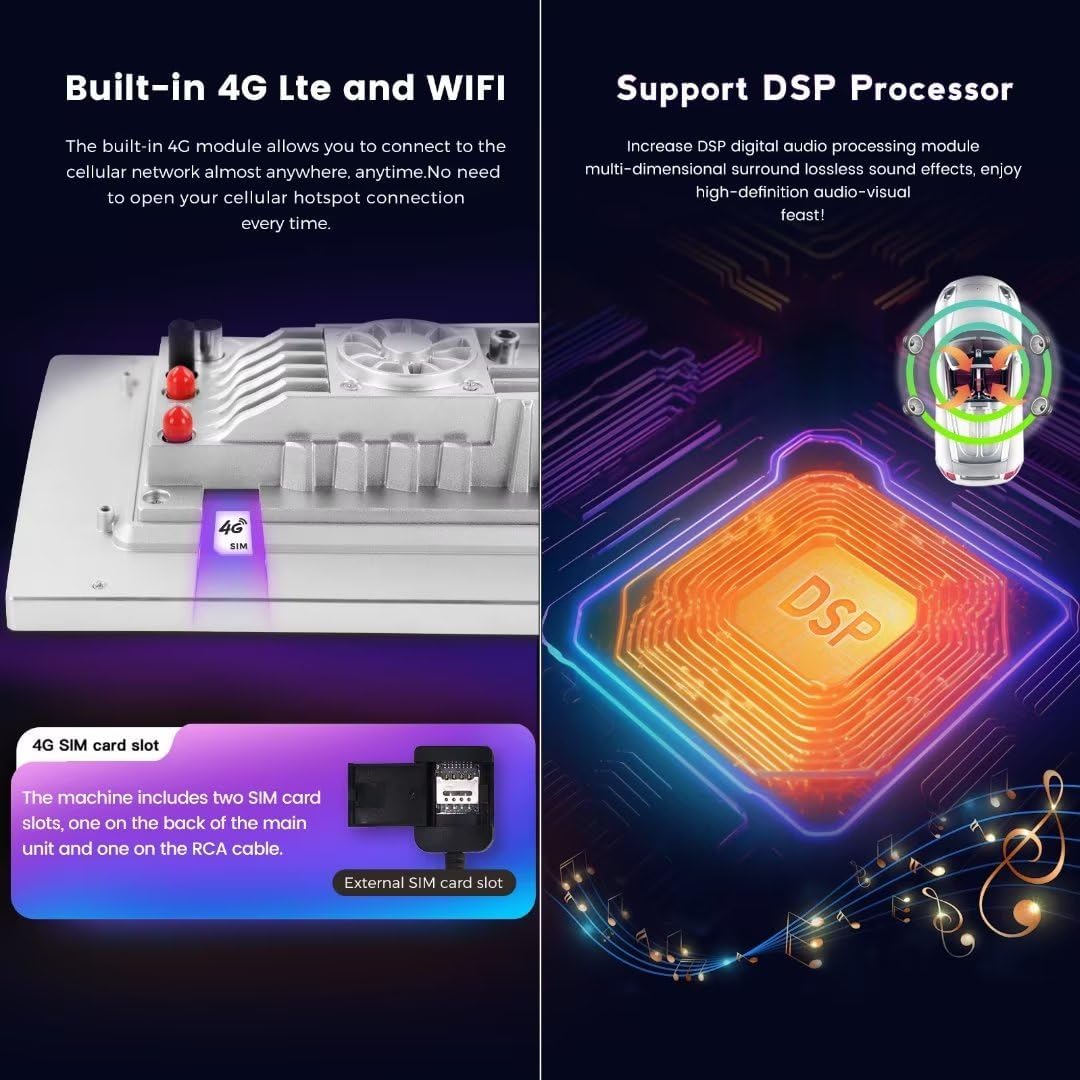
This image highlights two key features: 'Built-in 4G LTE and WIFI' and 'Support DSP Processor'. The left side shows the physical 4G SIM card slot on the unit, indicating support for cellular network connectivity. The right side visually represents the DSP processor, emphasizing its role in enhancing audio quality with multi-dimensional surround sound.
5.7 Steering Wheel Control
The unit retains all original steering wheel control functions, allowing you to switch songs, change channels, and adjust volume without taking your hands off the steering wheel. This enhances convenience and driving safety.
6. Maintenance
- Cleaning: Use a soft, dry cloth to clean the screen and unit. Avoid abrasive cleaners or solvents.
- Software Updates: Periodically check for software updates to ensure optimal performance and access to new features. Updates can usually be found on the manufacturer's website or through the unit's system settings.
- Temperature: Avoid exposing the unit to extreme temperatures, which can affect its lifespan and performance.
7. Troubleshooting
| Problem | Possible Cause | Solution |
|---|---|---|
| Unit does not power on | Loose power connection, blown fuse, vehicle battery issue | Check power cable connections. Inspect vehicle fuses. Ensure vehicle battery is charged. |
| No sound output | Volume too low, incorrect audio source, speaker wiring issue | Increase volume. Select correct audio source. Check speaker connections. |
| GPS signal lost or inaccurate | GPS antenna obstructed or disconnected | Ensure GPS antenna has a clear view of the sky and is securely connected. |
| CarPlay/Android Auto not connecting | Bluetooth not enabled, incorrect pairing, faulty USB cable | Ensure Bluetooth is on. Re-pair device. Try a different USB cable (for wired connection). |
| Touch screen unresponsive | Software glitch, screen damage | Restart the unit. If issue persists, contact support. |
8. Specifications
- System: Android 13 OS
- CPU: 8-Core A53 1.8GHz
- Memory: 4GB RAM, 64GB ROM
- Screen: 9-inch IPS Touch Screen
- Resolution: 1280 x 720
- Power Output: 4*50W
- Connectivity: Built-in 4G LTE, WiFi, Bluetooth 5.0
- Special Features: Wireless CarPlay, Wired Android Auto, Built-in DSP Sound System, Steering Wheel Control Support
- Audio Formats: APE, FLAC, WAV, MP3, WMA, etc.
- Video Formats: MKV, RMVB, AVI, MP4, MDV, etc.
- Picture Formats: PNG, JPEG, JPG, GIF, WBMP, BNP, etc.
- Vehicle Service Type: Car (Toyota RAV4 2013-2018)
9. Warranty and Support
9.1 Warranty Information
This MekedeTech product comes with a 1-Year Warranty from the date of purchase. This warranty covers manufacturing defects and malfunctions under normal use. It does not cover damage caused by improper installation, misuse, accidents, or unauthorized modifications.
9.2 Customer Support
For technical assistance, warranty claims, or any questions regarding your MekedeTech Android Car Radio Stereo, please contact MekedeTech customer support through their official website or the retailer where the product was purchased. Please have your model number and purchase date available when contacting support.
