
1. Introduction
This manual provides comprehensive instructions for the assembly, operation, and maintenance of your Feonase Queen Bed Frame. This bed frame is designed for comfort and functionality, featuring four integrated storage drawers, an upholstered headboard with a built-in fast charging station, and a robust slat support system that eliminates the need for a box spring.

Image 1.1: Fully assembled Feonase Queen Bed Frame with storage drawers pulled out and items on the headboard charging station.
2. Safety Information
- Exercise caution around sharp edges during assembly.
- Ensure all components are properly assembled and tightened to prevent instability.
- Do not exceed the maximum weight capacity of 1,000 lbs.
- Keep children and pets away from small parts during assembly.
- Unplug the charging station from the power source before cleaning or maintenance.
3. Package Contents
Before beginning assembly, verify that all components listed below are present and undamaged. If any parts are missing or damaged, please contact customer support.
- 4" Storage Wingback Headboard x 1
- Metal Bed Frame x 1
- Slats (quantity as per design)
- Drawers with pulley and lock x 4
- Installation Tools & Accessories (screws, bolts, Allen wrench)
- Instruction Manual x 1

Image 3.1: All components of the Feonase Queen Bed Frame laid out before assembly.
4. Setup and Assembly Instructions
Assembly of the Feonase Queen Bed Frame is designed to be straightforward. It is recommended that two people assemble the bed frame to ensure ease and safety. Please follow the detailed instructions provided in the included installation guide. Typical assembly time is approximately 30 minutes.
Key Assembly Steps:
- Unpack all components and verify against the package contents list.
- Assemble the main metal frame structure using the provided tools and hardware. Ensure all bolts are securely tightened.
- Attach the upholstered headboard to the main frame.
- Install the solid wooden slats onto the metal frame. The EVA foam on the metal slats helps reduce noise. Secure slats using the Velcro strips on the base.
- Insert the four storage drawers into their designated positions under the bed frame.

Image 4.1: Detail of slat attachment and metal frame construction during assembly.
5. Operating Instructions
5.1 Storage Drawers
Your Feonase bed frame includes four large storage drawers designed for easy access and organization. These drawers are equipped with pulleys for smooth movement and clips to secure them in place when closed.
- To open: Gently pull the drawer handle. The pulleys will allow it to glide smoothly.
- To close and secure: Push the drawer fully inward until the clips engage, holding it firmly under the bed.
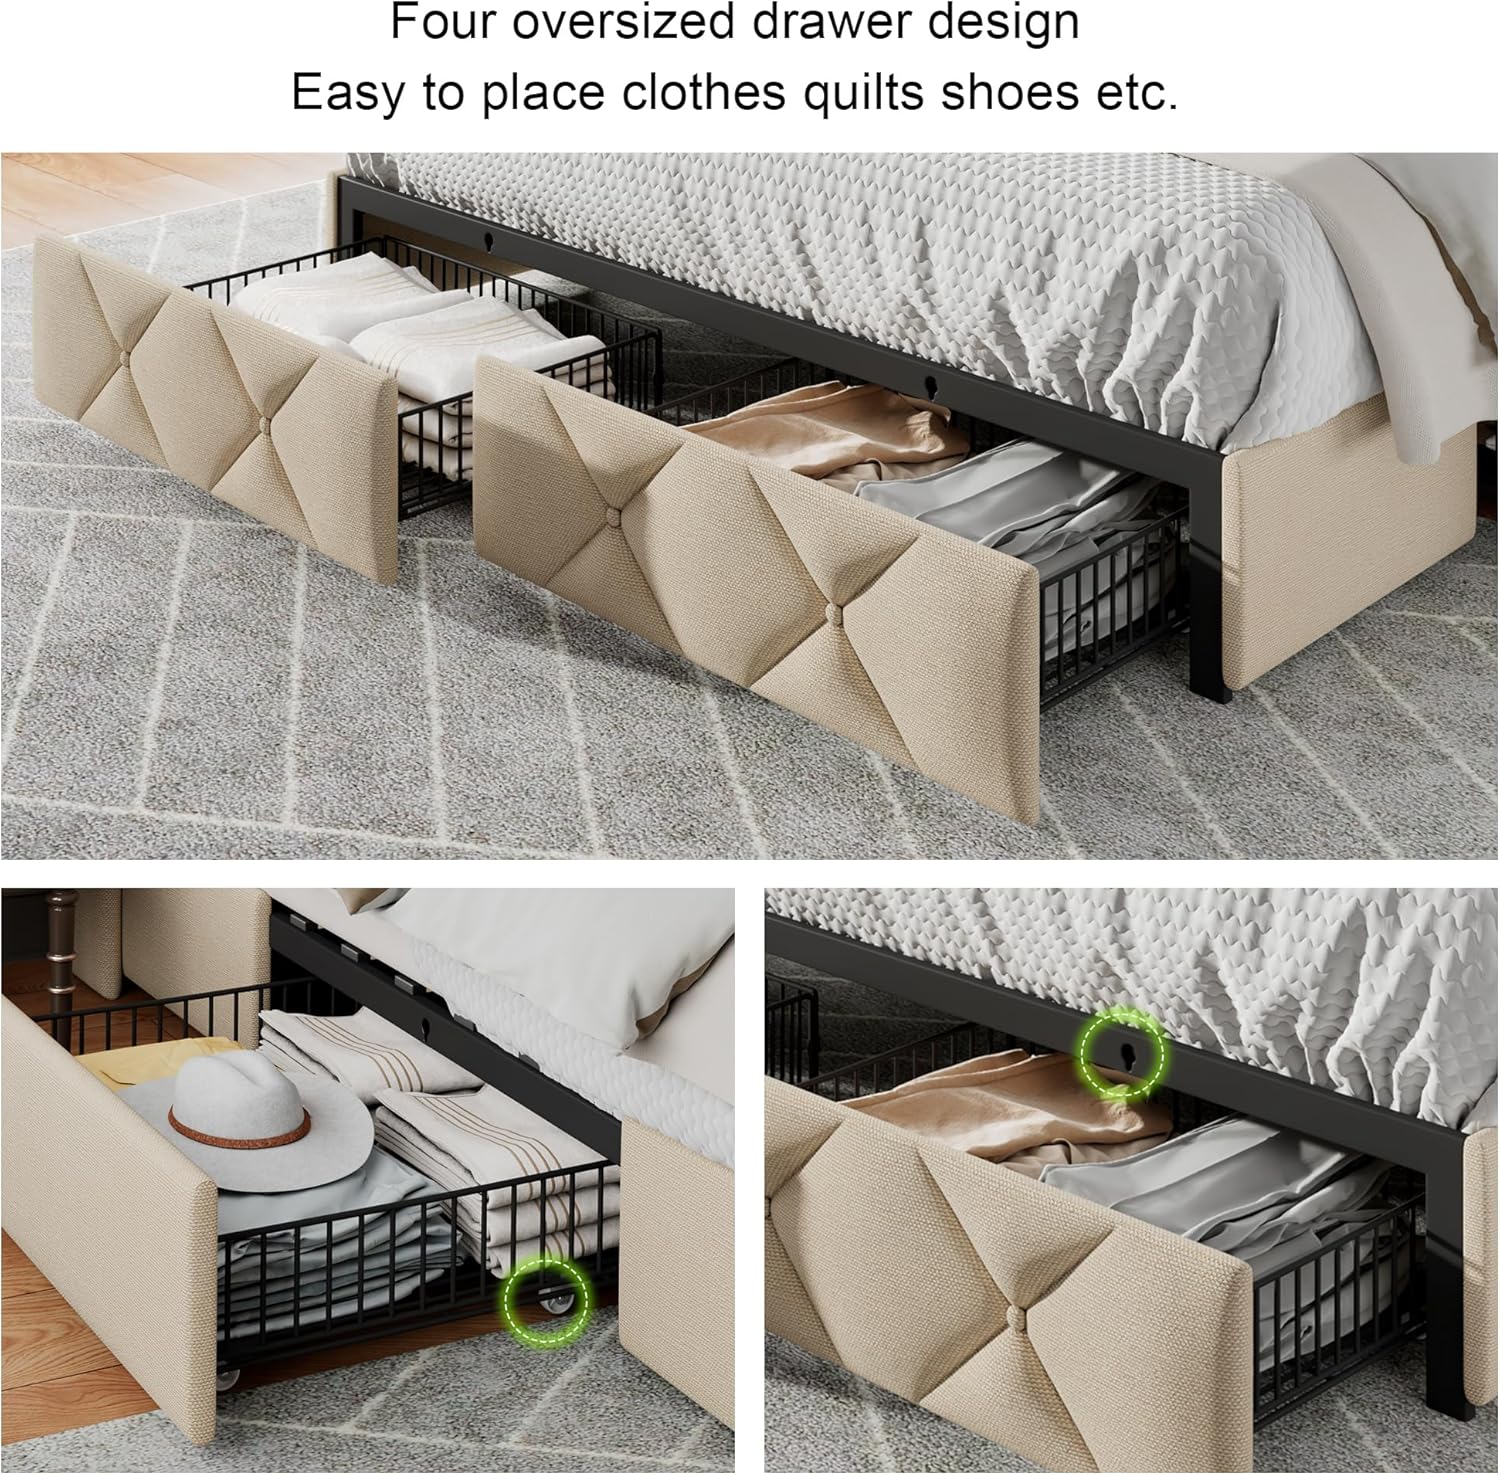
Image 5.1: Four oversized storage drawers pulled out, demonstrating ample space for various items.
5.2 Fast Charging Station
The upholstered headboard features a convenient fast charging station to keep your electronic devices powered. It includes 2 AC outlets, 1 USB port, and 1 Type-C port.
- Connect the bed frame's power cord to a wall outlet.
- Plug your devices into the available AC outlets, USB, or Type-C ports.
- The 20W fast charging ports (Type-C & Type-A) are designed to significantly reduce charging times.
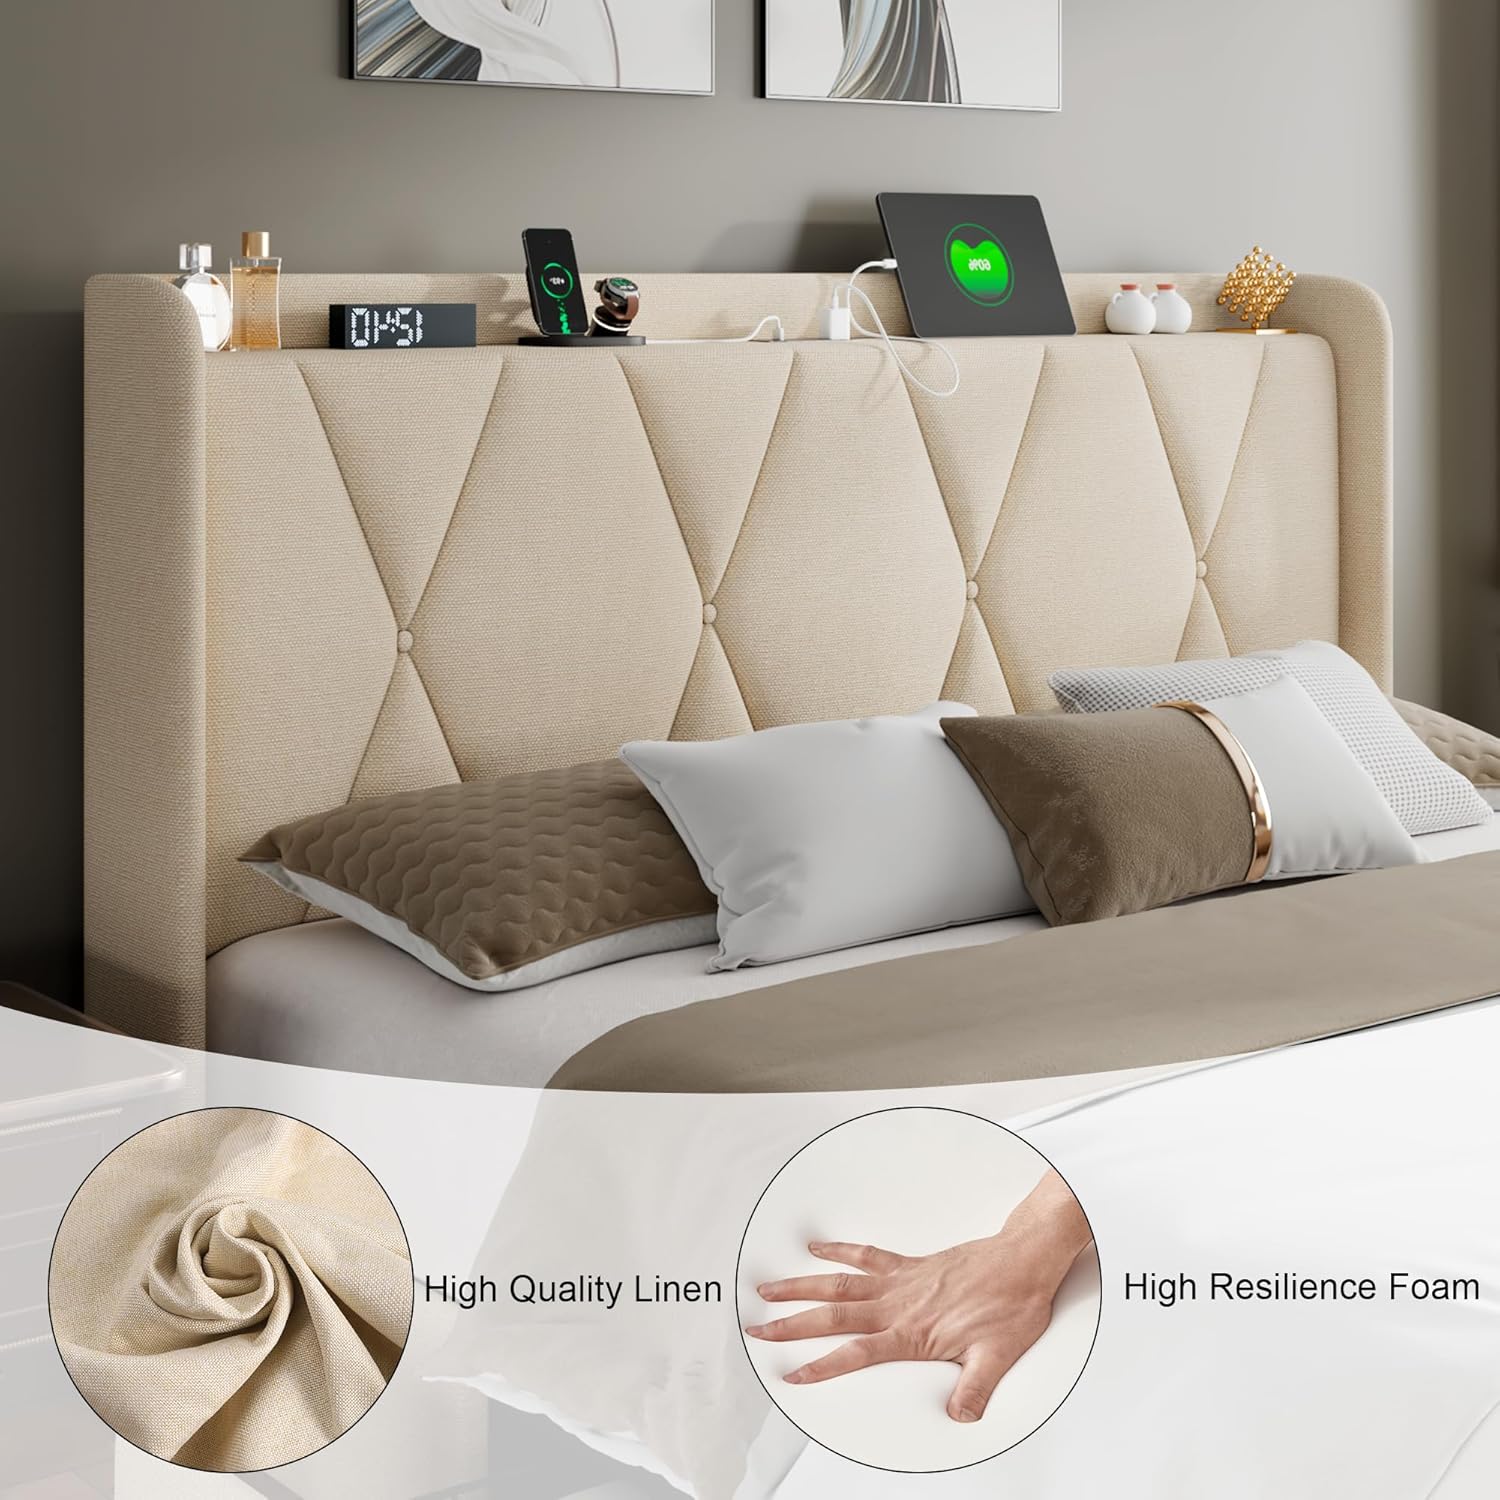
Image 5.2: Detail of the headboard's integrated charging station with devices connected.
6. Maintenance
6.1 Upholstered Headboard and Frame
- Cleaning: For general cleaning, gently vacuum the upholstered areas with a soft brush attachment to remove dust and debris. For spills, blot immediately with a clean, dry cloth. For stubborn stains, use a mild fabric cleaner following the product instructions, testing on an inconspicuous area first.
- Avoid: Do not use harsh chemicals, abrasive cleaners, or excessive moisture, as these can damage the fabric and foam.
6.2 Metal Frame and Slats
- Cleaning: Wipe the metal frame with a soft, damp cloth. Dry immediately to prevent rust.
- Inspection: Periodically check all bolts and connections to ensure they remain tight. Re-tighten if necessary to maintain stability and prevent noise.
7. Troubleshooting
| Problem | Possible Cause | Solution |
|---|---|---|
| Bed frame is noisy/squeaks | Loose bolts; slats not properly secured. | Ensure all bolts are tightened. Check that the EVA foam is correctly positioned on metal slats and Velcro is securing them. |
| Drawers do not slide smoothly or stay closed | Obstruction in the track; clips not engaging. | Clear any debris from the drawer's path. Ensure the drawer is pushed fully in for clips to engage. Check that pulleys are clean and functional. |
| Charging station not working | Power cord unplugged; faulty device. | Verify the bed frame's power cord is securely plugged into a working wall outlet. Test with a different device or outlet. |
| Bed frame feels unstable | Loose connections; uneven floor. | Re-tighten all assembly bolts. Ensure the bed frame is on a level surface. |
8. Specifications
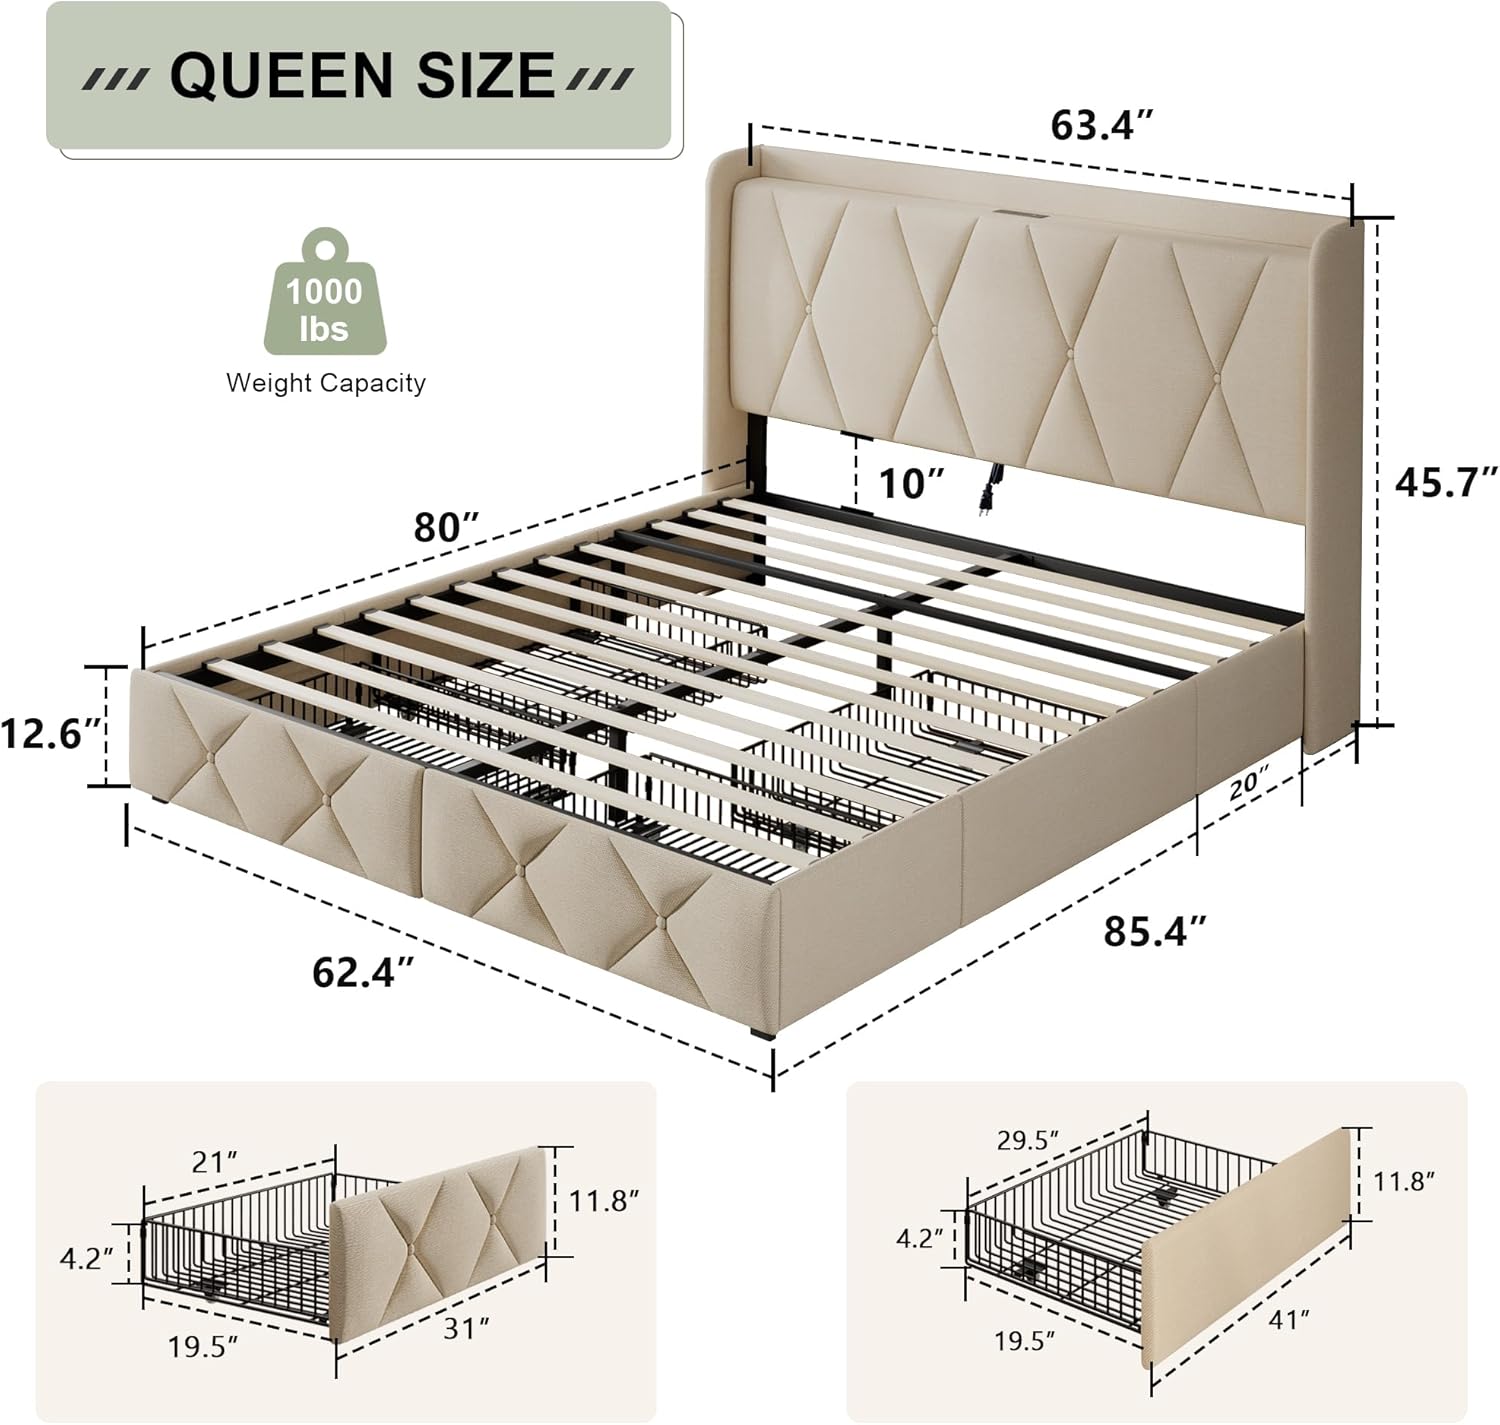
Image 8.1: Diagram illustrating the dimensions and weight capacity of the Feonase Queen Bed Frame.
| Feature | Detail |
|---|---|
| Size | Queen |
| Product Dimensions | 85.4"L x 63.4"W x 45.7"H |
| Color | Beige |
| Material | Fabric, Metal, Wood |
| Special Features | No Box Spring Needed, Squeak Resistant, 4 Storage Drawers, USB & Type-C Charging Ports |
| Weight Capacity | Over 1,000 lbs |
| Assembly Required | Yes |
| Item Weight | 116 pounds |
| Model Number | I870000840B3 |
9. Customer Support
For any questions, missing parts, or assistance with your Feonase Queen Bed Frame, please contact our customer support team. Refer to your purchase documentation for specific contact details or visit the official Feonase website.