Introduction
Thank you for choosing the VEVOR Magnetic Tumbler KT-1851. This manual provides essential information for the safe operation, maintenance, and troubleshooting of your new magnetic tumbler. Please read this manual thoroughly before operating the device to ensure proper use and to prevent damage or injury. Keep this manual for future reference.
Safety Instructions
Always follow basic safety precautions when using electrical appliances to reduce the risk of fire, electric shock, and personal injury.
- Ensure the power supply matches the voltage specified on the machine (110V AC 60Hz).
- Do not operate the machine with wet hands or in damp environments.
- Keep the work area clean and well-lit. Cluttered or dark areas invite accidents.
- Always unplug the machine before cleaning, performing maintenance, or when not in use.
- Do not allow children or untrained personnel to operate the machine.
- Use only genuine VEVOR replacement parts and accessories.
- Avoid overloading the tumbler barrel. Refer to the capacity specifications.
- Do not immerse the main unit in water or any other liquid.
- Ensure proper ventilation during operation to prevent overheating. The machine has built-in heat dissipation vents.
- Wear appropriate personal protective equipment, such as safety glasses, when operating the machine.
Package Contents
Upon unpacking, please verify that all items listed below are included and undamaged. If any items are missing or damaged, contact VEVOR customer service immediately.
- 1 x VEVOR Magnetic Tumbler (KT-1851 Main Unit)
- 1 x Magnetic Pin (Bag of Tumbler Pins)
- 2 x Fuses (0.5A)
- 1 x User Manual
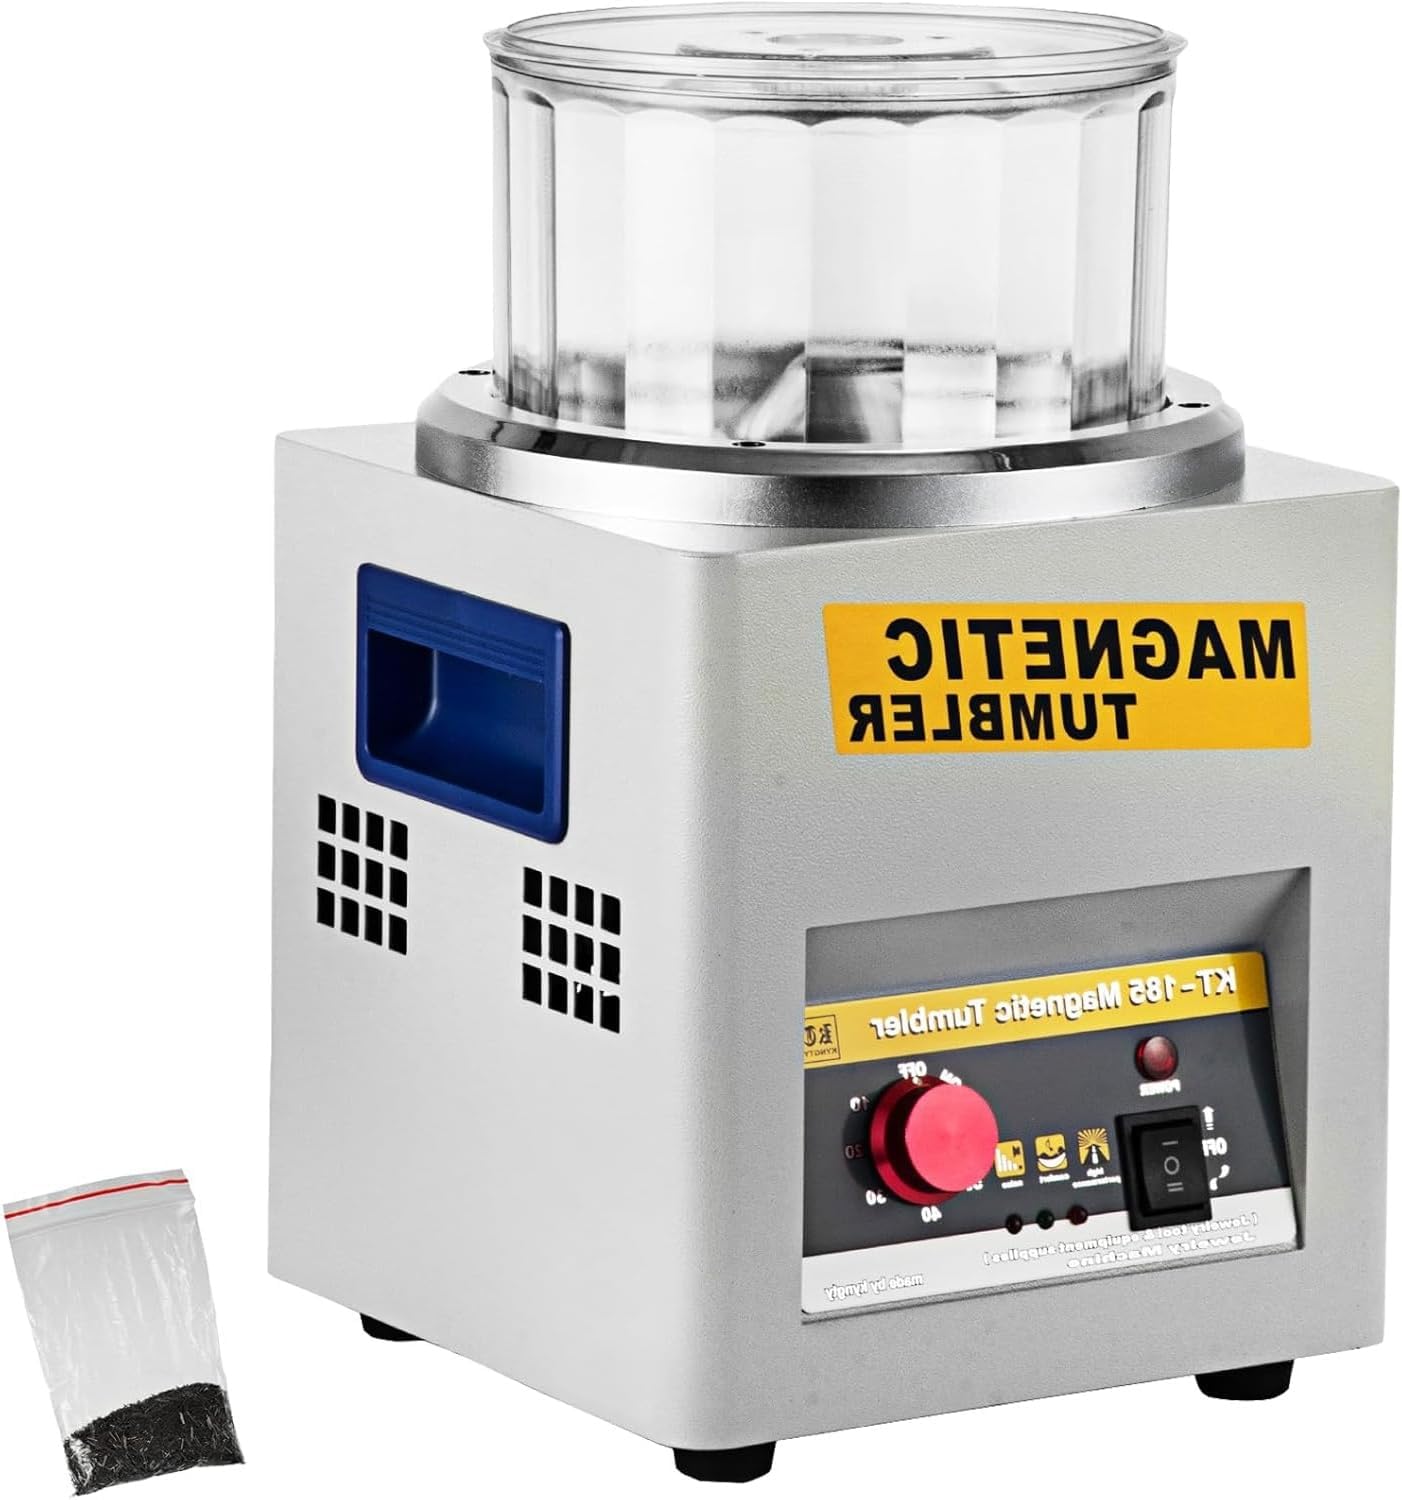
Image: The VEVOR Magnetic Tumbler KT-1851 main unit, showing the clear barrel and control panel, alongside a small bag of magnetic pins.
Product Overview
Familiarize yourself with the components of your magnetic tumbler.

Image: Close-up view of the premium plexiglass polishing barrel, highlighting its transparent and durable construction.

Image: The multifunctional control panel, showing the power switch, indicator light, one-way/two-way rotation selector, timer knob, and forward/reverse buttons.

Image: Side view of the tumbler unit, illustrating the integrated portable handle and the heat dissipation vents designed for efficient cooling.

Image: A clear plastic bag containing the small, dark magnetic tumbler pins used for polishing.

Image: Bottom view of the tumbler, showing the non-slip rubber pads that provide stability during operation.

Image: Diagram illustrating the overall dimensions of the VEVOR Magnetic Tumbler: 9.1 inches (width) x 9.2 inches (depth) x 15.2 inches (height), with the barrel diameter of 7.3 inches.
Key Components:
- Main Unit: Houses the motor, control panel, and magnetic base.
- Polishing Barrel: A durable, transparent polycarbonate barrel where items are placed for polishing. Outer Roller Size: 7.3 x 5.1 in (18.5 x 13 cm), Inner Roller Size: 7.1 x 3.9 in (18 x 10 cm). Capacity: 1.76 lbs (800 g).
- Control Panel: Features a power switch, indicator light, rotation mode selector (one-way/two-way), timer knob (0-60 minutes), and forward/reverse buttons.
- Magnetic Pins: Small stainless steel pins that act as the polishing medium.
- Heat Dissipation Vents: Located on the sides to ensure efficient cooling during operation.
- Portable Handle: Integrated on the side for easy transport.
- Non-Slip Rubber Pads: Located at the base for stability.
Setup
- Unpack: Carefully remove all components from the packaging. Retain packaging for future storage or transport.
- Placement: Place the magnetic tumbler on a stable, level, and dry surface. Ensure there is adequate ventilation around the machine.
- Power Connection: Connect the power cord to a grounded 110V AC 60Hz electrical outlet. Ensure the power switch on the control panel is in the "OFF" position before plugging in.
- Barrel Placement: Ensure the polishing barrel is securely seated on the main unit's magnetic base.
Operating Instructions
Follow these steps to operate your VEVOR Magnetic Tumbler for optimal polishing results.
- Prepare Items: Clean items to be polished to remove any heavy dirt or grease.
- Add Media: Place the magnetic pins into the polishing barrel. The quantity of pins should be appropriate for the items being polished, typically covering the bottom of the barrel.
- Add Solution: Add a small amount of water and a suitable polishing compound or solution to the barrel. The water level should just cover the items and pins.
- Load Items: Carefully place the items to be polished into the barrel with the magnetic pins and solution. Do not exceed the maximum capacity of 1.76 lbs (800 g).
- Secure Barrel: Ensure the barrel lid is securely closed and the barrel is properly seated on the machine.
- Select Rotation Mode:
- One-Way Rotation: For continuous rotation in a single direction.
- Two-Way Rotation: For alternating rotation (e.g., 5 minutes forward, 10 seconds stop, 5 minutes reverse). This mode is often preferred for more thorough and even polishing.
- Set Timer: Rotate the timer knob to set the desired polishing time (0-60 minutes). For initial use, start with a shorter time (e.g., 15-30 minutes) and adjust as needed.
- Start Operation: Flip the power switch to the "ON" position. The indicator light will illuminate, and the tumbler will begin operation.
- Monitor Progress: Periodically check the polishing progress. If necessary, stop the machine by flipping the power switch to "OFF" to inspect items.
- Completion: Once the timer reaches zero, the machine will automatically stop. If you need to stop it manually, turn the power switch to "OFF".
- Unload Items: Carefully remove the barrel from the machine. Pour out the solution, pins, and polished items into a sieve or container to separate them. Rinse the polished items thoroughly with clean water.

Image: Examples of various jewelry items, such as rings, bracelets, and necklaces, demonstrating the wide application and polishing capabilities of the magnetic tumbler.
Maintenance
Regular maintenance ensures the longevity and optimal performance of your magnetic tumbler.
- Cleaning the Barrel: After each use, rinse the polishing barrel thoroughly with clean water to remove any residue from the polishing compound and debris. Ensure it is completely dry before storage.
- Cleaning Magnetic Pins: The magnetic pins should also be rinsed and dried after each use. Store them in a dry place to prevent corrosion.
- Cleaning the Main Unit: Wipe the exterior of the main unit with a soft, damp cloth. Do not use abrasive cleaners or immerse the unit in water. Ensure no liquid enters the control panel or ventilation openings.
- Fuse Replacement: If the machine fails to power on, check the fuses. The unit comes with two spare 0.5A fuses. To replace, unplug the machine, locate the fuse holder (usually at the back or side), and carefully replace the old fuse with a new one.
- Storage: When not in use for extended periods, store the magnetic tumbler in a cool, dry place, away from direct sunlight and moisture.
Troubleshooting
This section addresses common issues you might encounter and their solutions.
| Problem | Possible Cause | Solution |
|---|---|---|
| Machine does not power on. | No power supply; Blown fuse; Power switch off. | Check power cord connection and outlet; Replace fuse (refer to Maintenance); Ensure power switch is ON. |
| Barrel is not rotating. | Barrel not seated correctly; Overloaded barrel; Motor issue. | Ensure barrel is properly placed; Reduce load in barrel; Contact customer support if motor issue is suspected. |
| Poor polishing results. | Insufficient polishing time; Incorrect amount of pins/solution; Items too dirty; Wrong polishing compound. | Increase polishing time; Adjust pin/solution ratio; Pre-clean items thoroughly; Use appropriate polishing compound for material. |
| Machine overheats. | Blocked vents; Continuous long operation; Overload. | Ensure vents are clear; Allow machine to cool down between long cycles; Do not overload. |
If the problem persists after attempting these solutions, please contact VEVOR customer support.
Specifications
| Specification | Value |
|---|---|
| Item Model Number | KT-1851 |
| Voltage | 110V AC 60Hz |
| Power | 250W |
| Speed | 1400-2000 RPM |
| Time Control | 0-60 minutes |
| Outer Roller Size | 7.3 x 5.1 in (18.5 x 13 cm) |
| Inner Roller Size | 7.1 x 3.9 in (18 x 10 cm) |
| Capacity | 1.76 lbs (800 g) |
| Machine Size (L x W x H) | 9.1 x 9.1 x 14.9 in (23 x 23 x 38 cm) |
| Net Weight | 20.94 lbs (9.5 kg) |
Warranty and Support
VEVOR products are designed for durability and performance. For warranty information and technical support, please refer to the warranty card included with your product or visit the official VEVOR website. When contacting support, please have your model number (KT-1851) and purchase details ready.
You can visit the VEVOR Store for more information: VEVOR Official Store


