1. Introduction
This manual provides detailed instructions for the installation, operation, and maintenance of your REOLINK E1 Outdoor SE PoE 4K Security Camera. Please read this manual thoroughly before using the product to ensure correct usage and optimal performance. Keep this manual for future reference.

2. What's in the Box
Verify that all components are present in your package:
- E1 Outdoor SE PoE Camera x 1
- Camera Bracket x 1
- 1m Network Cable x 1
- Waterproof Lid x 1
- Quick Start Guide x 1
- Mounting Template x 1
- Pack of Screws x 1
- Surveillance Sticker x 1

3. Setup and Installation
3.1 Mounting the Camera
The REOLINK E1 Outdoor SE PoE camera can be mounted on a wall or ceiling. Use the included mounting template to mark drill holes. Ensure the camera is positioned to provide optimal coverage without obstructions.

3.2 Power over Ethernet (PoE) Connection
This camera utilizes Power over Ethernet (PoE) for both power supply and data transmission through a single Ethernet cable. This simplifies installation by eliminating the need for a separate power adapter.
- Connect one end of the Ethernet cable to the camera's PoE port.
- Connect the other end of the Ethernet cable to a PoE switch or a Reolink NVR (Network Video Recorder).
- Ensure your PoE switch or NVR is powered on.
Note: A PoE switch, NVR, or DC power adapter are not included with the camera. The camera is compatible with IEEE 802.3at PoE switches.

3.3 Initializing the Camera
After connecting the camera, power it up. Then, initialize the camera by scanning the QR code via the Reolink App/Client or directly viewing the camera on the NVR UI. This process typically involves setting up a password and configuring basic network settings.
3.4 Compatibility and Wi-Fi
Reolink PoE cameras are fully compatible only with the Reolink App/Client/NVR. Third-party NVRs are not supported. The E1 Outdoor SE PoE camera connects via Ethernet and does not support Wi-Fi connectivity.
4. Operating Instructions
4.1 Accessing the Camera
Access your camera's live view and settings using the Reolink App (for mobile devices) or Reolink Client software (for computers). These applications allow you to:
- View live video feed.
- Control pan and tilt functions.
- Configure detection settings.
- Review recorded footage.
- Manage storage options.

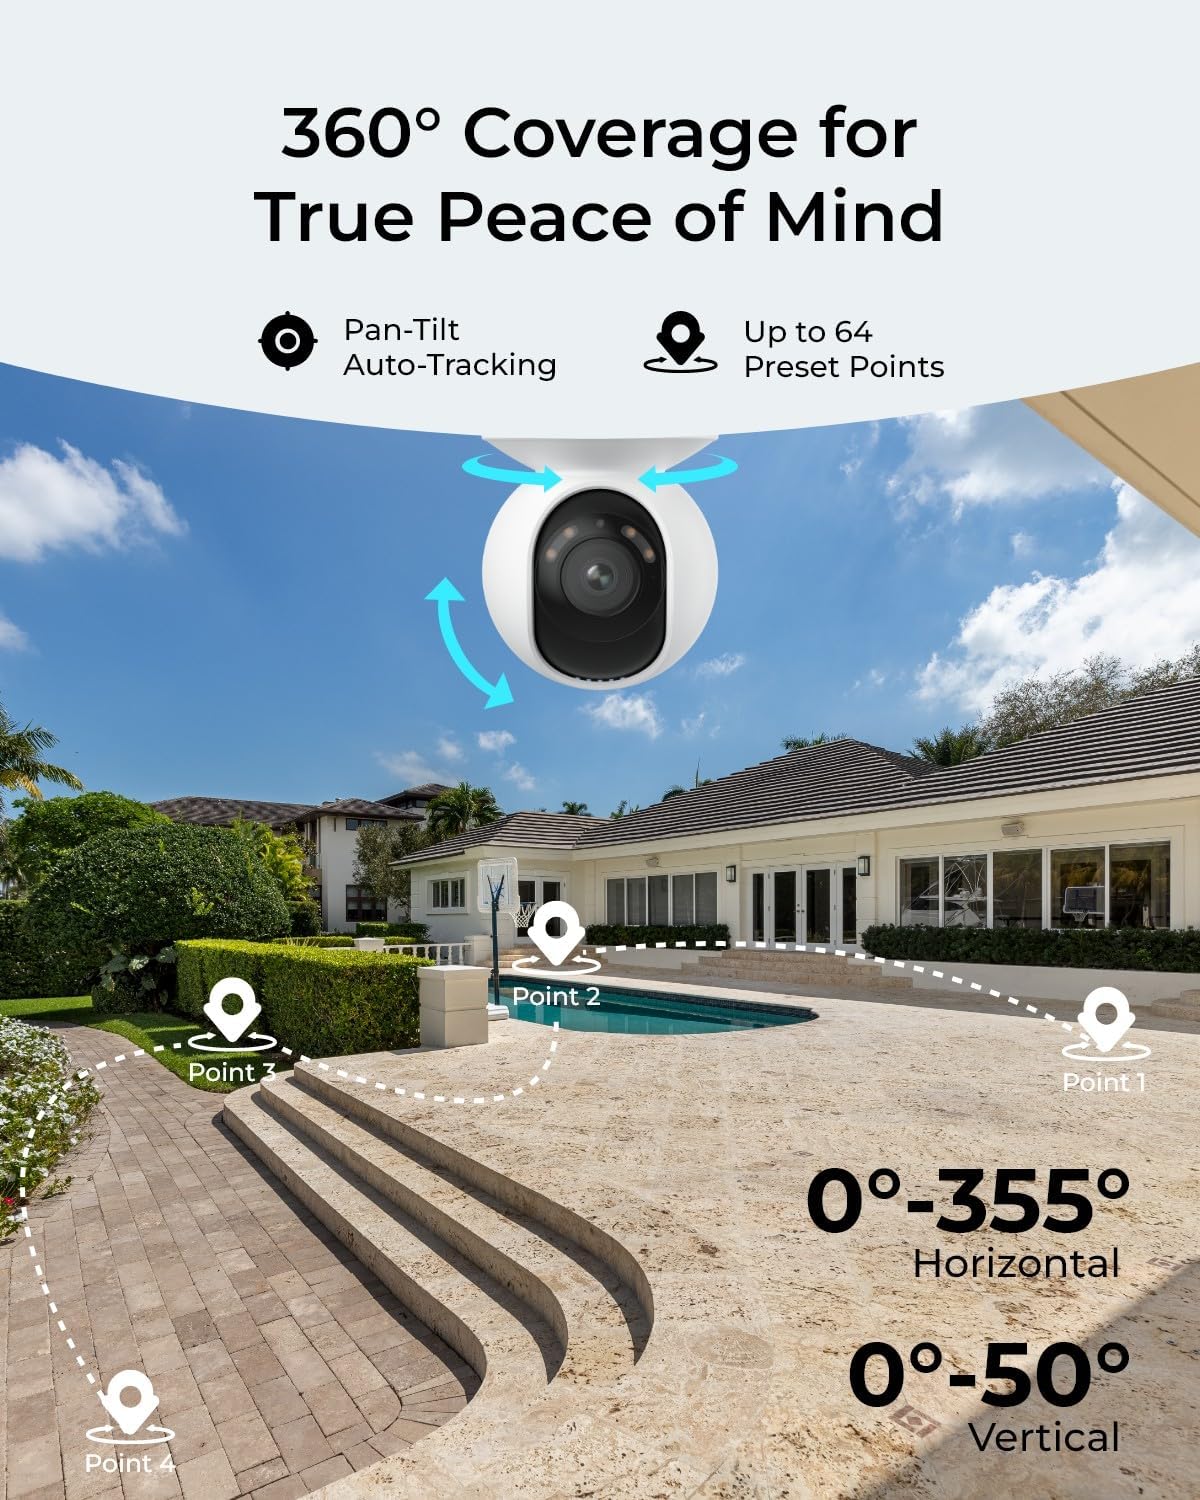
4.2 Pan, Tilt, and Auto-Tracking
The camera offers 355° horizontal pan and 50° vertical tilt capabilities. You can manually adjust the camera's view through the Reolink App/Client. The auto-tracking feature allows the camera to automatically follow detected subjects (persons, vehicles, animals) within its field of view. You can also set up to 64 preset points for quick navigation to specific areas.
4.3 Smart Detection and Two-Way Talk
The camera supports intelligent detection of persons, vehicles, and animals, reducing false alarms from irrelevant movements. When an event is detected, you will receive accurate alerts. The integrated microphone and speaker enable two-way communication, allowing you to speak to visitors or deter intruders remotely.

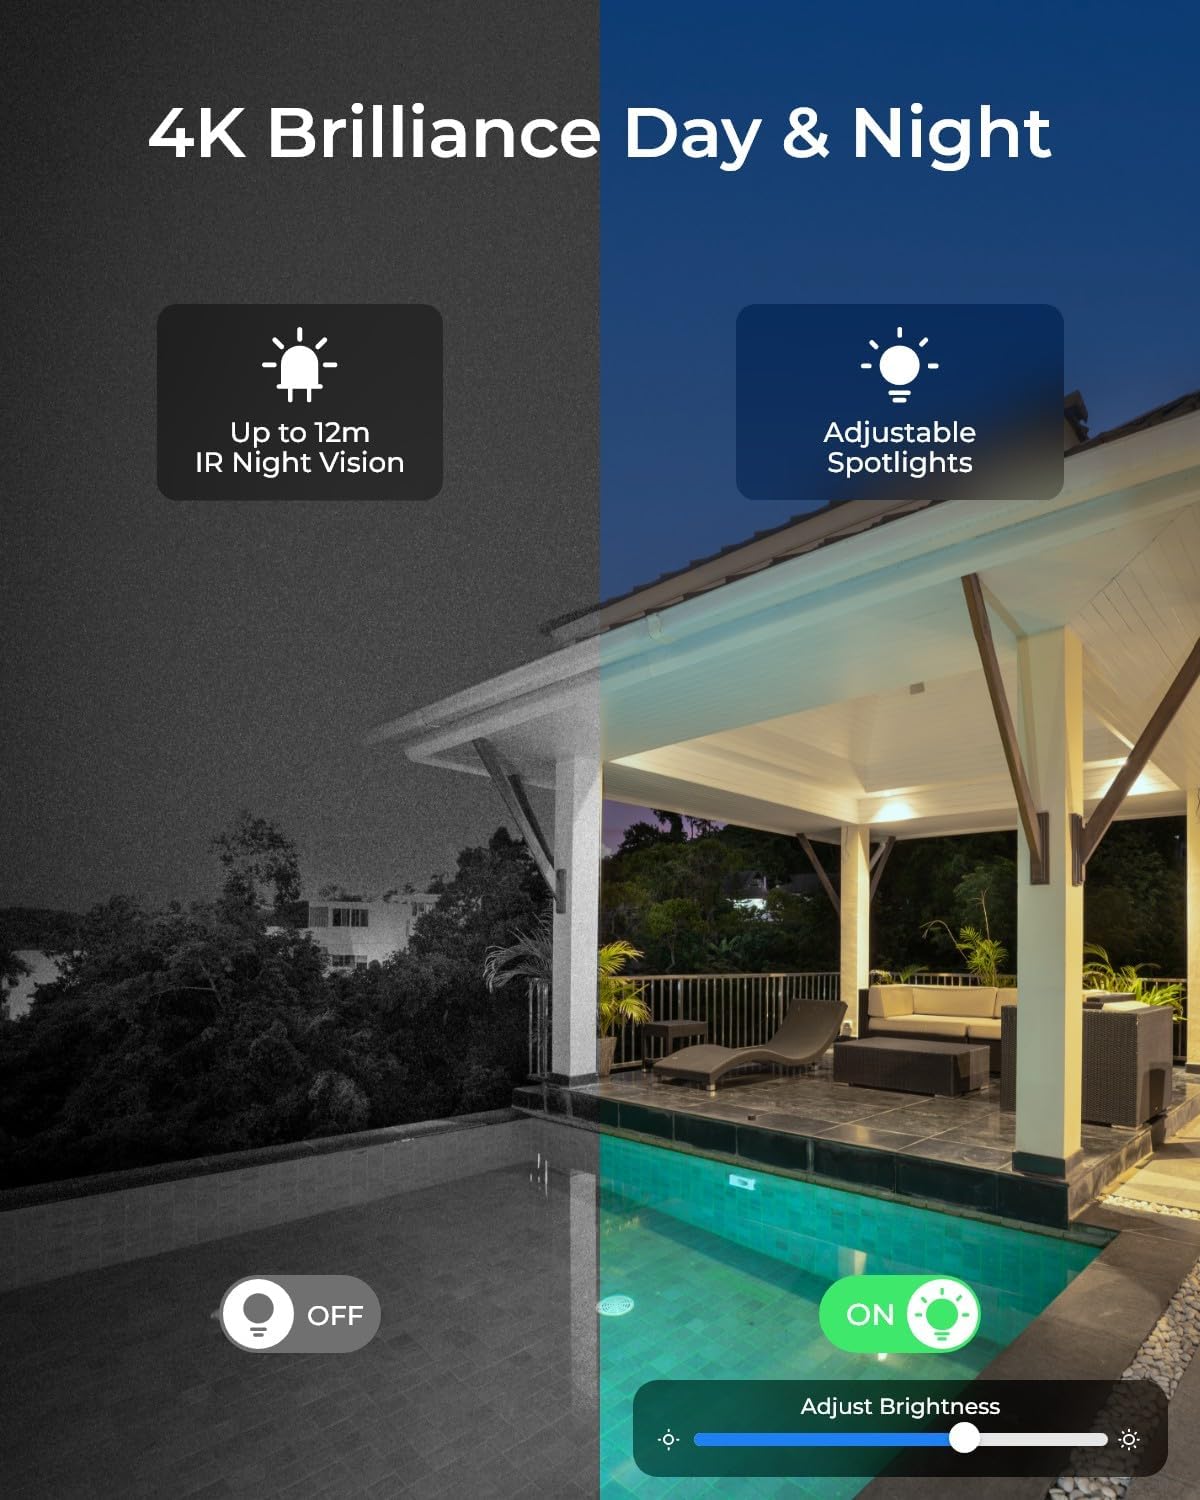
4.4 Night Vision Modes
The E1 Outdoor SE PoE camera offers three night vision modes for clear visibility in low-light conditions:
- Infrared (IR) Night Vision: Provides black and white video up to 12 meters using built-in IR LEDs.
- Color Night Vision: Achieved with the F1.6 wide aperture and 3000K adjustable spotlights, delivering full-color video in low light.
- Smart Mode: Automatically adapts night vision based on ambient light conditions.
4.5 Recording and Storage
The camera supports various recording and storage options:
- MicroSD Card: Insert a microSD card (up to 512GB, sold separately) into the camera's slot for local storage.
- Reolink NVR: Connect the camera to a Reolink Network Video Recorder for continuous 24/7 recording and centralized management.
- FTP: Configure FTP settings to upload recordings to an FTP server.

5. Maintenance
- Cleaning: Regularly clean the camera lens with a soft, damp cloth to ensure clear image quality. Avoid abrasive cleaners.
- Firmware Updates: Periodically check for and install firmware updates via the Reolink App/Client to ensure optimal performance, security, and access to new features.
- Cable Inspection: Inspect the network cable and connections for any signs of wear or damage, especially in outdoor installations, to maintain a stable connection.
- Environmental Protection: While the camera is waterproof (IP65 rated), ensure it is installed in a location that minimizes direct exposure to extreme weather conditions for extended longevity.
6. Troubleshooting
6.1 Camera Not Powering On / No Video
- Check PoE Connection: Ensure the Ethernet cable is securely connected to both the camera and a powered PoE switch or NVR. Verify the PoE switch/NVR is functioning correctly.
- Cable Integrity: Inspect the Ethernet cable for any damage. Try a different cable if necessary.
- Power Source: If using a DC adapter (not included), ensure it is properly connected and providing the correct voltage.
6.2 Cannot Connect to Camera / Offline Status
- Network Connectivity: Verify your network connection is active. Ensure the camera is on the same local network as the device you are using to access it (initially).
- Router/Switch Status: Restart your router and/or PoE switch.
- Firewall Settings: Check if your network firewall is blocking the camera's communication.
- Reolink App/Client: Ensure you are using the latest version of the Reolink App or Client software.
6.3 False Alarms / Inaccurate Detection
- Detection Sensitivity: Adjust the detection sensitivity settings in the Reolink App/Client.
- Detection Zone: Configure specific detection zones to exclude areas with frequent irrelevant motion (e.g., swaying trees, busy roads).
- Object Size: For person/vehicle/animal detection, ensure the minimum and maximum object sizes are set appropriately to filter out small movements like insects or leaves.
6.4 Image Out of Focus
- Clean Lens: Ensure the camera lens is clean and free from dust, dirt, or smudges.
- Refocus: If the issue persists, try adjusting the focus within the Reolink App/Client if such an option is available for your model, or perform a camera restart.
7. Specifications
| Feature | Detail |
|---|---|
| Model Name | E1 Outdoor SE PoE |
| Video Capture Resolution | 4K (8 MP Effective Still Resolution) |
| Pan Range | 355 Degrees |
| Tilt Range | 50 Degrees |
| Night Vision | Color Night Vision, IR Night Vision (up to 12 meters) |
| Detection | Person, Vehicle, Animal Detection |
| Connectivity | Ethernet (PoE) |
| Storage Options | MicroSD Card (up to 512GB), Reolink NVR, FTP |
| Two-Way Talk | Yes (Built-in Mic & Speaker) |
| Weather Resistance | IP65 Waterproof |
| Power Source | Corded Electric (PoE) |
| Dimensions (L x W x H) | 3.54 x 3.54 x 4.72 inches |
| Item Weight | 2.1 Pounds |
| Material | Aluminum |
| Frame Rate | 25 frames per second |
| Viewing Angle | 88 Degrees |
8. Warranty and Support
For warranty information and technical support, please refer to the official REOLINK website or contact REOLINK customer service directly. Details regarding product registration, warranty claims, and support resources can typically be found on the manufacturer's support pages.
Online Resources: Visit www.reolink.com for FAQs, firmware downloads, and additional support documentation.


