1. Introduction
Thank you for choosing the Dystler Grey Dresser with LED Light and Charging Station. This manual provides essential information for the safe assembly, operation, and maintenance of your new furniture. Please read these instructions carefully before beginning assembly and retain them for future reference.
This dresser is designed to offer versatile storage and modern conveniences, including integrated LED lighting and a charging station, suitable for bedrooms, living rooms, or hallways.
2. Safety Information
- Assembly: Always assemble the dresser on a soft, clean surface to prevent scratches. Ensure all parts are present and undamaged before starting. Do not use power tools for assembly unless specifically instructed, as this may overtighten screws and damage the material.
- Stability: This dresser is designed with stability in mind. For enhanced safety, especially in households with children, it is highly recommended to secure the dresser to a wall using the provided anti-toppling hardware. Failure to do so may result in serious injury.
- Weight Capacity: Do not exceed the recommended weight capacity for the tabletop (50 lbs) and drawers (30 lbs per drawer). Overloading can compromise the dresser's stability and structural integrity.
- Electrical Components: The LED lighting and charging station contain electrical components. Do not expose these components to water or excessive moisture. Disconnect from power before cleaning or if any malfunction occurs.
- Children's Safety: Keep small parts and assembly hardware out of reach of children. Do not allow children to climb on or play with the dresser.
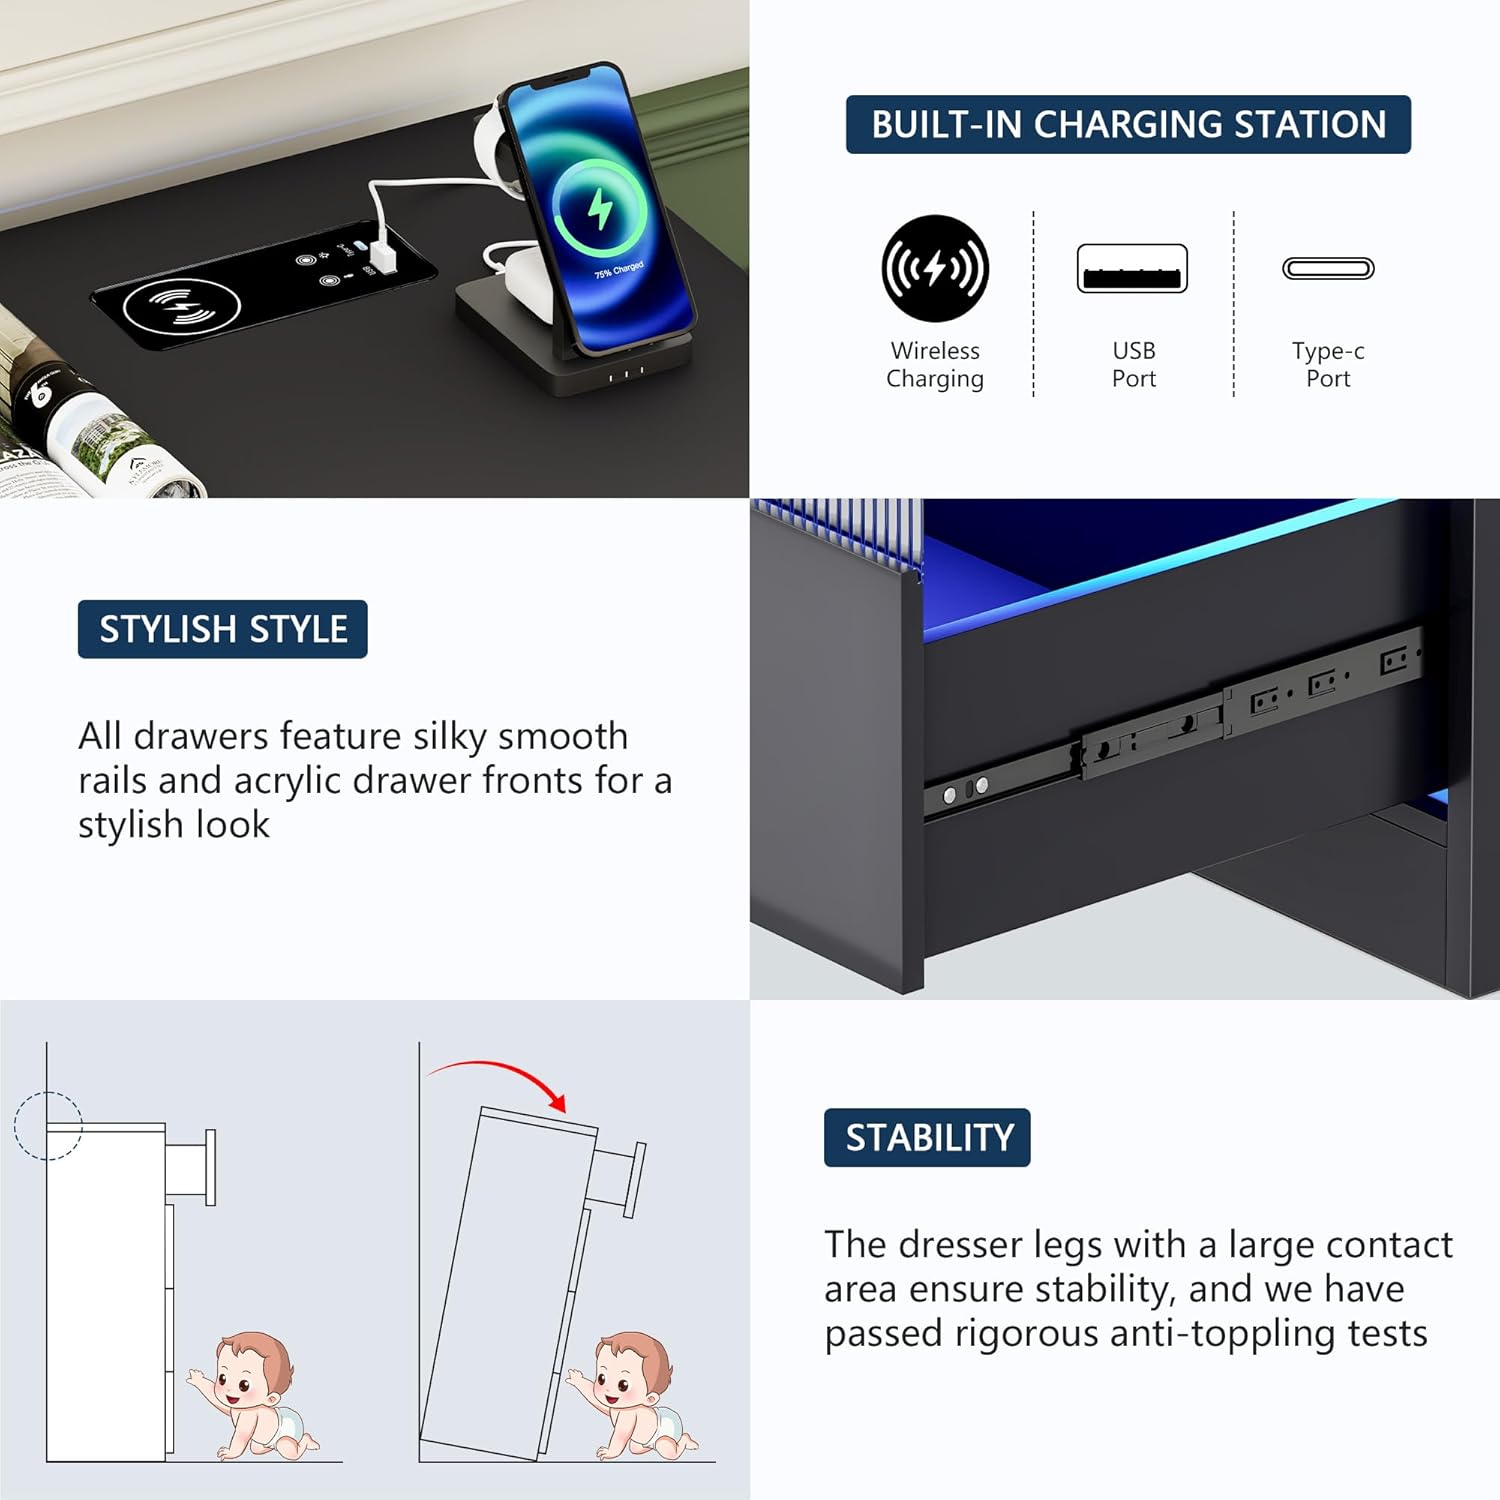
Image 2.1: Illustration of the anti-toppling mechanism, demonstrating how to secure the dresser to a wall for safety, particularly important in homes with young children.
3. Package Contents
Before assembly, verify that all components listed in the included instruction manual are present and undamaged. If any parts are missing or damaged, please contact customer support immediately.
The package typically includes:
- Dresser panels (top, bottom, sides, back)
- Drawer components (fronts, sides, backs, bottoms)
- Drawer slides
- Handles
- LED light strips and control unit
- Wireless charging module with USB and Type-C ports
- Power adapter
- Assembly hardware (screws, dowels, cam locks, etc.)
- Anti-toppling kit
- Remote control for LED lights
- Detailed assembly instructions
4. Assembly Instructions
Assembly of the Dystler dresser requires careful attention to detail. A comprehensive, step-by-step instruction manual with coded spare parts and precise hole locations is included in your package to facilitate accurate and faster installation.
- Preparation: Clear a spacious area and lay out all components on a soft, protective surface to prevent damage. Identify each part using the labels provided in the instruction manual.
- Frame Assembly: Follow the diagrams to assemble the main frame of the dresser. Ensure all connections are secure but do not overtighten screws until the frame is fully aligned.
- Drawer Assembly: Construct each drawer according to the instructions. Install the drawer slides onto both the drawers and the dresser frame.
- LED Light Installation: Carefully install the LED light strips into the designated areas. Connect the light strips to the control unit as shown in the diagrams.
- Charging Station Installation: Integrate the wireless charging module and USB/Type-C ports into the tabletop as instructed. Connect the power adapter.
- Final Touches: Insert the assembled drawers into the frame. Attach handles to the drawers. Secure the dresser to the wall using the anti-toppling kit.
For detailed visual guidance, refer to the specific assembly diagrams and instructions provided in your product packaging.
5. Product Features
5.1. LED Human Sensor Lighting
The dresser features an integrated LED lighting system designed for convenience and ambiance. The lights can be controlled in three ways: manual touch adjustment, remote control, and a human body sensing design.
- Human Sensor: Automatically illuminates when motion is detected within approximately 1 meter, providing light in dim environments.
- Light Colors: Offers three distinct light colors (White, Yellow, Blue) to suit different preferences and moods.
- Brightness Adjustment: Brightness can be adjusted from 0% to 100% via touch control or remote control.

Image 5.1.1: The human body sensing feature illuminates the dresser's LED lights when a person approaches, ideal for nighttime use.

Image 5.1.2: Visual representation of the three available light colors (White, Yellow, Blue) and the controls for adjusting brightness and speed via remote or touch button.
5.2. Wireless Charging Station
The dresser is equipped with a built-in charging station on the tabletop, offering convenient power access for your devices.
- Wireless Charging: Place compatible devices on the designated wireless charging pad to charge without cables.
- USB Port: Standard USB-A port for charging various devices.
- Type-C Port: Modern Type-C port for faster charging of compatible devices.

Image 5.2.1: Detailed view of the integrated charging station, highlighting the wireless charging pad, USB port, and Type-C port for convenient device charging.
5.3. Storage Capacity
This dresser features six spacious drawers designed to accommodate a variety of items, helping to keep your space organized.
- Large Drawers: Dimensions of 23.4" x 15.6" x 9.3" (W x D x H) for bulkier items.
- Smaller Drawers: Dimensions of 15.6" x 15.6" x 7.7" (W x D x H) for smaller essentials.
- Smooth Operation: Each drawer is equipped with smooth slide rails for effortless opening and closing.

Image 5.3.1: The dresser's drawers are shown open, illustrating their capacity for organizing various personal items such as clothing, accessories, and books.
5.4. Construction and Stability
Constructed from durable MDF, the dresser is designed for long-term use and resistance to scratches. Its free-standing design provides stability, further enhanced by the recommended anti-toppling measures.
- Material: Durable Medium-Density Fiberboard (MDF).
- Finish: Waterproof and easy to clean surface.
- Stability: Large contact area for dresser legs and anti-toppling hardware for secure placement.
6. Operating Instructions
6.1. LED Light Operation
To operate the LED lights:
- Power On/Off: Use the touch button on the dresser or the remote control to turn the lights on or off.
- Change Color: Press the color selection button on the remote or cycle through colors using the touch control.
- Adjust Brightness: Long press the touch button or use the brightness controls on the remote to increase or decrease light intensity.
- Human Sensor Mode: Ensure the human sensor is activated (refer to the specific LED control unit instructions for activation). The lights will automatically turn on when motion is detected within its range.
6.2. Charging Station Usage
To use the charging station:
- Power Connection: Ensure the dresser's power adapter is securely plugged into a functional wall outlet.
- Wireless Charging: Place your Qi-compatible device directly onto the wireless charging pad. Ensure the device is centered for optimal charging. A charging indicator (if present on your device) will confirm connection.
- USB/Type-C Charging: Connect your device's charging cable to the appropriate USB or Type-C port on the dresser.
Avoid placing metallic objects on the wireless charging pad as this may interfere with charging or cause overheating.
7. Maintenance and Care
- Cleaning: Wipe the dresser surfaces with a damp cloth. Avoid using harsh chemicals, abrasive cleaners, or excessive moisture, which can damage the finish or electrical components.
- Dusting: Regularly dust the dresser with a soft, dry cloth to prevent buildup.
- Spills: Immediately wipe up any spills to prevent staining or damage to the wood finish.
- Drawer Slides: Periodically check drawer slides for smooth operation. If they become stiff, a small amount of silicone lubricant can be applied.
- Electrical Components: Ensure the power cord for the LED lights and charging station is not pinched or damaged. Do not attempt to repair electrical components yourself; contact qualified personnel.
8. Troubleshooting
| Problem | Possible Cause | Solution |
|---|---|---|
| LED lights not turning on. |
|
|
| Charging station not working. |
|
|
| Drawers are stiff or difficult to open/close. |
|
|
| Dresser feels unstable. |
|
|
9. Specifications
| Feature | Detail |
|---|---|
| Brand | Dystler |
| Model Number | BL-97023 |
| Product Dimensions | 15.6"D x 46.8"W x 31.5"H |
| Color | Grey |
| Number of Drawers | 6 |
| Material | Durable MDF |
| Tabletop Weight Capacity | 50 lbs |
| Drawer Weight Capacity | 30 lbs per drawer |
| LED Lighting | Human sensor, 3 colors (White, Yellow, Blue), adjustable brightness, remote/touch control |
| Charging Station | Wireless charging, 1x USB port, 1x Type-C port |
| Assembly Required | Yes |
| Product Care | Wipe with Damp Cloth |
| Item Weight | 103 Pounds |

Image 9.1: Detailed product dimensions, including overall size and individual drawer capacities, along with tabletop and drawer weight limits.
10. Warranty and Support
Dystler is committed to providing high-quality products. While specific warranty details are not provided in this manual, please refer to your purchase documentation or the retailer's website for information regarding warranty coverage.
If you encounter any issues during assembly, operation, or require replacement parts, please do not hesitate to contact Dystler customer service. Our support team is available to assist you with any questions or concerns.
Customer Service Contact: Refer to the contact information provided with your purchase or visit the official Dystler website for support options.


