1. Introduction
Thank you for choosing the SURAIELEC 6-Inch LED Spa Light. This manual provides essential information for the safe installation, operation, and maintenance of your new spa light. Please read these instructions thoroughly before installation and retain them for future reference.
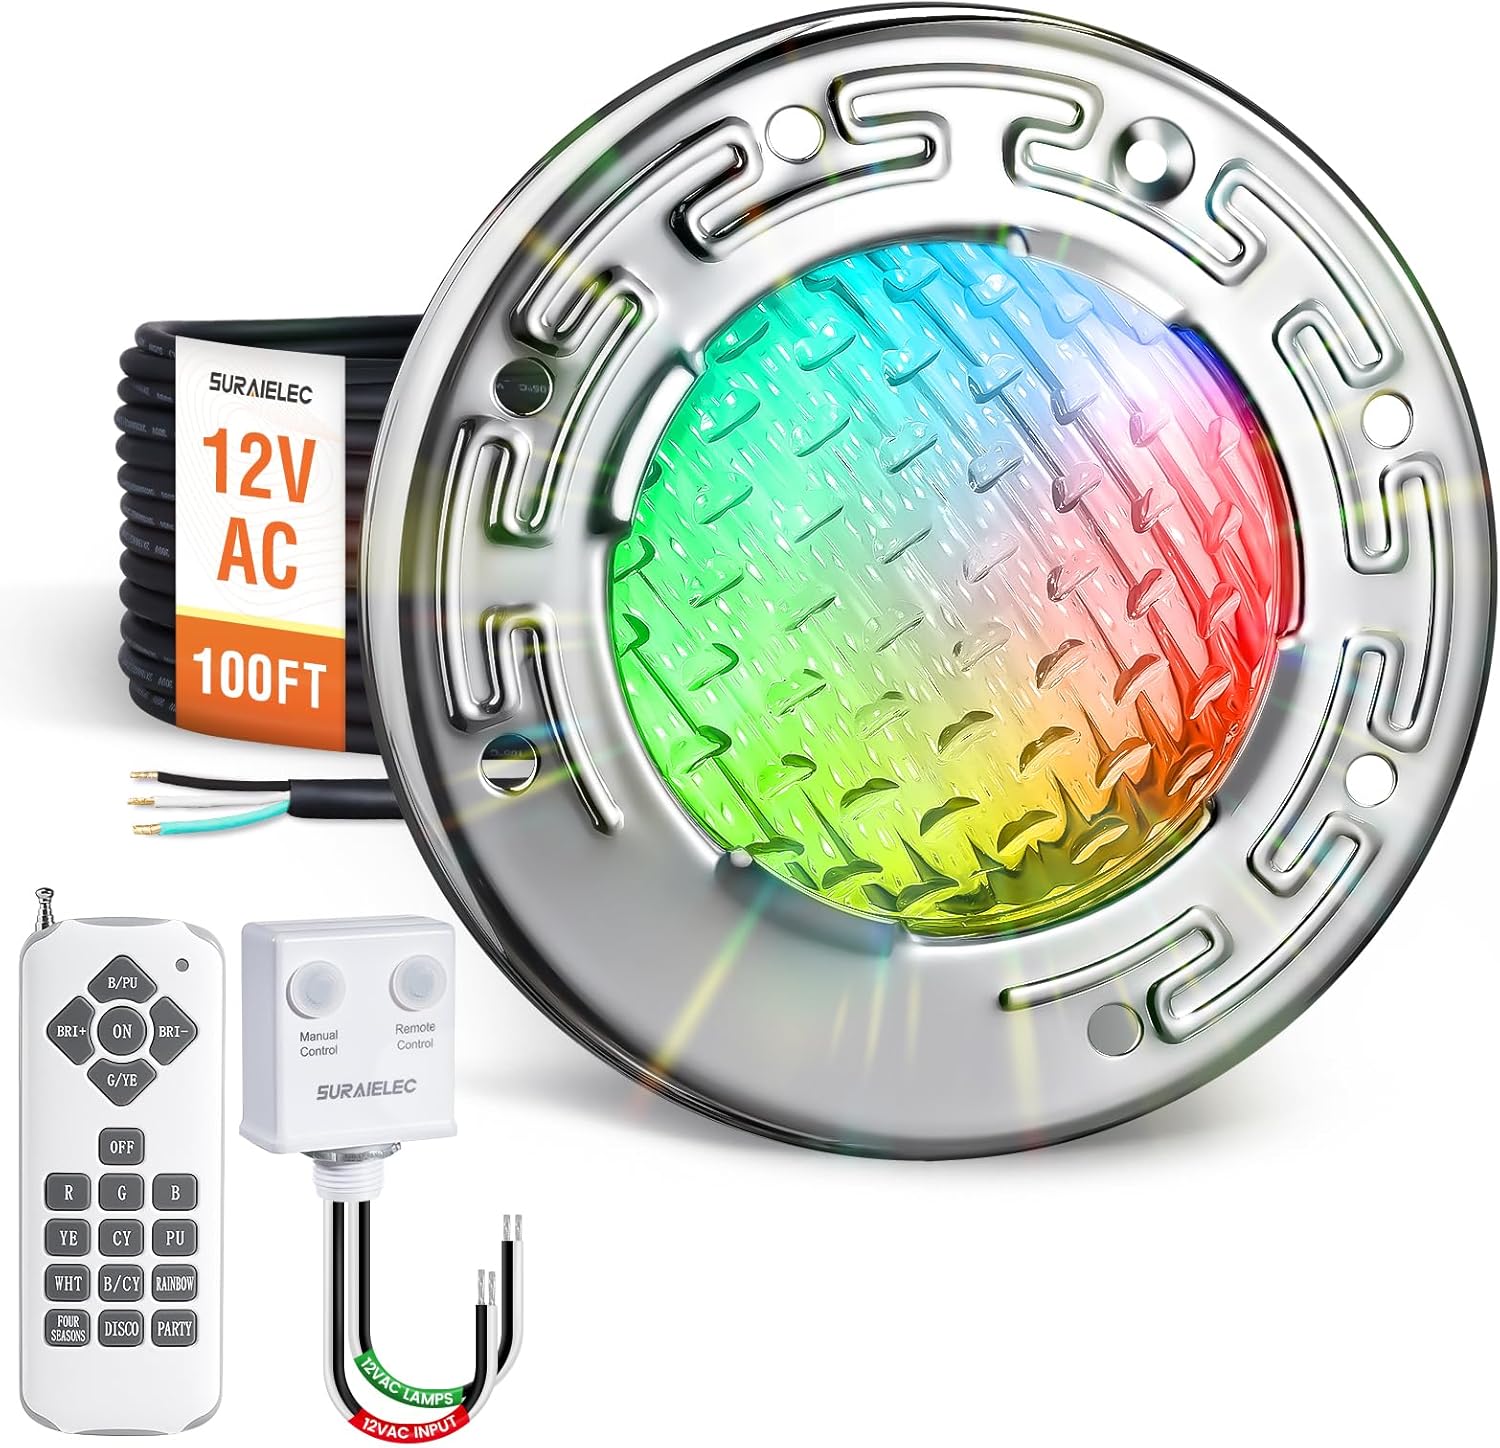
Image 1.1: SURAIELEC 6-inch LED Spa Light, remote, and receiver.
2. Safety Information
Always follow basic safety precautions to reduce the risk of fire, electric shock, and injury to persons.
- Low Voltage System: This spa light operates on a 12V AC low voltage system. A compatible 12V AC transformer (not included) is required for operation. Do not connect directly to 120V AC power.
- Professional Installation: Installation should be performed by a qualified electrician or pool professional in accordance with all local and national electrical codes.
- Water Immersion: The light is designed for underwater use (IP68 waterproof rating). Ensure all connections are properly sealed and watertight before submerging.
- Power Disconnection: Always disconnect power to the light at the circuit breaker before performing any installation, maintenance, or troubleshooting.
- Cable Integrity: Inspect the power cord for any damage before installation. Do not install if the cord is cut, frayed, or damaged.
3. Package Contents
Verify that all components are present and undamaged upon opening the package:
- 1x 12V AC LED Spa Light with 100 Feet Cord
- 1x Remote Control (Battery included)
- 1x Receiver
- 1x Screw
- 4x Wire Nuts
4. Specifications
| Feature | Specification |
|---|---|
| Model Number | UPLR15B |
| Light Source Type | LED |
| Voltage | 12 Volts (AC) |
| Wattage | 15 Watts |
| Brightness | 1500 Lumens |
| Material | 316L Stainless Steel, Polycarbonate (PC) |
| Finish Type | Stainless Steel |
| Waterproof Rating | IP68 |
| Cord Length | 100 Feet |
| Product Dimensions | 6"L x 4.6"W x 6"H |
| Special Features | Anti-Rust, Color Changing, Dimmable, Energy Efficient, Low Voltage |
5. Installation
5.1 Pre-Installation Checks
Ensure your inground pool has a compatible 6-inch small wet niche. This light is designed to fit most Pentair, Hayward, and Jandy 12V small spa light niches. No additional rings, gaskets, or housings are typically required.

Image 5.1: Niche compatibility for 6-inch spa lights.
5.2 Wiring Diagram and Transformer Connection
The SURAIELEC spa light requires a 12V AC transformer (sold separately) to convert your main power source (120V input) to the safe 12V AC low voltage needed for the light. Ensure the transformer is installed in a dry, accessible location according to electrical codes.
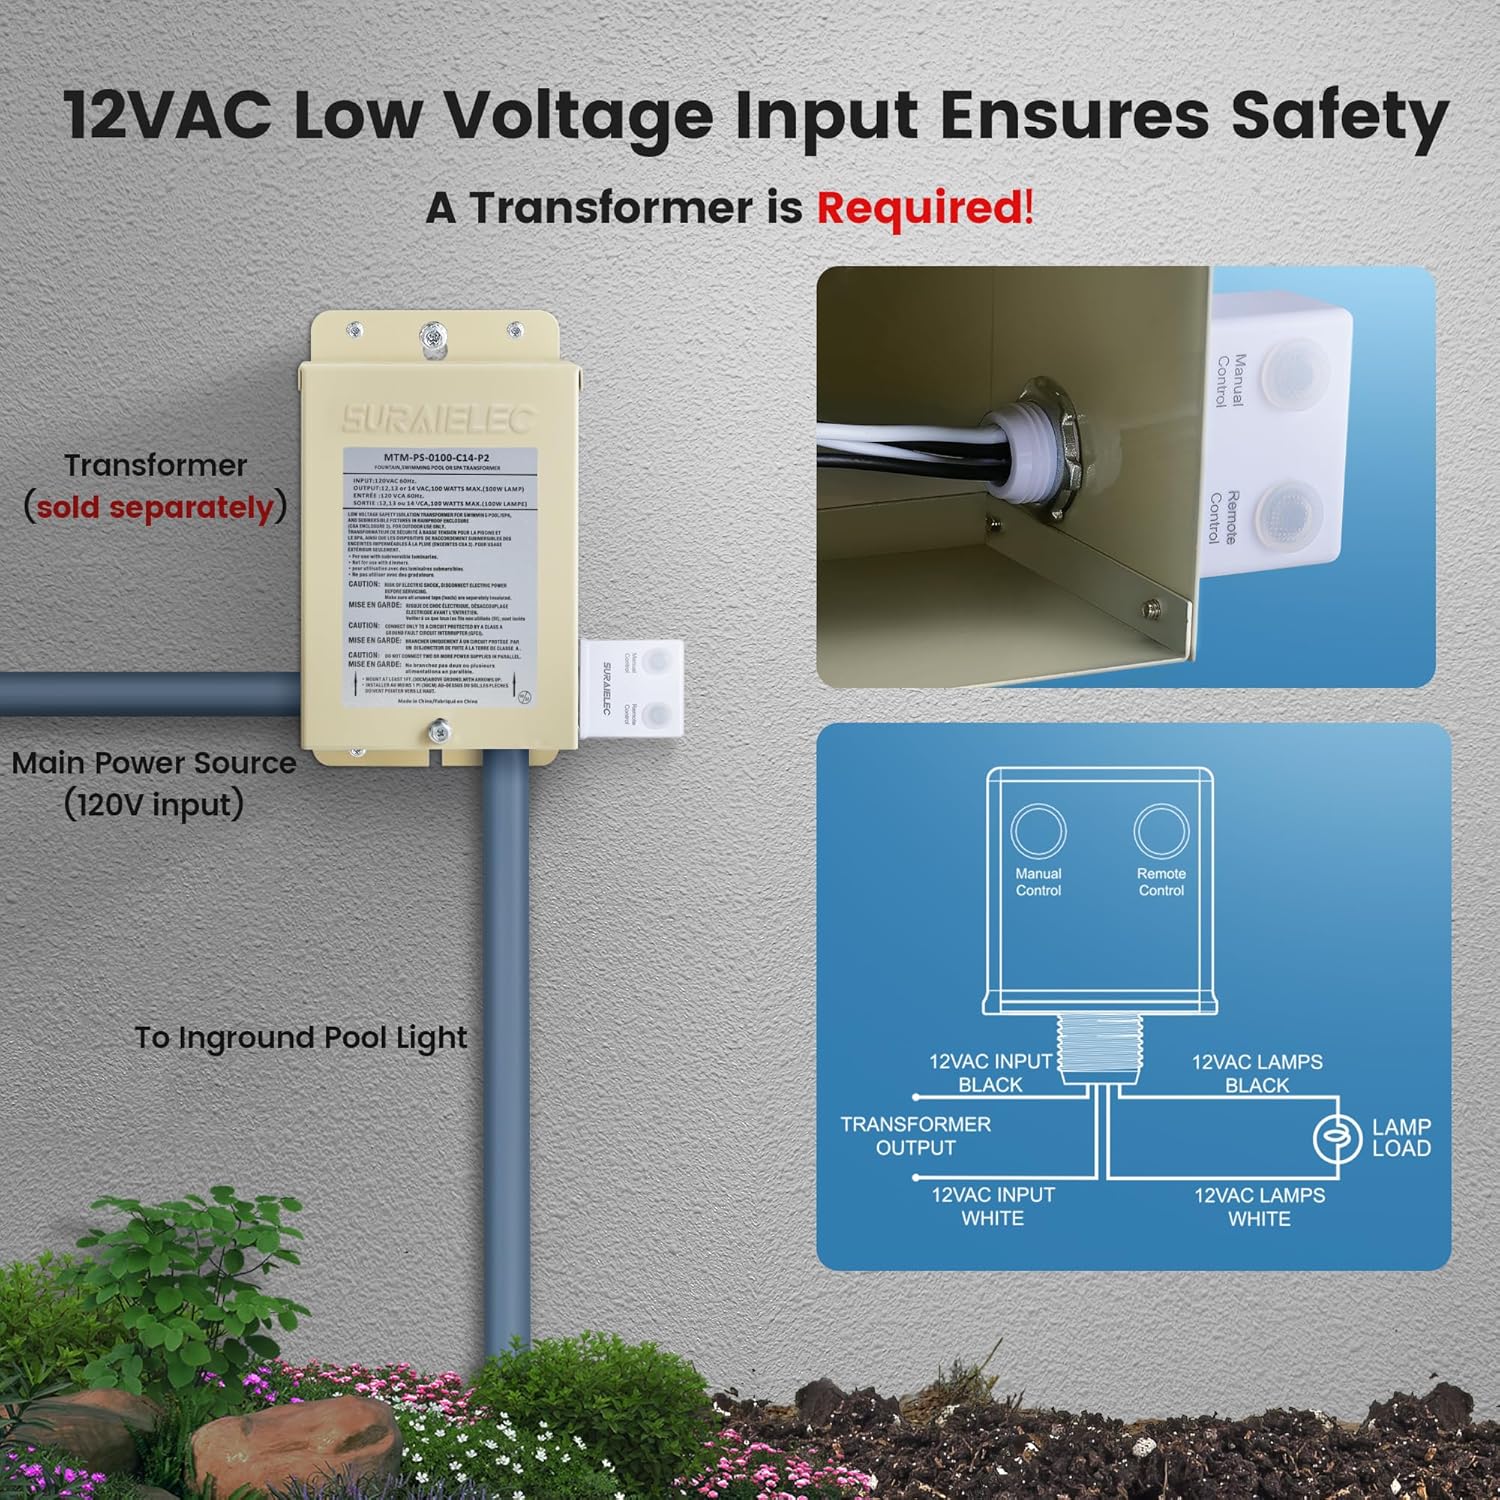
Image 5.2: Wiring diagram for 12V AC spa light and external receiver.
- Disconnect Power: Turn off the main power supply at the circuit breaker before beginning any wiring.
- Connect to Transformer: Connect the 12V AC input wires from the external receiver to the 12V AC output terminals of your transformer.
- Connect Light to Receiver: Connect the 12V AC spa light wires to the 12V AC lamp output wires of the external receiver using the provided wire nuts. Ensure all connections are secure and watertight.
- Grounding: Ensure proper grounding as per local electrical codes.
5.3 External Receiver Setup
The external receiver provides a stable connection for the remote control. Position the receiver in a location that minimizes interference from water or metal enclosures, ideally above the waterline and with a clear path to where the remote will be used.

Image 5.3: External receiver for stable remote connection.
5.4 Mounting the Light
- Prepare Niche: Ensure the 6-inch wet niche is clean and free of debris.
- Cable Management: Carefully feed the 100-foot power cord through the conduit to the transformer location. Leave sufficient slack (approximately 48 inches) coiled behind the light fixture within the niche to allow for future servicing without draining the pool.
- Secure Light: Align the light fixture with the niche and secure it using the included 12 o'clock pilot screw. Ensure the light is firmly seated and watertight.
- Test: Once installed and wired, restore power and test the light's functionality.
6. Operation
6.1 Remote Control Functions
The included remote control allows you to manage the light's colors, effects, and brightness. Ensure the remote's power switch (if present) is in the 'ON' position before use.

Image 6.1: Remote control layout and functions.
- ON/OFF: Turns the light on or off.
- Brightness +/-: Adjusts the light intensity (10 brightness levels).
- Color Selection: Buttons for 7 solid colors (Red, Green, Blue, Yellow, Cyan, Purple, White).
- Dynamic Modes: Buttons for 7 dynamic color effects (e.g., Rainbow, Disco, Party, Four Seasons).
6.2 Manual Control
In addition to the remote, the receiver unit features a manual control button. Pressing this button will cycle through the various lighting modes and colors, providing an alternative control method.
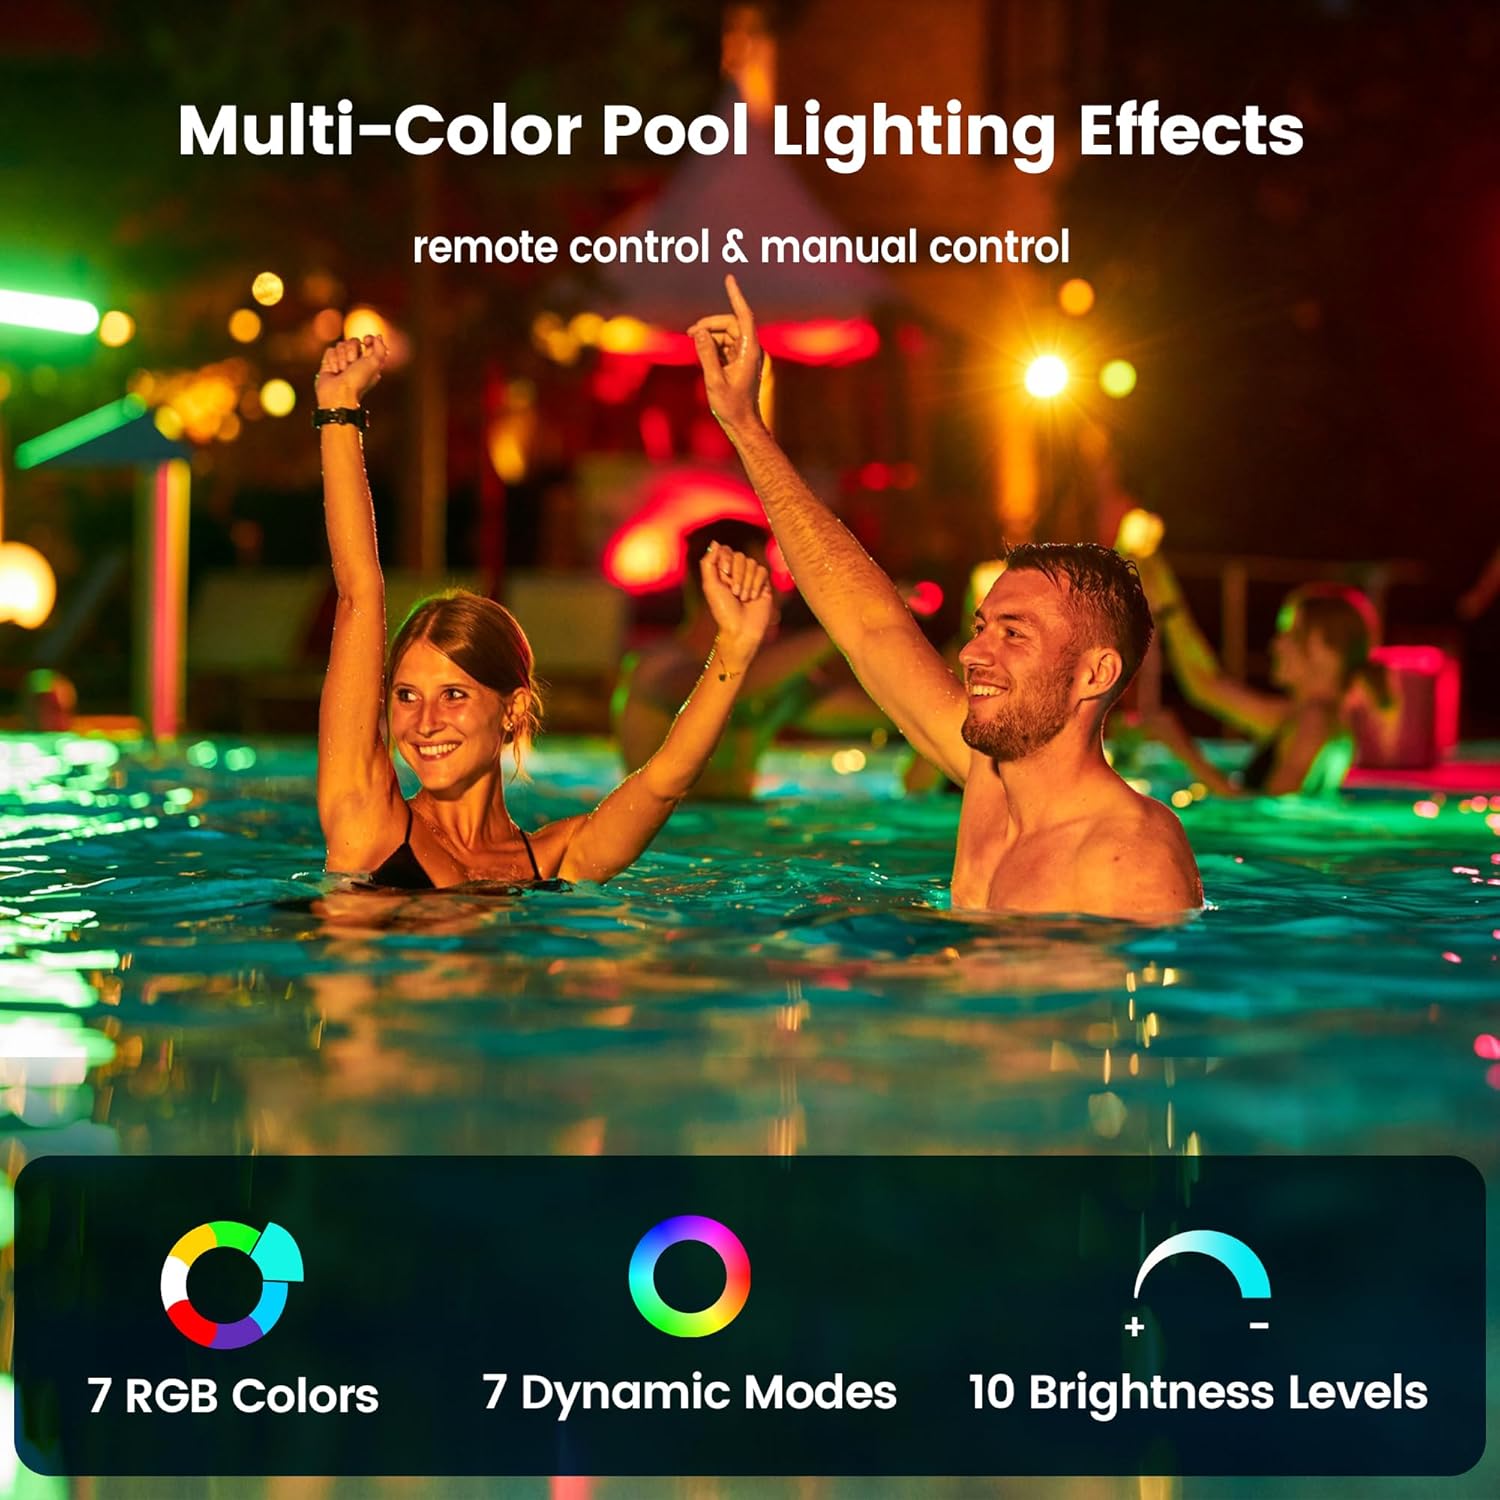
Image 6.2: Multi-color pool lighting effects.
7. Maintenance
The SURAIELEC spa light is designed for durability and minimal maintenance.
- Cleaning: Periodically clean the light fixture with a soft cloth to remove any algae or mineral deposits that may accumulate. Do not use abrasive cleaners or harsh chemicals.
- Material: The light features 316L stainless steel housing, offering excellent corrosion resistance for both fresh and saltwater environments.
- Sealing: The upgraded inner rubber ring design ensures a watertight seal. Avoid tampering with the sealed unit to maintain its IP68 waterproof integrity.
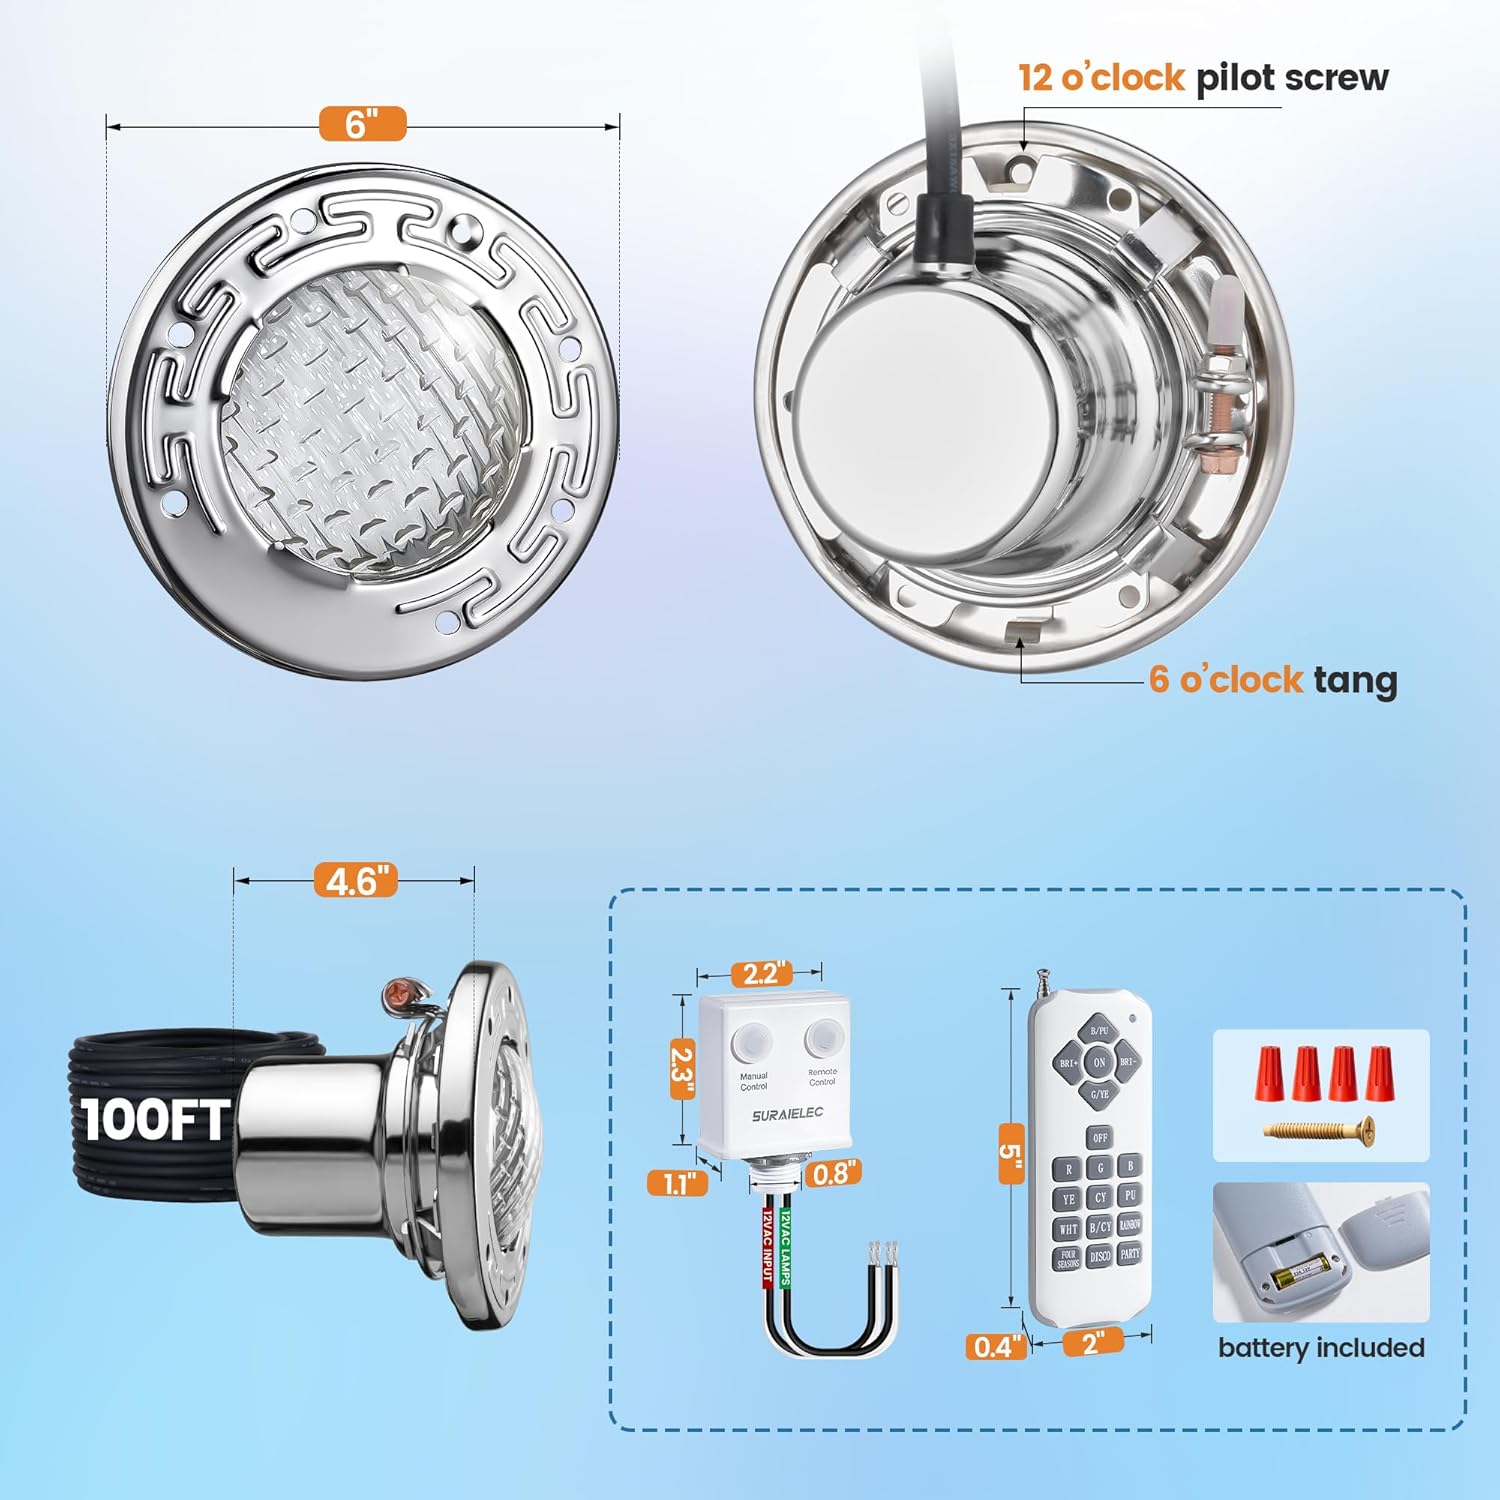
Image 7.1: Durable and fully-sealed construction details.
8. Troubleshooting
If you encounter issues with your spa light, refer to the following table for common problems and solutions.
| Problem | Possible Cause | Solution |
|---|---|---|
| Light does not turn on. | No power supply; Faulty wiring; Faulty transformer; Light unit failure. | Check circuit breaker. Verify transformer is receiving 120V input and providing 12V AC output. Inspect all wiring connections. Contact customer support if light unit is suspected to be faulty. |
| Remote control not working. | Remote battery low/dead; Remote not paired; Interference; Receiver issue. | Replace remote battery. Ensure remote's power switch is ON. Try resetting the remote by pressing the 'Manual Control' button on the receiver for 10-15 seconds. Ensure receiver is not obstructed. |
| Colors are not changing correctly or are stuck. | Remote/receiver synchronization issue; Internal light fault. | Try resetting the remote/receiver as described above. Cycle power to the light (turn off at breaker for 30 seconds, then turn back on). If problem persists, contact customer support. |
| Water inside the light fixture. | Improper installation; Damaged seal. | Immediately disconnect power. Remove the light and inspect for damage to the seals or housing. Re-install carefully ensuring watertight seal, or replace the unit if damaged. |
9. Warranty and Customer Support
SURAIELEC is committed to providing high-quality products. For warranty information, technical assistance, or any questions regarding your SURAIELEC 6-Inch LED Spa Light, please contact our customer support team. Refer to the product packaging or the official SURAIELEC website for contact details.


