1. Introduction
The Darmoshark K3 QMK is a 21-key wired mechanical numeric keypad designed for enhanced productivity and customization. It features RGB backlighting, hot-swappable Gateron switches, and full programmability through QMK/VIA firmware, making it suitable for various applications including office work, gaming, and data entry.

2. Package Contents
Please verify that all items are present in your package:
- Darmoshark K3 Digital Mechanical Keypad x 1
- Product Manual x 1
- Type-C Charging Cable x 1
- Shaft Puller x 1

3. Setup
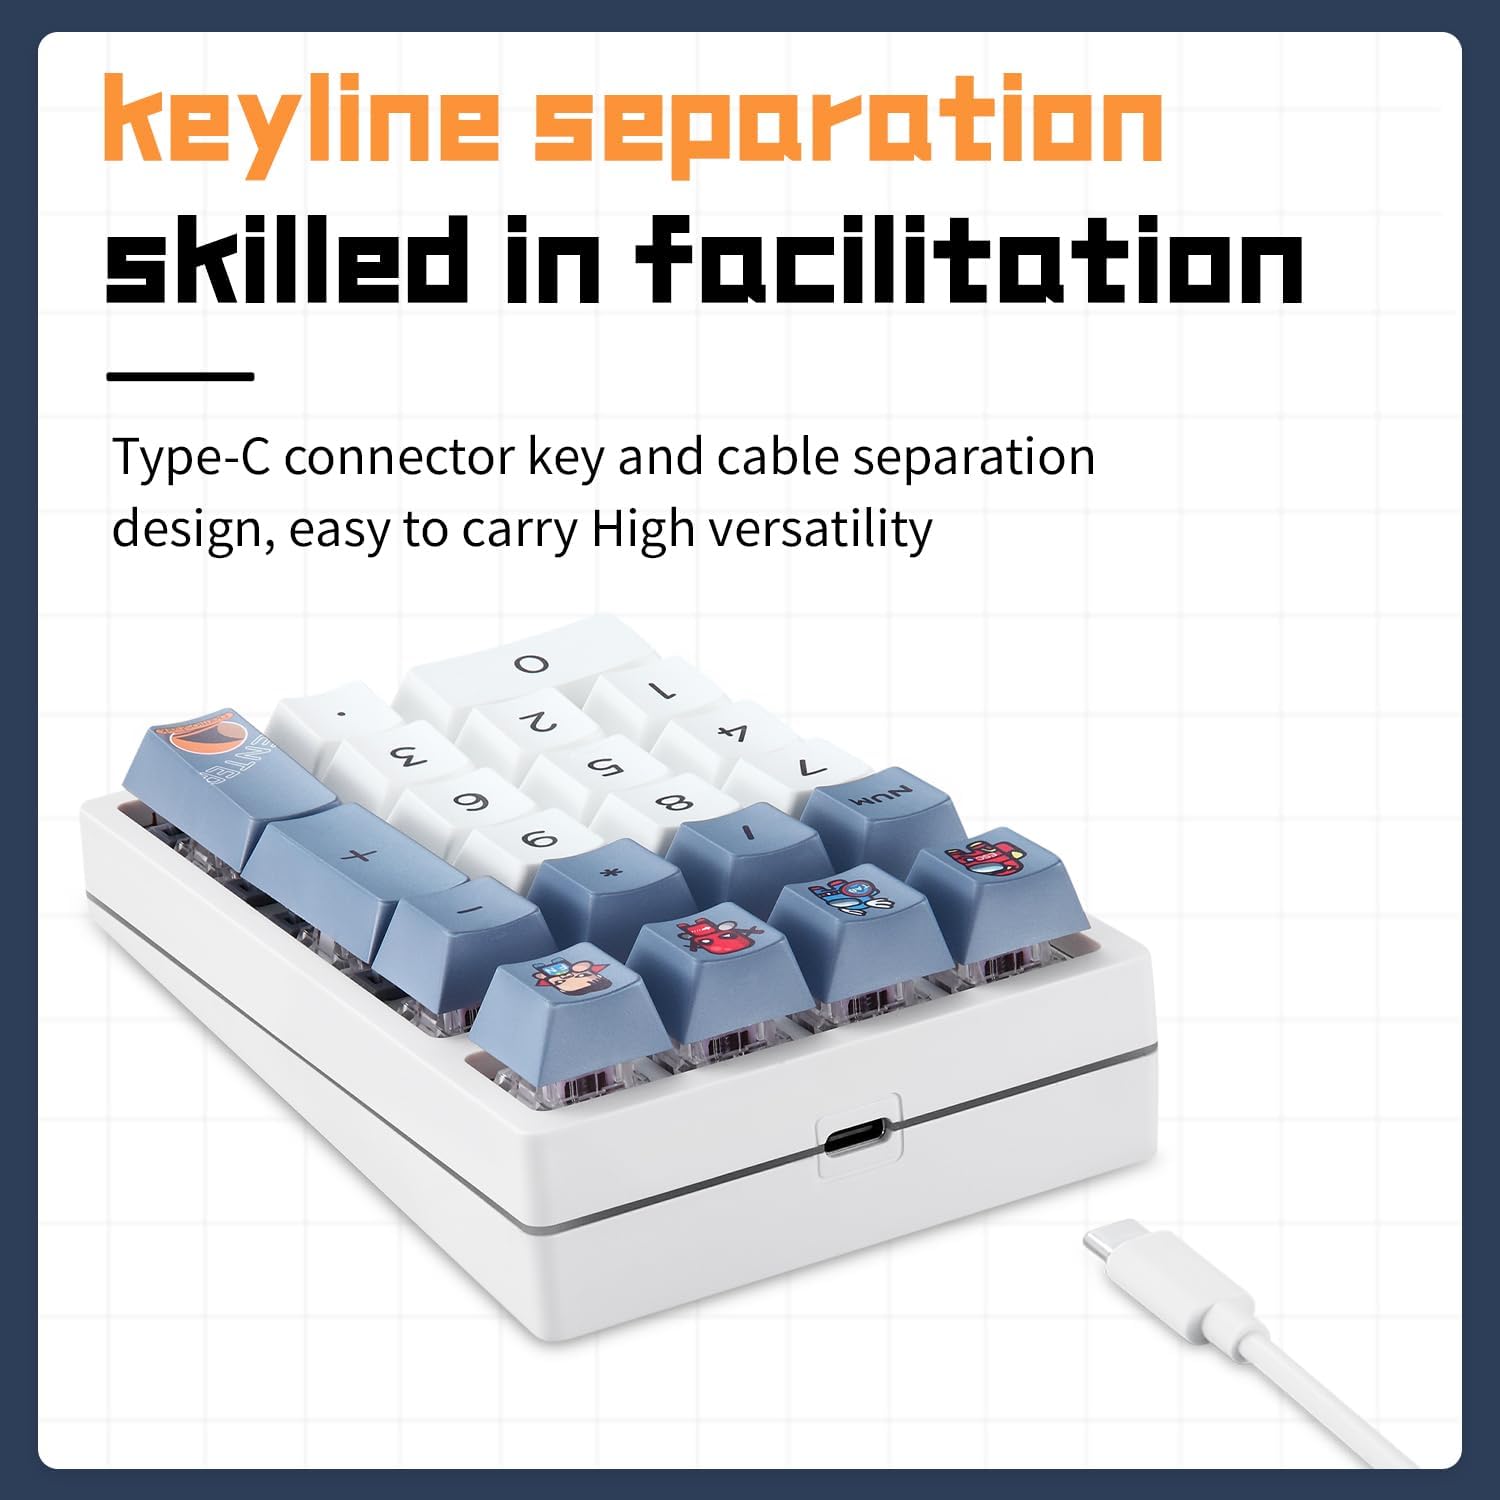
The Darmoshark K3 QMK keypad is designed for simple plug-and-play operation.
- Locate the USB Type-C port on the keypad.
- Connect one end of the provided Type-C cable to the keypad.
- Connect the other end of the cable to an available USB port on your computer (PC, laptop, or compatible device).
- The keypad should be automatically recognized by your operating system without requiring additional drivers.
4. Operating Instructions
4.1 RGB Backlight Control
The K3 QMK keypad supports 12 distinct RGB backlight models. To cycle through these modes or adjust brightness:
- Press the FN key in combination with specific keys to change backlight modes. Refer to the included quick start guide or the QMK/VIA software for detailed key combinations.
- Press the FN key in combination with other designated keys to adjust backlight brightness levels.
4.2 Hot-Swappable Switches
The keypad features hot-swappable Gateron switches, allowing you to easily replace individual switches without soldering. This enables customization of typing feel and sound. Use the provided shaft puller to carefully remove and insert switches.
4.3 Programmable Keys (QMK/VIA Customization)
The Darmoshark K3 QMK keypad is fully programmable using QMK firmware and VIA software. This allows for extensive customization of key functions, macros, and lighting effects.
QMK is an open-source community project for keyboard firmware. VIA is QMK firmware-based software that provides a graphical user interface for modifying key settings without recompiling firmware for every change.

To utilize VIA for customization, you may need to flash a compatible firmware to your keypad. Follow these steps:
- Download Firmware: Obtain the
darmoshark_k3_via.binfirmware file from the official VIA website or the QMK GitHub repository. Optionally, download the keymap JSON file for the K3 from the VIA GitHub (keyboards/v3/darmoshark/k3). - Install QMK Toolbox: Download and install the QMK Toolbox application from the QMK GitHub. This is an executable for Windows.
- Load Firmware: Open QMK Toolbox and load the downloaded
.binfirmware file. - Enter DFU Mode: Unplug the K3 keypad. While holding down the ESC key on the keypad, plug the keypad back into your computer. QMK Toolbox should display a confirmation message indicating a DFU device is connected.
- Flash Firmware: Click the "Flash" button in QMK Toolbox. Wait for the process to complete and for "Flash complete" to appear.
- Reconnect Keypad: Unplug the keypad and plug it back in normally.
- Launch VIA: Open the VIA web application in your browser. Click "Authorize Device", select your K3 keypad, and click "Connect".
- Load Definition (if needed): If VIA does not recognize the keypad, go to settings (gear icon), enable "Show design tab", then navigate to the design tab (paintbrush icon) and "Load definition" using the previously downloaded JSON file.
Once connected, you can remap keys, create macros, and configure lighting directly within the VIA interface.
4.4 Ergonomic Design
The K3 QMK features a stepped keycap design that positions your fingers at an optimal angle, reducing strain and fatigue during extended use. This ergonomic consideration contributes to a more comfortable typing experience.

4.5 Usage Scenarios
The versatile design and programmability of the K3 QMK make it suitable for a wide range of applications:
- Gaming: Assign complex macros or frequently used commands to individual keys.
- Office & Data Entry: Speed up numerical input for spreadsheets, accounting, or cashier operations.
- Programming & Design: Create custom shortcuts for software tools.
- Education: Assist students with quick calculations and data input.

5. Maintenance
To ensure the longevity and optimal performance of your Darmoshark K3 QMK keypad, follow these maintenance guidelines:
- Cleaning: Regularly clean the keypad with a soft, dry cloth. For deeper cleaning, you may use a can of compressed air to remove dust and debris from between the keycaps. Avoid using harsh chemicals or abrasive materials.
- Keycap Removal: If removing keycaps for cleaning or replacement, use a keycap puller to prevent damage to the keycaps or switches.
- Switch Replacement: When replacing switches, use the provided shaft puller and ensure the new switch is aligned correctly before pressing it into place to avoid bending the pins.
- Durability: The keypad is built with high-quality PBT keycaps and Gateron switches, rated for 50 million keystrokes, ensuring extreme durability under tough conditions.
6. Troubleshooting
If you encounter issues with your Darmoshark K3 QMK keypad, consider the following troubleshooting steps:
- Keypad Not Responding:
- Ensure the USB Type-C cable is securely connected to both the keypad and your computer.
- Try connecting the keypad to a different USB port on your computer.
- Test the keypad on another computer to rule out system-specific issues.
- RGB Backlight Not Working/Incorrect:
- Verify that the backlight is not turned off or set to the lowest brightness level using the FN key combinations.
- If using custom QMK/VIA settings, ensure the lighting configuration is correctly applied.
- QMK/VIA Software Issues:
- If the VIA software does not recognize the keypad out of the box, you may need to flash the VIA-compatible firmware as described in Section 4.3.
- Ensure you are using the latest version of QMK Toolbox and VIA software.
- Double-check that the keypad is in DFU mode when attempting to flash new firmware.
- Keys Not Registering:
- If a specific key is not working, carefully remove the keycap and switch using the provided tools. Inspect the switch pins for any bends or damage. Replace the switch if necessary.
- Ensure no debris is obstructing the switch mechanism.
7. Specifications
| Product Name | K3 QMK Digital Mechanical Keyboard |
| Product Dimensions | 132mm x 86mm x 42mm |
| Product Weight | 264g ± 10g |
| Number of Keys | 21 keys |
| Keystroke Life | 50 million cycles |
| Keyboard Type | High keycap step design |
| Operating Voltage | DC5V ± 5% |
| Maximum Current | 300mA |
| Connection Method | Wired (USB Type-C) |
| System Requirements | WINXP/WIN7/WIN8/WIN10/WIN11/MAC, Android/Linux |

8. Warranty and Support
For warranty information or technical support, please refer to the official Darmoshark website or contact your retailer. Keep your purchase receipt as proof of purchase for warranty claims.


