1. Introduction
The ANENG SL106 Soldering Iron Kit is a versatile and essential tool designed for various electronic repair, DIY projects, and general soldering tasks. Featuring an adjustable temperature range, quick heating capabilities, and a clear LCD digital display, this 60W soldering iron provides precise control and ease of use. The kit includes a comprehensive set of accessories to ensure you have everything needed to get started with your soldering endeavors.

Figure 1: Complete ANENG SL106 Soldering Iron Kit with accessories.
2. Safety Information
Always prioritize safety when operating the soldering iron. Failure to follow these guidelines may result in injury or damage to property.
- Electrical Safety: Ensure the power outlet is properly grounded. Do not use the soldering iron with wet hands or in damp environments. Disconnect from power when not in use or when changing tips.
- Heat Hazard: The soldering iron tip reaches very high temperatures (up to 520°C / 968°F). Always use the included stand to rest the iron when not actively soldering. Avoid touching the tip or metal parts of the iron. Allow the iron to cool completely before storing.
- Fume Inhalation: Soldering produces fumes that can be harmful. Work in a well-ventilated area or use a fume extractor.
- Eye Protection: Always wear safety glasses to protect your eyes from solder splashes or flying debris.
- Fire Prevention: Keep flammable materials away from the work area. Have a fire extinguisher or fire blanket readily available.
- Children and Pets: Keep the soldering iron and all accessories out of reach of children and pets.
3. Package Contents
Verify that all items listed below are included in your ANENG Soldering Iron Kit:
- 1 x ANENG SL106 Electric Soldering Iron (60W)
- 5 x Interchangeable Soldering Iron Tips (various shapes)
- 1 x Simple Soldering Iron Stand
- 1 x Cleaning Sponge
- 1 x Solder Wire Tube
- 1 x Tweezers
- 1 x Storage Bag
4. Setup
Follow these steps to prepare your soldering iron for use:
- Place on Stand: Position the simple soldering iron stand on a stable, heat-resistant surface.
- Connect Power: Insert the soldering iron's plug into a suitable power outlet. The LCD display will illuminate.
- Set Temperature: Use the '+' and '-' buttons on the handle to adjust the desired temperature. The digital display will show the set temperature.
- Preheat: Allow the soldering iron to heat up to the set temperature. This typically takes about 10-15 seconds due to its rapid heating ceramic core.
- Tin the Tip: Once heated, gently touch the tip of the soldering iron to the rosin (if using) and then apply a small amount of solder to coat the tip. This 'tins' the tip, improving heat transfer and preventing oxidation.
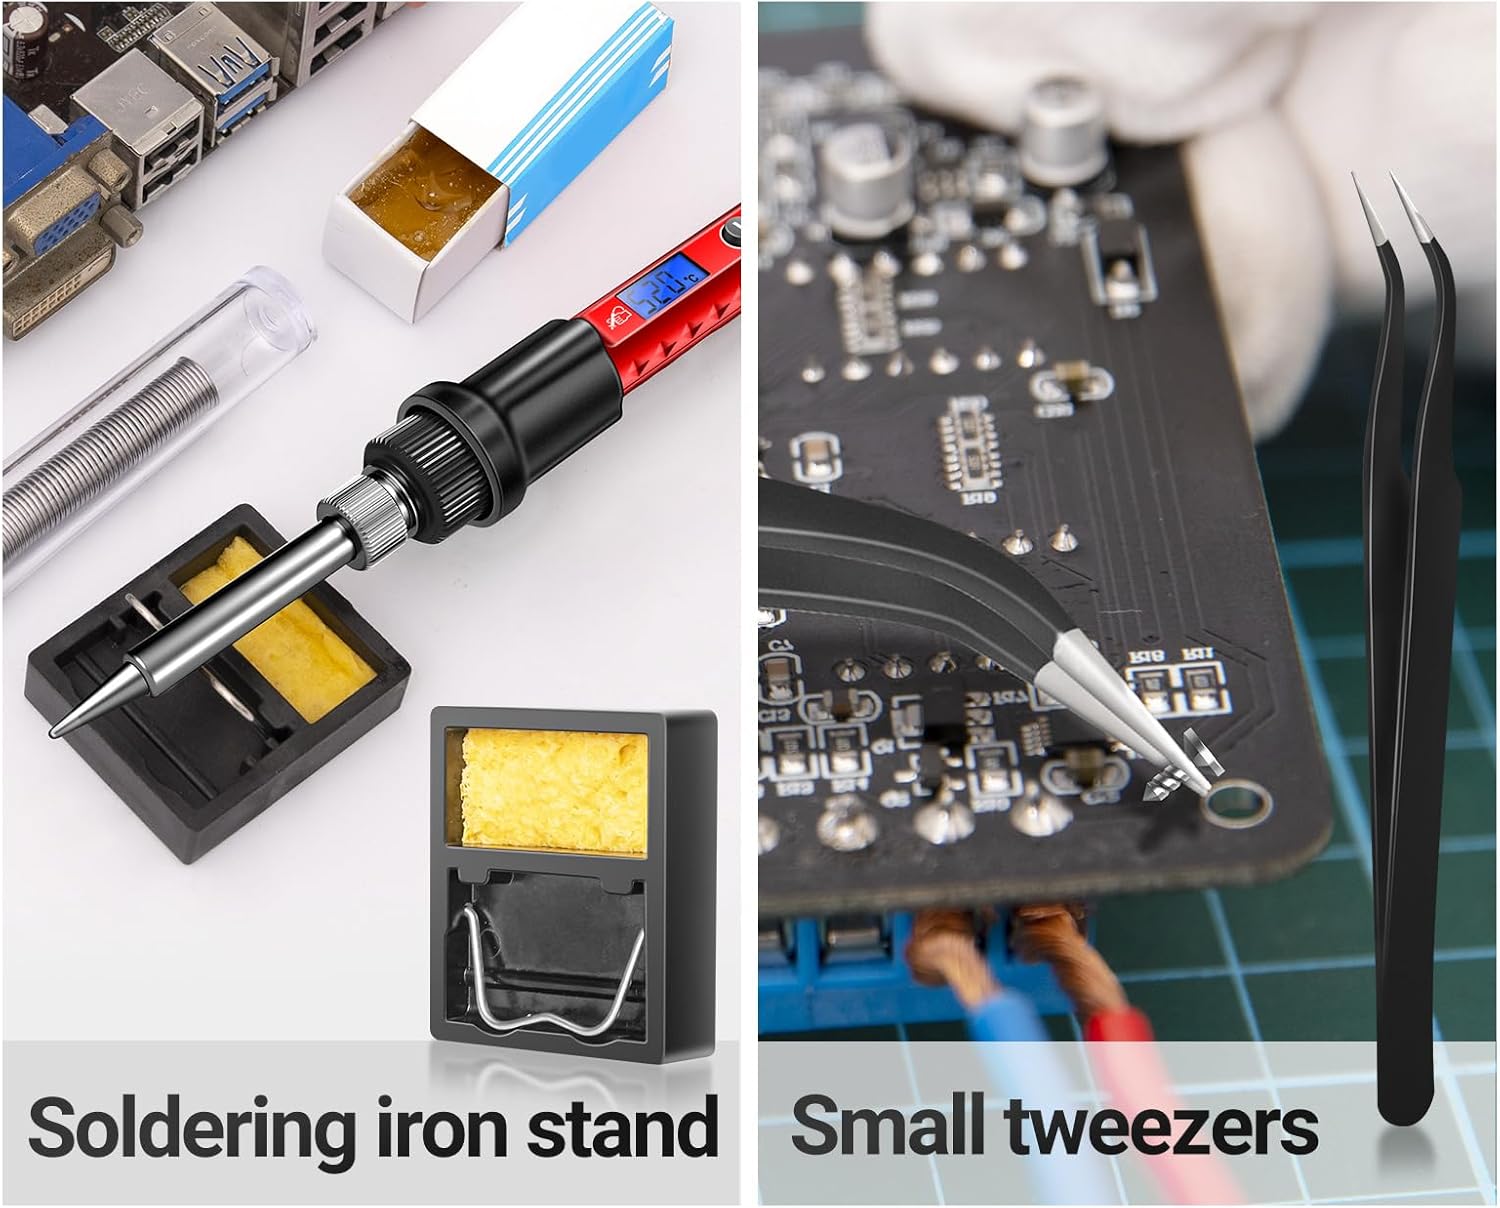
Figure 2: Simple steps for preparing and using the soldering iron.
5. Operating Instructions
5.1. Temperature Adjustment
The ANENG SL106 features an LCD digital display and push-buttons for precise temperature control. The temperature can be adjusted from 180°C (356°F) to 520°C (968°F).
- Press the '+' button to increase the temperature.
- Press the '-' button to decrease the temperature.
- The current temperature will be displayed on the LCD screen.

Figure 3: Temperature control buttons and digital display.
5.2. Soldering Process
Once the iron is heated and tinned:
- Clean Surfaces: Ensure the components and PCB pads to be soldered are clean and free of oxidation.
- Heat Joint: Place the soldering iron tip in contact with both the component lead and the PCB pad simultaneously. Allow a few seconds for the joint to heat up.
- Apply Solder: Touch the solder wire to the heated joint (not directly to the iron tip). The solder should melt and flow smoothly around the joint, forming a shiny, conical connection.
- Remove Solder and Iron: Once enough solder has flowed, first remove the solder wire, then remove the soldering iron. Avoid moving the component until the solder has solidified.

Figure 4: Soldering a circuit board, demonstrating quick heating.
5.3. Desoldering
For removing solder or components, the kit includes a solder straw (solder sucker) and tweezers.
- Using Solder Straw: Heat the solder joint with the iron until the solder melts. Quickly place the tip of the solder straw over the molten solder and press the release button to suck up the liquid solder. Repeat if necessary.
- Using Tweezers: For small electronic components, heat the solder joint until molten, then use the tweezers to gently lift or remove the component while the solder is still liquid.

Figure 5: Soldering iron stand and tweezers for component handling.
5.4. Replacing Soldering Iron Tips
The kit comes with 5 interchangeable soldering tips for different applications. Ensure the iron is cool before changing tips.
- Unscrew Sleeve: Carefully unscrew the metal sleeve that holds the tip in place.
- Remove Old Tip: Gently pull out the old tip.
- Insert New Tip: Insert the desired new tip into the heating element.
- Secure Sleeve: Screw the metal sleeve back on tightly to secure the new tip.

Figure 6: Variety of interchangeable soldering iron tips.
5.5. Official Product Video
Video 1: This official ANENG video demonstrates the features, setup, and various applications of the SL106 soldering iron kit, including temperature adjustment, soldering, and tip replacement.
6. Maintenance
Proper maintenance ensures the longevity and optimal performance of your soldering iron.
- Clean the Tip: Regularly clean the soldering iron tip using the included wet sponge. Wipe the tip before and after each use to remove excess solder and oxidation. A clean tip ensures efficient heat transfer.
- Tin the Tip After Use: Before storing, apply a small amount of fresh solder to the tip. This 'tins' the tip and protects it from oxidation during storage.
- Store Properly: Once completely cool, store the soldering iron and all accessories in the provided storage bag. This keeps components organized and protected from damage.

Figure 7: The convenient storage roll bag for organizing and protecting your kit.
7. Troubleshooting
Here are some common issues and their potential solutions:
| Problem | Possible Cause | Solution |
|---|---|---|
| Soldering iron not heating up. | Not plugged in; faulty power outlet; damaged heating element. | Check power connection; try a different outlet; contact support if damaged. |
| Solder not melting or poor solder joints. | Tip is dirty/oxidized; temperature too low; incorrect solder type. | Clean and re-tin the tip; increase temperature; ensure appropriate solder is used. |
| Excessive smoke during soldering. | Too much rosin; burning flux; dirty tip. | Use less solder/rosin; ensure good ventilation; clean tip. |
| Tip discolors or corrodes quickly. | Lack of tinning; high temperature for extended periods. | Always tin the tip; lower temperature when idle; replace tip if severely corroded. |
8. Specifications
| Feature | Detail |
|---|---|
| Brand | ANENG |
| Model Number | SL106 LCD & Taste |
| Wattage | 60 watts |
| Power Source | Corded Electric |
| Temperature Range | 180°C - 520°C (356°F - 968°F) |
| Display | Blue Backlit Digital LCD |
| Heating Core | Ceramic Heating Core |
| Handle Material | Silicone / Rubber |
| Special Feature | Portable, Adjustable Temperature |
| Item Weight | 9.2 ounces |
| Dimensions | 10.75 x 3.54 x 2.01 inches (Package) |
9. Warranty and Support
For warranty information, technical support, or any product-related inquiries, please contact ANENG customer service directly. Refer to the product packaging or the official ANENG website for the most up-to-date contact details.


