1. Introduction
Thank you for choosing the Loboo Motorcycle Phone Mount. This device is engineered to provide secure and stable phone support for your motorcycle, featuring advanced shock absorption and convenient charging capabilities. Please read this manual thoroughly before installation and use to ensure optimal performance and safety.

Figure 1: Loboo Motorcycle Phone Mount (13MM Pipe Diameter Edition)
2. What's in the Box
The Loboo Motorcycle Phone Mount (13MM Pipe Diameter Edition) includes the following components:
- Mobile phone holder body
- Screw adhesive
- 13mm pipe diameter clamp
- 3mm wrench
- Matching screws
- Spare Fuse
- Fuse Box
- Cable Tie

Figure 2: Included Components (Charging Version)
3. Product Features
- Magnetic Damping Structure: Reduces vibration intensity by increasing amplitude, suitable for long-term non-paved road driving, providing stable mobile phone support.
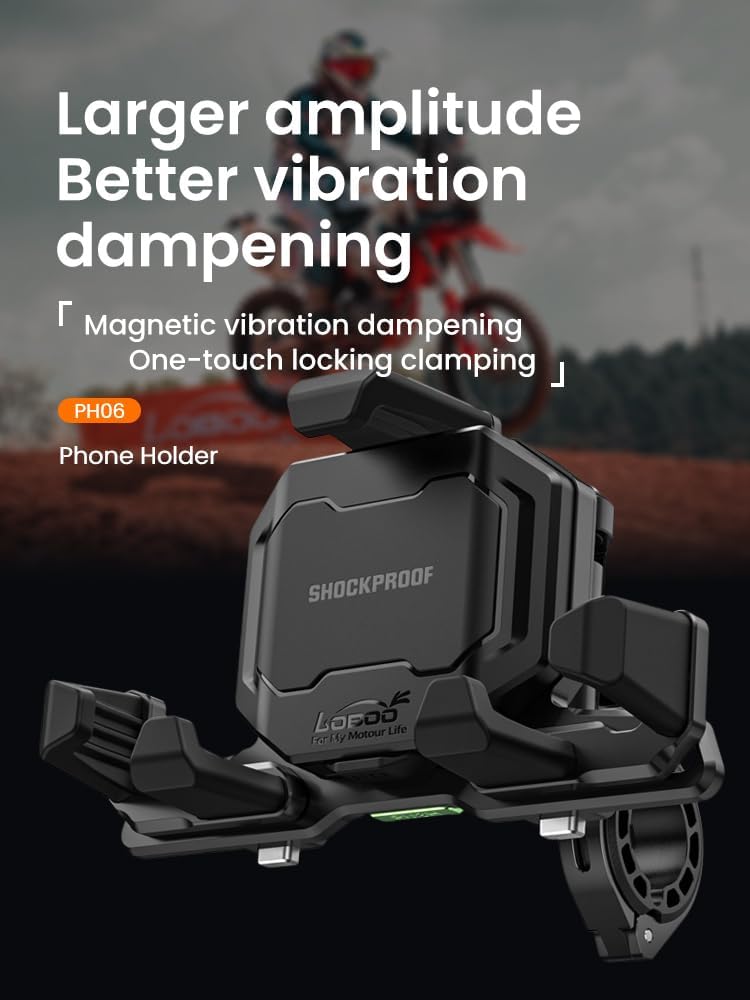
Figure 3: Magnetic Damping Mechanism
This feature ensures your phone remains stable even on rough terrain, minimizing vibrations for a clear view and secure hold.
- One-Click Locking Clamping Structure: Suitable for non-paved road driving, fast loading, and unable to shake off. It can be tightened without the use of tools, with simple and convenient operation.
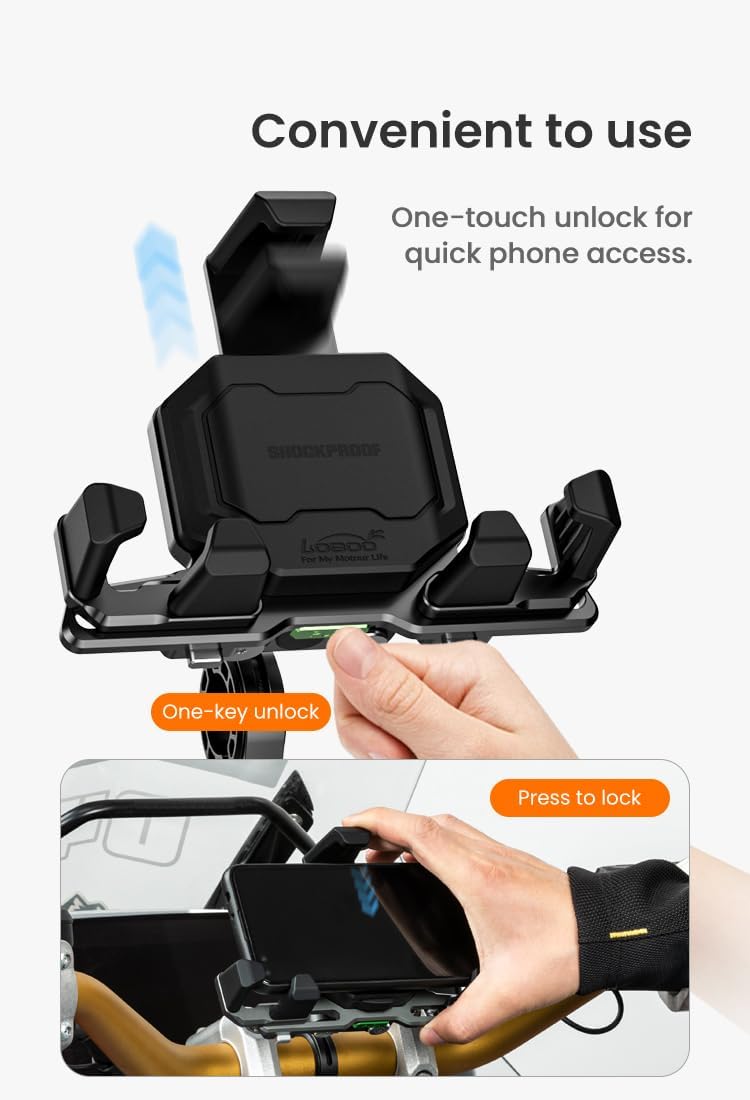
Figure 4: One-Click Locking for Secure Phone Placement
Effortlessly secure and release your phone with a single action, providing quick access while ensuring a firm grip.
- Mechanical Structure Rotation Angle Design: Rotation adjustment is more convenient and flexible, allowing users to freely adjust the angle of the phone holder.

Figure 5: Flexible Angle Adjustment
Customize your viewing angle for optimal visibility and comfort during your ride.
- Integrated Design of Wired Fast Charging and Wireless Charging: Supports both wired fast charging and wireless charging, PD wired charging is faster and more stable, and wireless charging is more convenient, providing more options for mobile phone charging.

Figure 6: Integrated Charging Capabilities
Keep your device powered throughout your journey with versatile charging options.
- Main Aluminum Alloy Material: Sturdy and reliable, not afraid of strong vibrations, durable and reliable, ensuring a good user experience and a long service life.

Figure 7: Durable Aluminum Alloy Build
Constructed from high-quality aluminum alloy for maximum durability and resistance to harsh riding conditions.
4. Specifications
| Attribute | Value |
|---|---|
| Brand | Loboo |
| Model Number | 13MM Pipe Diameter Edition |
| Mounting Type | Motorcycle Handle |
| Compatible Phone Models | Compatible with multiple phone models on the market (4.7''-7.2'' phones) |
| Special Features | Rotatable, Adjustable, Magnetic Damping, Wired/Wireless Charging |
| Color | Black |
| Input Voltage | DC 12-16V |
| Wired Charging Output Power | 5V=3A, 9V=3A, 12V=3A (36W MAX) |
| Wireless Charging Output Power | 5V=1A, 9V=1.1A, 12V=1.3A (15W MAX) |
| Main Material | Aluminum Alloy |

Figure 8: Detailed Product Parameters
5. Setup and Installation
The Loboo Motorcycle Phone Mount offers various installation options to suit different motorcycle types. The 13MM Pipe Diameter Edition is designed for handlebars with a 13mm pipe diameter. Ensure the vibration damping travel is vertical when installing.
General Installation Steps:
- Choose Mounting Location: Identify the appropriate handlebar section for the 13mm pipe diameter clamp.
- Attach Clamp: Securely attach the 13mm pipe diameter clamp to the handlebar.
- Mount Phone Holder Body: Connect the main phone holder body to the clamp.
- Adjust Angle: Adjust the tilt and angle of the phone holder for optimal viewing.
- Secure Fasteners: Tighten all screws to the recommended torque specifications (refer to video for details).
- Cable Management: Attach the cable clamp and reserve sufficient cable length to avoid jamming between rotating parts.
- Wiring (for Charging Version): Connect the red wire to the positive battery terminal, the black wire to the negative battery terminal, and the yellow wire to the vehicle's ACC wire.

Figure 9: Various Mounting Options (including 13MM Fixed Position)

Figure 10: Examples of Installed Phone Mounts
Installation Video Guide:
Video 1: PH06 Motorcycle Phone Holder Installation (Duration: 3:03). This video demonstrates the complete installation process for various mounting types, including the 13MM pipe diameter edition.
Video 2: PH06 Phone Holder Assemble (Duration: 2:44). This video details the assembly of the phone holder components before mounting it on the motorcycle.
6. Operating Instructions
Once installed, operating your Loboo phone mount is straightforward:
- Power On: Turn on your vehicle's ACC electric switch. The indicator lights on the phone holder will illuminate.
- Open Clamps: Press the bottom button on the phone holder. The clamps will automatically pop open.
- Adjust Width: Press the adjustment buttons on both sides at the bottom to adjust the width of the holder to fit your phone (compatible with 4.7''-7.2'' phones, including case, up to 12.5mm thickness).
- Insert Phone: Carefully insert your phone into the holder. Press firmly until the phone is securely clamped and does not come loose.
- Charging: If you have the charging version, wireless charging will activate automatically when the phone is correctly placed. Wired charging can be used via the integrated port.
- Remove Phone: Press the bottom button again to release the clamps and remove your phone.

Figure 11: Phone Compatibility and Dimensions
Video 3: PH02 Phone Holder Overview (Duration: 0:31). This video provides a general overview of the phone holder's features and operation, including phone insertion and removal.
7. Maintenance
To ensure the longevity and optimal performance of your Loboo Motorcycle Phone Mount, follow these maintenance guidelines:
- Regular Cleaning: Wipe down the mount with a soft, damp cloth to remove dust and grime. Avoid abrasive cleaners.
- Check Fasteners: Periodically inspect all screws and bolts to ensure they are securely tightened. Re-tighten if necessary, adhering to specified torque values.
- Cable Inspection: Check the charging cable for any signs of wear, fraying, or damage. Replace if necessary to prevent electrical issues.
- Moving Parts: Ensure the clamping and rotation mechanisms move smoothly. Do not force any parts.
8. Troubleshooting
If you encounter any issues with your Loboo Motorcycle Phone Mount, refer to the following common troubleshooting tips:
- Phone Not Charging:
- Ensure the vehicle's ACC electric switch is on.
- Verify all wiring connections (red to positive, black to negative, yellow to ACC) are secure.
- Check the fuse for the charging circuit. Replace if blown.
- Ensure your phone is properly aligned with the wireless charging coil or securely connected via wired charging.
- Confirm your phone supports wireless charging if attempting to use that feature.
- Phone Not Holding Securely:
- Ensure the one-click locking mechanism is fully engaged after inserting the phone.
- Adjust the width of the holder using the bottom adjustment buttons to ensure a snug fit for your phone.
- Check that all mounting screws are tightened to prevent wobbling.
- Excessive Vibration:
- Verify that the magnetic damping mechanism is installed vertically as shown in the installation video.
- Ensure all mounting points are securely fastened to the motorcycle.
Video 4: PH06 Phone Holder Shock Absorption Test (Duration: 0:24). This video demonstrates the effectiveness of the shock absorption feature.
Video 5: PH06 OFF-ROAD Testing (Duration: 1:20). This video showcases the phone holder's performance in challenging off-road conditions.
9. Warranty and Support
For warranty information and customer support, please refer to the documentation provided with your purchase or contact Loboo Motocycle Gears directly through their official channels. Keep your proof of purchase for any warranty claims.


