1. Introduction
This manual provides detailed instructions for the setup, operation, and maintenance of your REOLINK TrackMix LTE Trail + Solar Panel camera. Designed for outdoor use, this 4K dual-lens cellular security camera offers advanced features such as auto-tracking, hybrid zoom, and person/vehicle/animal detection, making it ideal for monitoring wildlife or remote properties without Wi-Fi access.
Please read this manual thoroughly before using the product to ensure proper installation and functionality.
2. Product Overview
The REOLINK TrackMix LTE Trail camera is a robust, solar-powered cellular security solution. It features dual lenses for both wide-angle and close-up views, 4K UHD video recording, and intelligent detection capabilities. Its 4G LTE connectivity ensures reliable monitoring in areas without traditional network infrastructure.

Figure 2.1: REOLINK TrackMix LTE Trail Camera with included Solar Panel and SIM card.
Key Features:
- 4K UHD Video & Dual Lens: Captures clear 4K footage with both wide-angle and telephoto views simultaneously.
- 6X Hybrid Zoom: Allows for detailed close-ups without loss of clarity.
- 360° Pan & Tilt with Auto Tracking: Automatically follows detected subjects across a wide area.
- Intelligent Detection: Distinguishes between people, vehicles, and animals to reduce false alerts.
- No-Glow IR Night Vision: Provides clear black & white night vision up to 10 feet using invisible infrared LEDs.
- 4G LTE Cellular Network: Operates independently of Wi-Fi, ideal for remote locations.
- Solar Powered: Equipped with a solar panel for continuous power supply.
- IP66 Waterproof: Designed to withstand various outdoor weather conditions.
- Versatile Storage Options: Supports microSD card (up to 128GB), FTP server, and optional Reolink Cloud.
3. Package Contents
Verify that all items listed below are included in your package. If any items are missing or damaged, please contact REOLINK customer support.

Figure 3.1: Contents of the REOLINK TrackMix LTE Trail + Solar Panel package.
- REOLINK TrackMix LTE Trail Camera
- REOLINK Solar Panel
- Quick Start Guide
- USB-C Cable
- Mounting Template
- Surveillance Sticker
- Strap
- SIM Card (Included Reolink SIM Card)
- Pack of Screws
4. Setup
Follow these steps to set up your REOLINK TrackMix LTE Trail camera.
4.1. Charging the Camera
Before initial use, fully charge the camera's internal battery using the provided USB-C cable and a 5V/2A power adapter (not included). The solar panel will maintain the charge once installed.
4.2. Inserting SIM Card and MicroSD Card
The camera requires a nano SIM card for cellular connectivity and a microSD card (up to 128GB, not included) for local storage. The SIM card included supports AT&T, Verizon, and T-Mobile in the US.
- Locate the SIM card slot and microSD card slot on the camera body. These are typically protected by a rubber cover secured with screws.
- Using a small Phillips head screwdriver, carefully remove the screws and open the cover.
- Insert the nano SIM card into the SIM card slot with the gold contacts facing down and the notched corner aligned correctly.
- Insert the microSD card into its designated slot until it clicks into place.
- Securely close the cover and tighten the screws to ensure the camera remains waterproof.

Figure 4.1: Inserting the SIM card and microSD card.
4.3. App Download and Activation
The REOLINK App is essential for controlling and viewing your camera. Activation of the included SIM card is done through the app.
- Download the REOLINK App from the App Store (iOS) or Google Play Store (Android). You can also scan the QR code provided in the Quick Start Guide or on the product packaging. Download REOLINK App
- Open the app and create an account or log in.
- Tap the '+' icon in the top right corner of the app to add your camera.
- Scan the QR code on the camera body or the SIM card packaging to add the device.
- Follow the on-screen guidance within the app to activate your SIM card and complete the camera setup. The app will automatically select the strongest signal from supported carriers.

Figure 4.2: Simple activation process via the REOLINK App.
4.4. Mounting the Camera and Solar Panel
Choose a suitable location for mounting, ensuring the solar panel receives adequate sunlight and the camera has a clear view of the desired monitoring area.
- Use the provided mounting template to mark drill holes on a tree or wall.
- Secure the camera bracket using the included screws. Alternatively, use the strap for tree mounting.
- Mount the solar panel in a position that maximizes sun exposure throughout the day. Connect the solar panel cable to the camera's charging port.
- Adjust the camera's angle for optimal coverage.

Figure 4.3: Camera and solar panel mounted on a tree.

Figure 4.4: Examples of versatile mounting options for the camera.
5. Operating the Camera
Once set up, you can operate your camera using the REOLINK App on your smartphone or the client software on your computer.
5.1. Live View and Playback
Access real-time video feeds and review recorded footage through the app.
- Open the REOLINK App and select your camera from the device list.
- Tap on the live view to see the current feed. You can switch between wide-angle and telephoto lenses.
- Use the playback function to review recorded events stored on the microSD card or cloud.

Figure 5.1: Dual lens views showing wide-angle and telephoto perspectives.

Figure 5.2: Reviewing recorded footage via the REOLINK App.
5.2. Pan, Tilt, and Zoom (PTZ)
Control the camera's orientation and zoom level remotely.
- In live view, use the directional controls within the app to pan (left/right) and tilt (up/down) the camera.
- Utilize the 6X hybrid zoom feature to get closer details of the monitored area.
5.3. Auto Tracking and Detection
The camera can automatically track moving subjects and send alerts based on detected events.
- Enable auto-tracking in the camera settings via the app. When motion is detected, the camera will automatically pan and tilt to follow the subject.
- Configure detection types (person, vehicle, animal) and sensitivity settings to receive relevant alerts.
- Receive instant push notifications on your smartphone when an event is detected.

Figure 5.3: Auto-tracking in action, following detected movement.

Figure 5.4: Intelligent detection capabilities for animals, persons, and vehicles.

Figure 5.5: Example of a push notification for detected activity.
5.4. Night Vision
The camera is equipped with 940nm no-glow infrared LEDs for clear night vision without emitting visible light.

Figure 5.6: Ultra-clear night vision capturing details in low-light conditions.
5.5. Storage Options
Recordings can be saved to a microSD card, an FTP server, or the optional Reolink Cloud service.
- MicroSD Card: For local storage, supporting up to 128GB.
- FTP Server: Configure FTP settings in the app to upload recordings to a remote server.
- Reolink Cloud: An optional subscription service for off-site storage of event recordings.

Figure 5.7: Flexible storage options for your camera recordings.
6. Maintenance
Regular maintenance ensures the longevity and optimal performance of your camera.
- Cleaning: Periodically clean the camera lenses and solar panel with a soft, damp cloth to remove dust, dirt, or debris that may obstruct the view or reduce charging efficiency. Avoid abrasive cleaners.
- Solar Panel Positioning: Ensure the solar panel remains in a location with maximum direct sunlight exposure. Trim any overgrown vegetation that might shade the panel.
- Firmware Updates: Check for and install firmware updates via the REOLINK App. Updates often include performance improvements, new features, and security enhancements.
- Battery Health: While the solar panel provides continuous power, monitor the battery level in the app, especially during prolonged periods of low sunlight.
- Waterproof Integrity: Periodically inspect the rubber covers for the SIM/microSD card slots and charging port to ensure they are securely closed and free from damage, maintaining the IP66 waterproof rating.
7. Troubleshooting
If you encounter issues with your camera, refer to the following common troubleshooting steps. For more detailed assistance, consult the official REOLINK support resources.
7.1. Camera Not Connecting to Cellular Network
- SIM Card: Ensure the SIM card is correctly inserted and activated through the REOLINK App. Verify that the SIM card has an active data plan.
- Signal Strength: Check the cellular signal strength in the camera's location via the app. If the signal is weak, try repositioning the camera or solar panel for better reception.
- Carrier Compatibility: Confirm that your SIM card carrier is supported by the camera (AT&T, Verizon, T-Mobile in the US).
- Reboot: Power off the camera, wait a few seconds, and then power it back on.
7.2. Battery Not Charging or Draining Quickly
- Solar Panel Connection: Ensure the solar panel cable is securely connected to the camera's charging port.
- Sunlight Exposure: Verify that the solar panel receives at least 2-3 hours of direct sunlight daily. Clear any obstructions (leaves, dirt) from the panel surface.
- Temperature: Extreme cold or heat can affect battery performance. The camera's operating temperature range is important to consider.
- High Activity: Frequent live viewing, extensive recording, or continuous auto-tracking will consume more battery power. Adjust detection sensitivity and recording schedules if necessary.
7.3. Motion Detection Issues
- Sensitivity Settings: Adjust the motion detection sensitivity in the app. Too low may miss events, too high may cause false alarms.
- Detection Zone: Ensure the detection zone is properly configured to cover the desired area and exclude irrelevant zones (e.g., busy roads).
- Obstructions: Clear any physical obstructions in front of the camera's PIR sensor.
- Firmware: Ensure the camera's firmware is up to date.
7.4. Image or Video Quality Issues
- Lens Cleanliness: Clean the camera lenses to remove smudges or dirt.
- Lighting: Ensure adequate lighting during the day. For night vision, confirm the IR LEDs are functioning.
- Network Speed: Poor cellular signal can affect live view and playback quality.
For further assistance, please refer to the official REOLINK User Guide (PDF) or contact REOLINK support.
8. Specifications
| Feature | Specification |
|---|---|
| Model Name | Trackmix LTE Trail +Solar Panel |
| Video Capture Resolution | 4K (8 MP) |
| Connectivity Technology | 4G LTE Cellular |
| Power Source | Solar Powered |
| Indoor/Outdoor Usage | Outdoor |
| Viewing Angle | 360 Degrees (Pan & Tilt) |
| Zoom Type | 6X Hybrid Zoom |
| Night Vision Range | 10 Feet (No-Glow IR) |
| Alert Type | Person/Vehicle/Animal Detection |
| Water Resistance Level | IP66 Waterproof |
| Material | Metal |
| Item Dimensions (L x W x H) | 9.45 x 7.8 x 7.8 inches |
| Item Weight | 5.94 pounds |
| Batteries | 1 Lithium Ion battery (included) |
9. Warranty and Support
REOLINK is committed to providing high-quality products and excellent customer service.
9.1. Warranty Information
- 30-Day Money Back Guarantee: If you are not satisfied with your purchase, you may return it within 30 days for a full refund.
- 2-Year Limited Warranty: The REOLINK TrackMix LTE Trail camera is covered by a 2-year limited warranty from the date of purchase, covering manufacturing defects.

Figure 9.1: REOLINK After-sales Support details.
9.2. Customer Support
- Online Support: REOLINK offers 24/7 online support for technical assistance and inquiries. Visit the official REOLINK website for contact information and FAQs.
- Transparency Verification: Each product includes a unique Transparency code. You can scan this code with the Transparency app to verify product authenticity and prevent counterfeits.
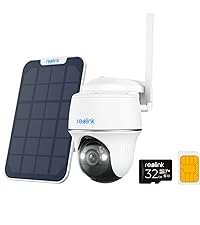
Figure 9.2: Transparency verification process.