1. Product Overview
The GreenYi 5G WiFi Wireless Solar Backup Camera offers a high-definition 1080P solution for rear and front vehicle monitoring. Designed for easy DIY installation, it features a built-in 4800mAh battery, solar charging capabilities, and connects wirelessly to your smartphone or tablet for display. Its versatile design allows for flexible mounting and adjustable viewing angles, making it suitable for various vehicle types including cars, vans, and RVs.

Image: The GreenYi 5G WiFi Wireless Solar Backup Camera, showing the camera unit, a remote control, and a smartphone displaying the camera feed with parking lines.
2. What's in the Box
- Solar WIFI Wireless License Plate Camera
- Remote Control with Charging Cable
- Screw Set
- Sticker
- User Manual (this document)
3. Setup and Charging
Initial Charging
Before final installation, ensure the camera's built-in 4800mAh battery is fully charged. You can charge it using the provided USB Type-C cable. The camera also features a solar panel for continuous charging when exposed to strong sunlight, extending its operational time.
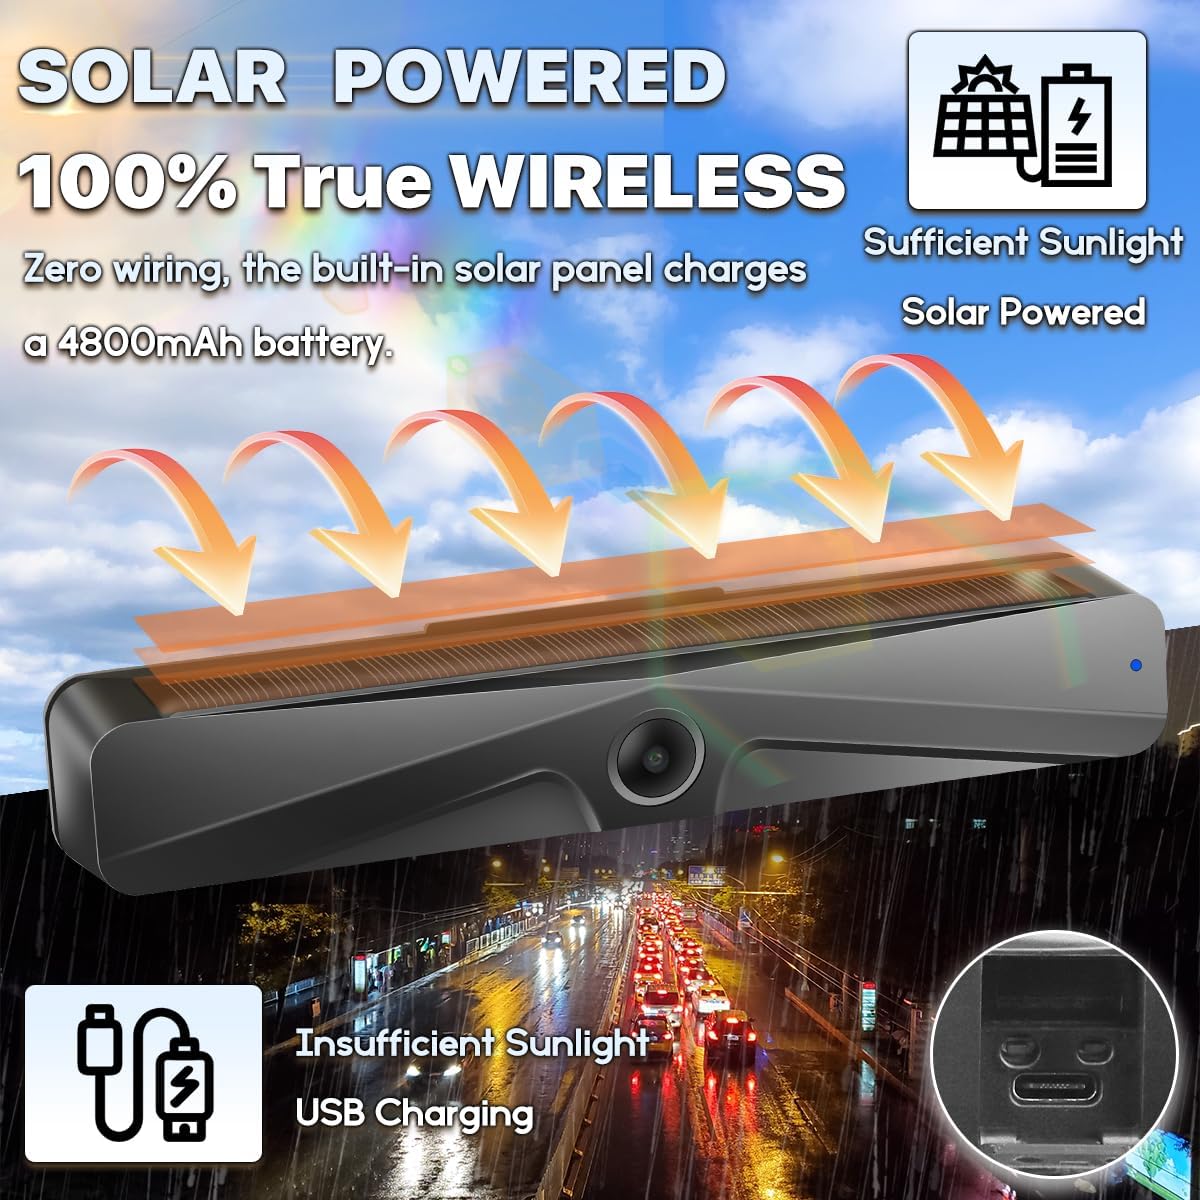
Image: Illustration of the camera's solar panel charging and a close-up of the USB Type-C charging port for when sunlight is insufficient.
App Download
To use the camera, download the 'Ebikam Driving' app from your device's app store:
(Search for 'Ebikam Driving' or scan the QR code provided in the physical user manual.)
4. Installation
The GreenYi camera is designed for a quick 3-minute DIY installation without the need for complex wiring or drilling.
Mounting
- Attach the camera to your vehicle's license plate using the provided screw set. The flexible design allows for installation at either the bottom or top of your license plate.
- The camera body can be adjusted up to 150 degrees to achieve the desired viewing angle.
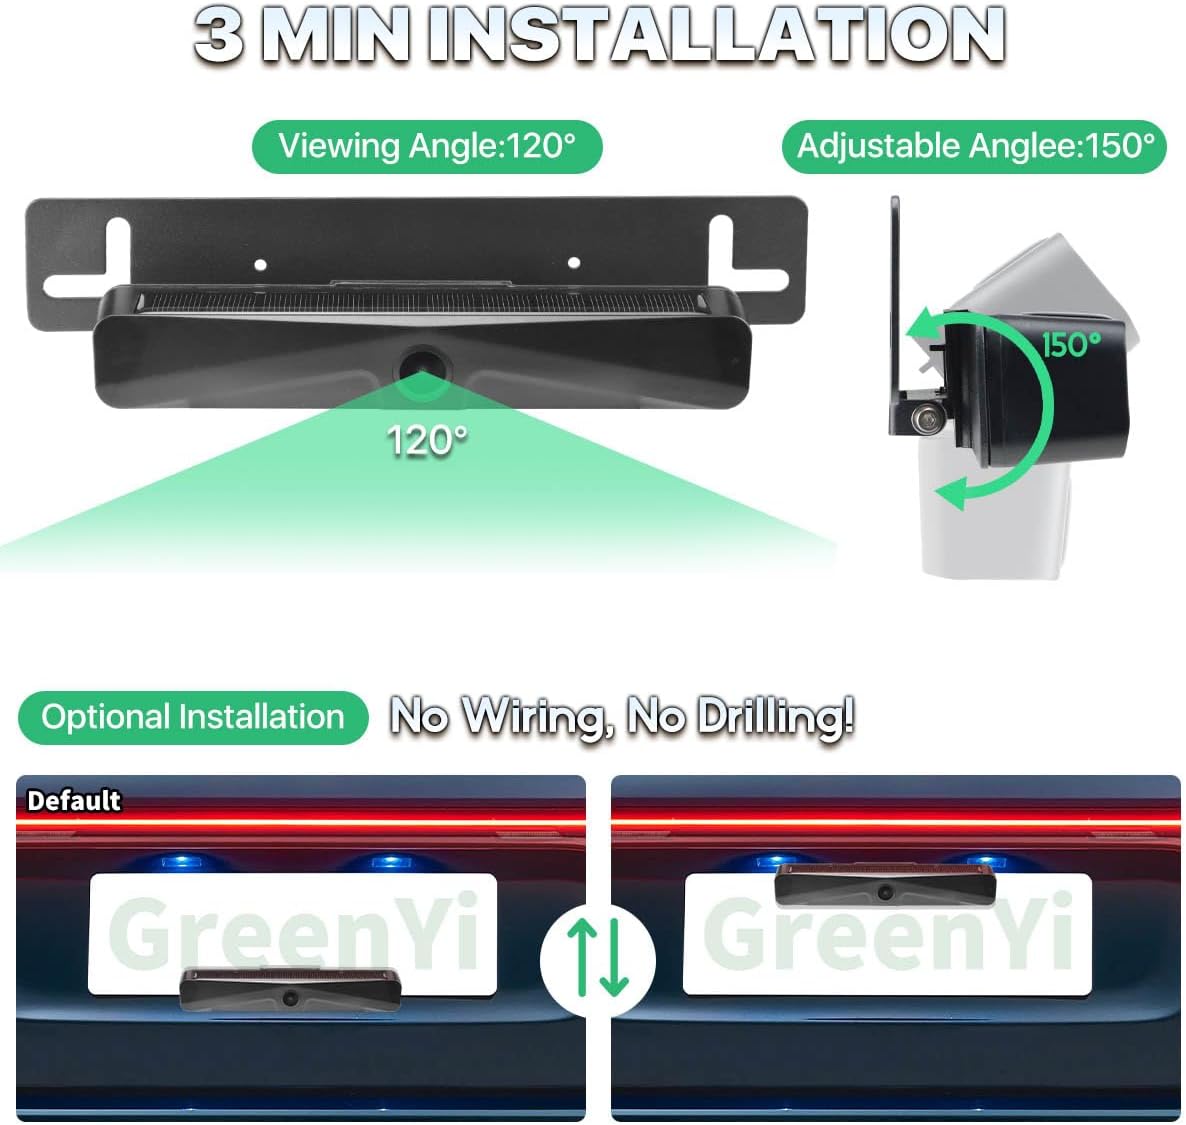
Image: Visual guide demonstrating the camera's 120-degree viewing angle and 150-degree adjustable angle, along with options for top or bottom license plate mounting.

Image: A graphic illustrating the time-saving benefit of wire-free installation (3 minutes) compared to traditional wired cameras (60 minutes).
5. App Usage & Connection
Connecting to the Camera
- Long press the switch button on the camera to power it on.
- On your smartphone or tablet, go to your Wi-Fi settings and connect to the Wi-Fi hotspot starting with 'Ebikam-xxxxxx'.
- Open the 'Ebikam Driving' app to view the camera image.
NOTE: Always perform a test connection before completing the final installation.

Image: A step-by-step visual guide on downloading the app, turning on the camera, connecting to its Wi-Fi hotspot, and viewing the live feed in the app.
Image Settings and Resolution
The camera provides a Full HD 1080P (1920x1080p) resolution for clear visuals. You can adjust the resolution within the app to 480P (720x480p), 720P (1280x720p), or 1080P (1920x1080p) based on your preference. The app also allows you to set the image as mirror or non-mirror, making it suitable for both front and rear camera use.

Image: A smartphone screen showing the camera's full HD 1080P resolution display, with adjustable resolution options.
Using Mobile Data with the App
Your phone can use internet even if the Wi-Fi has been connected to the camera's Wi-Fi. Just set it correctly:
- For iOS Devices: If you want to use your mobile network data while using the app, please set it in "WLAN & Cellular" and allow the app to use "WLAN & Cellular".
- For Android Devices: Please ignore the message "This WLAN network has no internet access. Connect anyway?" by clicking or skidding to somewhere else without pressing YES or NO. If you already pressed "YES", you can't use the mobile network data, but the camera will still work well. To reset it, ignore the connected Wi-Fi hotspot and reconnect.
If the setup still cannot be successful, please uninstall the app and reinstall it.

Image: A visual guide detailing how to configure iOS and Android devices to maintain internet access while connected to the camera's Wi-Fi.
6. Operating Instructions
Remote Control Functions
The included remote control provides convenient access to key camera functions:
- Power Button: Long press for 3 seconds to turn the camera on/off.
- Camera On/Off: Dedicated buttons to turn the camera on or off.
- Take Photo: Capture still images from the camera feed.
- Record Video: Start and stop video recording.

Image: A detailed diagram of the remote control, highlighting its antenna, Type-C charging port, function indicator light, and buttons for power, photo, and video recording.
Real-time Display
The camera transmits a wireless digital signal to your connected device, providing a real-time display for safer parking and maneuvering. For optimal transmission distance, maintain a range of about 20-26 feet. Beyond this range, the signal may weaken or fade.

Image: A graphic illustrating the wireless signal transmission from the camera to a smartphone, emphasizing zero interference within the optimal range.
Viewing and Saving Media
The Ebikam Driving APP allows you to view the live camera feed, as well as download and save images and videos directly to your phone.

Image: A smartphone screen displaying a gallery of images and videos captured and stored within the Ebikam Driving app.
7. Maintenance
- Cleaning: Gently wipe the camera lens and solar panel with a soft, damp cloth to ensure clear vision and efficient solar charging. Avoid abrasive cleaners.
- Battery Care: While the solar panel provides continuous charging, it is recommended to fully charge the camera via USB-C periodically, especially if the vehicle is parked indoors or in low-light conditions for extended periods.
- Storage: If storing the camera for a long time, ensure it is fully charged and turn it off to preserve battery life.
- Security: The camera can be easily removed from its mounting bracket if you are concerned about theft.
8. Troubleshooting
| Issue | Possible Cause | Solution |
|---|---|---|
| Camera not powering on. | Low battery. | Charge the camera fully using the USB Type-C cable. |
| Cannot connect to camera Wi-Fi. | Camera not powered on; incorrect Wi-Fi selection. | Ensure camera is powered on. Select the correct 'Ebikam-xxxxxx' Wi-Fi network. Try forgetting the network and reconnecting. |
| No image or frozen image in app. | Poor Wi-Fi signal; app glitch. | Ensure device is within 20-26 feet of camera. Close and reopen the app. Restart the camera. Reinstall the app if issues persist. |
| Solar charging is slow or ineffective. | Insufficient sunlight; dirty solar panel. | Ensure camera is exposed to direct, strong sunlight. Clean the solar panel. Use USB-C charging for faster results. |
| Remote control not working. | Remote battery low; not paired. | Charge the remote control. Refer to the manual for remote pairing instructions if applicable (not detailed in provided info). |
9. Specifications
- Product Dimensions: 9 x 1.22 x 1.22 inches
- Item Weight: 12.8 ounces
- Item Model Number: GreenYi-243
- Battery: 1 Lithium Ion battery (included), 4800mAh
- Special Features: Built-in Battery, Remote Control, Solar Panel Charging, WIFI Wireless Connection
- Display Technology: LED (for compatible devices)
- Other Display Features: Wireless
- Color: Black
- Screen Size: 6 Inches (for compatible devices)
- Lux Rating: 0.1
- Compatible Devices: Smartphone, tablet, iPhone, iPad
- Installation Type: Surface Mount
- Video Capture Resolution: 1920*1080p (adjustable to 480P, 720P)
- Voltage: 5 Volts
- Optical Sensor Technology: CMOS
10. Warranty and Support
For warranty information and customer support, please refer to the contact details provided on the product packaging or the official GreenYi website. Keep your purchase receipt for warranty claims.