Introduction
This manual provides essential information for the safe and effective operation of your 10-Amp Car Battery Charger. This intelligent, fully automatic charger is designed to maintain and charge various 12V and 24V lead-acid batteries, including Calcium, Gel, AGM, Wet, and EFB types. It features microprocessor control, multiple safety protections, and advanced charging modes to ensure optimal battery health and longevity.
Key features include:
- 10-Amp (12V) and 5-Amp (24V) quick charging.
- 7-stage automatic charging process.
- Temperature compensation for hot and cold climates.
- Pulse repair function for sulfated batteries.
- Float/trickle charge mode for long-term maintenance.
- LCD display for real-time charging status.
- Multiple safety protections: reverse polarity, overcharge, short circuit, overcurrent, cooling system, fireproof material.
Important Safety Information
Please read all safety warnings and instructions before using this product. Failure to follow these instructions may result in electric shock, fire, or serious injury.
- Do not charge non-rechargeable batteries.
- Do not expose the charger to rain or snow.
- Do not operate the charger if it has received a sharp blow, been dropped, or otherwise damaged.
- Ensure proper ventilation during charging.
- Always connect the output clips to the battery before plugging the charger into the power outlet. Disconnect in reverse order.
- Keep out of reach of children.
- Wear eye protection when working with batteries.
- This charger is designed for 12V and 24V lead-acid batteries only.
Product Overview
Familiarize yourself with the components of your battery charger.

Figure 1: Overall view of the 10-Amp Car Battery Charger, showing the main unit, power cord, and battery clamps.
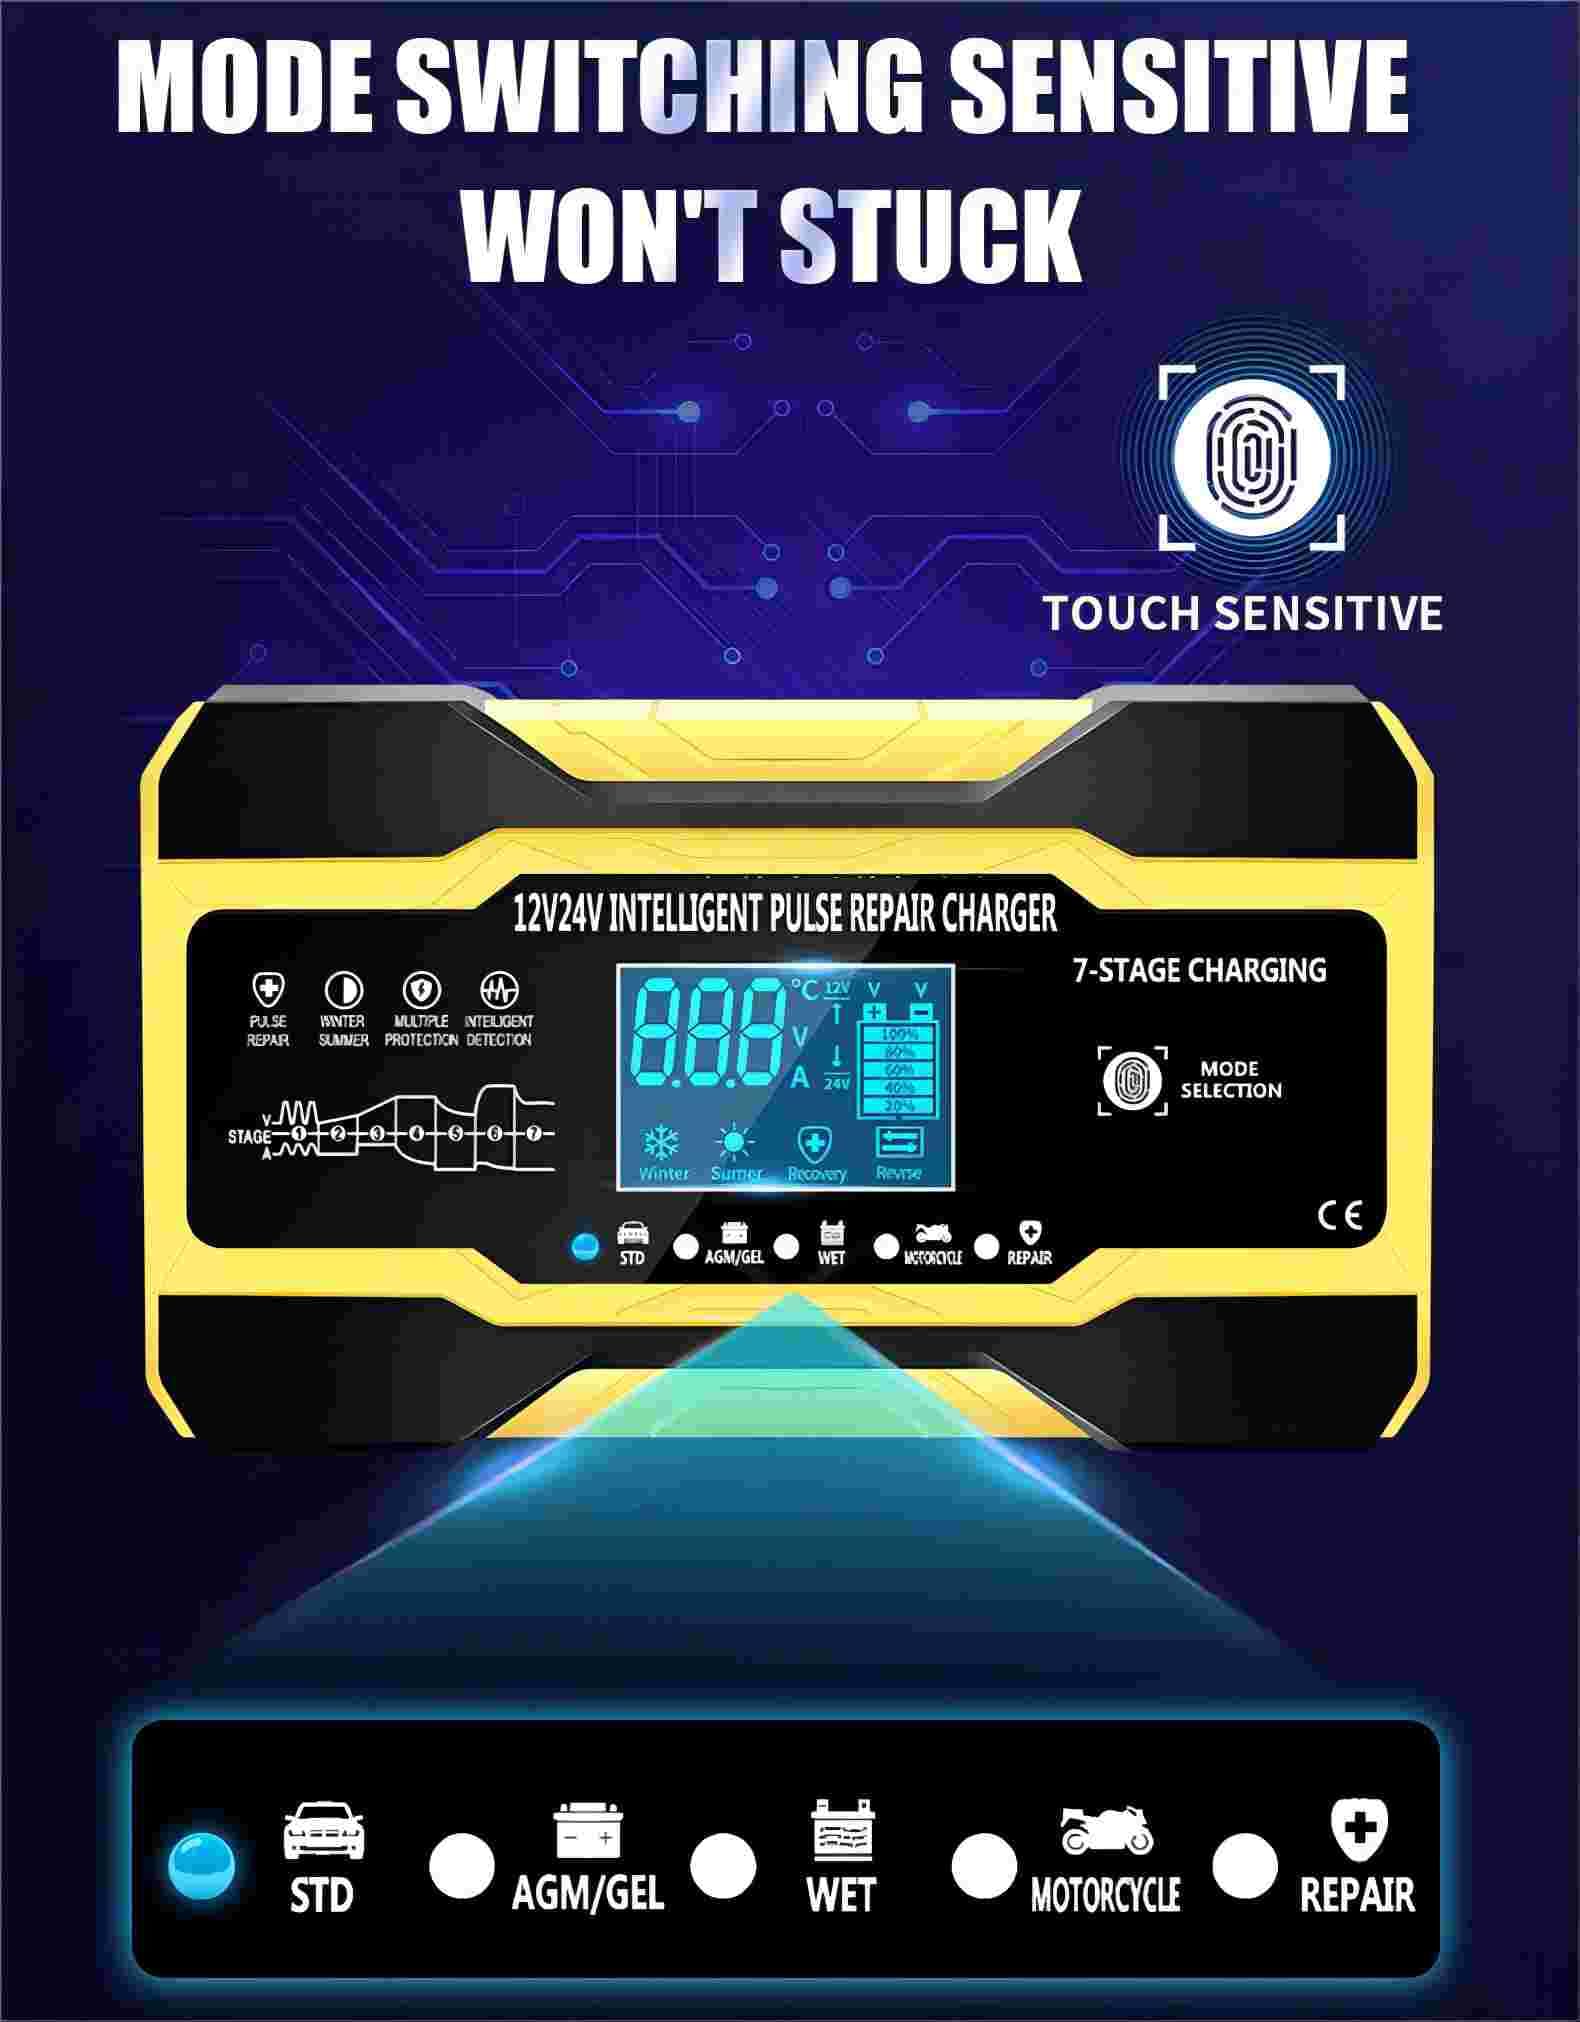
Figure 2: Detailed view of the charger's control panel, featuring the LCD display, mode selection button, and indicators for various charging modes (STD, AGM/GEL, WET, MOTORCYCLE, REPAIR).
Key Components:
- LCD Display: Shows voltage, current, temperature, charge percentage, and mode.
- Mode Selection Button: Touch-sensitive button to cycle through charging modes.
- Battery Clamps: Red (+) and Black (-) for connecting to battery terminals.
- Power Cord: For connecting to AC power outlet.
- Cooling Fan: Located on the side for heat dissipation.
Setup and Connection
- Prepare the Battery: Ensure the battery terminals are clean and free of corrosion. If charging a battery in a vehicle, ensure the vehicle is turned off and in park/neutral with the parking brake engaged.
- Connect Battery Clamps:
- Connect the RED (+) positive clamp to the positive (+) battery terminal.
- Connect the BLACK (-) negative clamp to the negative (-) battery terminal.
- For vehicle batteries: If connecting to a battery installed in a vehicle, connect the negative clamp to the vehicle chassis away from the battery and fuel line if the negative terminal is grounded to the chassis. Consult your vehicle's manual for specific instructions.
- Connect to Power: Plug the charger's power cord into a standard 110-220V AC, 50-60Hz electrical outlet. The charger will automatically detect the battery voltage (12V or 24V) and begin the charging process.
- Initial Display: The LCD display will illuminate, showing current battery voltage, temperature, and charging status.
Operating Instructions
The charger operates automatically, but you can select specific modes for optimal charging.
Mode Selection
Press the "MODE SELECTION" touch button to cycle through the available charging modes:
- STD (Standard): For standard lead-acid batteries.
- AGM/GEL: For AGM (Absorbed Glass Mat) and Gel batteries.
- WET: For wet cell batteries.
- MOTORCYCLE: For smaller 12V motorcycle batteries, also used for trickle charging.
- REPAIR: Pulse repair mode for desulfating and restoring old batteries.
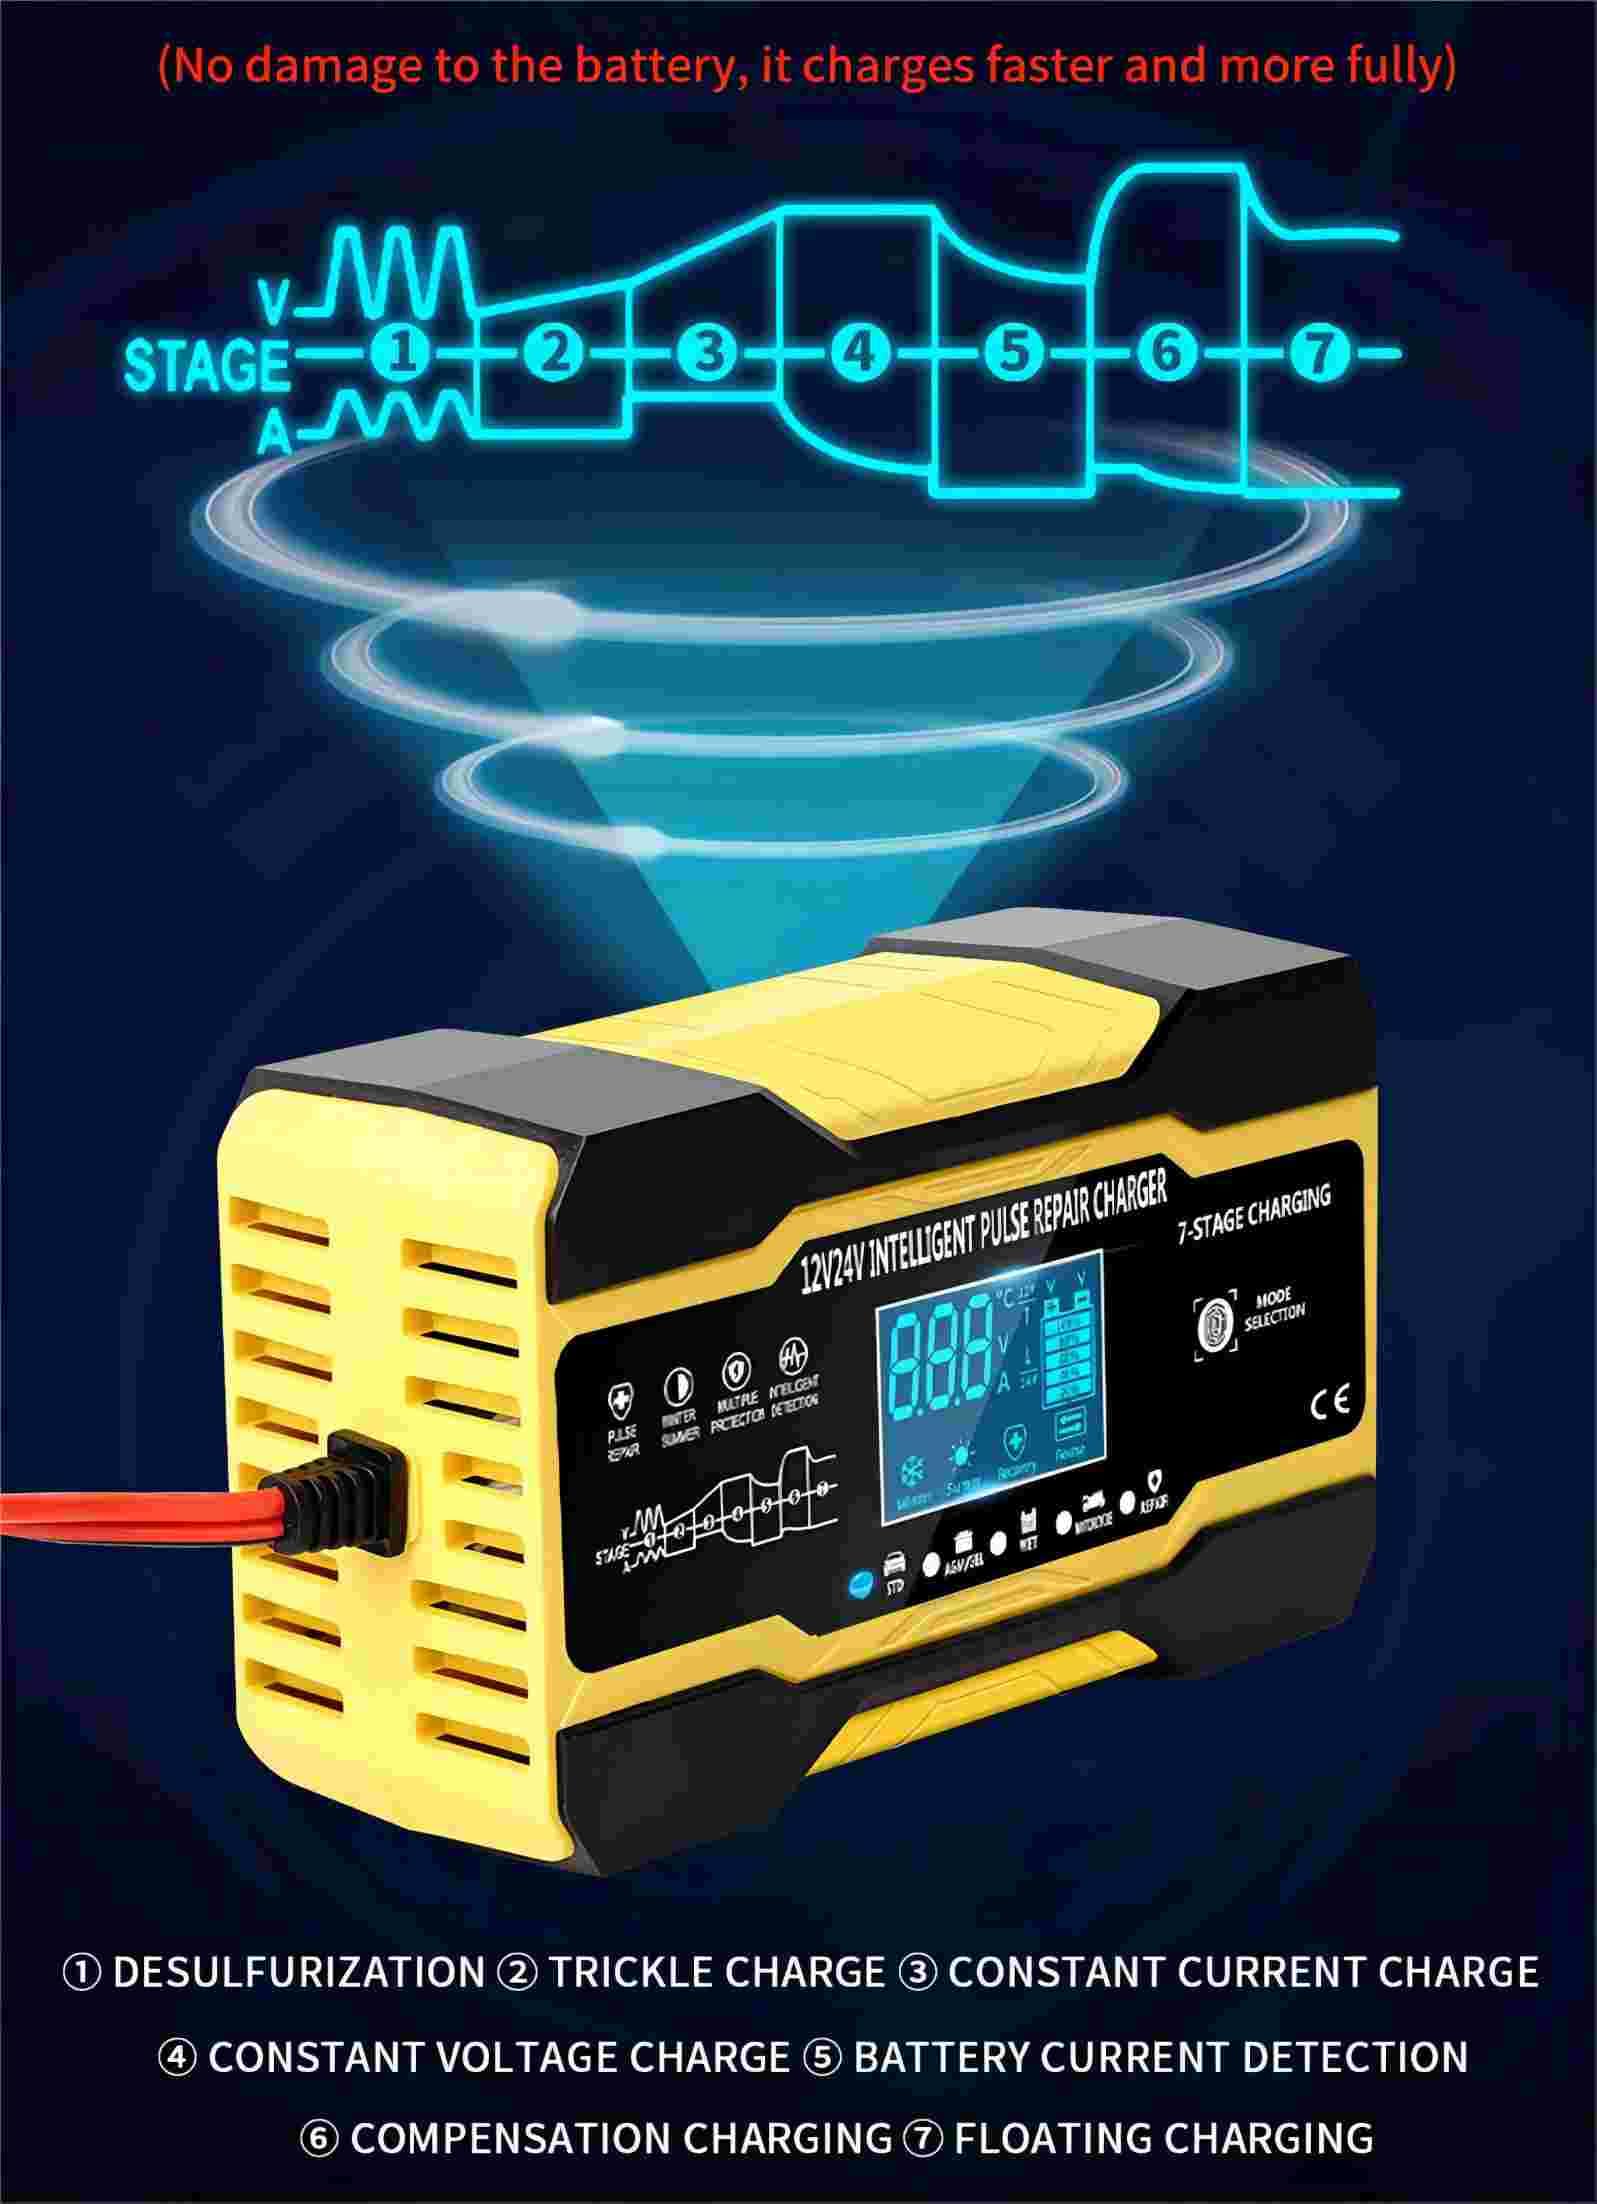
Figure 3: The 7-stage charging process, including Desulfurization, Trickle Charge, Constant Current Charge, Constant Voltage Charge, Battery Current Detection, Compensation Charging, and Floating Charging.
7-Stage Automatic Charging Process
The charger employs a sophisticated 7-stage charging process to optimize battery performance and lifespan:
- Desulfurization: Uses pulse voltage to break down lead sulfate crystals in sulfated batteries.
- Trickle Charge: Initial low current charge for deeply discharged batteries.
- Constant Current Charge: Charges the battery at a constant high current until it reaches a certain voltage.
- Constant Voltage Charge: Charges at a constant voltage, with current gradually decreasing.
- Battery Current Detection: Monitors battery current to ensure optimal charge.
- Compensation Charging: Fine-tunes the charge based on battery condition.
- Floating Charging: Maintains the battery at full charge with a low, constant voltage, preventing overcharge.
Temperature Compensation (Summer/Winter Mode)
The charger automatically adjusts charging parameters based on ambient temperature to prevent overcharging in hot conditions and ensure full charge in cold conditions.
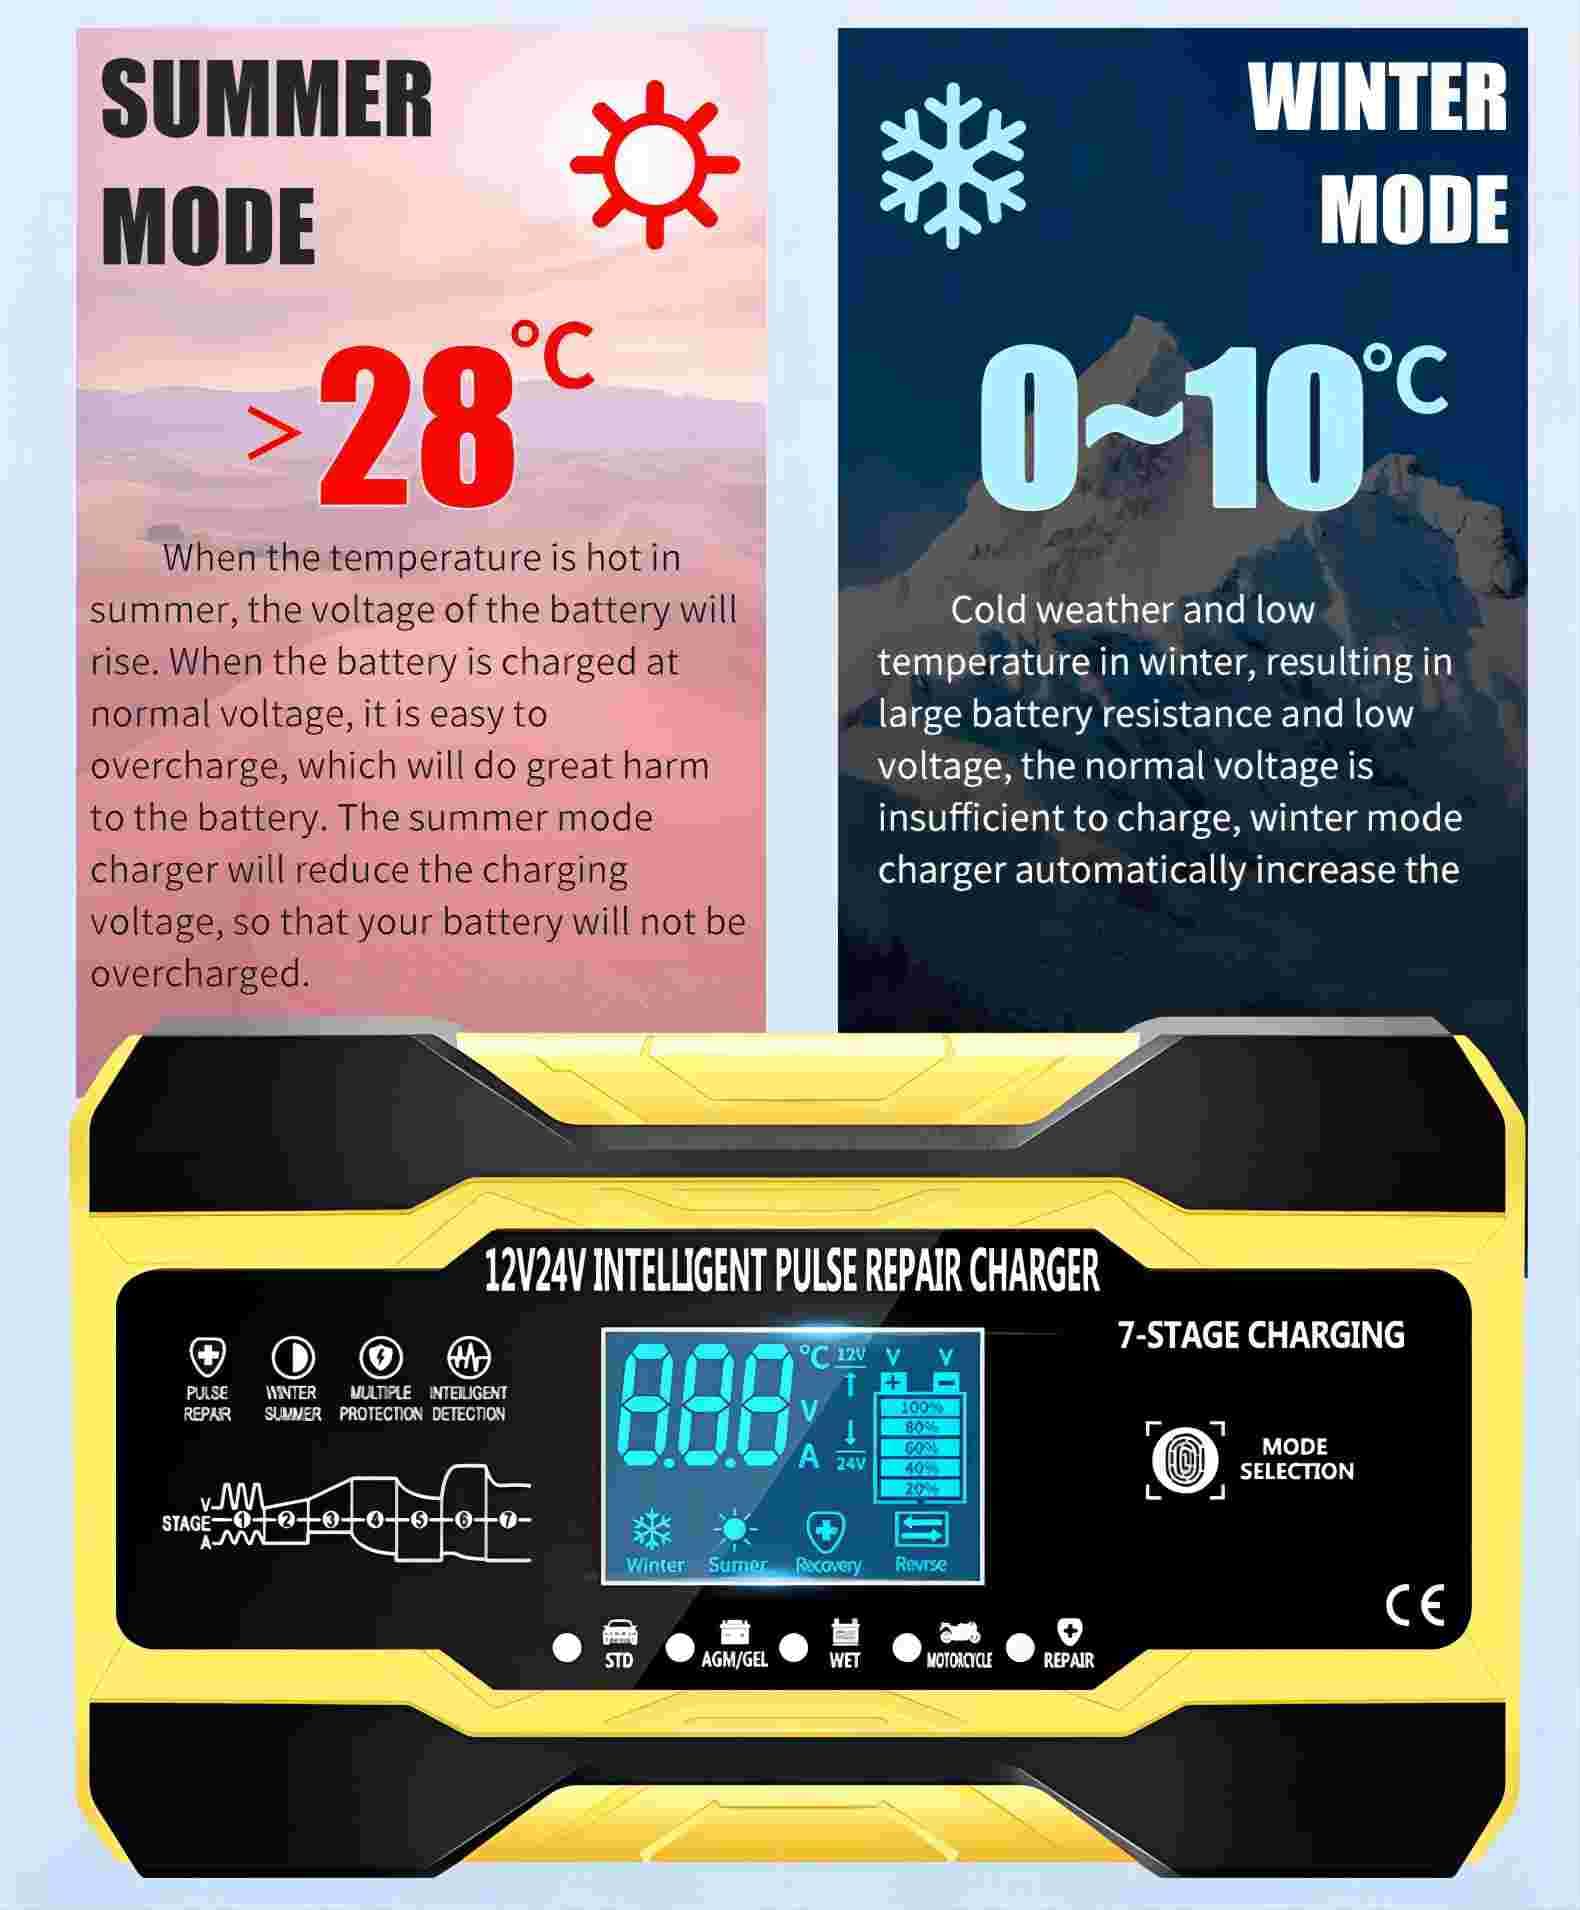
Figure 4: Automatic temperature compensation. In Summer Mode (>28°C), charging voltage is reduced. In Winter Mode (0-10°C), charging voltage is increased.
- Summer Mode (>28°C): When the temperature is high, the charger reduces the charging voltage to prevent overcharging and damage to the battery.
- Winter Mode (0-10°C): In cold weather, battery resistance increases. The charger automatically increases the charging voltage to ensure the battery receives a full charge.
Pulse Repair Function
The "REPAIR" mode utilizes pulse technology to detect and restore lost battery performance by addressing sulfation and acid stratification. This can extend battery life and improve starting power. Note: This function cannot activate or charge totally dead batteries.
Float/Trickle Charge Mode
For long-term battery maintenance, especially during winter or extended storage:
- First, fully charge the battery using the appropriate mode (STD/AGM/GEL/WET). The display will show "FUL" when complete.
- Then, switch the charger to "MOTORCYCLE" mode. The charger will automatically enter trickle charging mode, maintaining the battery's charge without overcharging.
Maintenance
- Cleaning: Disconnect the charger from power and the battery before cleaning. Wipe the exterior with a soft, damp cloth. Do not use harsh chemicals or abrasives.
- Storage: Store the charger in a cool, dry place when not in use. Ensure cables are neatly coiled and not kinked.
- Cable Inspection: Periodically inspect the power cord and battery clamps for any signs of damage, fraying, or corrosion. Do not use the charger if any part is damaged.
- Battery Terminals: Keep battery terminals clean to ensure good electrical contact.
Troubleshooting
| Problem | Possible Cause | Solution |
|---|---|---|
| Charger not turning on. | No power from outlet; loose connection; internal fault. | Check power outlet; ensure power cord is securely plugged in; contact support if problem persists. |
| "FUL" displayed but battery not fully charged. | Battery may be faulty or deeply sulfated; incorrect mode selected. | Try "REPAIR" mode; test battery with a load tester; ensure correct mode is selected for battery type. |
| Charger displays "Reverse" or error. | Reverse polarity connection. | Disconnect from power, then reconnect clamps correctly (Red to +, Black to -). |
| Charger gets hot during operation. | Normal operation; poor ventilation; excessive load. | Ensure adequate ventilation around the charger; this is normal for high-current charging. The charger has thermal protection. |
| Pulse repair not working. | Battery is completely dead or severely damaged. | The repair function cannot revive totally dead batteries. Battery may need replacement. |
Specifications
| Feature | Detail |
|---|---|
| Model | RJ-C121001A |
| Input Voltage | 110-220V AC, 50-60Hz |
| Output Voltage | 12V / 24V Auto-detection |
| Output Current | 12V 10A, 24V 5A |
| Battery Types | Lead-Acid (Calcium, Gel, AGM, Wet, EFB) |
| Charging Stages | 7-Stage Automatic |
| Thermal Protection | 65°C +/- 5°C |
| Dimensions | 15.75 x 6.1 x 9.4 cm |
| Compliance | CE, FC, Rohs, UL |
| Shell Material | ABS Flame Retardant |
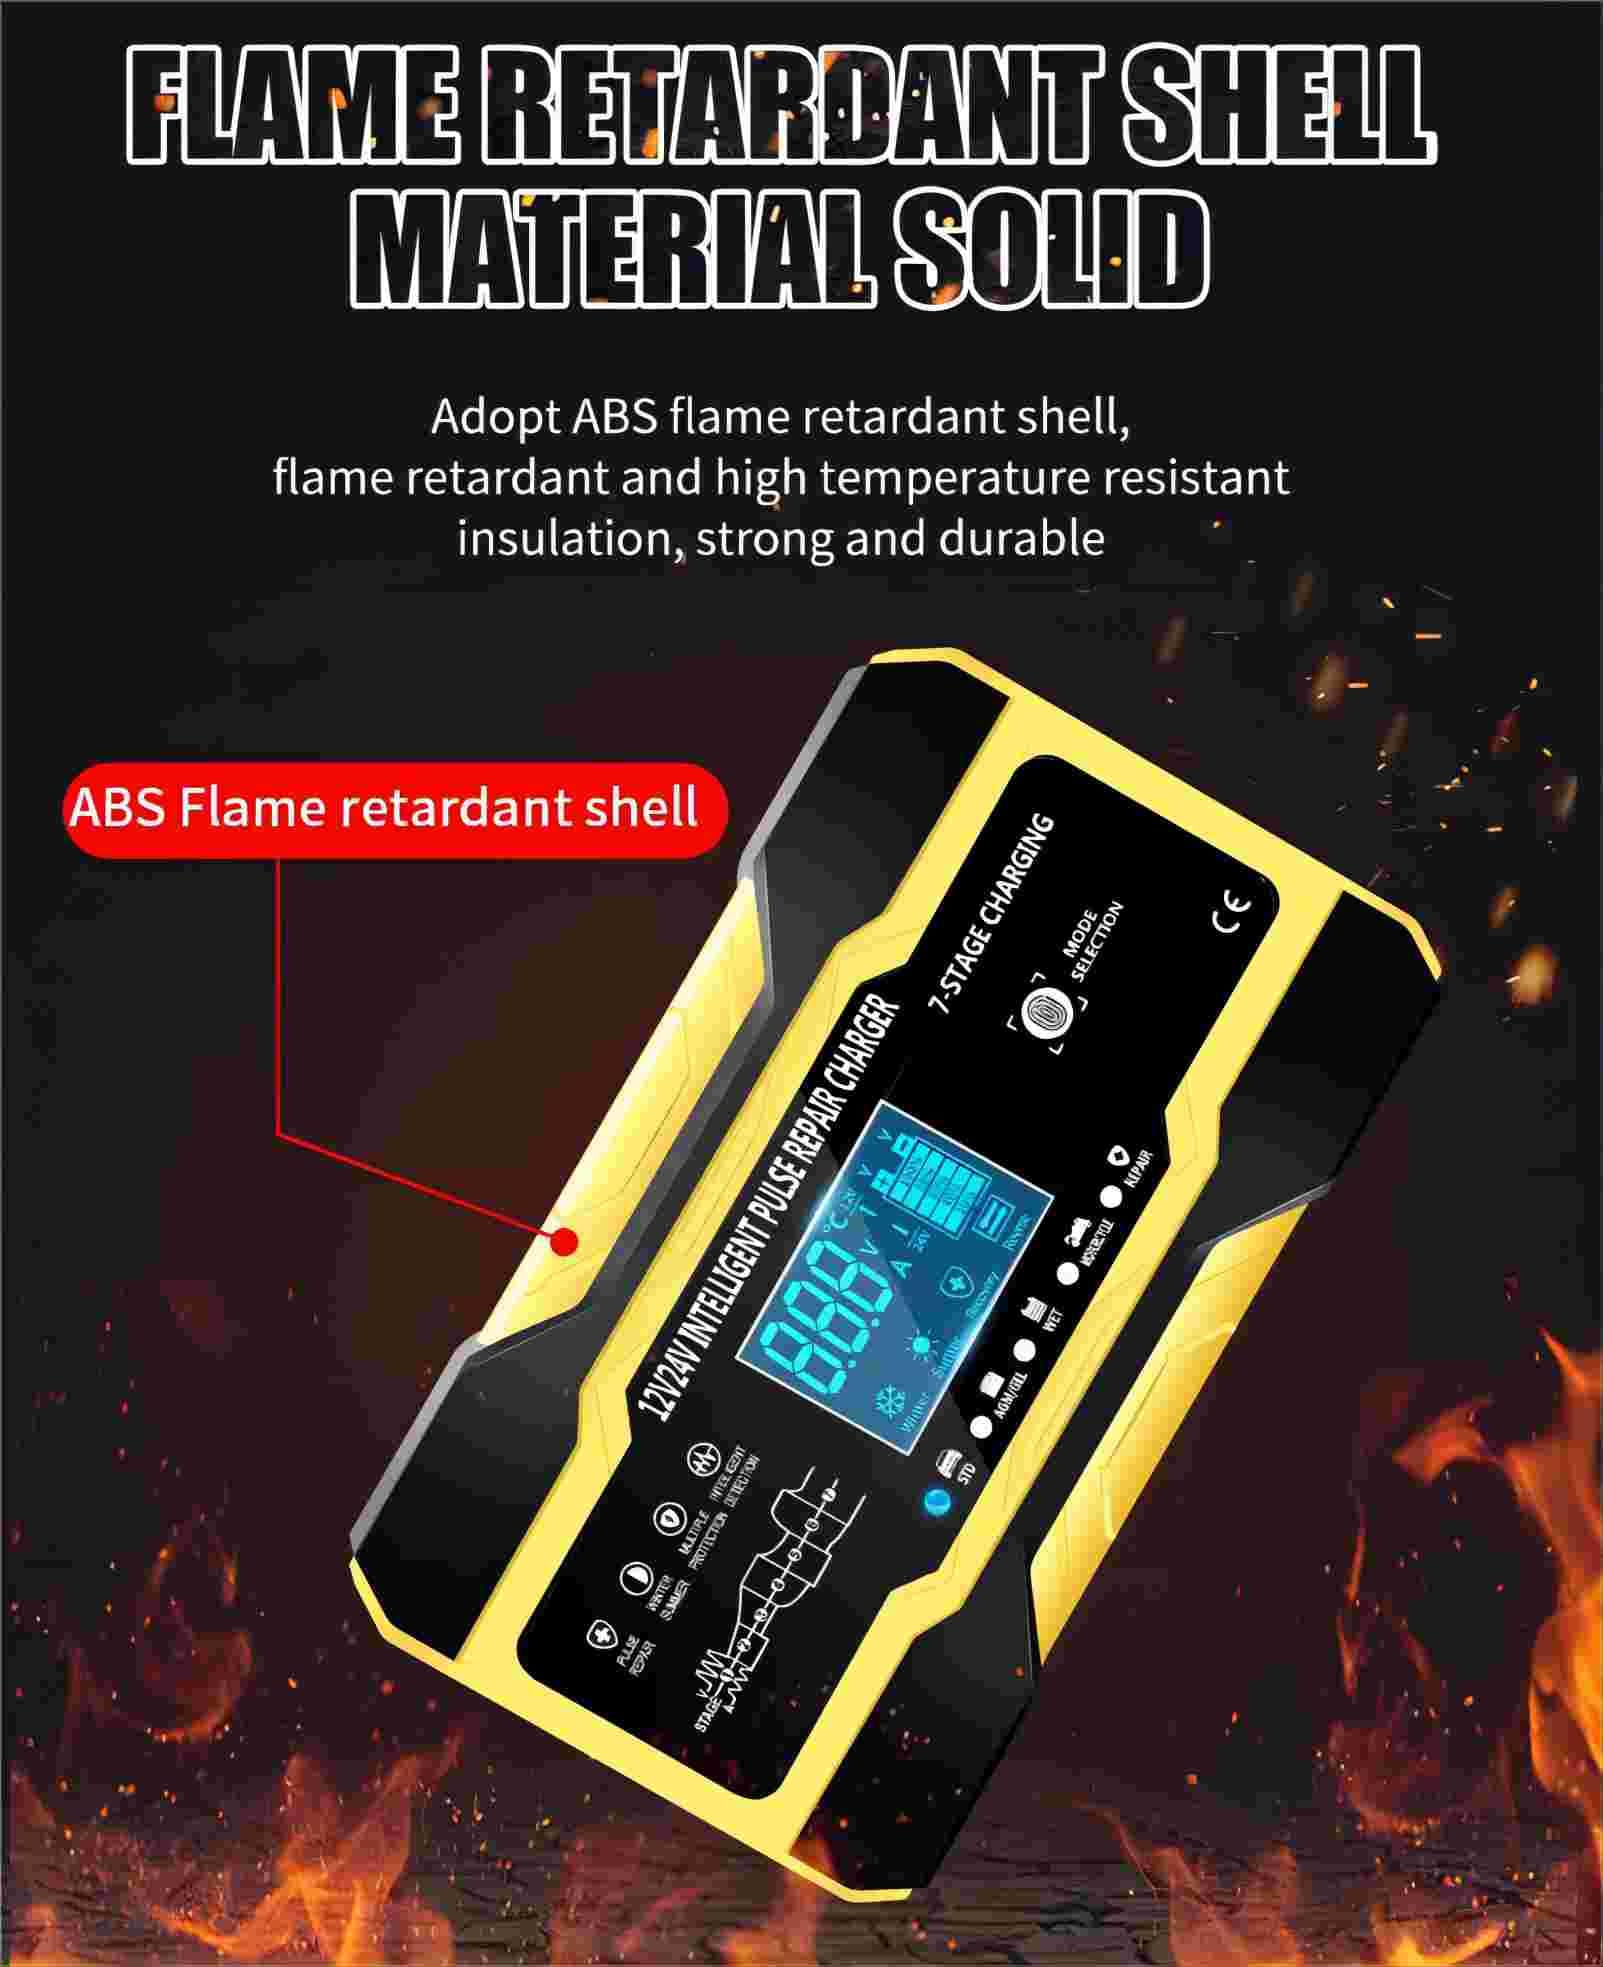
Figure 5: The charger features a flame-retardant ABS shell, providing durability and safety.
Warranty and Support
For any quality issues, a new replacement is available. Please refer to your purchase documentation for specific warranty terms and conditions. For technical support or inquiries, please contact the seller or manufacturer through the platform where the product was purchased.
Manufacturer: RJTianye


