
HOFTRONIC 2711542
Contents
HOFTRONIC Q-Series LED Batten Instruction Manual
Model: 2711542
1. Introduction
This manual provides essential information for the safe and efficient installation, operation, and maintenance of your HOFTRONIC Q-Series LED Batten. Please read this manual thoroughly before installation and retain it for future reference.
2. Safety Information
WARNING: Risk of electric shock. Installation must be performed by a qualified electrician in accordance with all local and national electrical codes.
- Always disconnect power before installation, maintenance, or cleaning.
- Ensure the supply voltage matches the product's specifications (220 Volts).
- Do not modify the product in any way.
- Do not look directly into the LED light source when illuminated.
- This product is rated IP65 for water and dust resistance and IK08 for impact resistance. However, avoid direct high-pressure water jets.
- Operating temperature range: -20°C to +40°C.
3. Product Overview
The HOFTRONIC Q-Series LED Batten is a robust, waterproof, and energy-efficient lighting solution designed for various environments such as basements, garages, cold rooms, kitchens, sheds, and warehouses. It features integrated LED light sources and quick connectors for easy installation and linking.

Image: A single HOFTRONIC Q-Series LED Batten, showcasing its sleek, tubular design and the HOFTRONIC branding.
Key Features:
- Model: 2711542
- Power: 36 Watts
- Luminous Flux: 4320 Lumens
- Color Temperature: 6500K (Cool White)
- Voltage: 220 Volts (AC)
- Dimensions: 120 x 5.7 x 5.7 cm
- IP Rating: IP65 (Water and Dust Resistant)
- IK Rating: IK08 (Vandalism Resistant)
- Material: ABS and Polycarbonate
- Lifespan: 25,000 hours (approx. 10 years with average use)
- Energy Savings: Up to 75% compared to 144W fluorescent lamps.
- Connectivity: Quick Connector for fast installation, linkable up to 8 fixtures.
Product Applications:
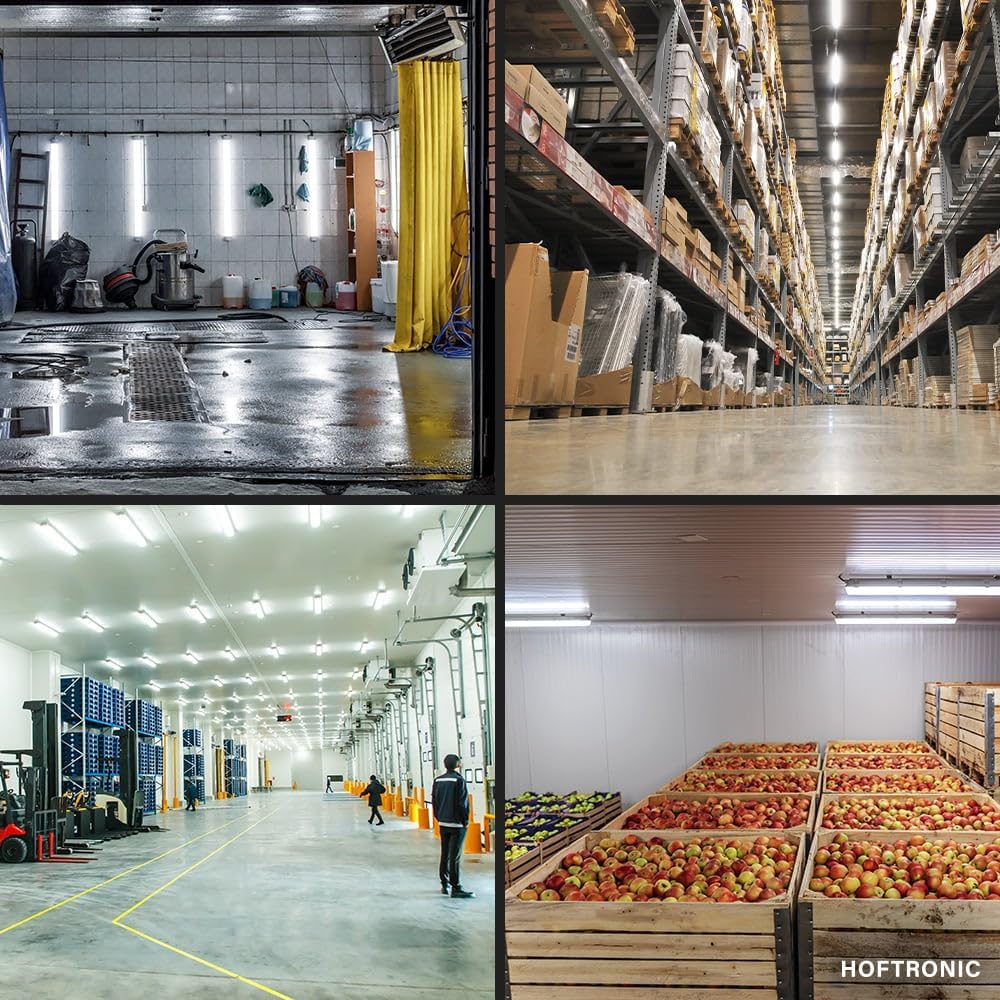
Image: Examples of HOFTRONIC Q-Series LED battens providing bright illumination in industrial settings like a car wash and a large warehouse.

Image: Further application examples showing the LED battens in a supermarket aisle, a home workshop, and a residential garage, demonstrating their versatility.
The HOFTRONIC Q-Series LED Batten is suitable for a wide range of indoor and outdoor environments due to its robust design and high protection ratings.
Product Components:
The package includes the LED batten fixture and mounting accessories (clips, screws, wall plugs).
4. Installation (Setup)
The HOFTRONIC Q-Series LED Batten is designed for easy "plug and play" installation. Follow these steps carefully:
4.1 Mounting the Fixture:
- Prepare the Mounting Surface: Choose a suitable location on the ceiling or wall. Ensure the surface is stable and can support the weight of the fixture.
- Mark Drilling Points: Use the provided mounting clips as a template to mark the drilling points for the screws.

Image: Illustration showing the mounting clips, screws, and wall plugs required for installation, with arrows indicating the drilling and attachment process.
- Drill Holes: Drill holes at the marked points using an appropriate drill bit for your wall/ceiling material. Insert the wall plugs if necessary.
- Attach Mounting Clips: Securely fasten the mounting clips to the surface using the screws.
- Attach Fixture: Gently push the LED batten into the mounting clips until it clicks securely into place.

Image: Close-up view demonstrating how the LED batten clicks into the pre-installed mounting clips on the ceiling.
4.2 Electrical Connection:
- Ensure Power is OFF: Before making any electrical connections, ensure the main power supply to the circuit is switched off at the breaker.
- Access Wiring Terminal: The fixture features a quick connector for wiring. Unscrew the end cap to access the internal wiring terminal.

Image: Detailed view of the quick connect mechanism on the end of the LED batten, showing how it twists to open and reveal the wiring terminals.
- Connect Wires: Connect the live, neutral, and ground wires from your electrical supply to the corresponding terminals inside the fixture. The quick connectors allow for tool-free wiring.
- Secure End Cap: Once wiring is complete, securely screw the end cap back onto the fixture.
- Power On: Restore power to the circuit and test the light.
4.3 Linking Multiple Fixtures:
Up to 8 HOFTRONIC Q-Series battens can be linked together using the integrated quick connectors and a suitable connecting cable (not included, min. 5mm / max. 9mm diameter for PG11 cable gland). This allows for continuous lighting runs without additional wiring to the main power supply for each fixture.

Image: Diagram illustrating how two HOFTRONIC LED battens can be linked together using a connecting cable and the PG11 cable gland, with a note indicating up to 10 fixtures can be linked.
5. Operating Instructions
Once installed and connected to the power supply, the HOFTRONIC Q-Series LED Batten operates by simply switching on the connected light switch. There are no complex controls or settings required.
Light Characteristics:
The fixture provides a cool white light (6500K) with a diffuse output, designed to prevent glare and provide uniform illumination. This makes it suitable for environments where clear, bright, and non-blinding light is essential, such as parking lots or workshops.

Image: A side-by-side comparison showing the diffuse light output of the HOFTRONIC Q-Series LED batten versus a non-diffuse light source, highlighting its anti-glare properties.
6. Maintenance
The HOFTRONIC Q-Series LED Batten requires minimal maintenance due to its durable construction and integrated LED technology.
- Cleaning: Disconnect power before cleaning. Wipe the fixture with a soft, damp cloth. Do not use abrasive cleaners or solvents.
- Inspection: Periodically inspect the fixture for any signs of damage, loose connections, or wear. If any issues are found, disconnect power and consult a qualified electrician.
- No User-Serviceable Parts: The LED light source is integrated and not user-replaceable. Do not attempt to open or repair the fixture.
7. Troubleshooting
If you encounter issues with your HOFTRONIC Q-Series LED Batten, refer to the following table:
| Problem | Possible Cause | Solution |
|---|---|---|
| Light does not turn on. | No power supply. Loose wiring connection. Faulty switch. | Check circuit breaker. Verify all connections are secure (ensure power is off first). Test or replace the switch. |
| Light flickers. | Unstable power supply. Loose connection. | Consult an electrician to check power stability. Check wiring connections (ensure power is off first). |
| Reduced brightness. | Dust accumulation on fixture. End of product lifespan. | Clean the fixture surface. Consider replacement if product is beyond its expected lifespan. |
If the problem persists after attempting these solutions, please contact HOFTRONIC customer support or a qualified electrician.
8. Specifications
| Attribute | Value |
|---|---|
| Brand | HOFTRONIC |
| Model Number | 2711542 |
| Dimensions (L x W x H) | 120 x 5.7 x 5.7 cm |
| Weight | 5 Kilograms |
| IP Rating | IP65 |
| IK Rating | IK08 |
| Number of Items (in pack) | 4 |
| Color Temperature | 6500K (Cool White) |
| Material | Acrylonitrile Butadiene Styrene (ABS), Polycarbonate (PC) |
| Number of Bulbs | 1 (integrated LED) |
| Maximum Wattage | 36 Watts |
| Voltage | 220 Volts |
| Luminous Flux | 4320 lm |
| Incandescent Equivalence | 144 Watts |
| Color Rendering Index (CRI) | 80.00 |
| Average Lifespan | 25,000 hours (10 years) |
| Certification | Energy Star Certified |
| Special Features | Quick Connector, Vandalism Resistant, Plug and Play, Flicker-free, Energy Saving |

Image: Technical drawing showing the dimensions of the HOFTRONIC Q-Series LED batten, including its length (1200mm) and cross-sectional measurements (47mm height, 59mm width).
9. Warranty and Support
HOFTRONIC provides a 2-year warranty for this product. If the LED batten fails within the warranty period, a replacement will be provided free of charge.
For technical support, warranty claims, or further assistance, please contact HOFTRONIC customer service through your purchase platform or the official HOFTRONIC website.
Please retain your proof of purchase for warranty purposes.
Ask a question about this manual
Ask about setup, troubleshooting, compatibility, parts, safety, or missing instructions. Manuals+ will review the question and use this page’s manual context to help answer it.