Introduction
This manual provides detailed instructions for the setup, operation, and maintenance of your Atlanta 1856/5 Radio-Controlled Analog Alarm Clock. Please read this manual thoroughly before using the product to ensure correct functionality and to understand all features.
The Atlanta 1856/5 is a radio-controlled alarm clock designed for accurate timekeeping and quiet operation. It features automatic time synchronization, a "No Tick" silent second hand function, luminous hands, and a snooze function.
Package Contents
- Atlanta 1856/5 Radio-Controlled Analog Alarm Clock
- User Manual (this document)
Note: 1x AA/LR6 battery is required and not included in the package.
Product Overview
Familiarize yourself with the main components of your alarm clock.

Image 1: Front View. This image shows the front of the Atlanta 1856/5 alarm clock. It has a blue casing and a white analog dial with black numbers (1-12) and green hour/minute markers. The hour and minute hands are black with luminous green tips, and the second hand is red. The brand "Atlanta" is printed above the center, and "RADIO CONTROLLED" with a radio signal icon is printed below the center.

Image 2: Side View with Alarm Switch. This image displays a side view of the alarm clock, highlighting the alarm ON/OFF slide switch located on the right side of the casing. The switch is black and clearly labeled "ON" and "OFF".

Image 3: Back View. This image shows the back of the alarm clock. It features a large battery compartment cover at the bottom. Above it, there is a small dial for setting the alarm time, labeled "SET", and a button labeled "WAVE" for manual radio signal reception. A small reset button is also visible.
Setup
- Battery Installation:
- Open the battery compartment cover located on the back of the alarm clock (refer to Image 3).
- Insert one (1) AA/LR6 battery, ensuring the correct polarity (+/-).
- Close the battery compartment cover securely.
- Initial Time Synchronization (Radio Control):
- After inserting the battery, the clock hands will perform a full rotation and then stop precisely at the "12" position.
- The alarm clock will then enter reception mode to synchronize with the DCF-77 time signal.
- This initial synchronization process can take up to 20 minutes. During this time, the hands will not move. It is crucial not to interrupt this process. The clock will automatically set to the correct time once the signal is received.
- For optimal reception, place the clock near a window and away from electronic devices that may cause interference.
Operating Instructions
- Setting the Alarm Time:
- Locate the alarm setting dial on the back of the clock (labeled "SET" in Image 3).
- Rotate this dial to move the small alarm hand to your desired alarm time.
- Activating/Deactivating the Alarm:
- Use the ON/OFF slide switch located on the right side of the casing (refer to Image 2).
- Slide the switch to "ON" to activate the alarm. When the alarm is active, the second hand will move to the "12" position and stop, enabling the "No Tick" silent operation feature.
- Slide the switch to "OFF" to deactivate the alarm. The second hand will resume normal sweeping motion.
- Snooze Function:
- When the alarm sounds, press the large button on top of the clock (labeled "LIGHT/SNOOZE").
- The alarm will pause for approximately 5 minutes before sounding again.
- Dial Illumination:
- Press the large button on top of the clock (labeled "LIGHT/SNOOZE") to temporarily illuminate the dial for easy reading in the dark.
- The clock also features luminous hour and minute hands for visibility in low light conditions.
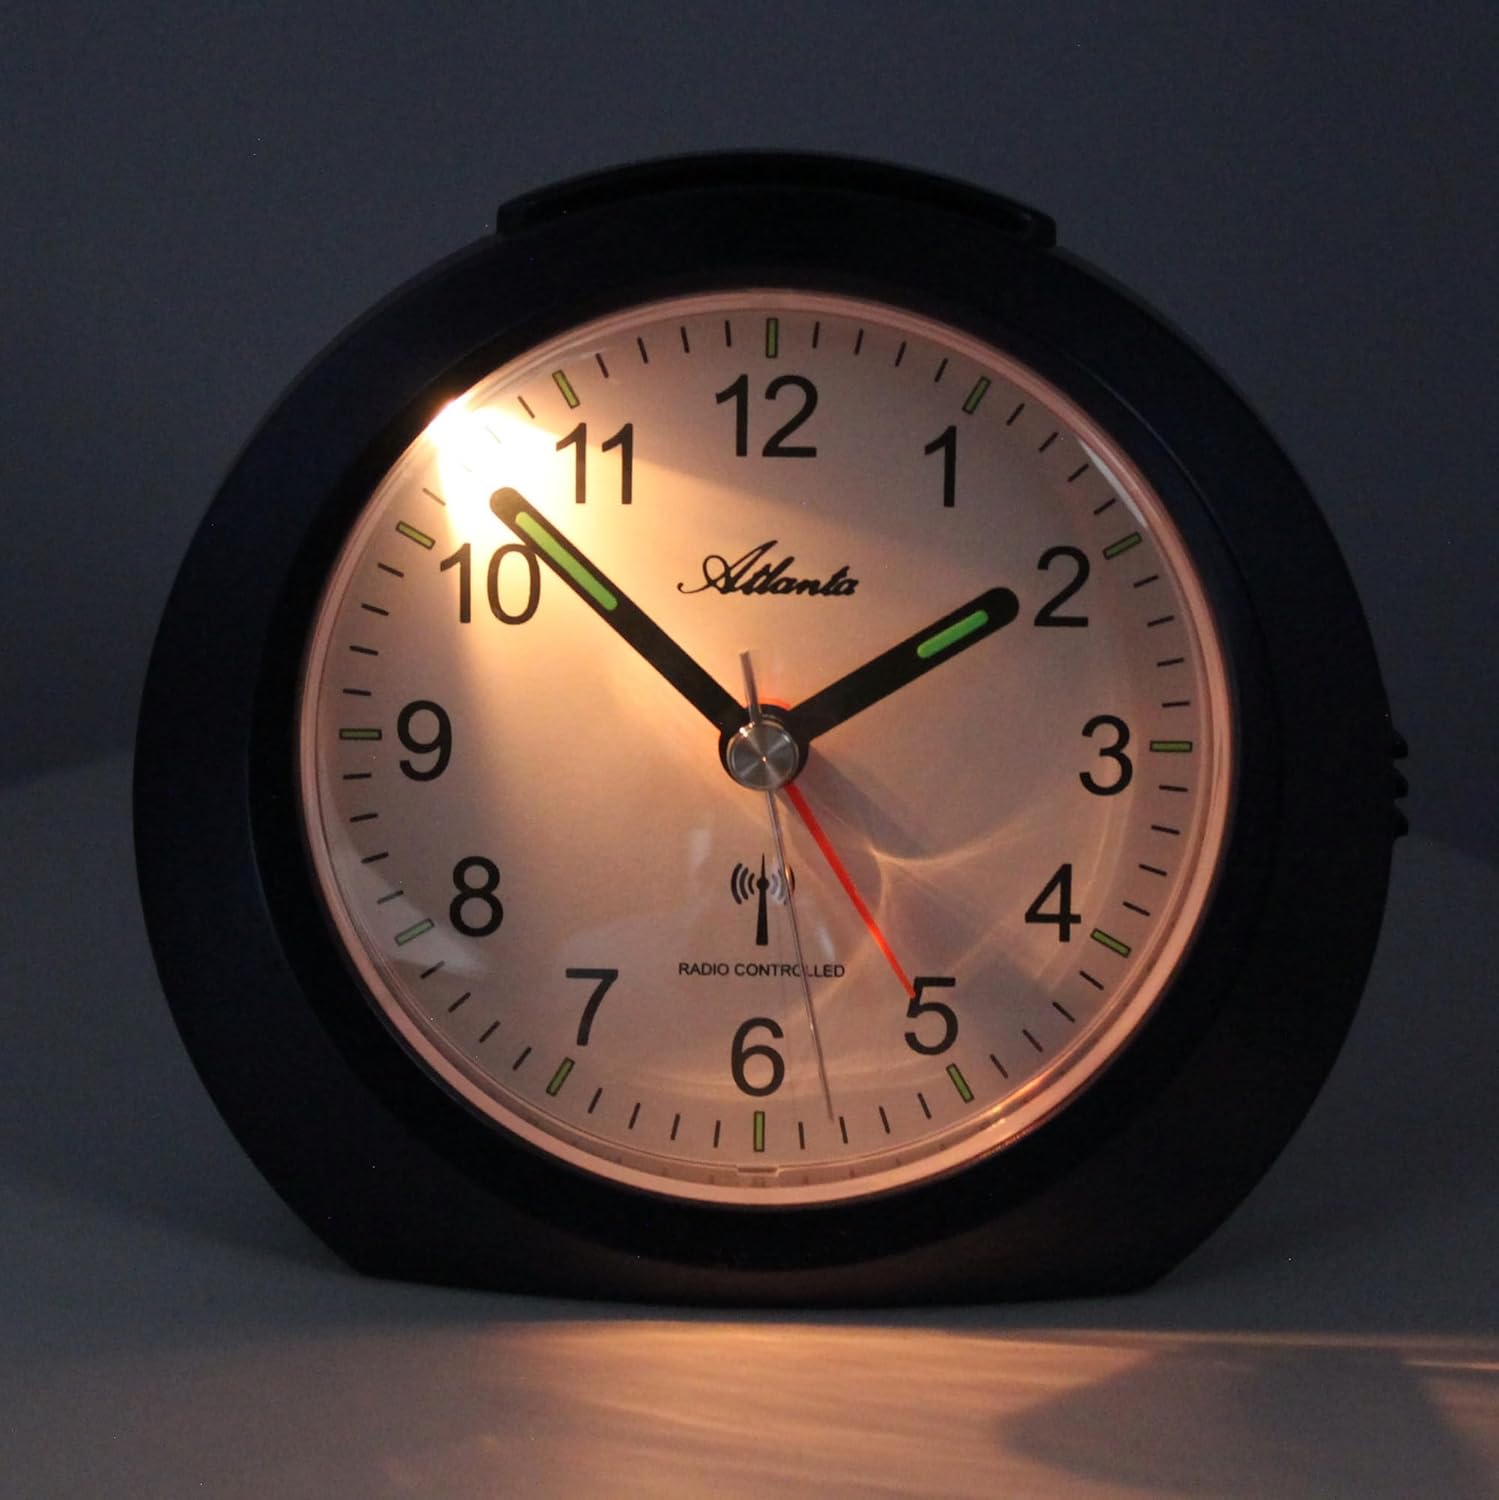
Image 4: Illuminated Dial. This image shows the alarm clock's dial illuminated in a dark environment, demonstrating the effectiveness of the backlight feature activated by the top button.
- Automatic Summer/Winter Time Adjustment:
- The radio-controlled mechanism automatically adjusts for Daylight Saving Time (summer/winter time changes) overnight between 2 AM and 3 AM. No manual adjustment is required.
Key Features
- "No Tick" Silent Operation: When the alarm is active, the second hand stops at the "12" position, ensuring a completely silent environment at night.
- Radio-Controlled Time: Automatic and highly accurate time synchronization via the DCF-77 signal.
- Automatic DST Adjustment: Seamless transition between standard and daylight saving time.
- Luminous Hands & Dial Illumination: Easy time reading in the dark with glow-in-the-dark hands and a button-activated backlight.
- Crescendo Alarm: The alarm sound starts quietly and gradually increases in volume and intensity.
- Snooze Function: Provides an additional 5 minutes of sleep by temporarily pausing the alarm.
- Stable Design: Equipped with a stable stand for secure placement.
Maintenance
- Battery Replacement:
- When the clock's performance degrades or the display becomes dim, it is time to replace the battery.
- Follow the battery installation steps outlined in the "Setup" section.
- Always use a fresh AA/LR6 battery.
- Cleaning:
- Wipe the clock's surface with a soft, dry cloth.
- Do not use abrasive cleaners or chemical solvents, as these may damage the casing or dial.
Troubleshooting
| Problem | Possible Cause | Solution |
|---|---|---|
| Clock hands do not move or show incorrect time after battery insertion. | Initial radio signal reception failed or was interrupted. |
|
| Alarm does not sound. | Alarm is not activated or battery is low. |
|
| "No Tick" function (silent second hand) is not working. | Alarm is not activated. | Ensure the alarm ON/OFF switch is in the "ON" position. The second hand will stop at "12" only when the alarm is active. |
| Dial illumination is dim or not working. | Low battery. | Replace the battery with a fresh AA/LR6 battery. |
Specifications
| Feature | Detail |
|---|---|
| Brand | Atlanta |
| Model Number | 1856/5 |
| Color | Blue |
| Product Dimensions (L x W x H) | 11 x 3.81 x 10 cm |
| Weight | 155 grams |
| Material | Plastic |
| Display Type | Analog |
| Power Source | Battery Powered |
| Battery Type | 1 x AA/LR6 (not included) |
| Special Features | "No Tick" function, Radio-controlled time, Snooze, Dial illumination, Luminous hands, Automatic DST adjustment |
| Usage | Indoor, Bedroom |
Warranty Information
This product is covered by a manufacturer's warranty. Please refer to the warranty card included with your purchase or contact the retailer for specific details regarding warranty duration and terms. Keep your proof of purchase for any warranty claims.
Support
For further assistance, technical support, or inquiries not covered in this manual, please contact your retailer or the manufacturer directly. Contact information can typically be found on the product packaging or the manufacturer's official website.


