
Andeman SKUK53267
Andeman Level 2 EV Charger 40 Amp User Manual
Model: SKUK53267
1. Introduction
This manual provides detailed instructions for the safe and efficient operation, installation, and maintenance of your Andeman Level 2 EV Charger. Please read this manual thoroughly before using the product to ensure optimal performance and longevity.

Figure 1: The Andeman Level 2 EV Charger, showcasing the main unit, charging cable, and NEMA 14-50 plug.
2. Important Safety Instructions
Always adhere to the following safety guidelines to prevent injury or damage to the product:
- Ensure the charger is connected to a 240V, 4-prong NEMA 14-50 outlet with adequate electrical service.
- Do not attempt to open or modify the charger unit. Unauthorized modifications may void the warranty and pose safety risks.
- Keep the charging cable and connector away from water, excessive heat, and sharp objects.
- Do not use the charger if the cable or unit appears damaged. Contact customer support for assistance.
- The charger is designed with multiple safety protections, including overheating, over-voltage, under-voltage, overcurrent, overcharge, short circuit, battery cell protection, and leakage protection.
- The unit is IP66 waterproof, suitable for both indoor and outdoor use, and can withstand various weather conditions.
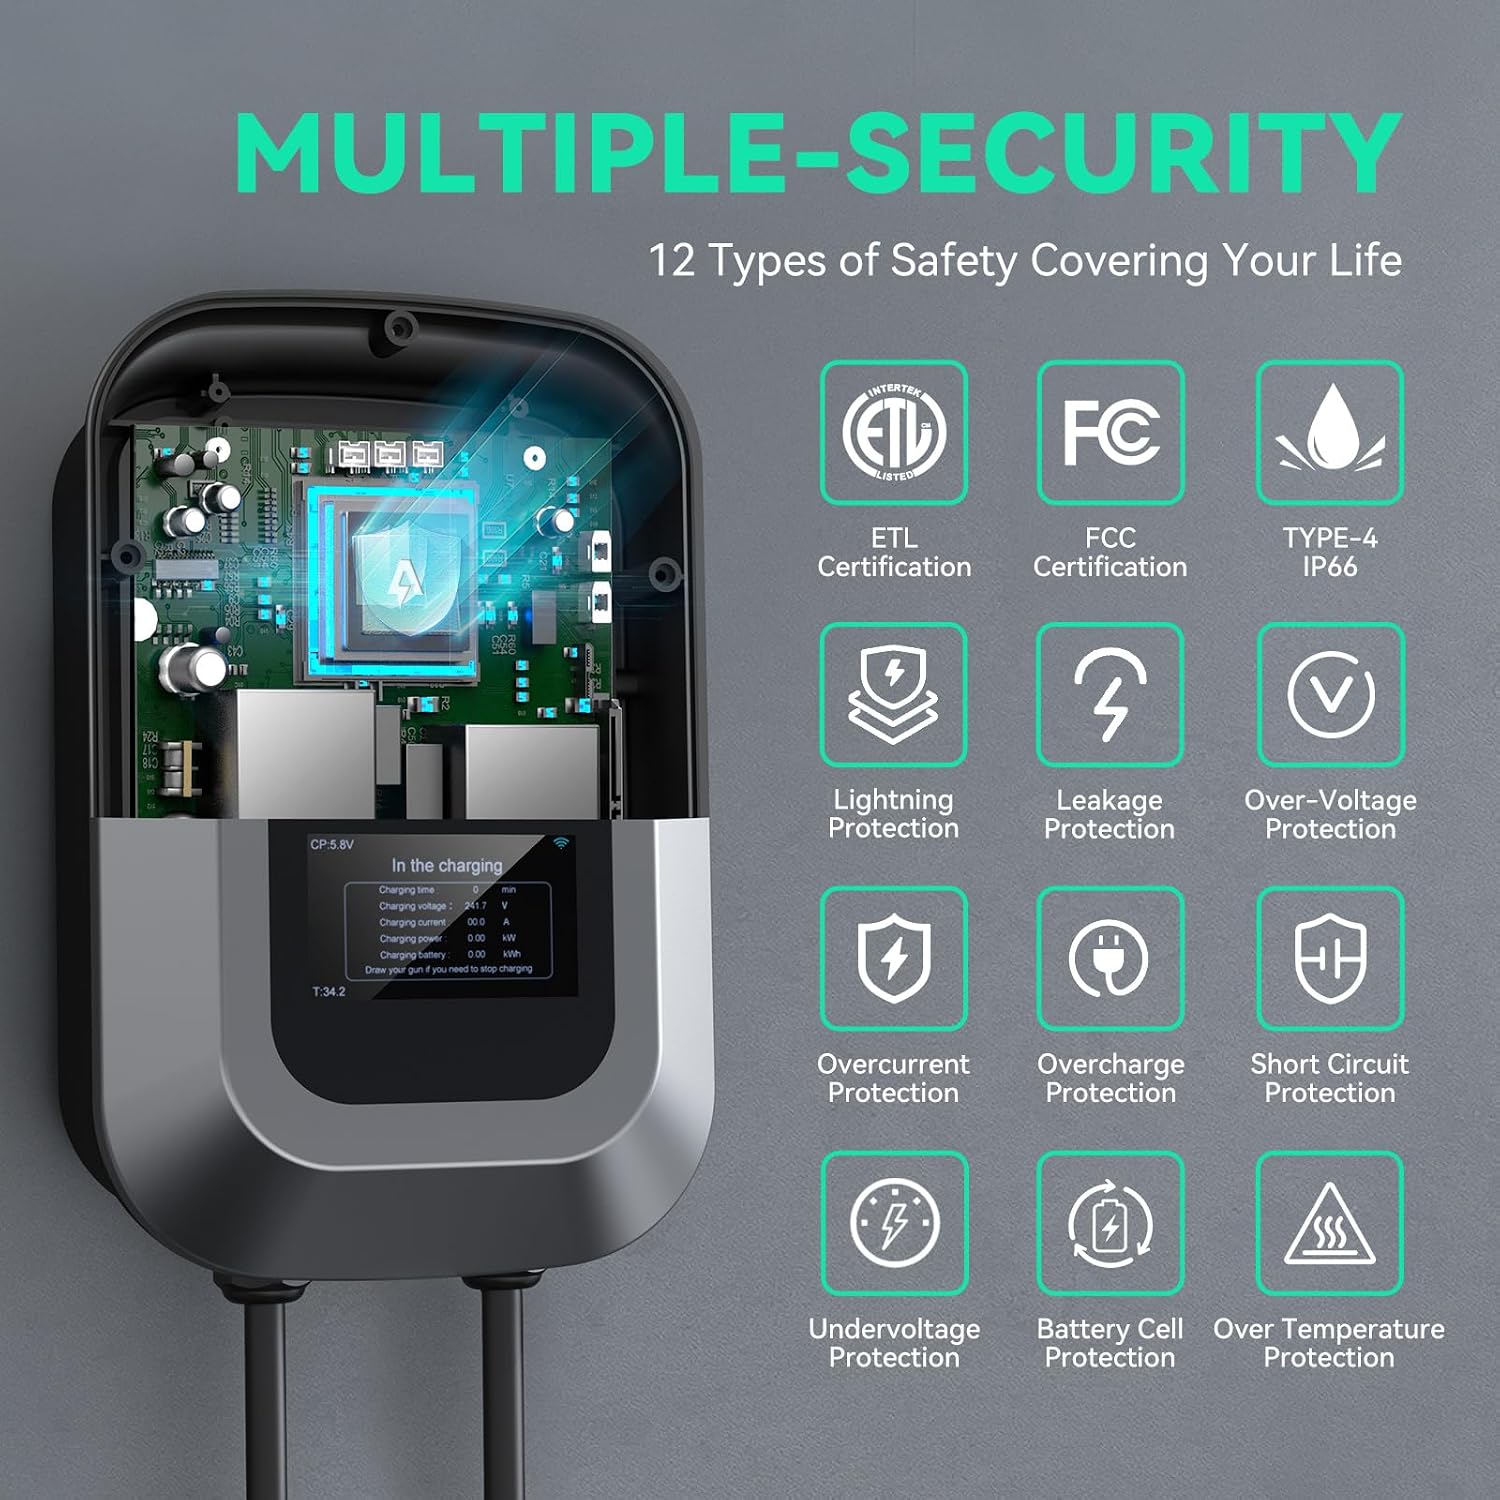
Figure 2: The internal components and safety certifications (ETL, FCC, IP66) of the Andeman EV Charger, highlighting its robust protection features.
3. Package Contents
Verify that all items are present in the package:
- 1x Level 2 EV Charger Home Unit (Model: SKUK53267)
- 1x User Manual
- 2x EV Charger RFID Cards
- Mounting Screws and Wall Anchors
- Wall Mount for Connector
4. Setup
4.1 Electrical Requirements
Before installation, ensure you have a dedicated 240V NEMA 14-50 outlet. This is a 4-prong outlet, which is required for the charger's plug. If you do not have this type of outlet, consult a qualified electrician for proper installation.

Figure 3: The NEMA 14-50 Type 4 outlet, essential for the charger's operation, and the charger's resilience to different weather conditions.
4.2 Mounting the Charger
- Detach Mounting Plate: The charger unit comes with a detachable mounting plate on its back. Use a small flat-head screwdriver to gently pry open the latch on the side of the plate, then slide the plate downwards to remove it from the main unit.
- Choose Mounting Location: Select a suitable location on a sturdy wall (e.g., a wooden stud or a reinforced area) near your 240V NEMA 14-50 outlet. Ensure the location allows for easy access to the charging cable and your vehicle.
- Mark Drill Holes: Place the detached mounting plate against the wall at your desired height. Use a pencil to mark the positions for the four mounting screws through the designated holes on the plate.
- Drill Pilot Holes: Drill pilot holes at the marked positions. If mounting into drywall without a stud, use the provided wall anchors.
- Secure Mounting Plate: Align the mounting plate with the pilot holes and secure it to the wall using the provided screws. Ensure it is firmly attached.
- Attach Charger Unit: Slide the main charger unit onto the secured mounting plate until it clicks into place. Ensure it is securely fastened.
- Install Cable Holder: Mount the provided wall mount for the charging connector near the charger unit for convenient storage of the cable.
- Plug In Charger: Insert the NEMA 14-50 plug into the dedicated 240V outlet. The charger's LCD display will illuminate, indicating it is powered on and ready for use.
5. Operating Instructions
5.1 Charging Your EV
The Andeman Level 2 EV Charger provides rapid charging, up to 8 times faster than a standard 16A charger, delivering 9.6KW and 40A. It can add approximately 30 miles of range per charging hour.

Figure 4: Visual representation of the charger's efficiency, demonstrating 30 miles of driving range per charging hour.
- Connect to Vehicle: Open your EV's charging port and firmly insert the SAE J1772 charging connector into the vehicle's port. For Tesla vehicles, a simple adapter (not included) is required.
- Initiate Charging: The charger's LCD display will show "Welcome to use AC charging equipment. Swipe card /APP to start charging." You can initiate charging using one of two methods:
- Using RFID Card: Gently swipe one of the provided RFID cards over the designated sensor area on the charger unit. You will hear a sound confirming activation. The charger will then begin a connection check with the vehicle.
- Using Smart App: Refer to Section 5.2 for instructions on using the Smart App to control charging.
- Monitor Charging: Once charging begins, the circular LED on the charger will turn green, and the LCD display will show "In charging" along with real-time charging data (charging time, voltage, current, power, etc.).
- Stop Charging: To stop charging, either swipe the RFID card again or use the Smart App. Disconnect the charging connector from your vehicle.
5.2 Using the Smart App
The intelligent Smart App allows for remote control, scheduling, current adjustments, and efficient charging time management. It also provides charging statistics and real-time monitoring.
- Download App: Scan the QR code provided in the instruction manual or search for "Smart Life" in your mobile app store (available for Android and iOS).
- Register/Login: Follow the in-app instructions to register a new account or log in if you already have one.
- Add Device: In the app, select to add a new device. The app will guide you through the process of connecting to your charger via Wi-Fi.
- Control Features: Once connected, you can:
- Adjust Current: Customize the charging current between 8-40Amp to suit your vehicle's needs or to prevent circuit breaker trips during voltage instability.
- Schedule Charging: Set specific times for charging to take advantage of off-peak electricity rates, optimizing your electricity bill.
- Monitor Statistics: View charging history, power consumption, and costs in real-time.
- Remote Start/Stop: Initiate or stop charging sessions from your smartphone.

Figure 5: The Smart App interface demonstrating the adjustable current feature, allowing users to select charging amperage from 1-40A.
5.3 RFID Card Function
The RFID security feature allows for convenient and secure charging, preventing unauthorized access. Two RFID cards are included.
- Activate Charging: Swipe the RFID card over the sensor to start a charging session.
- Deactivate Charging: Swipe the RFID card again to stop the charging session.
- Disable RFID (Optional): If you prefer not to use the RFID function (e.g., if the charger is in a secure private garage), you can disable it by holding a card over the sensor for 15 seconds.

Figure 6: The charger's RFID function provides an additional layer of security, preventing unauthorized use, and can be used in conjunction with the app's scheduling features for off-peak charging.
5.4 Universal Compatibility
The Andeman EV Charger is equipped with an SAE J1772 plug, making it universally compatible with most electric vehicle models. For Tesla vehicles, a simple adapter is required to connect and charge seamlessly.

Figure 7: The SAE J1772 plug ensures broad compatibility with most electric vehicles, requiring only an additional adapter for Tesla models.
6. Maintenance
To ensure the longevity and optimal performance of your Andeman EV Charger, follow these maintenance guidelines:
- Regular Cleaning: Periodically wipe down the charger unit and cable with a soft, dry cloth to remove dust and dirt. Avoid using abrasive cleaners or solvents.
- Inspect Cable and Connector: Regularly check the charging cable for any signs of wear, cuts, or damage. Inspect the connector for bent pins or debris. If any damage is found, discontinue use and contact customer support.
- Proper Storage: When not in use, coil the charging cable neatly and store the connector in its wall mount to prevent tangling or damage.
- Environmental Protection: Although the charger is IP66 rated, avoid prolonged exposure to extreme weather conditions if possible. Ensure the unit is not submerged in water.
7. Troubleshooting
If you encounter issues with your Andeman EV Charger, refer to the table below for common problems and solutions:
| Problem | Possible Cause | Solution |
|---|---|---|
| Charger not powering on | No power from outlet; loose connection | Check the 240V outlet and ensure the plug is fully inserted. Verify the circuit breaker is not tripped. |
| Charging not starting | RFID card not recognized; app not connected; vehicle not ready | Ensure the RFID card is swiped correctly. Check app connection and device binding. Verify the vehicle's charging port is open and ready. |
| Slow charging speed | Current setting too low; voltage instability | Adjust the charging current to a higher amperage via the Smart App. The charger may automatically adjust current during voltage instability. |
| Charger unit is warm | Normal operation; prolonged use | Slight warmth is normal during operation. If it becomes excessively hot or emits smoke/odor, disconnect immediately and contact support. |
| App connectivity issues | Poor Wi-Fi signal; app glitch | Ensure strong Wi-Fi signal. Restart the app or re-pair the device if necessary. |
8. Specifications
| Feature | Detail |
|---|---|
| Brand | Andeman |
| Model Number | SKUK53267 |
| Output Voltage | 240 Volts |
| Amperage | 8-40 Amp (Adjustable) |
| Power Output | Up to 9.6 KW |
| Charging Connector | SAE J1772 |
| Cable Length | 24ft / 25ft (approx.) |
| Waterproof Rating | IP66 |
| Certifications | ETL, ENERGY STAR |
| Control Features | Smart App (Remote Control, Scheduling, Current Adjustment, Monitoring), RFID Card |
| Display | LCD Display |
| Product Dimensions | 21"D x 17"W x 9"H |
| Item Weight | 2 Pounds |
9. Warranty and Support
Andeman provides a 2-year warranty for the Level 2 EV Charger (Model: SKUK53267). For warranty claims, technical support, or any inquiries not covered in this manual, please contact Andeman customer service through the following channels:
- Email: Refer to your product packaging or the official Andeman website for contact information.
- Website: Visit the official Andeman website for FAQs, support resources, and contact forms.
Please retain your purchase receipt as proof of purchase for warranty purposes.
Ask a question about this manual
Ask about setup, troubleshooting, compatibility, parts, safety, or missing instructions. Manuals+ will review the question and use this page’s manual context to help answer it.