
1. Introduction
The SVBONY SC432M is a monochrome cooled planetary camera designed for astrophotography. It features a 1.77MP IMX432 CMOS sensor with a global shutter, large pixels, and active cooling to deliver high-quality images of celestial objects. This manual provides detailed instructions for setting up, operating, and maintaining your camera to ensure optimal performance.
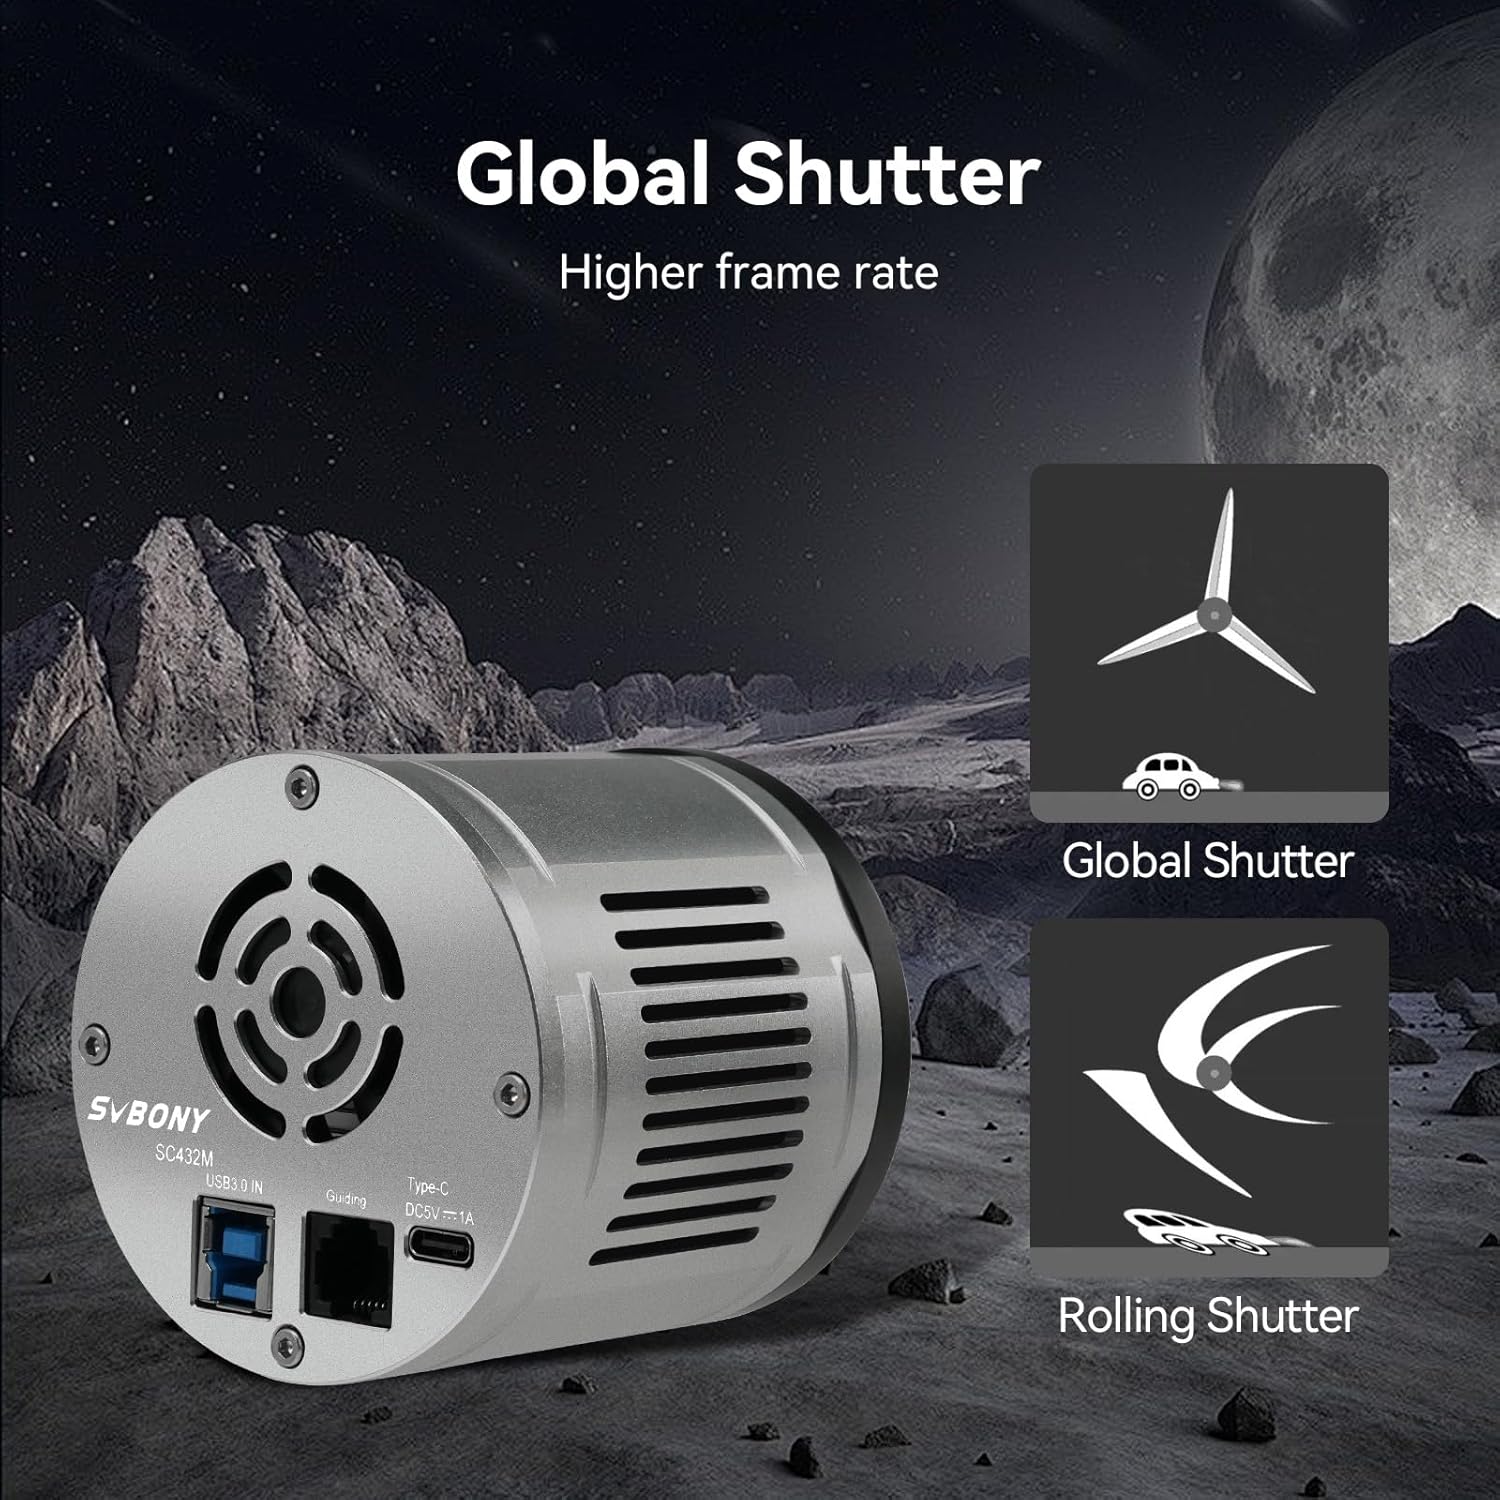
Figure 1.1: The SVBONY SC432M Monochrome Cooled Planetary Camera.
Video 1.1: An overview of the SC432M Monochrome Cooled Planetary Camera's features and design.
2. What's in the Box
Verify that all components are present upon unpacking your SVBONY SC432M camera.
- 1x SC432M Astronomical Camera
- 1x Camera Bag
- 1x M42 Threaded Dust Cover
- 1x 1.25-inch Dust Cover
- 1x M42 Thread-1.25 inch Adapter Ring
- 1x USB 3.0 Data Cable
- 1x ST4 Guide Star Cable
- 1x Fan Power Cord
- 1x Cleaning Cloth
- 2x Wrenches

Figure 2.1: All items included in the SVBONY SC432M camera package.
3. Key Features
- Global Shutter: The SC432M is equipped with a global shutter, enabling a high frame rate of 120 frames per second. This feature is crucial for capturing clear images of fast-moving objects like the Moon, planets, or the International Space Station (ISS), preventing motion blur and distortion.

Figure 3.1: Illustration of global shutter technology for capturing fast-moving objects without distortion.
- Large Pixels: Featuring 9µm x 9µm pixels, the SC432M offers high sensitivity. This allows for the capture of finer colors and subtle details in astronomical images, even in low-light conditions.
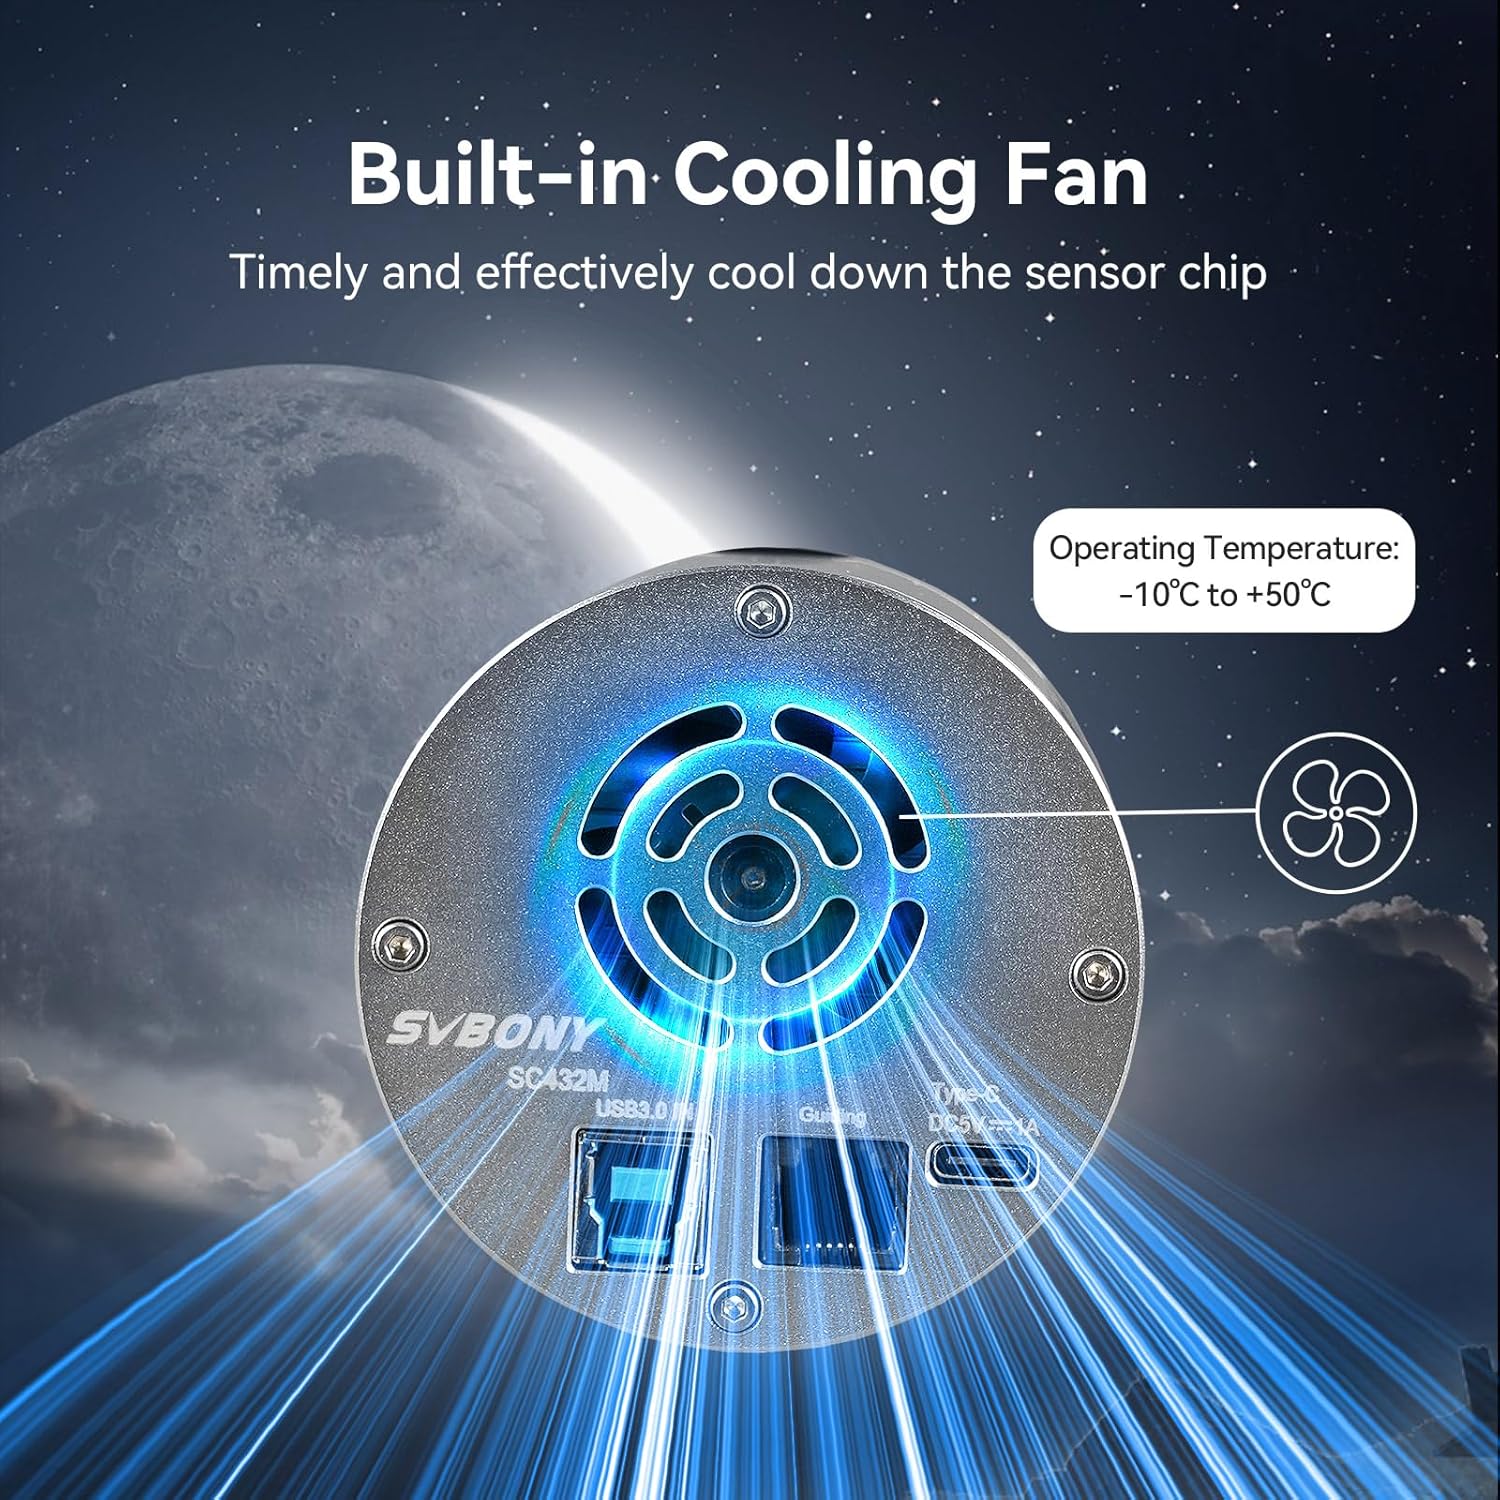
Figure 3.2: Visual representation of the large 9µm pixels of the SC432M sensor compared to smaller pixels.
- 1.1" Large Frame: The camera incorporates a 1.1" large format sensor, providing a wider field of view compared to many planetary cameras. This helps capture more of the target object and reduces the need for extensive post-processing to stitch multiple images.

Figure 3.3: The 1.1-inch sensor frame size of the SC432M, offering a larger field of view.
- Fan Cooling: An integrated fan cooling system, powered by an external 5V1A Type-C power supply, can lower the camera's temperature by 5-10 degrees Celsius. This active cooling significantly reduces thermal noise during long exposures, improving image quality.
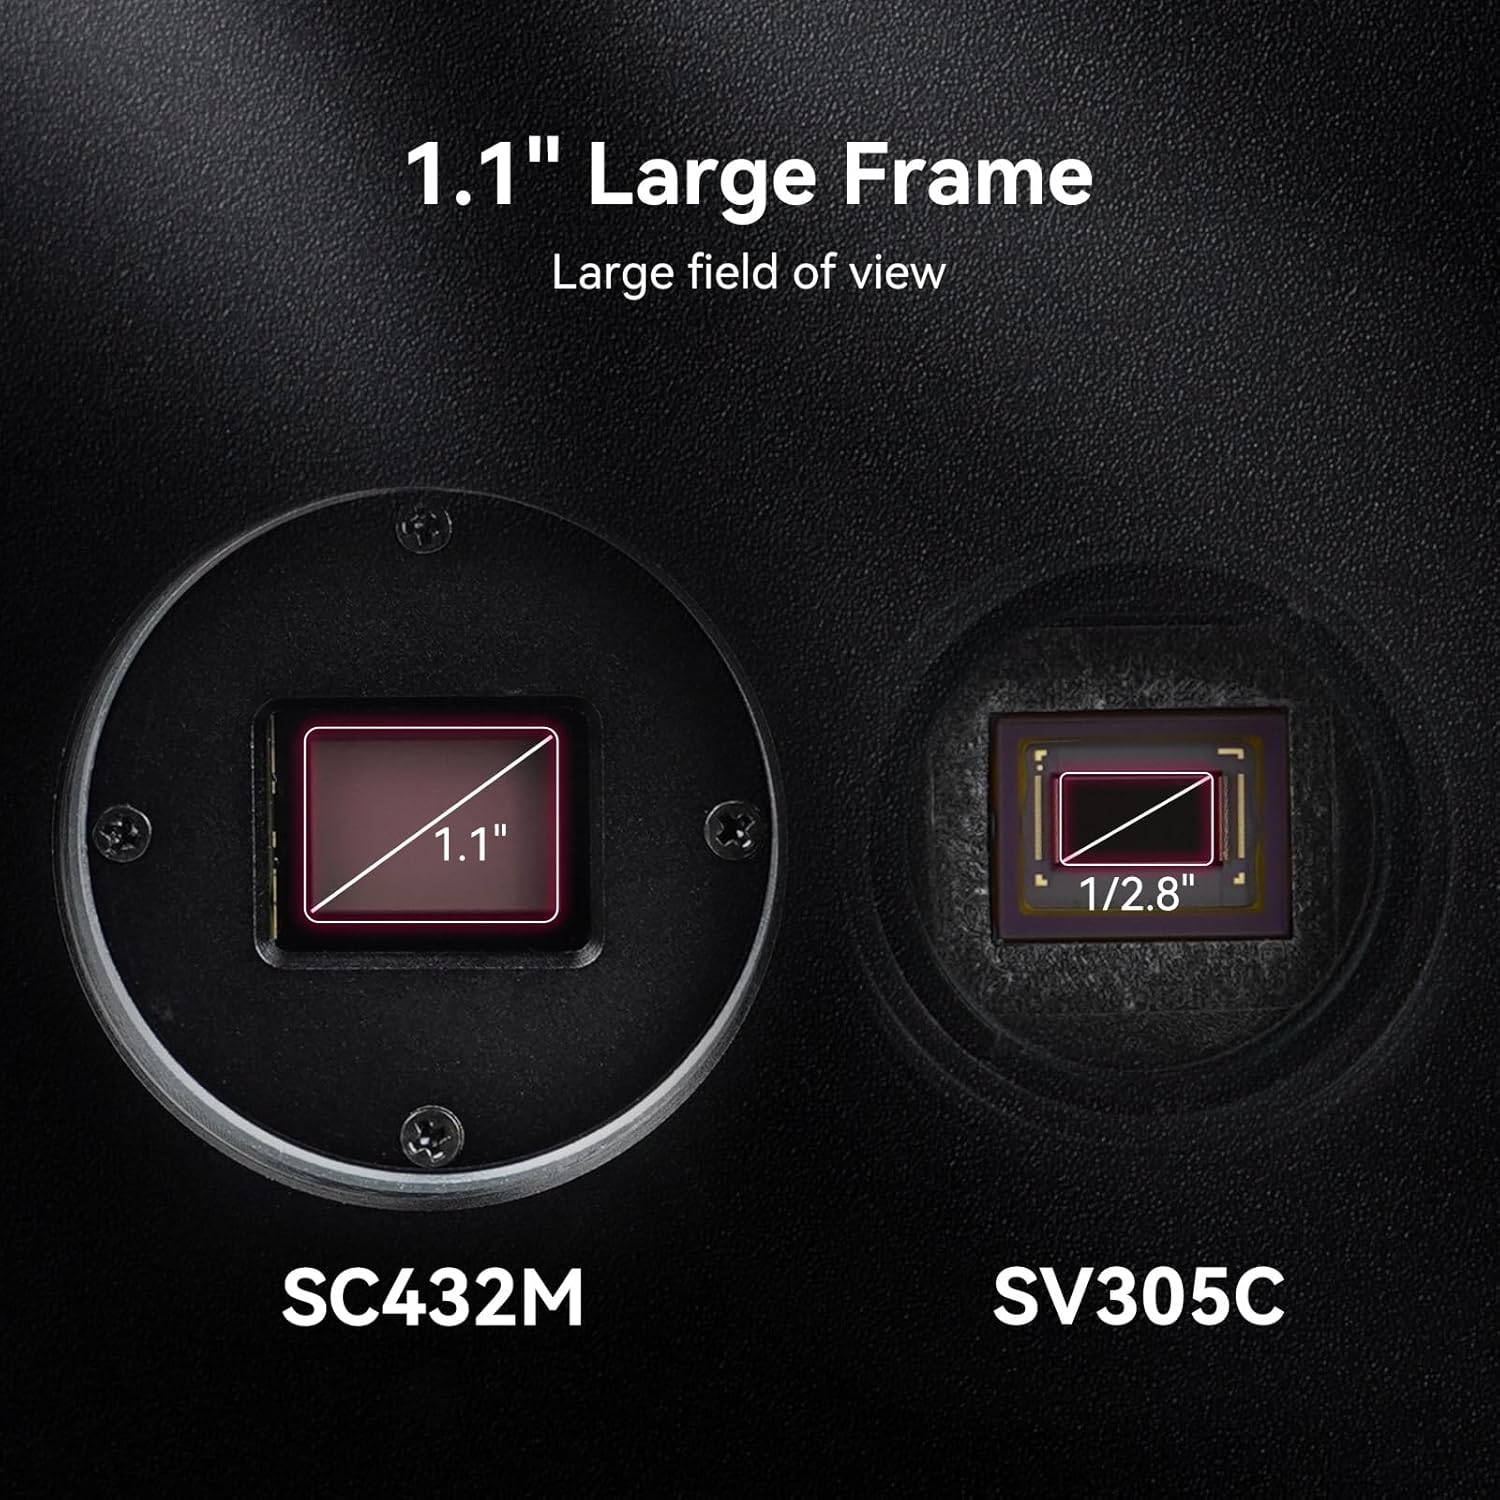
Figure 3.4: The built-in cooling fan and its effect on sensor temperature.
- HCG Mode: When the gain value reaches 140, the High Conversion Gain (HCG) mode automatically activates. This mode substantially reduces readout noise while maintaining a high dynamic range, which helps prevent celestial object trailing and enhances detail.
- USB 3.0 & 256MB DDR3 Memory: The camera features a USB 3.0 interface and 256MB of DDR3 memory, ensuring stable and secure data transfer. This allows for excellent performance even when connected to a USB 2.0 port, reducing computational demands on your system.
- Reticle Adjustment Ring: The camera includes a reticle adjustment ring with four sets of screws for precise sensor calibration. Each set consists of one push and one pull screw. A high-density sponge light-blocking pad is built-in to prevent stray light from entering.

Figure 3.5: The reticle adjustment ring for sensor calibration.
- ROI (Region of Interest) Function: The ROI function allows you to select a smaller region of the sensor for imaging. When a lower resolution is selected, the camera automatically centers the image, and the frame rate increases, which is beneficial for capturing planetary details.
- Camera Interfaces: The SC432M astrocamera is equipped with multiple interfaces:
- M42 Thread Interface for telescope connection.
- USB-C Power Supply Interface for cooling fan power.
- M28.5 Filter Thread Interface for attaching filters.
- ST4 Guide Star Interface for autoguiding.

Figure 3.6: Detailed view of the SC432M camera interfaces and dimensions.
- Compatible Products: The SC432M can be used with the SVBONY MK105 for planetary photography. For deep-space imaging, it is compatible with the SV550 80mm telescope and a diagonal.
Figure 3.7: Example setup showing the SC432M connected to a telescope with a diagonal and filter.
4. Setup Instructions
Follow these steps to set up your SVBONY SC432M camera for astrophotography.
- Mounting the Camera:
- Attach the M42 thread-1.25 inch adapter ring to the camera's M42 thread interface.
- Insert the camera (with adapter) into the 1.25-inch focuser of your telescope. Secure it with the focuser's thumbscrews.
- Alternatively, if your telescope has an M42 thread, connect the camera directly using its M42 interface.
Figure 4.1: The SC432M camera attached to a telescope.
- Connecting to Computer:
- Connect one end of the provided USB 3.0 data cable to the camera's USB 3.0 port and the other end to a USB 3.0 port on your computer.
- For optimal performance, use a USB 3.0 port. The camera is also compatible with USB 2.0, but data transfer speeds may be reduced.
- Powering the Cooling Fan:
- Connect the fan power cord to the camera's Type-C power supply interface.
- Connect the other end of the fan power cord to an external 5V1A power supply (not included).
- Autoguiding Connection (Optional):
- If using an autoguider, connect the ST4 guide star cable from the camera's ST4 port to your mount's autoguiding port.
- Software Installation:
- Download and install the necessary drivers and imaging software from the SVBONY official website or the provided installation media. Popular compatible software includes SharpCap, FireCapture, and ASCOM platforms.
Video 4.2: Instructions on how to install the SC432M Monochrome Planetary Camera with a telescope.
5. Operating Instructions
This section outlines the basic operation of your SC432M camera.
- Launching Imaging Software:
- Open your preferred astrophotography software (e.g., SharpCap, FireCapture).
- Select the SVBONY SC432M camera from the list of available devices.
- Focusing:
- Adjust your telescope's focuser until the image appears sharp on your computer screen. Utilize focusing aids within your software if available.
- Adjusting Exposure and Gain:
- Set the exposure time and gain settings within your imaging software. Start with shorter exposures for bright objects and adjust as needed.
- When the gain reaches 140, the HCG mode will automatically engage, reducing readout noise.
- Using Cooling Function:
- Ensure the external 5V1A power supply is connected to the camera's Type-C port.
- Activate the cooling function through your imaging software, if supported, or ensure the fan is running. Monitor the sensor temperature for optimal performance during long exposures.
- Utilizing ROI:
- To increase frame rates for planetary imaging, select a smaller Region of Interest (ROI) within your software. The camera will automatically center the selected area.
- Capturing Images/Video:
- Once settings are optimized, begin capturing images or video sequences through your software.
- For planetary imaging, capturing short videos (AVI, SER) is common, which can then be stacked and processed.
Video 5.1: An overview of the SC432M Monochrome Cooled Planetary Camera's operational aspects.
6. Maintenance
Proper maintenance ensures the longevity and performance of your camera.
- Cleaning the Sensor:
- The camera sensor is a delicate component. Only clean it if absolutely necessary and with specialized sensor cleaning tools (e.g., sensor swabs, air blower). Avoid touching the sensor directly.
- If dust is visible on images, first try using a rocket blower to gently dislodge particles.
- Cleaning the Camera Body:
- Use the provided cleaning cloth or a soft, lint-free cloth to wipe the exterior of the camera. Do not use harsh chemicals or abrasive materials.
- Storage:
- When not in use, store the camera in its protective bag in a dry, dust-free environment.
- Ensure dust covers are placed on all interfaces to prevent dust ingress.
- Cable Care:
- Handle cables carefully. Avoid sharp bends or kinks that could damage internal wires.
7. Troubleshooting
This section addresses common issues you might encounter.
- Issue: Camera not detected by computer.
- Solution:
- Ensure the USB 3.0 cable is securely connected to both the camera and the computer.
- Try a different USB port on your computer.
- Verify that the camera drivers are correctly installed. Reinstall if necessary.
- Restart your computer and try again.
- Issue: No image or black screen in software.
- Solution:
- Check if the camera is selected as the active device in your imaging software.
- Adjust exposure settings. If exposure is too short or gain too low, the image may appear black.
- Ensure the telescope's dust cap is removed and the focuser is roughly set.
- Issue: Images are noisy or grainy.
- Solution:
- Ensure the cooling fan is powered and operating, especially for long exposures.
- Check if HCG mode is active (gain at 140 or higher).
- Reduce the gain setting if possible, or increase exposure time to gather more light.
- Consider taking dark frames for noise reduction during post-processing.
- Issue: Image shows distortion or wavy lines (rolling shutter effect).
- Solution:
- The SC432M features a global shutter, which inherently prevents rolling shutter effects. If you observe such effects, ensure your software settings are not introducing them or that you are indeed using the SC432M camera.
For further assistance, please refer to the SVBONY official website or contact customer support.
8. Specifications
| Feature | Detail |
|---|---|
| Model Name | SC432M |
| Sensor Type | CMOS (IMX432) |
| Effective Still Resolution | 1.77 MP |
| Pixel Size | 9µm x 9µm |
| Frame Size | 1.1 inches |
| Shutter Type | Global Shutter |
| Max Frame Rate | 120 FPS (at full resolution) |
| Cooling | Fan Cooling (5V1A Type-C external power) |
| Connectivity | USB 3.0 Type B |
| Memory | 256MB DDR3 |
| Interfaces | M42 thread, USB-C, M28.5 filter thread, ST4 guide star |
| File Format | JPEG, TIFF, RAW |
| Item Weight | 831 g |
| Item Dimensions (D x W x H) | 6.1"D x 5.15"W x 6.1"H |
9. Warranty and Support
SVBONY provides a lifetime warranty for the telescope camera and a 30-day no-reason return policy. Beyond the warranty period, maintenance services are still offered, with buyers responsible for associated costs. For support, contact SVBONY on Amazon, and they will respond within 12 hours.
For the latest drivers, software, and additional resources, please visit the official SVBONY website: SVBONY Store on Amazon
