1. Introduction
This user manual provides comprehensive instructions for the safe and efficient operation, maintenance, and troubleshooting of your MR-20G Drill Bits Sharpener. Please read this manual thoroughly before using the device to ensure proper function and to prevent injury or damage.
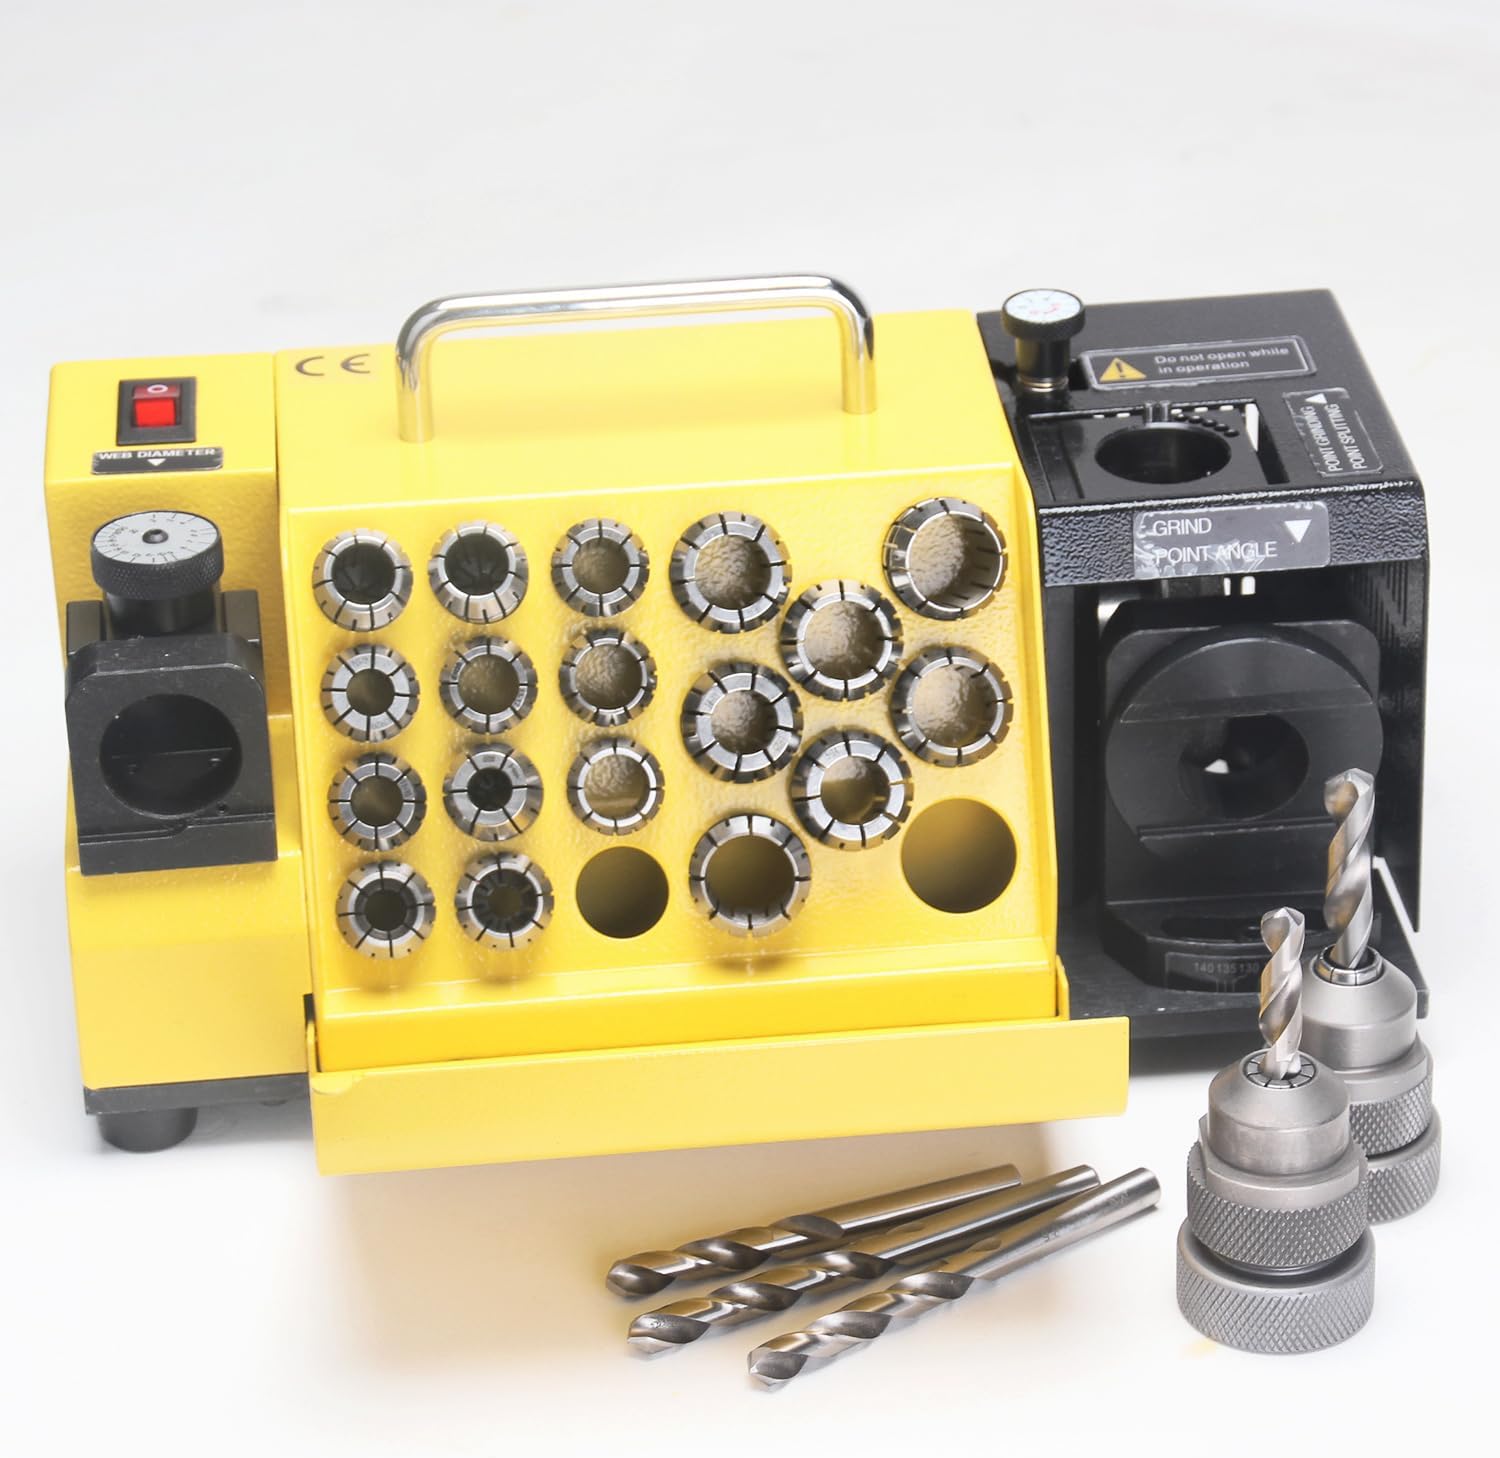
Figure 1: MR-20G Drill Bits Sharpener with included collets and drill bits.
2. Safety Instructions
Always adhere to the following safety precautions to prevent personal injury or damage to the sharpener.
- Read the Manual: Familiarize yourself with all instructions and warnings before operation.
- Eye Protection: Always wear safety glasses to protect against flying debris.
- Hand Protection: Use gloves to protect hands from sharp edges and grinding dust.
- Stable Work Surface: Ensure the sharpener is placed on a stable, level, and clean surface.
- Ventilation: Operate in a well-ventilated area to disperse grinding dust.
- Power Disconnection: Disconnect power before performing any maintenance or changing accessories.
- Keep Clear: Keep hands, hair, and loose clothing away from moving parts.
- Proper Drill Bit Size: Only sharpen drill bits within the specified diameter range (3-20mm).
- Avoid Overheating: Do not apply excessive pressure, which can overheat the drill bit or grinding wheel.
- Supervision: Do not allow children or untrained personnel to operate the sharpener.
3. Product Components and Features
3.1 Package Contents
The MR-20G Drill Bits Sharpener package typically includes:
- MR-20G Drill Bits Sharpener Unit
- 18 Elastic Collets (3mm to 20mm)
- CBN Grinding Wheel (installed)
- Professional Drill Bits Collet Chuck
- Power Cord
- User Manual

Figure 2: The 18 elastic collets included with the MR-20G sharpener, suitable for 3-20mm drill bits.
3.2 Key Features
- High-precision Sharpening: Excels at sharpening both point angle and lip relief angle for drill bits from 3mm to 20mm.
- Adjustable Point Angle: Offers a 95° to 135° point angle adjustment for compatibility with various drill hole materials and rotation speeds.
- Robust CBN Grinding Wheel: Designed for high-speed steel materials, enhancing grinding precision and efficiency.
- Powerful DC Motor: Operates at 4800 RPM with strong horsepower and torque, while maintaining low noise levels.
- Versatile Application: Suitable for factories, workshops, garages, and home DIY projects.

Figure 3: Illustration of the powerful DC motor providing high speed and torque.

Figure 4: The CBN grinding wheel, designed for precision and durability.
3.3 Parts Identification
Refer to the diagram below to identify the main components of your MR-20G Drill Bits Sharpener.

Figure 5: Labeled components of the MR-20G Drill Bits Sharpener.
- 1. Motor Switch
- 2. Positioning Adjustment Nut
- 3. Collet
- 4. Tool Holder
- 5. Angle Adjustment Screw
- 6. Grinding Seat
- 7. SDC/CBN Grinding Wheel
- 8. Center Dead Center Adjustment
- 9. Positioning Pin
- 10. Adjustment Scan
- 11. Grinding Wheel Replacement Screw
4. Setup
Before operating the sharpener, ensure it is properly set up.
- Unpacking: Carefully remove all components from the packaging. Inspect for any damage.
- Placement: Place the sharpener on a stable, clean, and dry workbench. Ensure adequate space around the unit for safe operation.
- Power Connection: Connect the power cord to the sharpener and then to a suitable power outlet. Ensure the motor switch is in the "OFF" position before connecting to power.
- Collet Selection: Select the appropriate collet for the diameter of the drill bit you intend to sharpen. The MR-20G supports drill bits from 3mm to 20mm.
- Collet Installation: Insert the selected collet into the collet chuck.
5. Operating Instructions
Follow these steps for effective drill bit sharpening.
5.1 General Sharpening Procedure (3-Step Process)
- Step 1: Adjust Position According to Drill Bit Size. Insert the drill bit into the selected collet and secure it in the tool holder. Adjust the positioning adjustment nut to set the correct length for the drill bit.
- Step 2: Adjust Position for Point Grinding. Place the tool holder with the drill bit into the grinding seat for point angle sharpening. Rotate the tool holder as instructed by the machine's markings to grind the primary cutting edge.
- Step 3: Adjust Position for Lip Relief Grinding. Move the tool holder to the lip relief grinding station. Rotate the tool holder to grind the secondary relief angle, ensuring proper clearance behind the cutting edge.

Figure 6: Visual guide for the 3-step drill bit sharpening process.
5.2 Adjusting Point Angle (95° to 135°)
The MR-20G allows for precise adjustment of the drill bit's point angle to match different materials and drilling requirements.
- Locate the angle adjustment screw on the grinding seat (refer to Figure 5, item 5).
- Rotate the screw to set the desired point angle between 95° and 135°. Consult drilling guides for optimal angles for specific materials.

Figure 7: The adjustable point angle feature, ranging from 95° to 135°.
5.3 Grinding Hole Types
The sharpener features different grinding holes for various drill bit configurations.
- Standard Back Angle Grinding Hole: Used for basic back angle sharpening.
- Front Corner Grinding Hole with Adjustable Locating Pin: Provides flexibility for front corner grinding.
- Separate Rear Corner Grinding Hole and Front Corner Grinding Hole: For specialized sharpening needs.

Figure 8: Different grinding hole configurations and their application to various drill bit types.
6. Maintenance
Regular maintenance ensures the longevity and optimal performance of your sharpener.
- Cleaning: After each use, disconnect the power and use a brush or compressed air to remove grinding dust from the machine, especially around the grinding wheel and collet areas.
- Grinding Wheel Inspection: Periodically inspect the CBN grinding wheel for wear or damage. A worn wheel will reduce sharpening efficiency and quality.
- Grinding Wheel Replacement: To replace the grinding wheel, refer to Figure 5, item 11, and remove the screw securing the wheel. Install the new wheel and secure it firmly. Ensure the power is disconnected before replacement.
- Storage: Store the sharpener in a clean, dry place away from direct sunlight and extreme temperatures.
7. Troubleshooting
This section addresses common issues you might encounter.
| Problem | Possible Cause | Solution |
|---|---|---|
| Sharpener does not turn on. | No power supply; Motor switch off; Faulty power cord. | Check power connection; Ensure switch is ON; Inspect power cord for damage. |
| Drill bits not sharpening effectively. | Worn grinding wheel; Incorrect collet size; Improper angle setting; Insufficient pressure. | Replace grinding wheel; Use correct collet; Adjust point angle; Apply consistent, moderate pressure. |
| Excessive vibration or noise. | Loose components; Unstable work surface; Damaged grinding wheel. | Check all screws and connections; Ensure sharpener is on a stable surface; Inspect and replace grinding wheel if damaged. |
| Drill bit overheats during sharpening. | Excessive pressure; Prolonged grinding time. | Reduce pressure; Grind in shorter intervals to allow cooling. |
8. Specifications
| Attribute | Detail |
|---|---|
| Model | MR-20G |
| Drill Bit Diameter Range | 3mm - 20mm |
| Adjustable Point Angle | 95° - 135° |
| Grinding Wheel Material | CBN (Cubic Boron Nitride) |
| Motor Speed | 4800 RPM |
| Power Source | AC |
| Material | Alloy Steel |
| Product Dimensions (L x W x H) | 30.48 x 15.24 x 17.78 cm (12 x 6 x 7 inches) |
| Item Weight | 9.21 kg (20.3 lbs) |
9. Warranty and Support
For warranty information and technical support, please refer to the documentation included with your purchase or contact MRCM customer service through their official website or the retailer where the product was purchased.
Return Policy: The product typically comes with a 30-day refund/replacement return policy from the date of purchase. Please check with your retailer for specific terms.