1. Introduction
This manual provides detailed instructions for the installation, operation, and maintenance of your FERMAX Way-FI Plus 7" Video KIT+ 1571. This video door entry system enhances home security and communication by allowing you to see and speak with visitors at your door, and grant access remotely. Please read this manual thoroughly before installation and use to ensure proper function and safety.
2. Safety Information
Observe the following safety precautions to prevent damage to the device and ensure user safety:
- Electrical Safety: Installation must be performed by qualified personnel in accordance with local electrical codes. Disconnect power before performing any wiring or maintenance.
- Environmental Conditions: Do not expose the outdoor unit to direct water jets or extreme temperatures outside its specified operating range. Ensure proper ventilation for indoor units.
- Handling: Handle all components with care. Avoid dropping or subjecting units to strong impacts.
- Cleaning: Use a soft, dry cloth for cleaning. Do not use abrasive cleaners or solvents.
- Modifications: Do not attempt to modify or repair the system yourself. Refer all servicing to authorized FERMAX technicians.
3. Package Contents
Verify that all components are present in the package before beginning installation:
- FERMAX Way-FI Plus 7" Monitor (Indoor Unit)
- Outdoor Panel (Door Station with Camera)
- Power Supply Unit
- Mounting Accessories (screws, wall plugs)
- User Manual and Installation Guide
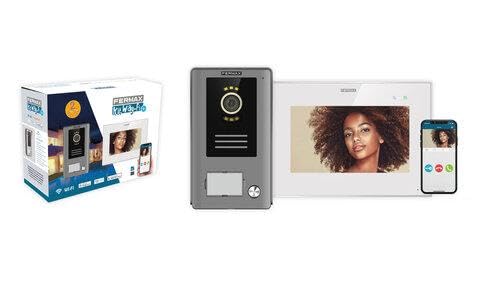
Image 3.1: Overview of the FERMAX Way-FI Plus 7" Video KIT+ 1571 system components. Shown are the product packaging, the outdoor door entry panel, the indoor 7-inch monitor, and a smartphone displaying the Way-FI app interface.
4. Setup and Installation
This section outlines the general steps for installing your video door entry system. For detailed wiring diagrams and specific mounting instructions, refer to the separate installation guide provided in your package.
4.1. Planning the Installation
- Location: Choose suitable locations for the outdoor panel (near the entrance, protected from direct rain if possible) and the indoor monitor (convenient for access and viewing).
- Wiring: Plan the cable routing for power and communication between the outdoor panel, indoor monitor, and power supply. Ensure sufficient cable length.
4.2. Mounting the Outdoor Panel
- Mark the drilling points on the wall using the mounting template.
- Drill holes and insert wall plugs.
- Route the necessary cables through the wall opening.
- Secure the outdoor panel to the wall using the provided screws.
4.3. Mounting the Indoor Monitor
- Mark and drill holes for the monitor bracket.
- Attach the mounting bracket to the wall.
- Connect the system cables (power, communication) to the indoor monitor terminals as per the wiring diagram.
- Mount the indoor monitor onto its bracket.
4.4. Power Connection
Connect the power supply unit to the main power outlet and to the system as indicated in the installation guide. Ensure all connections are secure before powering on the system.
4.5. Initial Configuration and App Setup
- Power on the system. The indoor monitor will display the initial setup screen.
- Follow the on-screen prompts to configure basic settings such as language, date, and time.
- Wi-Fi Connection: Connect the indoor monitor to your home Wi-Fi network. This is essential for mobile app functionality.
- Mobile App: Download the "Way-FI" app from your smartphone's app store (iOS/Android).
- Register an account and follow the app's instructions to pair your indoor monitor with your smartphone. This typically involves scanning a QR code displayed on the monitor.
5. Operating Instructions
Once installed and configured, your FERMAX Way-FI Plus system is ready for use.
5.1. Answering a Call
- When a visitor presses the call button on the outdoor panel, the indoor monitor will ring and display the visitor's image. Your paired smartphone will also receive a notification.
- On the Monitor: Touch the "Answer" icon on the screen to establish two-way audio and video communication.
- On the Smartphone App: Tap the incoming call notification to open the app and answer the call.
5.2. Opening the Door
- During a call, or when monitoring the outdoor panel, press the "Door Open" icon on the indoor monitor or the smartphone app to activate the electric lock (if connected).
5.3. Monitoring the Outdoor Panel
- On the Monitor: From the main screen, tap the "Monitor" icon to view the live feed from the outdoor panel camera.
- On the Smartphone App: Open the app and select the outdoor panel to view the live feed.
5.4. Adjusting Settings
Access the settings menu on the indoor monitor to adjust volume, brightness, ringtones, Wi-Fi settings, and other system preferences. The mobile app also offers various settings for notifications and remote access.
6. Maintenance
Regular maintenance ensures the longevity and optimal performance of your FERMAX Way-FI Plus system.
- Cleaning: Wipe the indoor monitor and outdoor panel surfaces with a soft, slightly damp cloth. Avoid using harsh chemicals, abrasive cleaners, or excessive moisture.
- Camera Lens: Gently clean the outdoor panel camera lens with a microfiber cloth to ensure clear image quality.
- Software Updates: Periodically check for firmware updates for the indoor monitor and app updates for your smartphone. Updates often include performance improvements and new features.
- Connection Check: Occasionally verify that all cables are securely connected and free from damage.
7. Troubleshooting
If you encounter issues with your FERMAX Way-FI Plus system, refer to the following common problems and solutions:
| Problem | Possible Cause | Solution |
|---|---|---|
| No image on indoor monitor. | Loose cable connection, power issue, camera fault. | Check all wiring connections. Ensure power supply is active. Restart the system. If problem persists, contact support. |
| No audio during call. | Volume too low, microphone/speaker fault, wiring issue. | Adjust volume settings on the monitor/app. Check wiring. Restart system. |
| Mobile app not receiving calls/notifications. | No Wi-Fi connection, incorrect app settings, phone notification settings. | Verify indoor monitor's Wi-Fi connection. Check app notification settings. Ensure phone's notification permissions are granted to the app. |
| Door lock not opening. | Incorrect wiring to electric lock, faulty lock, insufficient power. | Verify electric lock wiring. Test the lock independently if possible. Consult an electrician if unsure. |
8. Specifications
Key technical specifications for the FERMAX Way-FI Plus 7" Video KIT+ 1571:
- Model: Way-FI Plus 7" Video KIT+ 1571
- Monitor Screen Size: 7 inches
- Connectivity: Wi-Fi (for mobile app integration), Wired (for outdoor panel communication)
- Power Supply: Specific to the included power adapter
- Operating Temperature: (Refer to detailed product sheet for exact range)
- ASIN: B0CXGX8RC4
- Manufacturer: fermax
- Date First Available: March 8, 2024
9. Warranty and Support
FERMAX products are designed for reliability and performance. This product comes with a standard manufacturer's warranty. For specific warranty terms and conditions, please refer to the warranty card included in your package or visit the official FERMAX website.
For technical assistance, troubleshooting beyond this manual, or to inquire about repairs, please contact FERMAX customer support. You can find contact information on the FERMAX website or through your local distributor.
Online Resources:


