
Fuers PA300
Fuers PA300 Personal Safety Alarm User Manual
Model: PA300 | Brand: Fuers
1. Introduction
Thank you for choosing the Fuers PA300 Personal Safety Alarm. This device is designed to provide immediate audible and visual alerts in emergency situations, enhancing your personal safety. Please read this manual thoroughly before using the device to ensure proper operation and maintenance.
2. Product Overview
The Fuers PA300 Personal Safety Alarm is a compact and portable device featuring a loud siren, LED strobe light, and vibration sensor. It is designed for quick activation to deter potential threats and attract attention.

Figure 2.1: Front view of the Fuers PA300 Personal Safety Alarm with key features labeled, including the alarm latch, LED light, speaker, LED light button, and USB Type-C charging port.
Key Features:
- 135dB Super Loud Siren: Emits a piercing sound to draw immediate attention.
- High Intensity LED Strobe Light: Provides visual alert and can disorient attackers.
- Vibration Sensor: Activates the alarm upon detecting movement (in specific mode).
- Compact and Portable Design: Easily attaches to bags, keys, or clothing.
- USB Type-C Rechargeable: Eliminates the need for battery replacement.
3. Package Contents
Ensure all items are present in the package:
- 1 x Fuers PA300 Personal Safety Alarm
- 1 x USB Type-C Charging Cable
- 1 x User Manual
4. Setup
4.1 Initial Charging
Before first use, fully charge the device. The alarm is equipped with a USB Type-C charging port.
- Locate the USB Type-C charging port on the bottom of the device.
- Connect the provided USB Type-C charging cable to the alarm and a compatible USB power source (e.g., computer, wall adapter).
- The charging indicator light will illuminate during charging and turn off when fully charged. A full charge typically takes approximately 2 hours.
Video 4.1: Demonstration of charging the personal safety alarm using the USB-C cable. The video shows the charging port and the connection process.
4.2 Attaching the Alarm
The Fuers PA300 is designed for easy attachment to various items for convenient access.
- Use the integrated loop to attach the alarm to a keychain, backpack, purse, belt loop, or dog leash.
- Ensure the alarm is securely fastened but remains easily accessible for quick activation.

Figure 4.1: The Fuers PA300 Personal Safety Alarm shown attached to a set of car keys, demonstrating its portability and ease of integration with everyday items.
5. Operating Instructions
5.1 Alarm Latch Mode (Pull Pin Activation)
This is the primary and most direct method of activating the alarm.
- To activate: Pull the top pin (alarm latch) completely out of the device. The 135dB siren will sound immediately, and the LED strobe light will begin flashing.
- To deactivate: Reinsert the top pin firmly back into the device. The alarm and light will stop.
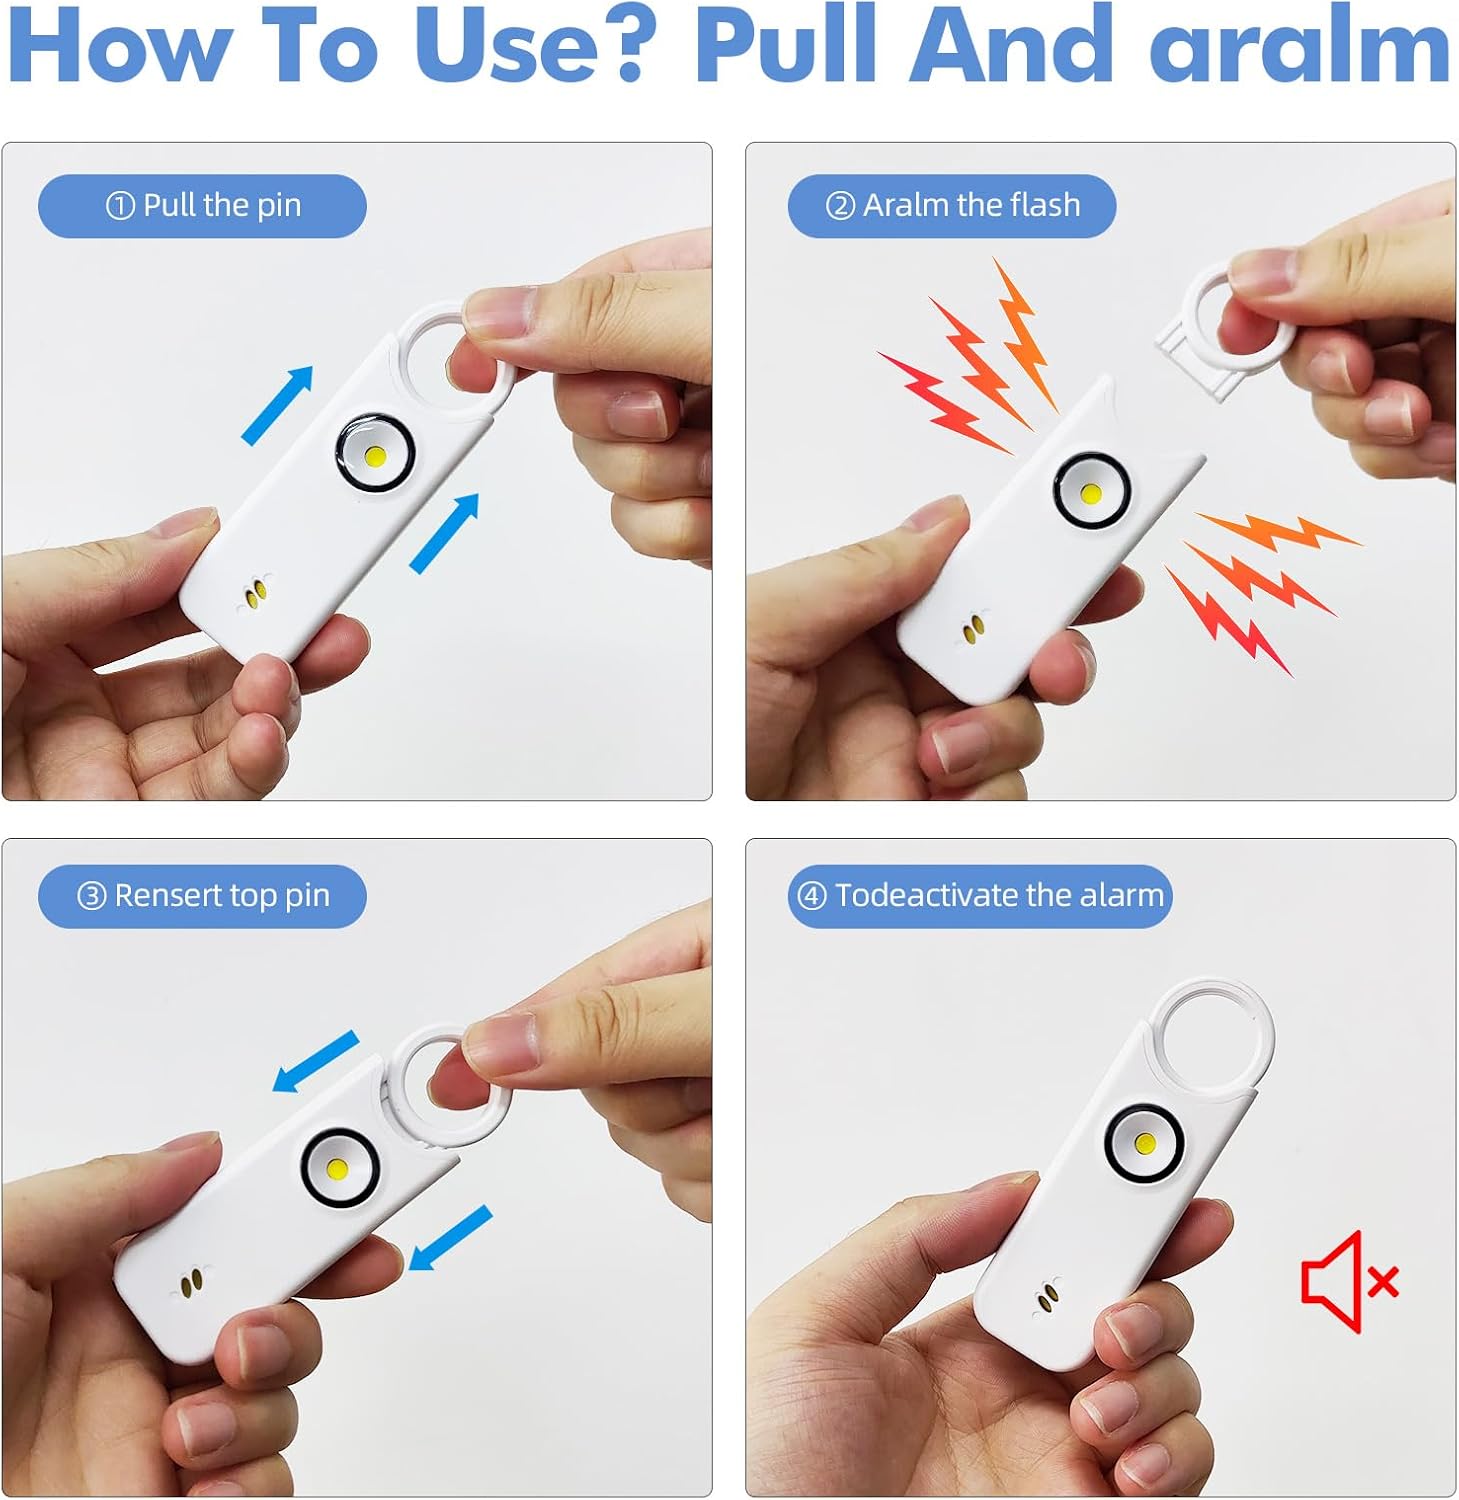
Figure 5.1: Step-by-step visual guide demonstrating the pull-pin activation and deactivation of the alarm. Panel 1 shows pulling the pin, Panel 2 shows the alarm and flash, Panel 3 shows reinserting the pin, and Panel 4 shows the deactivated alarm.
5.2 Vibration Alarm Mode
This mode allows the alarm to be triggered by vibration, useful for securing items or areas.
- To activate: Press and hold the LED light button (located on the side/bottom) for 3 seconds. The device will beep once to confirm activation of the vibration sensing mode. The vibration sensor will become active after 10 seconds.
- To trigger: The alarm will sound and the LED light will flash if the device vibrates or sways significantly.
- To deactivate: Press the LED light button once to stop the alarm.

Figure 5.2: Visual representation of activating the vibration alarm mode by pressing the LED button for 3 seconds (left panel) and an example of the alarm being triggered when placed against a door (right panel).
5.3 LED Flashlight Function
The built-in LED light can be used independently as a flashlight.
- To turn on the flashlight: Press the LED light button once.
- To activate strobe light: Press the LED light button a second time for a flashing strobe effect.
- To turn off: Press the LED light button a third time.

Figure 5.3: The personal safety alarm demonstrating its flashlight capability, illuminating a dark area, useful for finding keys or navigating in low light.
6. Maintenance
- Cleaning: Wipe the device with a soft, dry cloth. Do not use abrasive cleaners or immerse in water.
- Storage: Store the alarm in a cool, dry place away from direct sunlight and extreme temperatures.
- Battery Life: For optimal performance, recharge the device regularly, even if not frequently used. The device can last up to 500 days on standby after a full charge.
7. Troubleshooting
| Problem | Possible Cause | Solution |
|---|---|---|
| Alarm does not sound. | Low battery. Pin not fully pulled out. | Charge the device. Ensure the pin is completely removed. |
| LED light does not work. | Low battery. Button not pressed correctly. | Charge the device. Press the LED light button firmly. |
| Vibration alarm triggers too easily/not at all. | Sensitivity issue. | Ensure the device is placed on a stable surface for vibration mode. If issues persist, contact support. |
8. Specifications
| Feature | Detail |
|---|---|
| Model Number | PA300 |
| Brand | Fuers |
| Audible Noise | 135 Decibels |
| Power Source | Battery Powered (Rechargeable via USB Type-C) |
| Charging Time | Approx. 2 hours |
| Illumination Duration | Approx. 2 hours |
| Flashing Duration | Approx. 1 hour |
| Product Dimensions | 9 x 3 x 1.25 cm (3.54 x 1.18 x 0.49 inches) |
| Product Weight | 25g (0.88 oz) |
| Sensor Technology | Vibration |
| Control Method | Pull Pin / Button |
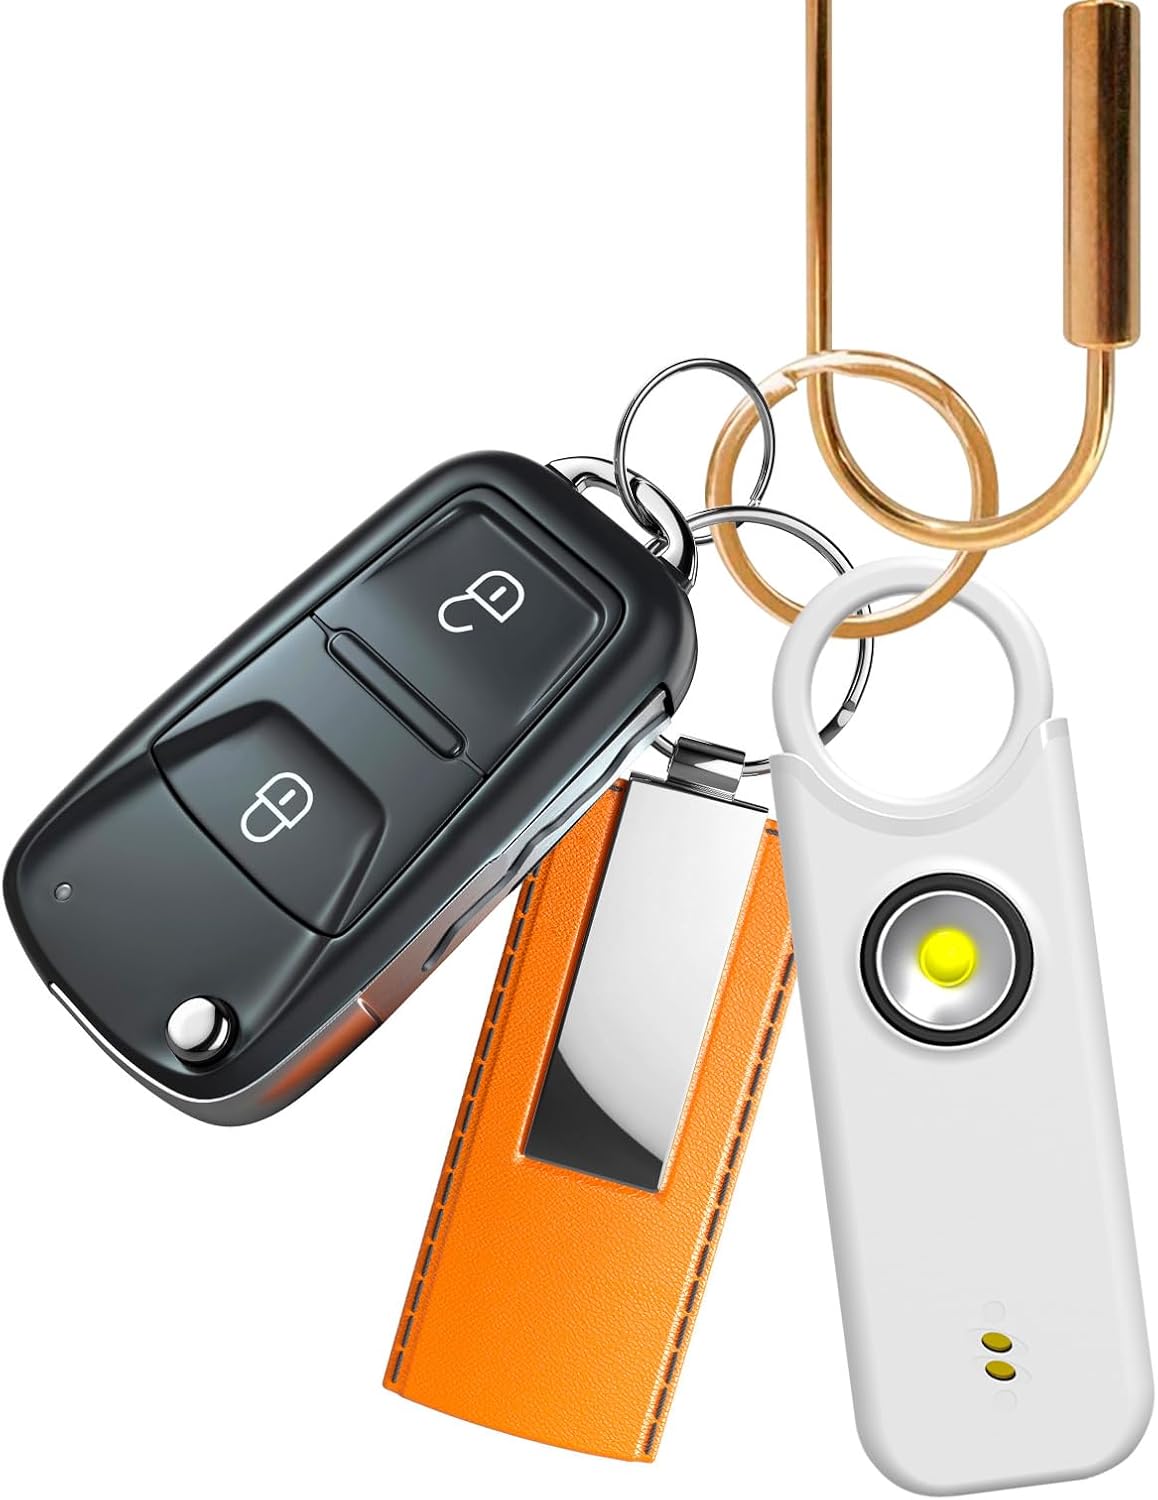
Figure 8.1: Detailed diagram of the Fuers PA300 Personal Safety Alarm showing its physical dimensions and a table summarizing key specifications like alarm mode, charging method, and duration.
9. Warranty and Support
Fuers provides a manufacturer's warranty for this product. For warranty claims, technical support, or any inquiries, please refer to the contact information provided on the product packaging or the official Fuers website.
Manufacturer Warranty Description: 1 year
Manufacturer Contact Information: Please refer to product packaging or official website.
10. Important Safety Information
- Do not expose the device to extreme temperatures, direct sunlight, or moisture.
- Keep out of reach of small children to prevent accidental activation or choking hazards.
- Do not attempt to disassemble or modify the device, as this will void the warranty and may cause damage.
- The alarm is very loud; avoid prolonged exposure to the sound to prevent hearing damage.
- This device is intended as a deterrent and an alert system; it is not a substitute for personal vigilance or professional security measures.
Ask a question about this manual
Ask about setup, troubleshooting, compatibility, parts, safety, or missing instructions. Manuals+ will review the question and use this page’s manual context to help answer it.