1. Important Safety Information
Please read and understand all safety warnings before installation and use of the JOYTUTUS Vehicle Awning.
- General Safety Warning: Ensure proper installation according to the provided instructions. Do not exceed the recommended weight limit. Keep clear of moving parts. In case of bad weather, properly secure or retract the awning to prevent damage or injury.
- Always ensure the awning is securely mounted to your vehicle's roof rack system.
- Do not use the awning in strong winds, heavy rain, or snow. Retract and secure the awning during adverse weather conditions.
- Regularly inspect all components for wear, damage, or loose connections. Replace damaged parts immediately.
- Keep children and pets away from the awning during setup and retraction.
2. Product Overview
The JOYTUTUS Vehicle Awning provides a convenient and portable shade solution for outdoor activities. Designed for quick setup, it offers protection from sun and light rain.
Key Features:
- Waterproof and UV-proof Fabric: Constructed from durable polyester fabric with UV50+ protection and waterproof coating. All four corners are reinforced and glued to prevent water leakage.
- Adjustable Support Brackets: Telescopic aluminum alloy poles allow for height adjustment to adapt to various terrains.
- Quick Installation and Retraction: Features a telescopic structure with twist locks for rapid deployment and storage.
- Versatile Mounting: Brackets are designed with a porous structure to fit most roof racks and roof rails.

Image: The JOYTUTUS Vehicle Awning deployed, offering UV50+ sun protection for outdoor relaxation.

Image: An aerial perspective illustrating the significant shade coverage provided by the awning.
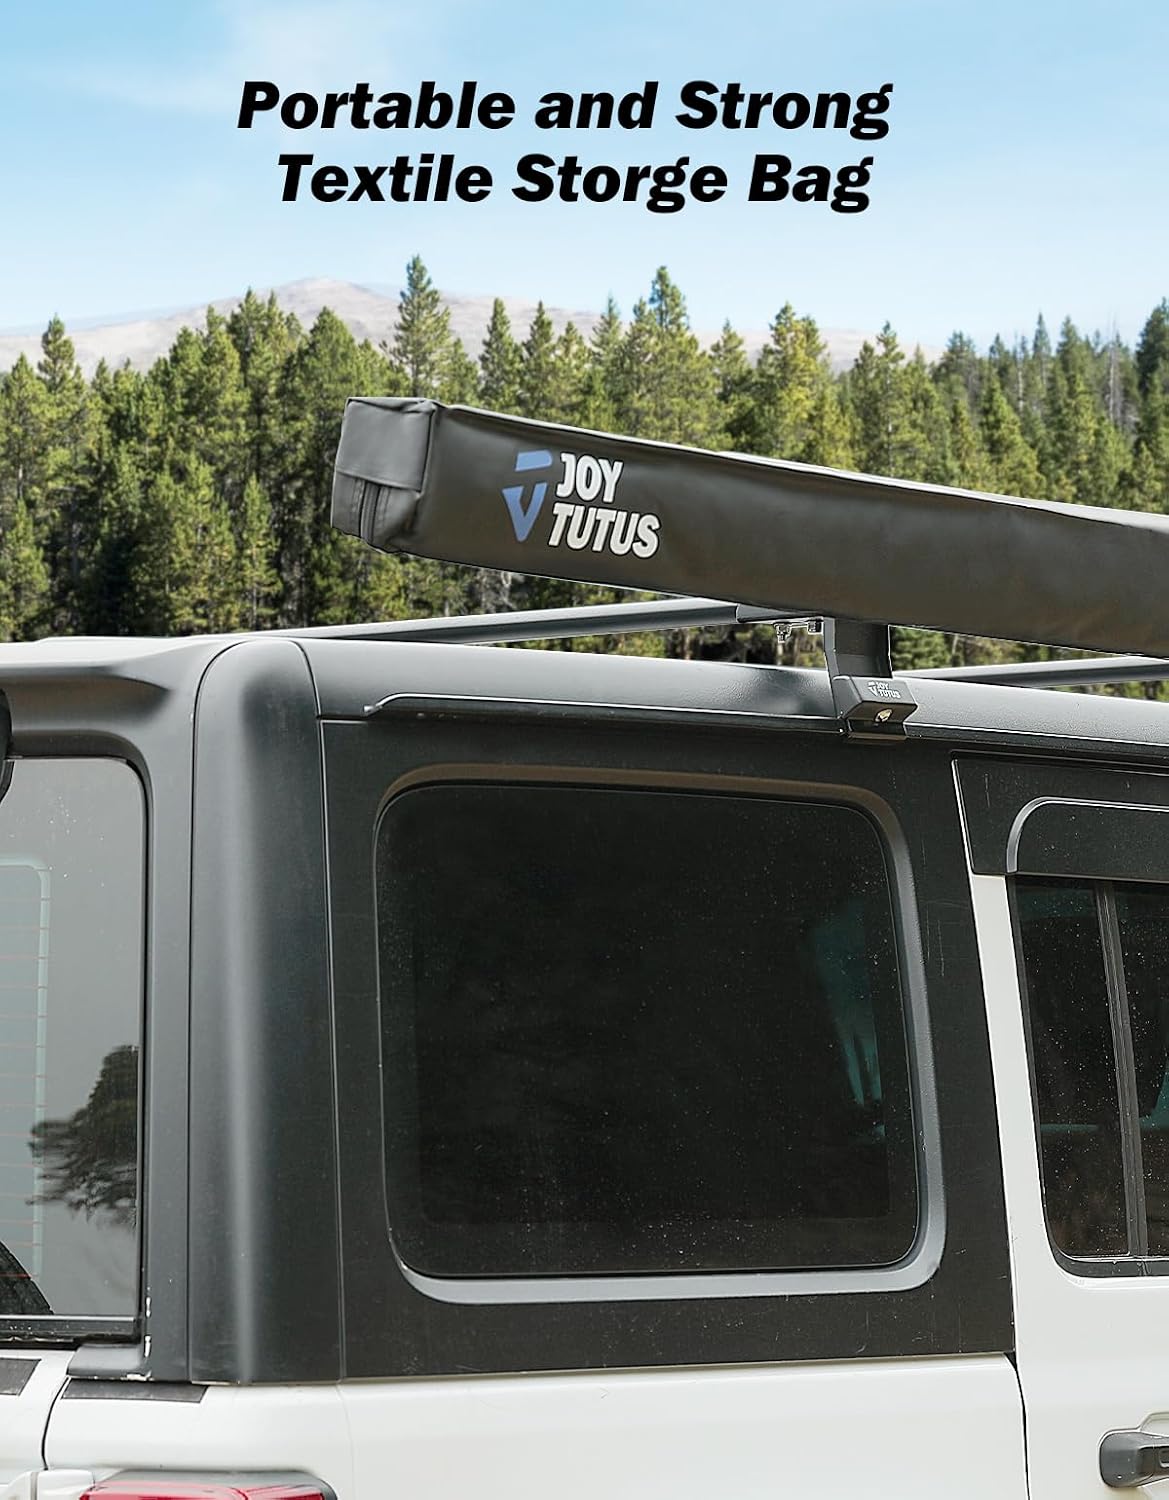
Image: The awning's water-resistant coating provides shelter from sudden showers.
3. Package Contents
Verify that all components are present in your package before beginning installation.

Image: Overview of the awning's dimensions and included accessories.
- 1x Awning Unit (4.6'x6.6')
- 2x Wind Ropes
- 2x L-shaped Brackets
- 2x Back Plates
- 2x L-shaped Ground Nails
- 2x Wrenches
- Assorted Bolts and Nuts for mounting
- 1x Portable Storage Bag
4. Setup and Installation
Follow these steps for secure installation and proper setup of your vehicle awning.
4.1 Mounting the Awning to Your Vehicle
- Identify Mounting Points: The awning is designed to attach to most vehicle roof racks, roof baskets, or cross bars. Refer to the diagram below for common mounting configurations.
- Attach Brackets: Use the provided L-shaped brackets, back plates, bolts, and nuts to securely fasten the awning to your chosen mounting points on the roof rack. Ensure all connections are tightened firmly.
- Verify Security: After mounting, gently shake the awning to ensure it is stable and does not wobble. Re-tighten any loose bolts.

Image: Mounting options for rooftop racks, baskets, and cross bars.
4.2 Deploying the Awning
- Unroll the Awning: Unclip the straps securing the rolled awning. Gently pull the awning fabric outwards from its casing.
- Extend Support Poles: Locate the telescopic support poles within the awning structure. Extend each pole to the desired height. To lock the aluminum alloy tubes, tighten them by twisting clockwise on the top section and counter-clockwise on the bottom section. Do not twist the black trim.
- Secure with Guy Ropes and Ground Nails: Attach the wind ropes to the designated points on the awning and secure them to the ground using the L-shaped ground nails. Adjust tension to ensure stability.
- Reinforced Straps: Utilize the reinforced straps on the awning fabric to further secure it to the poles, enhancing stability.
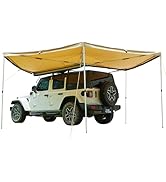
Image: Extending the awning from its stored position.

Image: Adjusting the height of the telescopic support poles.

Image: Guy rope and ground nail reinforcement for stability.

Image: Reinforced straps provide additional security for the awning fabric.
5. Operating Instructions
The JOYTUTUS Vehicle Awning is designed for manual operation.
5.1 Retracting the Awning
- Release Guy Ropes: Detach the wind ropes and remove the ground nails.
- Collapse Support Poles: Unlock the telescopic support poles by twisting them in the opposite direction (counter-clockwise on top, clockwise on bottom) and collapse them fully.
- Roll Up Awning: Carefully roll the awning fabric back into its casing. Ensure it is rolled tightly and evenly to prevent damage and allow for easy storage.
- Secure Awning: Fasten the awning with the integrated straps to keep it securely rolled within its casing.
- Store Accessories: Place all wind ropes, ground nails, and tools into the portable storage bag.

Image: The portable and strong textile storage bag keeps the awning protected when not in use.
6. Maintenance
Proper maintenance will extend the lifespan of your JOYTUTUS Vehicle Awning.
- Cleaning: Clean the awning fabric with mild soap and water. Do not use harsh chemicals or abrasive cleaners, as these can damage the waterproof and UV-protective coatings. Rinse thoroughly and allow to air dry completely before storing.
- Drying: Always ensure the awning fabric is completely dry before rolling it up and storing it. Storing a wet awning can lead to mildew and fabric degradation.
- Inspection: Periodically inspect the fabric for tears, punctures, or signs of wear. Check poles for bends or damage, and ensure all mounting hardware remains tight.
- Storage: Store the awning in its portable storage bag in a cool, dry place away from direct sunlight when not in use for extended periods.
7. Troubleshooting
Refer to this section for solutions to common issues.
| Problem | Possible Cause | Solution |
|---|---|---|
| Awning is unstable or wobbly. | Loose mounting hardware; insufficient tension on guy ropes; poles not fully extended/locked. | Ensure all mounting bolts are tightened. Adjust tension on wind ropes. Verify telescopic poles are fully extended and twist-locked. |
| Difficulty extending/retracting poles. | Poles are jammed or dirty; incorrect twisting direction. | Clean poles if dirty. Ensure you are twisting the correct sections (clockwise top, counter-clockwise bottom for locking; reverse for unlocking). Do not twist the black trim. |
| Water leakage. | Awning not pitched correctly; fabric damage; extreme weather. | Ensure awning is pitched with a slight angle for water runoff. Inspect fabric for damage. Retract awning in heavy rain. |
| Awning does not roll up smoothly. | Fabric is not aligned; debris in casing. | Ensure fabric is rolled evenly and tightly. Check casing for any obstructions. |
8. Specifications
| Feature | Detail |
|---|---|
| Model Number | H1201-01007-YL |
| Dimensions (Awning) | 4.6 feet (Projection) x 6.6 feet (Length) |
| Product Dimensions (Packaged) | 5.5"D x 3.94"W x 59.84"H |
| Material | Polyester fabric with PVC coating |
| UV Protection | UV50+ |
| Item Weight | 16.87 pounds |
| Assembly Required | Yes |
| Operation Mode | Manual |
9. Warranty Information
Warranty details for the JOYTUTUS Vehicle Awning are not specified in the provided product information. Please refer to the retailer or manufacturer's official website for current warranty terms and conditions.
10. Support
Contact information for product support is not specified in the provided product information. For assistance, please reach out to the retailer where the product was purchased or visit the official JOYTUTUS brand store for potential contact options.
JOYTUTUS Brand Store: https://www.amazon.com/stores/JoyTutus/page/DAA0C549-EE4C-4713-B245-3F25450947F0


