1. Introduction
This manual provides essential information for the proper setup, operation, and maintenance of your GenMachine Mini PC with AMD Ryzen 3 2200U processor. Please read this manual thoroughly before using the device to ensure optimal performance and longevity. This Mini PC is designed for various applications including office work, design tasks, and light gaming, offering a compact and efficient computing solution.
2. Package Contents
Verify that all items listed below are included in your package. If any items are missing or damaged, please contact customer support.
- GenMachine Mini PC Unit
- HDMI Cable
- Power Adapter
- User Manual

Image: The package contents including the Mini PC, HDMI cable, power adapter, and user manual.
3. Setup Instructions
Follow these steps to set up your GenMachine Mini PC:
- Connect to a Display: Connect the Mini PC to a monitor or TV using the provided HDMI cable. The device supports dual HDMI output for extended display configurations.
- Connect Peripherals: Plug in your USB keyboard and mouse into the available USB ports (2x USB 3.0, 2x USB 2.0).
- Connect to Network (Optional): For a wired internet connection, connect an Ethernet cable to the LAN port. For wireless connectivity, the device supports Wi-Fi 5.
- Power On: Connect the power adapter to the DC IN port on the Mini PC, then plug the adapter into a power outlet. Press the power button located on the front of the device.
- Initial Boot: The Mini PC will boot up. Follow any on-screen instructions for initial operating system setup.

Image: A detailed view of the GenMachine Mini PC's front and rear ports, including DC IN, LAN, DP, HDMI, USB 3.0, USB 2.0, and audio jack.
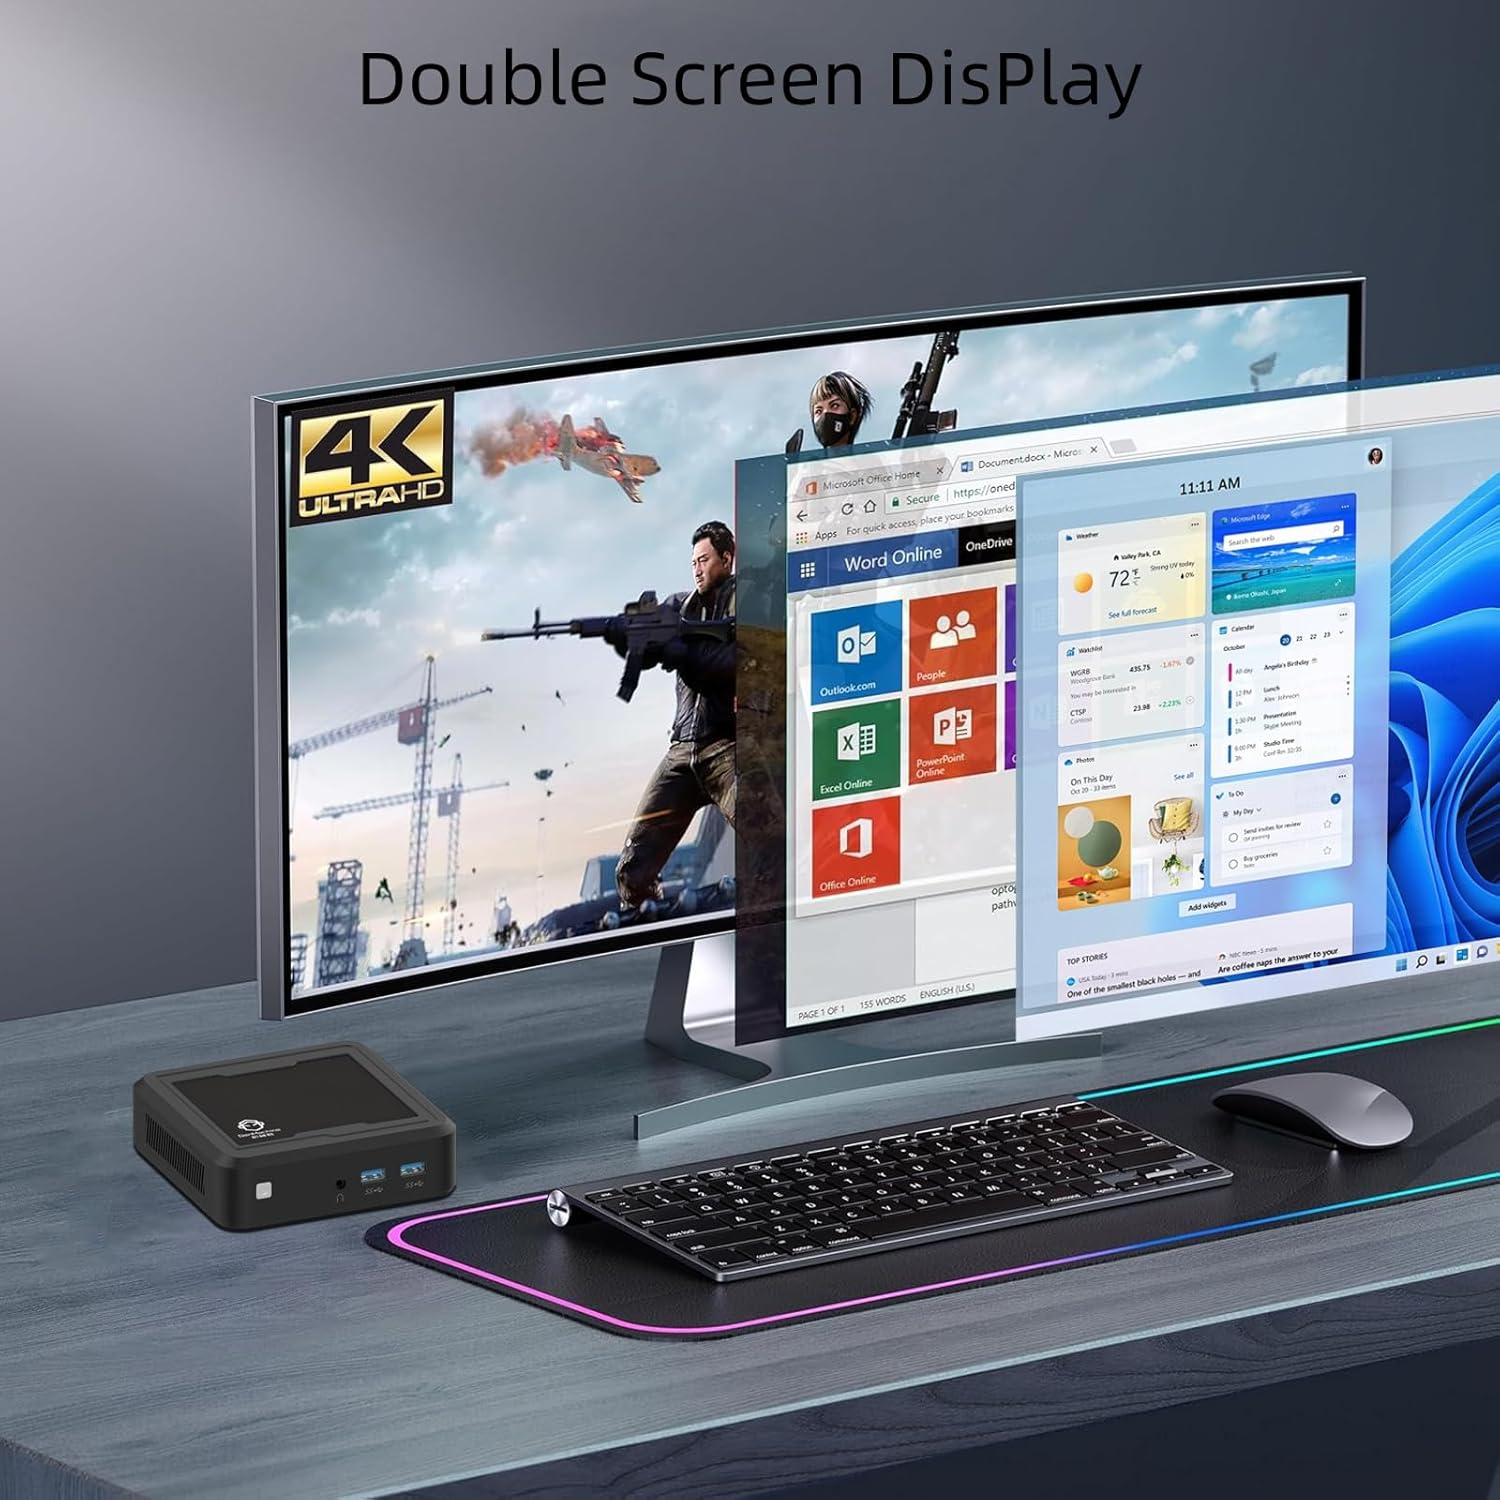
Image: The GenMachine Mini PC connected to a dual monitor setup, demonstrating its 4K Ultra HD display capabilities for multitasking.
Video: This video demonstrates the GenMachine Mini PC's capability to support two monitors simultaneously, enhancing productivity and user experience.
4. Operating Instructions
4.1 Power On/Off
- To Power On: Press the power button on the front of the Mini PC.
- To Power Off: Use the operating system's shutdown function. Alternatively, press and hold the power button for 5 seconds to force a shutdown (use only when necessary).
4.2 Display Configuration
The Mini PC supports dual HDMI output for connecting two displays. You can configure display settings (e.g., extend, duplicate) through your operating system's display settings menu.
4.3 Network Connectivity
- Wired Connection: Connect an Ethernet cable to the LAN port for a stable 1.0 Gbps internet connection.
- Wireless Connection: The Mini PC is equipped with Wi-Fi 5 (802.11ac) for wireless internet access. Connect to your preferred Wi-Fi network through the operating system's network settings.
- Bluetooth: Bluetooth 4.2 allows for connection to wireless peripherals such as keyboards, mice, and headphones. Pair devices through the operating system's Bluetooth settings.

Image: A close-up view of the 1.0 Gbps Ethernet port on the GenMachine Mini PC, highlighting its high-speed network capability.
5. Maintenance
Regular maintenance helps ensure the longevity and optimal performance of your Mini PC.
- Cleaning: Use a soft, dry cloth to clean the exterior of the Mini PC. Avoid using liquid cleaners or solvents. For dust accumulation in vents, use compressed air.
- Ventilation: Ensure the Mini PC is placed in a well-ventilated area. Do not block the ventilation openings to prevent overheating. The device features a silent cooling system.
- Software Updates: Regularly update your operating system and drivers to ensure security and performance.
- Storage Management: Periodically clean up unnecessary files and applications to maintain optimal storage performance.
6. Troubleshooting
This section addresses common issues you might encounter with your GenMachine Mini PC.
6.1 No Power
- Ensure the power adapter is securely connected to both the Mini PC and a working power outlet.
- Verify the power outlet is functional by plugging in another device.
- Try a different power outlet if available.
6.2 No Display Output
- Check if the HDMI cable is securely connected to both the Mini PC and the monitor.
- Ensure the monitor is powered on and set to the correct input source (HDMI/DP).
- Try a different HDMI cable or monitor if possible.
6.3 No Internet Connection
- For wired connections, ensure the Ethernet cable is properly connected and your router is working.
- For wireless connections, verify that Wi-Fi is enabled in your operating system and you are connected to the correct network with the correct password.
- Restart your router and the Mini PC.
6.4 Slow Performance
- Close unnecessary applications running in the background.
- Check for available operating system updates.
- Ensure there is sufficient free space on your SSD.
- Monitor system temperatures to ensure the device is not overheating.
7. Specifications
Detailed technical specifications for the GenMachine Mini PC (Model: 2200U/8GB/256GB):
| Feature | Detail |
|---|---|
| Processor | AMD Ryzen 3 2200U (2 Cores, 4 Threads, 2.5 GHz Base, up to 3.4 GHz Boost, 4MB L3 Cache) |
| Graphics | Integrated AMD Radeon Vega 3 Graphics (1100MHz) |
| RAM | 8GB DDR4 |
| Storage | 256GB SSD (M.2 NVME support) |
| Display Output | 2x HDMI (Supports 4K @ 60Hz, 3840 x 2160 resolution) |
| Wireless Connectivity | Wi-Fi 5 (802.11ac), Bluetooth 4.2 |
| Wired Connectivity | 1x Gigabit Ethernet (LAN) |
| USB Ports | 2x USB 3.0, 2x USB 2.0 |
| Audio | 1x 3.5mm Audio Jack |
| Dimensions (L x W x H) | 4.32 x 3.93 x 1.57 inches (114 x 106 x 37 mm) |
| Weight | 2 pounds (0.5 kg) |
| Operating System | OS (Pre-installed or user-installable) |
| Special Features | Silent Cooling System, Wake-on-LAN, PXE Boot |

Image: An infographic displaying key features and specifications of the GenMachine Mini PC, including Ryzen 2200U, DDR4 support, SSD support, silent fan, Bluetooth & Dual-Band WiFi, Radeon Vega 3 Graphics, and core/thread count.
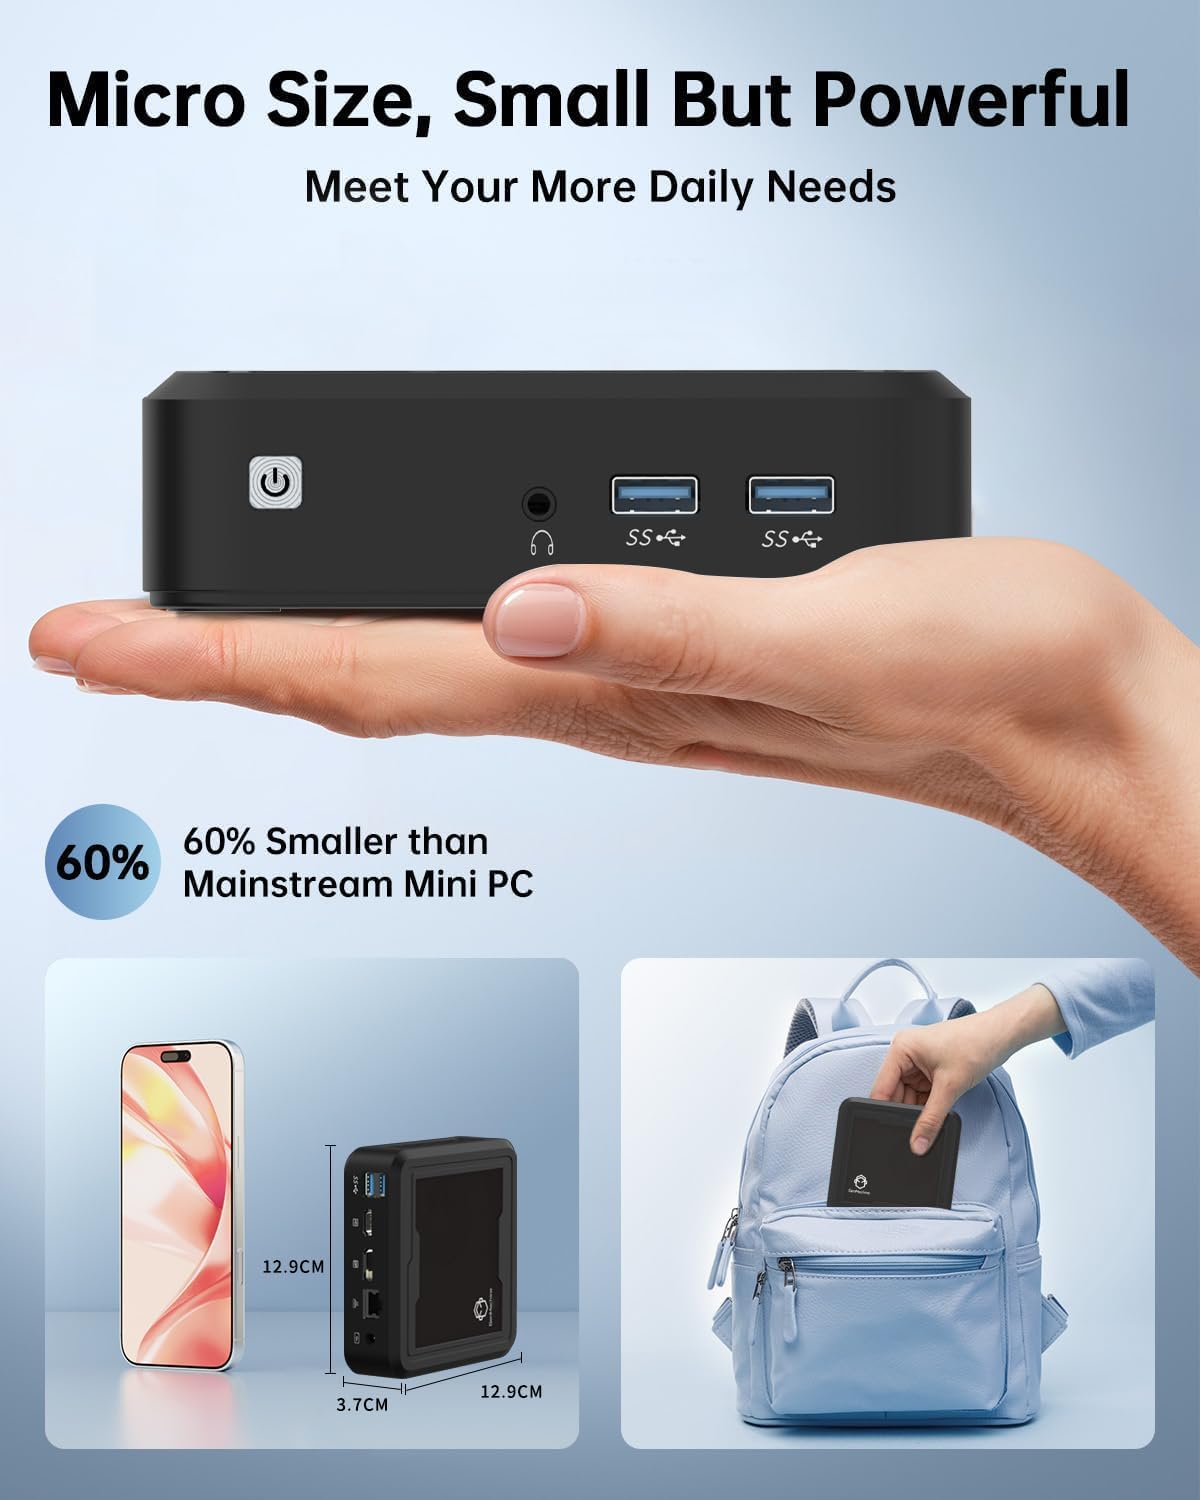
Image: The GenMachine Mini PC held in a hand and shown next to a smartphone and inside a backpack, illustrating its micro size and portability.
8. Warranty and Support
For warranty information and technical support, please refer to the documentation included with your purchase or visit the official GenMachine website. If you encounter any issues not covered in this manual, please contact GenMachine customer service for assistance.


