1. Safety Instructions
Read all instructions thoroughly before operating the appliance. Failure to follow these instructions may result in electric shock, fire, or serious injury.
- Electrical Safety: Ensure the oven is connected to a properly grounded 240V, 1-phase electrical supply with a dedicated circuit. Do not use extension cords. Disconnect power before servicing or cleaning.
- Hot Surfaces: The oven exterior and interior surfaces become extremely hot during operation. Use heat-resistant gloves or mitts when handling hot items or cleaning. Allow the oven to cool completely before cleaning.
- Ventilation: Install the oven in a well-ventilated area. Maintain adequate clearance around the oven for proper airflow and heat dissipation.
- Flammable Materials: Keep flammable materials, such as paper, plastic, and aerosols, away from the oven.
- Supervision: Do not leave the oven unattended during operation. Close supervision is necessary when any appliance is used by or near children.
- Proper Use: Use the oven only for its intended purpose of cooking and baking food. Do not use it for heating rooms or drying non-food items.
- Damage: Do not operate the oven if it has a damaged cord or plug, if it is malfunctioning, or if it has been dropped or damaged in any manner. Contact qualified service personnel.
2. Product Overview
The Wilprep Commercial Convection Oven WCO24E1 is designed for commercial kitchen environments, offering efficient and precise cooking capabilities. It features a robust stainless steel construction and a spacious interior.

Figure 2.1: Front view of the Wilprep Commercial Convection Oven, showing the double glass doors and control panel.
Key Features:
- Spacious Capacity: 7 cubic feet chamber with 5 adjustable racks and 11 sets of rack brackets for versatile cooking configurations.
- Powerful Heating: 10 kW heating power, reaching temperatures from 150°F to 500°F (65°C to 260°C) with an automatic thermostat for precision.
- Dual Fan Modes & Speeds: Convection fan with "Cook" and "Cool" modes, and high/low speed options for even heat distribution.
- User-Friendly Controls: 60-minute timer, temperature control knob, and switches for fan, light, and power.
- Durable Construction: Stainless steel exterior for corrosion resistance and an enamel interior for easy cleaning.
- Monitoring Features: Built-in LED lights and double-layer glass doors allow clear visibility of food during cooking.
Components:
- Control Panel (Timer, Temperature Knob, Fan Switch, Light Switch, Power Switch)
- Double-Layer Glass Doors
- Powder Coated Handles
- Oven Racks (5 included)
- Rack Brackets (11 sets)
- Convection Fan
- LED Interior Lights
- Adjustable Legs

Figure 2.2: Detailed view of the oven's construction, highlighting the stainless steel body, enamel interior, double-layer glass doors, and powder-coated handles.
3. Setup and Installation
3.1 Unpacking
- Carefully remove the oven from its packaging.
- Inspect the oven for any shipping damage. Report any damage to the carrier immediately.
- Remove all packing materials, including any protective films or tapes, from the interior and exterior of the oven.
3.2 Placement
- Place the oven on a stable, level surface capable of supporting its weight.
- Ensure adequate clearance around the oven for ventilation. Refer to local codes for specific requirements.
- Avoid placing the oven near heat-sensitive materials or appliances.

Figure 3.1: Oven dimensions for proper placement and installation. The overall product measures approximately 44.5 inches in depth, 38 inches in width, and 61.8 inches in height (including legs).
3.3 Electrical Connection
- This oven requires a 240V, 1-phase electrical supply with a 10 kW power rating.
- Installation must be performed by a qualified electrician in accordance with all local and national electrical codes.
- Ensure the circuit is properly fused and grounded.
3.4 Rack Installation
- Insert the oven racks into the desired rack brackets. The oven features 11 sets of brackets for flexible positioning.

Figure 3.2: Interior view illustrating the 7 cu. ft. capacity and the 11 sets of rack brackets for customizable rack placement.
4. Operating Instructions
4.1 Control Panel Overview
- POWER Switch: Turns the oven's main power ON/OFF.
- TEMP Knob: Adjusts the desired cooking temperature (150°F - 500°F).
- TIMER Knob: Sets the cooking duration up to 60 minutes. This timer provides a reminder but does not cut off power.
- FAN Switch: Selects between HIGH and LOW fan speeds.
- FAN MODE Switch: Toggles between COOK and COOL fan modes.
- LIGHT Switch: Activates the interior LED lights.

Figure 4.1: Interior view with LED lights illuminated, demonstrating visibility through the clear glass doors for monitoring food.
4.2 Initial Startup (Seasoning)
Before first use, it is recommended to "season" the oven to burn off any manufacturing oils or residues.
- Ensure the oven is empty.
- Turn the POWER switch ON.
- Set the TEMP knob to 400°F (200°C).
- Set the TIMER to 30 minutes.
- Allow the oven to operate for the set time. A slight odor or smoke may be present; this is normal.
- Once complete, turn the POWER switch OFF and allow the oven to cool with the doors slightly ajar.
4.3 Basic Operation
- Preheating:
- Turn the POWER switch ON.
- Set the desired temperature using the TEMP knob.
- Allow the oven to preheat until the desired temperature is reached. The HEAT indicator light will turn off when the set temperature is achieved.
- Loading Food:
- Carefully open the oven doors.
- Place food items on the oven racks. Ensure proper spacing for even air circulation.
- Close the oven doors securely.
- Setting Cook Time:
- Set the desired cooking time using the TIMER knob. The timer will sound an alert when the time expires but will not shut off the oven.
- Using the Convection Fan:
- Select the desired fan speed (HIGH or LOW) using the FAN switch.
- Choose the appropriate fan mode (COOK for active cooking, COOL for rapid cooling or gentle drying) using the FAN MODE switch.
- Monitoring:
- Use the LIGHT switch to illuminate the oven interior for monitoring food progress through the glass doors.
- Completion:
- When cooking is complete, carefully remove food using heat-resistant gloves.
- Turn the POWER switch OFF.
- Allow the oven to cool before cleaning.
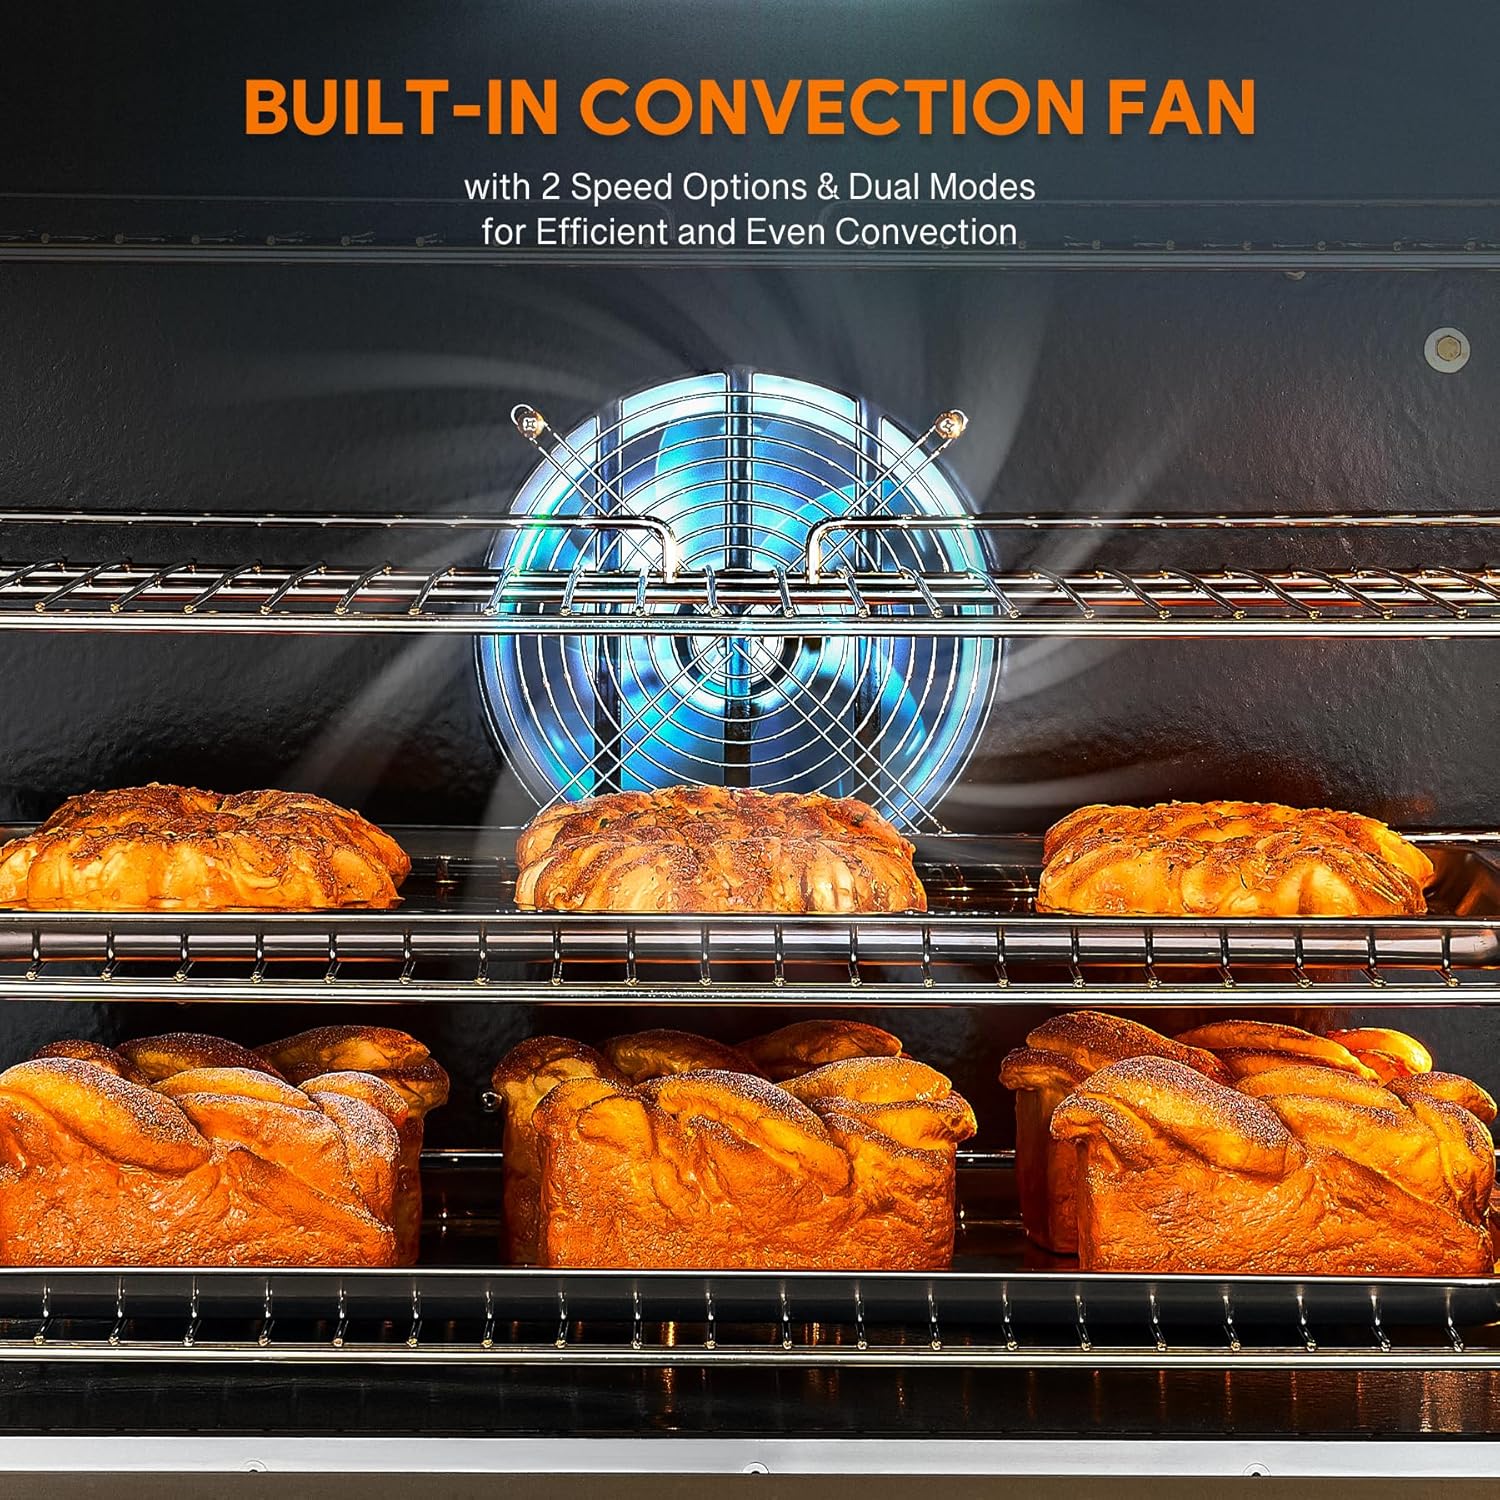
Figure 4.2: The built-in convection fan, which circulates hot air for even cooking and can be adjusted for speed and mode.

Figure 4.3: Illustration of the oven's heating capabilities, indicating 10 kW power and a temperature range of 150°F to 500°F.
5. Maintenance and Cleaning
Regular cleaning and maintenance will ensure the longevity and optimal performance of your Wilprep Commercial Convection Oven.
5.1 Daily Cleaning
- Exterior: Wipe down the stainless steel exterior with a damp cloth and mild detergent. Dry thoroughly to prevent water spots. Do not use abrasive cleaners or scouring pads.
- Interior: Once the oven has cooled, wipe the enamel interior with a damp cloth and mild, non-abrasive oven cleaner. The non-porous enamel surface facilitates easy cleaning.
- Glass Doors: Clean the double-layer glass doors with a glass cleaner or a damp cloth. Avoid harsh chemicals that could damage the seals.
- Racks: Remove oven racks and wash them with warm, soapy water. Rinse and dry completely before returning them to the oven.
5.2 Periodic Maintenance
- Inspect the door seals for any signs of wear or damage. Damaged seals can affect oven performance and energy efficiency.
- Check the electrical cord and plug for any fraying or damage.
- Ensure the convection fan operates smoothly and is free from obstructions.
- For any internal component inspection or repair, contact a qualified service technician.
6. Troubleshooting
This section addresses common issues that may arise during the operation of your convection oven. For problems not listed here, contact customer support.
| Problem | Possible Cause | Solution |
|---|---|---|
| Oven does not turn on. | No power supply; POWER switch OFF; Circuit breaker tripped. | Ensure oven is plugged in. Turn POWER switch ON. Check circuit breaker and reset if necessary. Verify electrical connection. |
| Oven not heating to set temperature. | Incorrect temperature setting; Faulty heating element; Door not fully closed. | Verify TEMP knob setting. Ensure oven doors are securely closed. If problem persists, contact service. |
| Convection fan not operating. | FAN switch OFF; FAN MODE switch incorrect; Motor malfunction. | Ensure FAN switch is ON and FAN MODE is set correctly. Check for obstructions. If problem persists, contact service. |
| Uneven cooking. | Overcrowding of oven; Improper rack placement; Fan malfunction. | Do not overcrowd the oven. Ensure proper spacing between items. Adjust rack positions. Check fan operation. |
| Timer alarm does not sound. | Timer not set; Faulty timer mechanism. | Ensure TIMER knob is set. If timer is set but no alarm, contact service. |
7. Specifications
| Feature | Detail |
|---|---|
| Brand | Wilprep |
| Model Number | WCO24E1 |
| Product Dimensions (D x W x H) | Approx. 44.5"D x 38"W x 61.8"H (with legs). Oven unit only: 38"D x 38"W x 38"H. |
| Capacity | 7 cu. ft. |
| Power Source | Electric |
| Power Rating | 10 kW |
| Voltage | 240V, 1 Phase |
| Temperature Range | 150°F - 500°F (65°C - 260°C) |
| Control Type | Knob |
| Door Style | Dropdown Door (Double-layer glass) |
| Included Components | Oven Racks (5) |
| Special Features | Automatic Thermostat, Adjustable Convection Fan (2 modes, 2 speeds), Multiple Rack Configurations, Durable and Easy-to-Clean Construction (Stainless Steel Exterior, Enamel Interior), Built-in LED Lights. |
8. Warranty and Support
For warranty information, please refer to the warranty card included with your product or visit the official Wilprep website. For technical support, parts, or service inquiries, please contact Wilprep customer service through their official channels.
Wilprep Official Website: Visit the Wilprep Store on Amazon


