Important Safety Instructions
When using electrical appliances, basic safety precautions should always be followed, including the following:
- Read all instructions before operating the mixer.
- To protect against risk of electrical shock, do not immerse the mixer base, cord, or plug in water or other liquid.
- Close supervision is necessary when any appliance is used by or near children.
- Unplug from outlet when not in use, before putting on or taking off parts, and before cleaning.
- Avoid contact with moving parts. Keep hands, hair, and clothing, as well as spatulas and other utensils, away from beaters during operation to reduce the risk of injury to persons and/or damage to the mixer.
- Do not operate any appliance with a damaged cord or plug, or after the appliance malfunctions or has been dropped or damaged in any manner. Contact customer support for assistance.
- The use of attachments not recommended or sold by the manufacturer may cause fire, electric shock, or injury.
- Do not use outdoors.
- Do not let cord hang over edge of table or counter.
- Do not let cord contact hot surfaces, including the stove.
- Remove beaters from mixer before washing.
- This appliance is intended for household use only.
Product Overview
Familiarize yourself with the components of your AILESSOM Stand Mixer before first use.

Figure 1: Stand Mixer Components. This image displays the AILESSOM Stand Mixer with its main parts clearly labeled, including the splash bowl cover, whisk, 6.5-quart stainless steel bowl, rise button, speed button, anti-slip feet, beater, and dough hook. Understanding these components is key to proper operation.
Components:
- Mixer Head: Contains the motor and attachment port.
- Mixer Base: Provides stability and houses the controls.
- 6.5-Quart Stainless Steel Bowl: For mixing ingredients.
- Splash Bowl Cover: Helps prevent splattering during mixing.
- Speed Button (Knob): Controls the mixing speed (10 speeds).
- Rise Button: Releases the mixer head for tilting.
- Anti-slip Feet: Ensures stability during operation.
Included Attachments:
- Dough Hook: For kneading yeast doughs.
- Beater: For general mixing, creaming, and mashing.
- Whisk: For whipping eggs, cream, and light batters.
Setup
Follow these steps to set up your AILESSOM Stand Mixer for first use.
- Unpack and Clean: Carefully remove all packaging materials. Wash the mixing bowl, splash cover, and all attachments (dough hook, beater, whisk) in warm, soapy water, then rinse and dry thoroughly. Wipe the mixer body with a damp cloth.
- Position the Mixer: Place the mixer on a clean, dry, and stable surface. Ensure the anti-slip feet are firmly gripping the countertop to prevent movement during operation.
- Tilt the Mixer Head: Press the "Rise Button" located on the side of the mixer. The mixer head will tilt upwards.
- Attach the Mixing Bowl: Place the stainless steel mixing bowl onto the base, aligning the tabs on the bowl with the slots on the base. Turn the bowl clockwise until it locks securely into place.
- Attach an Accessory: Select the desired attachment (dough hook, beater, or whisk). Insert the attachment shaft into the attachment port on the mixer head. Rotate the attachment until it clicks into place.
- Lower the Mixer Head: Gently push the mixer head down until it locks into place. You should hear a click. Ensure it is fully locked before operation.
- Attach Splash Cover (Optional): If desired, place the splash cover over the mixing bowl.

Figure 2: Tilt-Head Design and Anti-slip Feet. This image highlights the mixer's tilt-head mechanism for easy attachment and bowl access, along with the anti-slip suction feet that provide stability during use.
Operating Instructions
Operating your AILESSOM Stand Mixer is straightforward. Always ensure the mixer is properly assembled before plugging it in.
- Add Ingredients: Place your ingredients into the mixing bowl.
- Plug In: Connect the power cord to a suitable electrical outlet.
- Select Speed: Turn the Speed Button (knob) to your desired speed setting. The mixer offers 10 speeds for various mixing tasks. Start at a lower speed and gradually increase as needed to prevent splattering.
- Monitor Mixing: Observe the mixing process. Use a spatula to scrape down the sides of the bowl if necessary, but only when the mixer is turned off and unplugged.
- Turn Off: Once mixing is complete, turn the Speed Button back to the "0" (off) position.
- Unplug: Always unplug the mixer from the power outlet after use and before removing the bowl or attachments.
- Remove Attachments and Bowl: Press the "Rise Button" to tilt the head, then remove the attachment and mixing bowl.
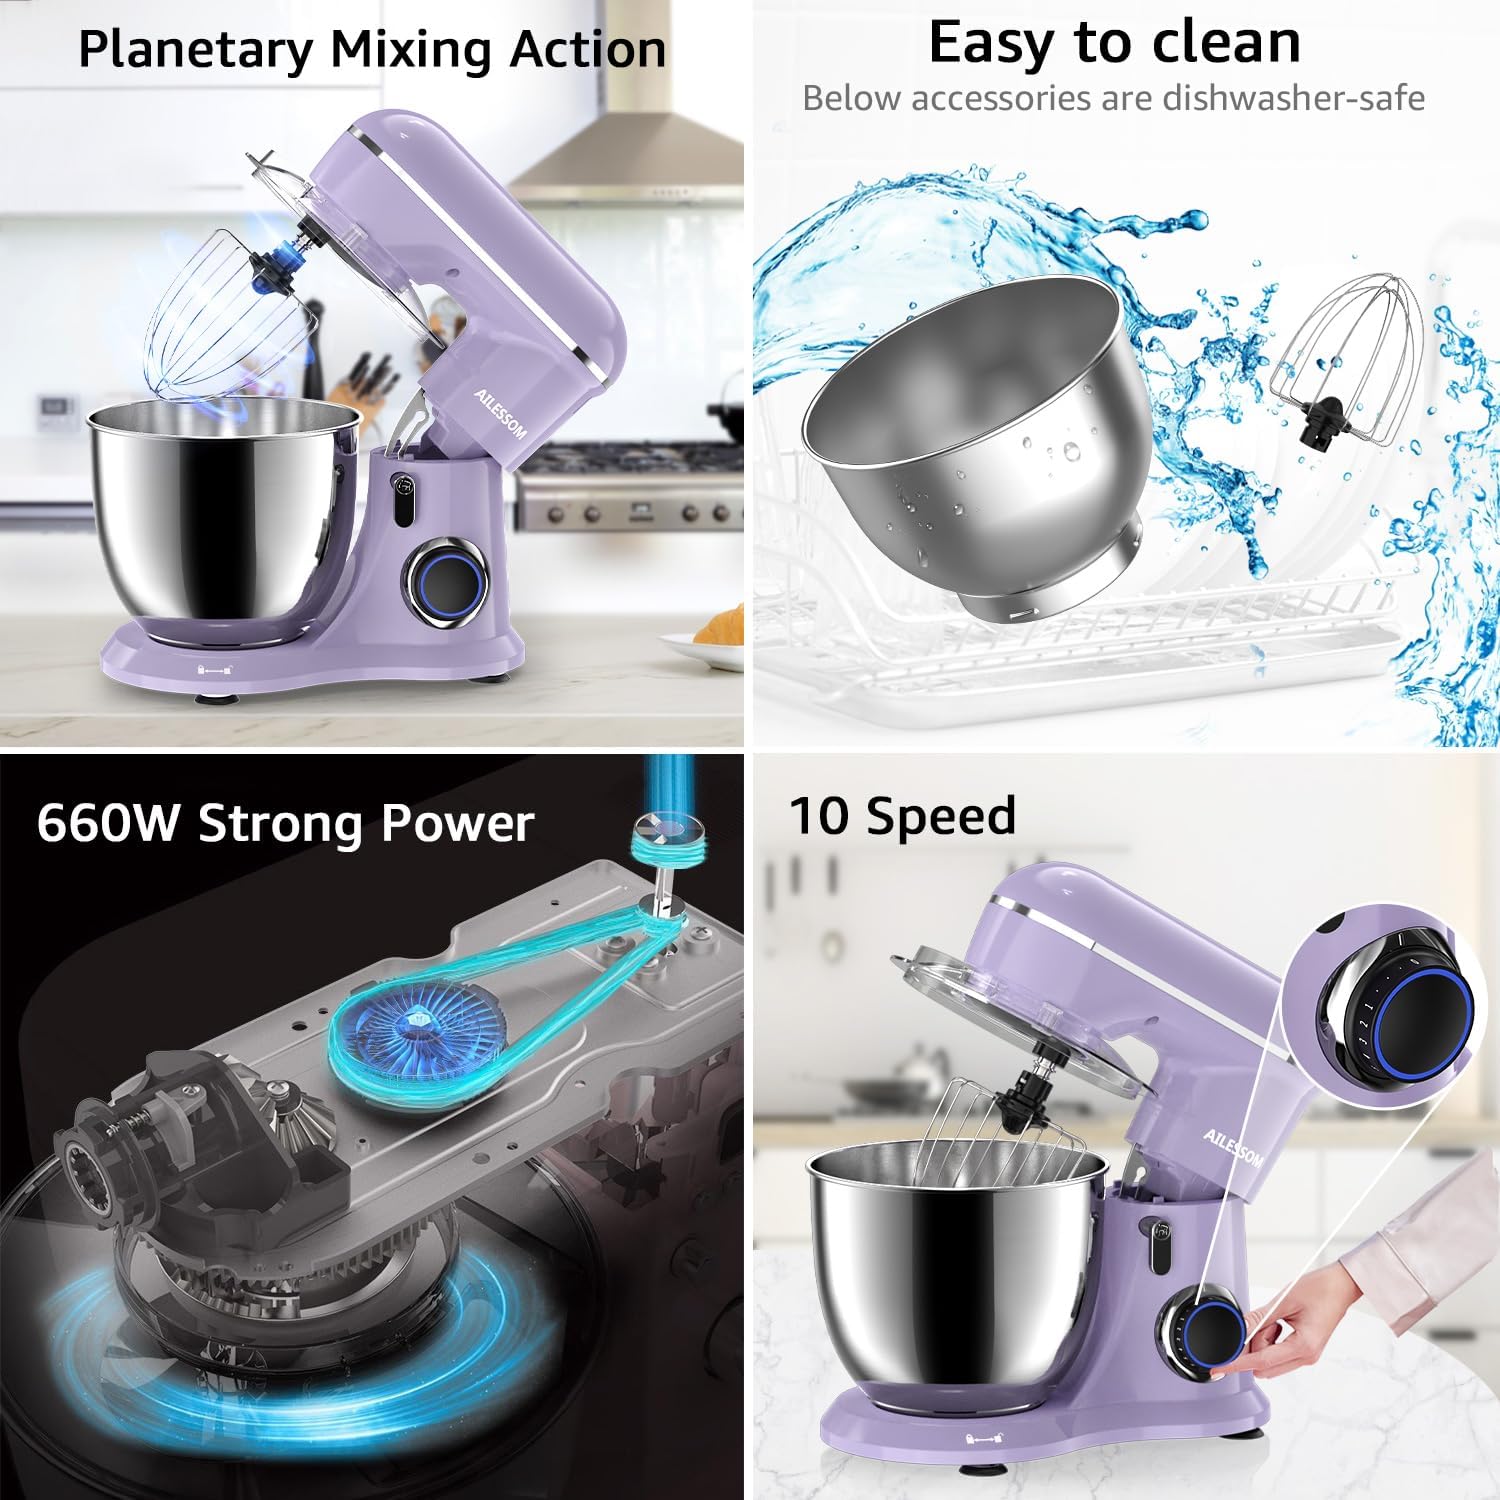
Figure 3: 10-Speed Control. This image illustrates the mixer's speed control knob, which allows for precise adjustment across 10 different speed settings, suitable for a wide range of recipes.
Attachments and Their Uses
Your AILESSOM Stand Mixer comes with three essential attachments, each designed for specific mixing tasks.

Figure 4: Attachment Guide. This image provides a visual guide to the three main attachments—beater, dough hook, and whisk—and demonstrates their recommended uses for various culinary preparations.
- Dough Hook:
Ideal for kneading heavy mixtures like bread dough, pizza dough, and pasta dough. Use at low speeds (1-3) to prevent overworking the motor.
- Beater:
Suitable for medium to heavy mixtures such as cakes, cookies, frostings, mashed potatoes, and quick breads. Use at medium speeds (3-6).
- Whisk:
Perfect for incorporating air into light mixtures like egg whites, cream, meringues, and light batters. Use at higher speeds (7-10).
Cleaning and Maintenance
Proper cleaning and maintenance will extend the life of your AILESSOM Stand Mixer.
- Always Unplug: Before cleaning, ensure the mixer is turned off and unplugged from the power outlet.
- Clean Mixer Body: Wipe the exterior of the mixer body with a soft, damp cloth. Do not use abrasive cleaners or immerse the mixer body in water.
- Clean Bowl and Attachments: The stainless steel mixing bowl, splash cover, dough hook, beater, and whisk are dishwasher-safe. Alternatively, wash them in warm, soapy water, rinse thoroughly, and dry immediately.
- Storage: Store the mixer and its attachments in a clean, dry place.

Figure 5: Easy Cleaning. This image highlights that the mixer's accessories, including the bowl and attachments, are designed for easy cleaning and are dishwasher-safe.
Troubleshooting
If you encounter any issues with your AILESSOM Stand Mixer, refer to the following common problems and solutions.
| Problem | Possible Cause | Solution |
|---|---|---|
| Mixer does not turn on. | Not plugged in; power outlet malfunction; mixer head not locked down. | Ensure the power cord is securely plugged into a working outlet. Check if the mixer head is fully lowered and locked into place. |
| Attachments are difficult to install or remove. | Mixer head not tilted; attachment not aligned correctly. | Press the "Rise Button" to tilt the mixer head. Ensure the attachment shaft is correctly aligned with the port and rotated until it clicks. |
| Mixer makes unusual noise or vibrates excessively. | Overloaded; unstable surface; internal issue. | Reduce the amount of ingredients. Ensure the mixer is on a stable, flat surface. If the problem persists, discontinue use and contact customer support. |
| Whisk attachment breaks or is damaged. | Wear and tear; manufacturing defect; improper use. | Discontinue use of the damaged attachment. Contact AILESSOM customer support for information on replacement parts. |
For issues not listed here, or if troubleshooting steps do not resolve the problem, please contact AILESSOM customer support.
Specifications
| Feature | Detail |
|---|---|
| Model Number | 1533P |
| Power | 660W |
| Capacity | 6.5 Quarts |
| Speed Settings | 10-Speed |
| Control Type | Knob |
| Product Dimensions | 13.8 x 8.6 x 12.9 inches |
| Item Weight | 9.83 pounds |
Warranty and Support
For warranty information, product support, or to inquire about replacement parts, please contact AILESSOM customer service. Keep your purchase receipt as proof of purchase.
Contact information may be found on the AILESSOM official website or through your retailer.
