1. Introduction
This manual provides detailed instructions for the safe and efficient operation of your FOXSUR 25A Smart Car Battery Charger. This fully automatic 8-stage battery charger is designed to charge and maintain various 12V and 24V lead-acid batteries, including Calcium, Gel, AGM, WET, EFB, and LiFePO4 batteries. It features multiple charging modes, a repair function, and a booster mode for quick starts.
1.1 What's in the Box
- FOXSUR 25A Smart Car Battery Charger (Model: RED-25A)
- AC Power Cord
- Battery Clamps (Red for positive, Black for negative)
- User Manual

Figure 1: FOXSUR 25A Smart Car Battery Charger with included accessories.
Video 1: Unboxing and initial setup of the FOXSUR 25A Smart Car Battery Charger, demonstrating how to connect the AC power and battery clamps.
2. Safety Information
Always prioritize safety when working with electrical equipment and batteries. Read all instructions before use.
- Wear eye protection and protective clothing when working with batteries.
- Ensure adequate ventilation in the charging area.
- Do not smoke or allow sparks or flames near the battery or charger.
- Never charge a frozen battery.
- Avoid short-circuiting the battery clamps.
- The charger includes multiple protection functions: overcharge, overheat, overvoltage, overcurrent, short circuit, and reverse connection protection.

Figure 2: Visual representation of the intelligent multiple protection features, including overheat, overcurrent, electric shock, short circuit, reverse connect, overvoltage, low voltage, and fire protection.
3. Setup and Connection
- Connect AC Power: Plug the AC power cord into the charger's input port, then plug the other end into a standard 100-240V AC, 50-60Hz electrical outlet. The charger display will illuminate.
- Connect Battery Clamps:
- Connect the RED positive (+) clamp to the positive (+) terminal of the battery.
- Connect the BLACK negative (-) clamp to the negative (-) terminal of the battery.

Figure 3: The charger's display showing options for charging current and mode selection.
4. Operating Instructions
The FOXSUR charger features a large LCD color display for easy monitoring and control.
4.1 Understanding the Display

Figure 4: Diagram illustrating the various indicators on the charger's LCD display, including selected battery voltage, winter/summer mode, current state, and mode selection.
- Selected Battery Voltage: Displays 12V or 24V.
- Winter/Summer Mode: Automatically adjusts charging based on ambient temperature.
- Current State: Shows charging progress percentage, voltage, and current.
- Mode Selection: Icons for Car/Boat, AGM, LiFePO4, Repair, and Booster modes.
4.2 Selecting Charging Current
Press the "CURRENT" button to cycle through available charging current options: 2A, 8A, Automatic, 20A, and 25A. Choose the current suitable for your battery's capacity.
4.3 Selecting Charging Mode
Press the "MODE" button to select the appropriate battery type or function:
- CAR/BOAT: Standard mode for most lead-acid batteries in cars, motorcycles, trucks, etc.
- AGM: Specific mode for Absorbed Glass Mat batteries.
- LiFePO4: Mode for Lithium Iron Phosphate batteries.
- REPAIR: For restoring drained or sulfated batteries. Long press to activate.
- BOOSTER: Provides a high current boost for 12V batteries to aid starting.
Video 2: Demonstrates connecting the charger to a battery, selecting charging current, and choosing different charging modes (Car/Boat, AGM, LiFePO4, Repair, Booster).
5. Special Modes
5.1 Repair Mode
If a battery has been idle for a long time, is aged, or cannot be charged, select the "Repair" mode. This mode automatically detects and activates the battery during the charging process and uses 8-stage trickle charging to help repair damaged batteries and extend their life. Note: This function cannot repair completely exhausted or severely damaged batteries.

Figure 5: Illustration of the pulse reconditioning feature for battery maintenance, designed to address issues like battery feeding and large internal resistance.
5.2 Booster Mode
The "Booster" mode is specifically for 12V batteries. When selected, the charging current will reach its maximum value for 200 seconds. After this period, the display will show "on", indicating that you can attempt to start the vehicle. This mode is designed to provide a quick charge to assist with engine starting.
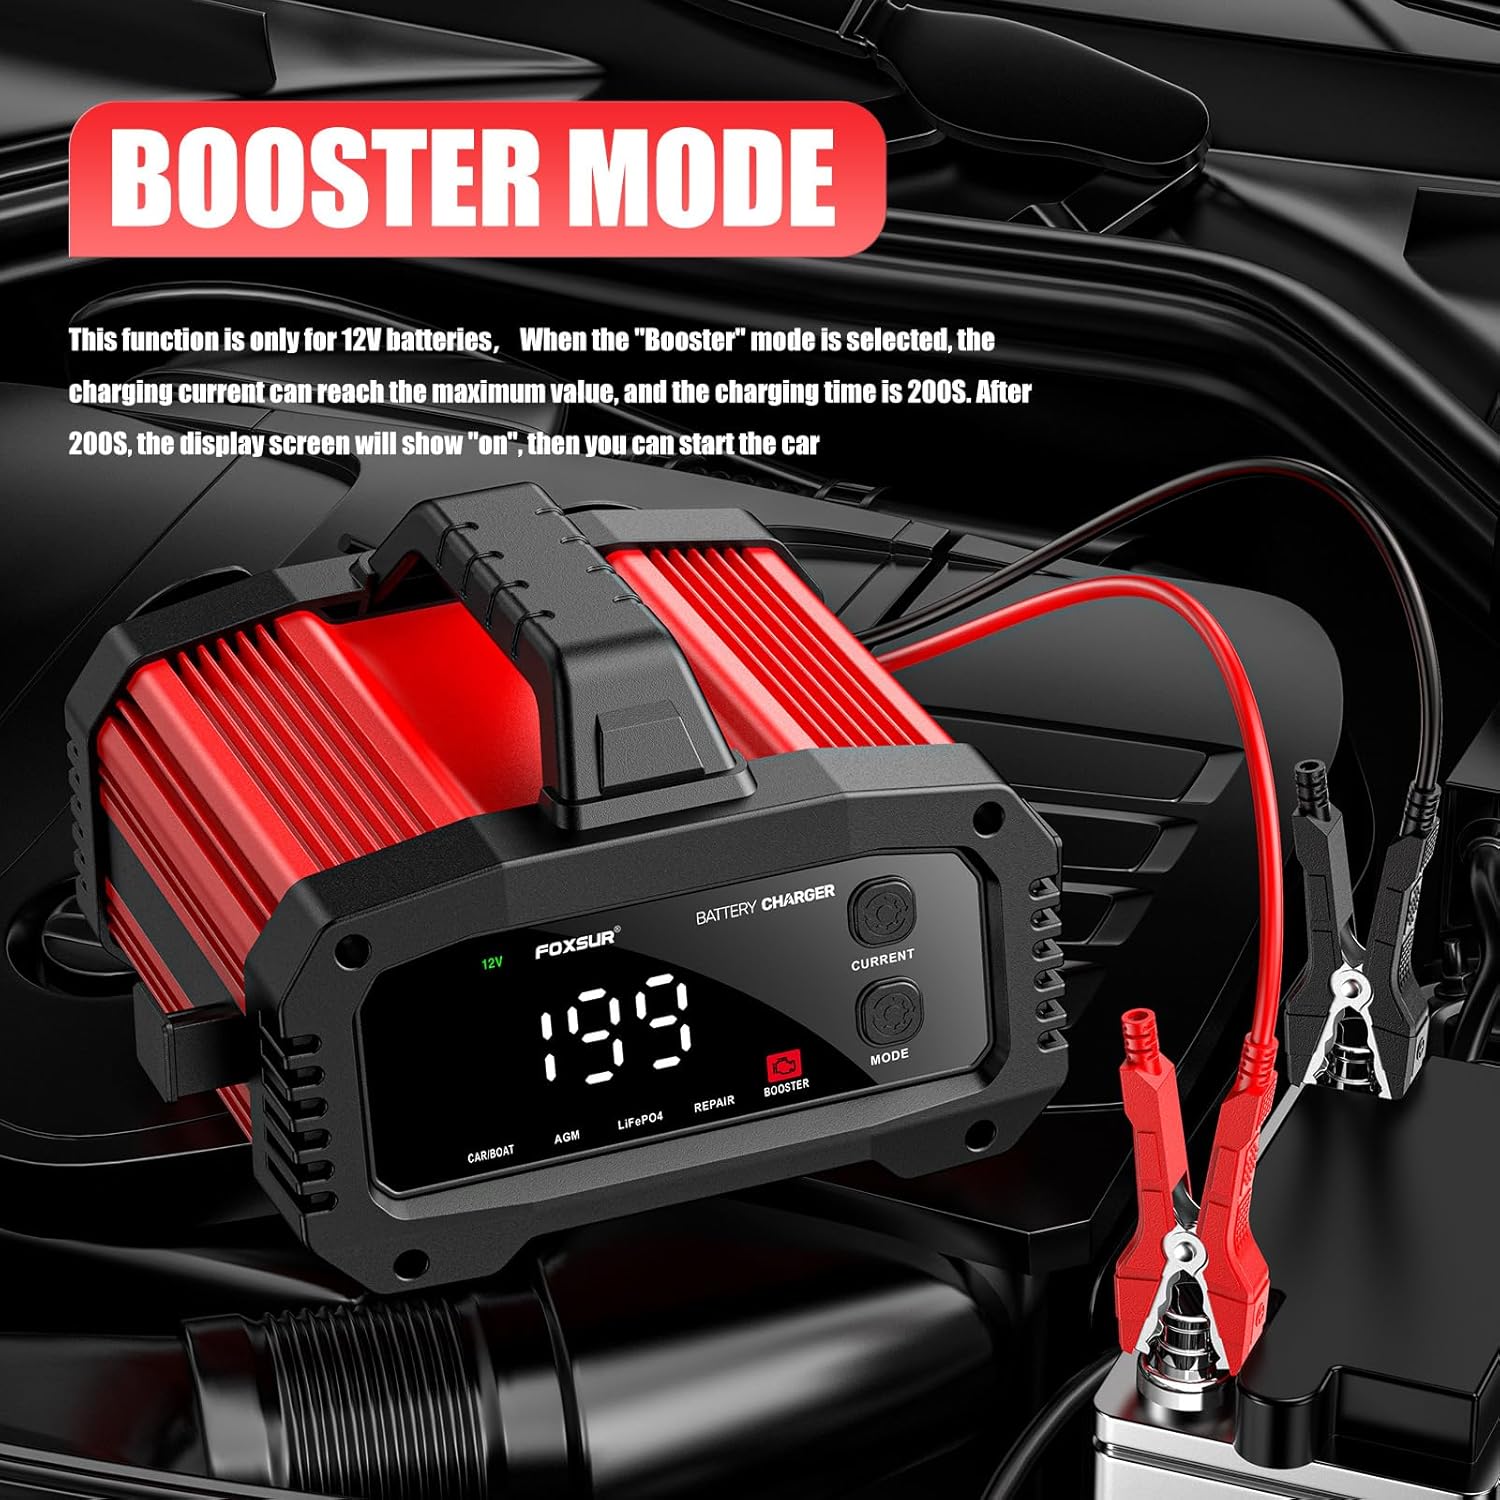
Figure 6: The charger operating in Booster Mode, connected to a car battery, showing the countdown timer.
6. Maintenance
- Cleaning: Disconnect the charger from both AC power and the battery before cleaning. Wipe the exterior with a soft, damp cloth. Do not use harsh chemicals or abrasives.
- Storage: Store the charger in a cool, dry place when not in use. The winding cable design on the back allows for convenient storage of the power cord and clamps.
- Heat Dissipation: The aluminum alloy shell and internal fan ensure efficient heat dissipation during operation. Ensure the fan vents are not obstructed.

Figure 7: The durable aluminum alloy shell of the charger, designed for high temperature and corrosion resistance.

Figure 8: The unique winding cable design on the back of the charger for organized storage of the power cord and clamps.
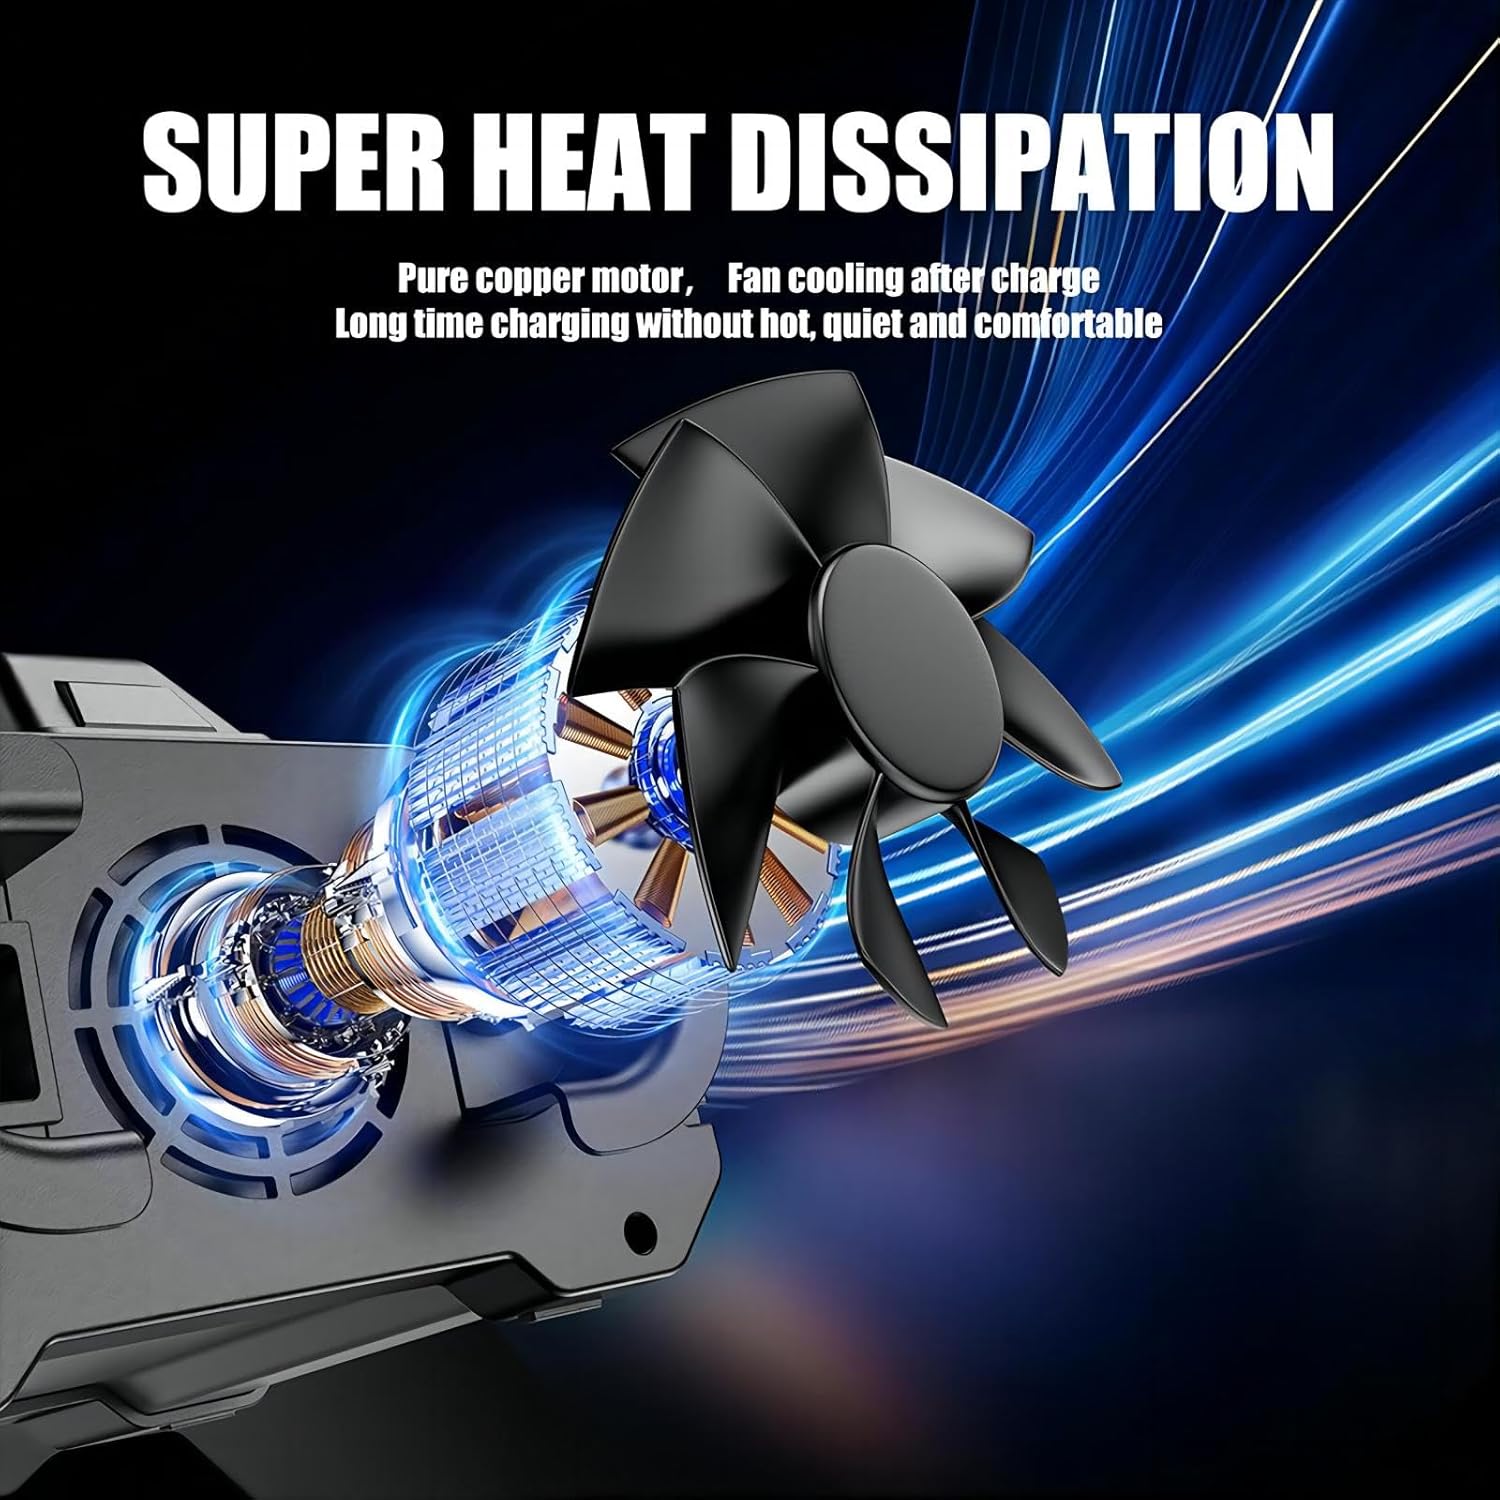
Figure 9: Illustration of the pure copper motor and fan cooling system for super heat dissipation, ensuring quiet and comfortable long-time charging.
7. Troubleshooting
| Problem | Possible Cause | Solution |
|---|---|---|
| Charger does not power on. | No AC power, loose connection. | Check AC power outlet and ensure power cord is securely plugged into both the charger and the outlet. |
| Charger not charging battery. | Incorrect battery connection, battery severely damaged/dead, incorrect mode selected. | Ensure battery clamps are correctly connected (red to positive, black to negative). Try "Repair" mode for drained batteries. If battery is completely dead or severely damaged, it may not be recoverable. |
| Display shows error code/protection activated. | Overcharge, overheat, overvoltage, overcurrent, short circuit, or reverse connection. | Disconnect charger, check connections, allow charger to cool if overheated, and re-attempt charging. Refer to safety information. |
8. Specifications
| Feature | Detail |
|---|---|
| Product Model | RED-25A |
| Input Voltage | 100-240V AC, 50-60Hz |
| Rated Output | 12V 25Amp, 24V 15Amp |
| Minimum Start Voltage | 5.0V |
| Battery Range | 6-400Ah |
| Battery Types Supported | Calcium, Gel, AGM, WET, EFB, LiFePO4 |
| Thermal Protect | 65°C +/- 5°C |
| Efficiency | App. 85% |
| Cooling | Fan |
| Compliant Standards | CE, UKCA, FCC |
| Dimensions (L x W x H) | 7.56 x 8.51 x 4.92 inches (192 x 216 x 125 mm) |
| Net Weight | 3.31 pounds (1500g) |
9. Warranty and Support
For warranty information and technical support, please contact the manufacturer, FOXSUR, directly or refer to their official website. Keep your purchase receipt as proof of purchase.


