1. Introduction
This manual provides comprehensive instructions for the Putikeeg Classical Morse Mini Code Key, Model 05. This device is designed for sending Morse code signals, featuring a compact and durable construction suitable for various applications, including amateur radio, field operations, and practice. Please read this manual thoroughly before using the product to ensure proper setup and operation.
2. Product Features
- Adjustable Paddle Distance: The distance between the Dit and Dah paddles can be adjusted independently to suit individual preferences and operating styles. This allows for comfortable rebound feedback.
- Dual Magnetic Circuit: Features a powerful magnetic return force for precise and consistent keying action.
- Stable Base: Equipped with four silicone foot pads on the bottom to increase friction, prevent slipping, and protect surfaces from scratches.
- Durable Construction: Manufactured from high-quality aluminum alloy with a surface treated for enhanced corrosion resistance.
- High-Quality Components: Utilizes NMB Japan imported bearings and 304 stainless steel screws for longevity and rust resistance.
- Portable Design: Lightweight and compact, making it suitable for portable radio devices and field use (POTA, SOTA, LOTA).
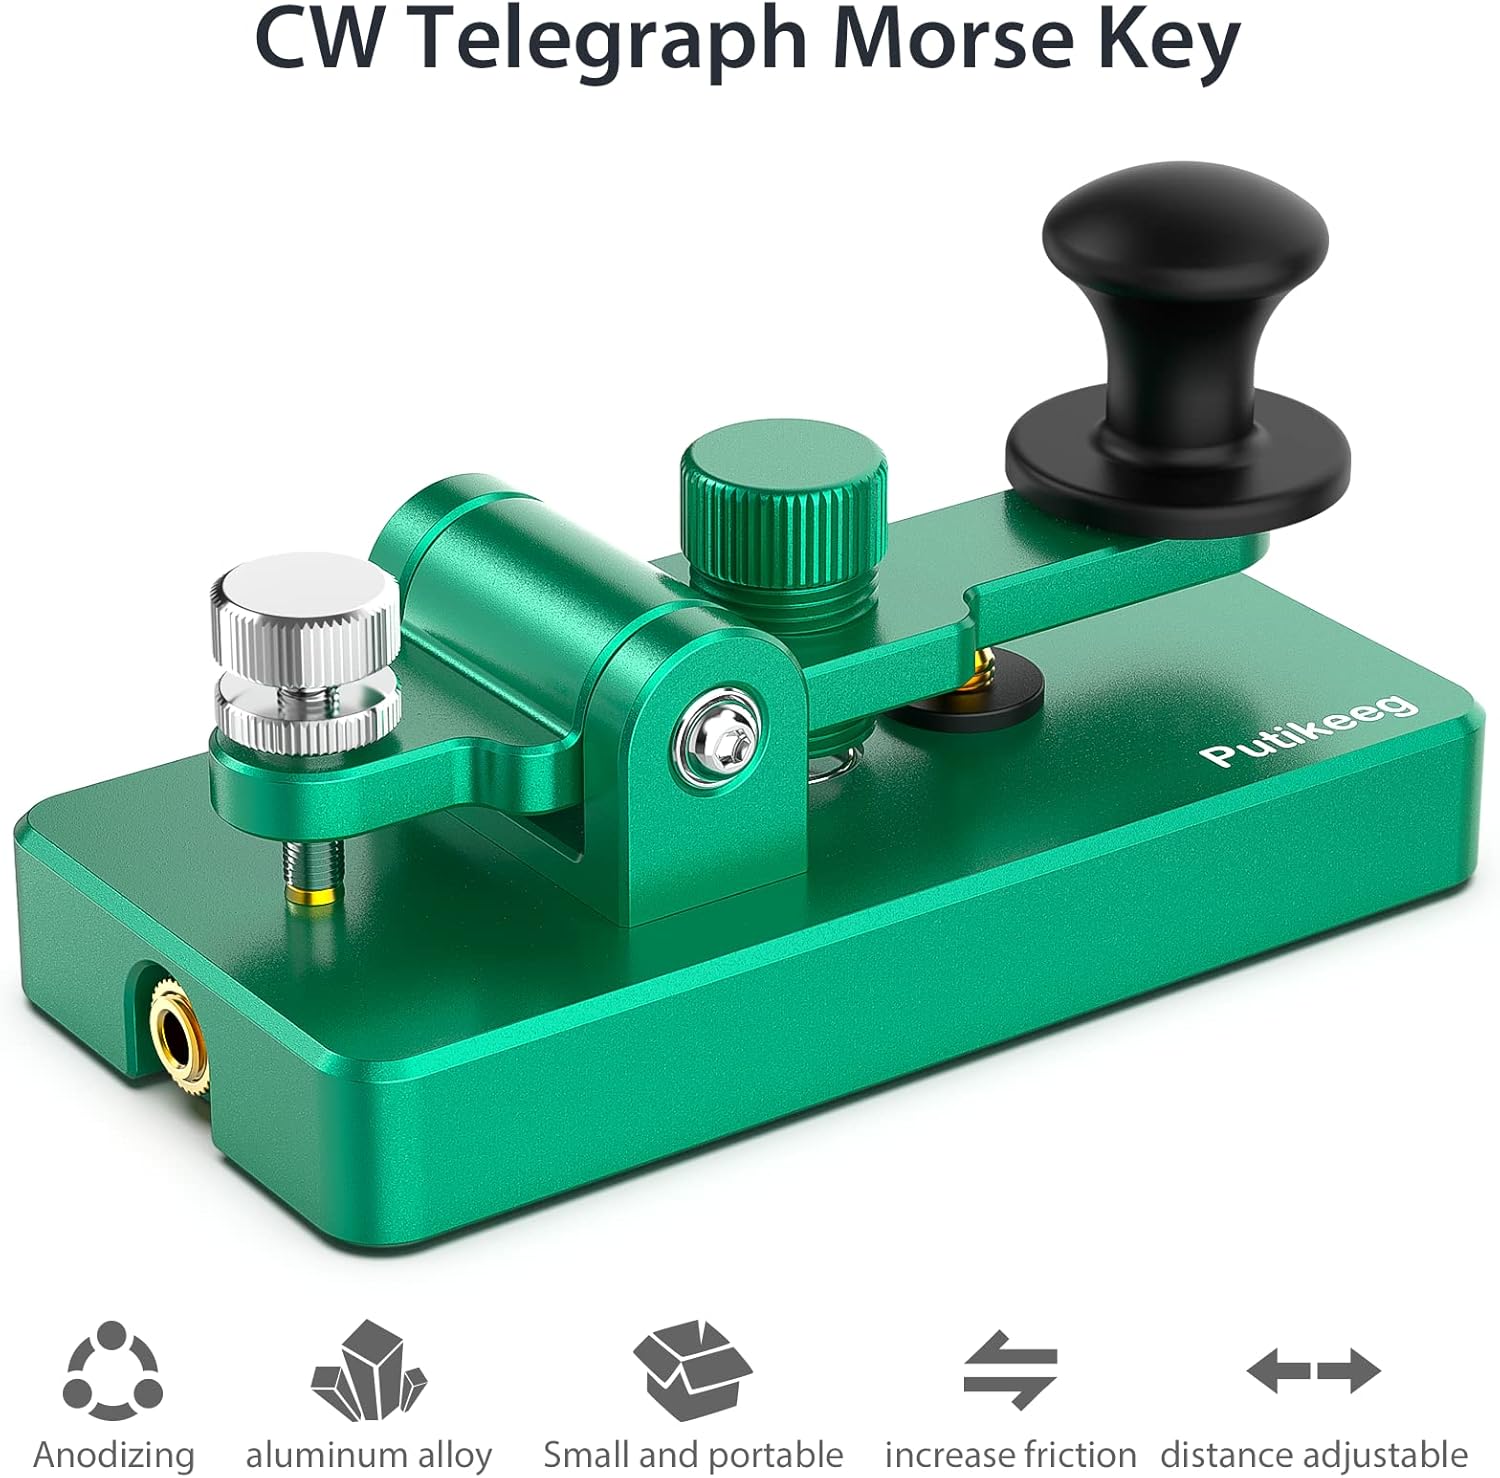
Image 2.1: The Putikeeg Morse Code Key highlighting its anodized aluminum alloy construction, portability, increased friction from silicone pads, and adjustable paddle distance.
3. Setup
- Placement: Place the Morse Code Key on a stable, flat surface. Ensure the silicone foot pads are making full contact to prevent movement during operation.
- Connection: Connect the included 3.5mm stereo cable from the key's socket to the appropriate input on your radio transceiver or practice device. The connector is wired for mono use.
- Adjusting Paddle Distance: The distance between the Dit and Dah paddles can be adjusted. Use the adjustment screws located on the key to set the desired spacing. Turn clockwise to decrease distance, counter-clockwise to increase.
- Adjusting Button Height: The height of the keying button can also be adjusted for ergonomic comfort.
- Magnetic Elastic Design: The magnetic return force is adjustable, allowing you to fine-tune the key's feel and responsiveness.
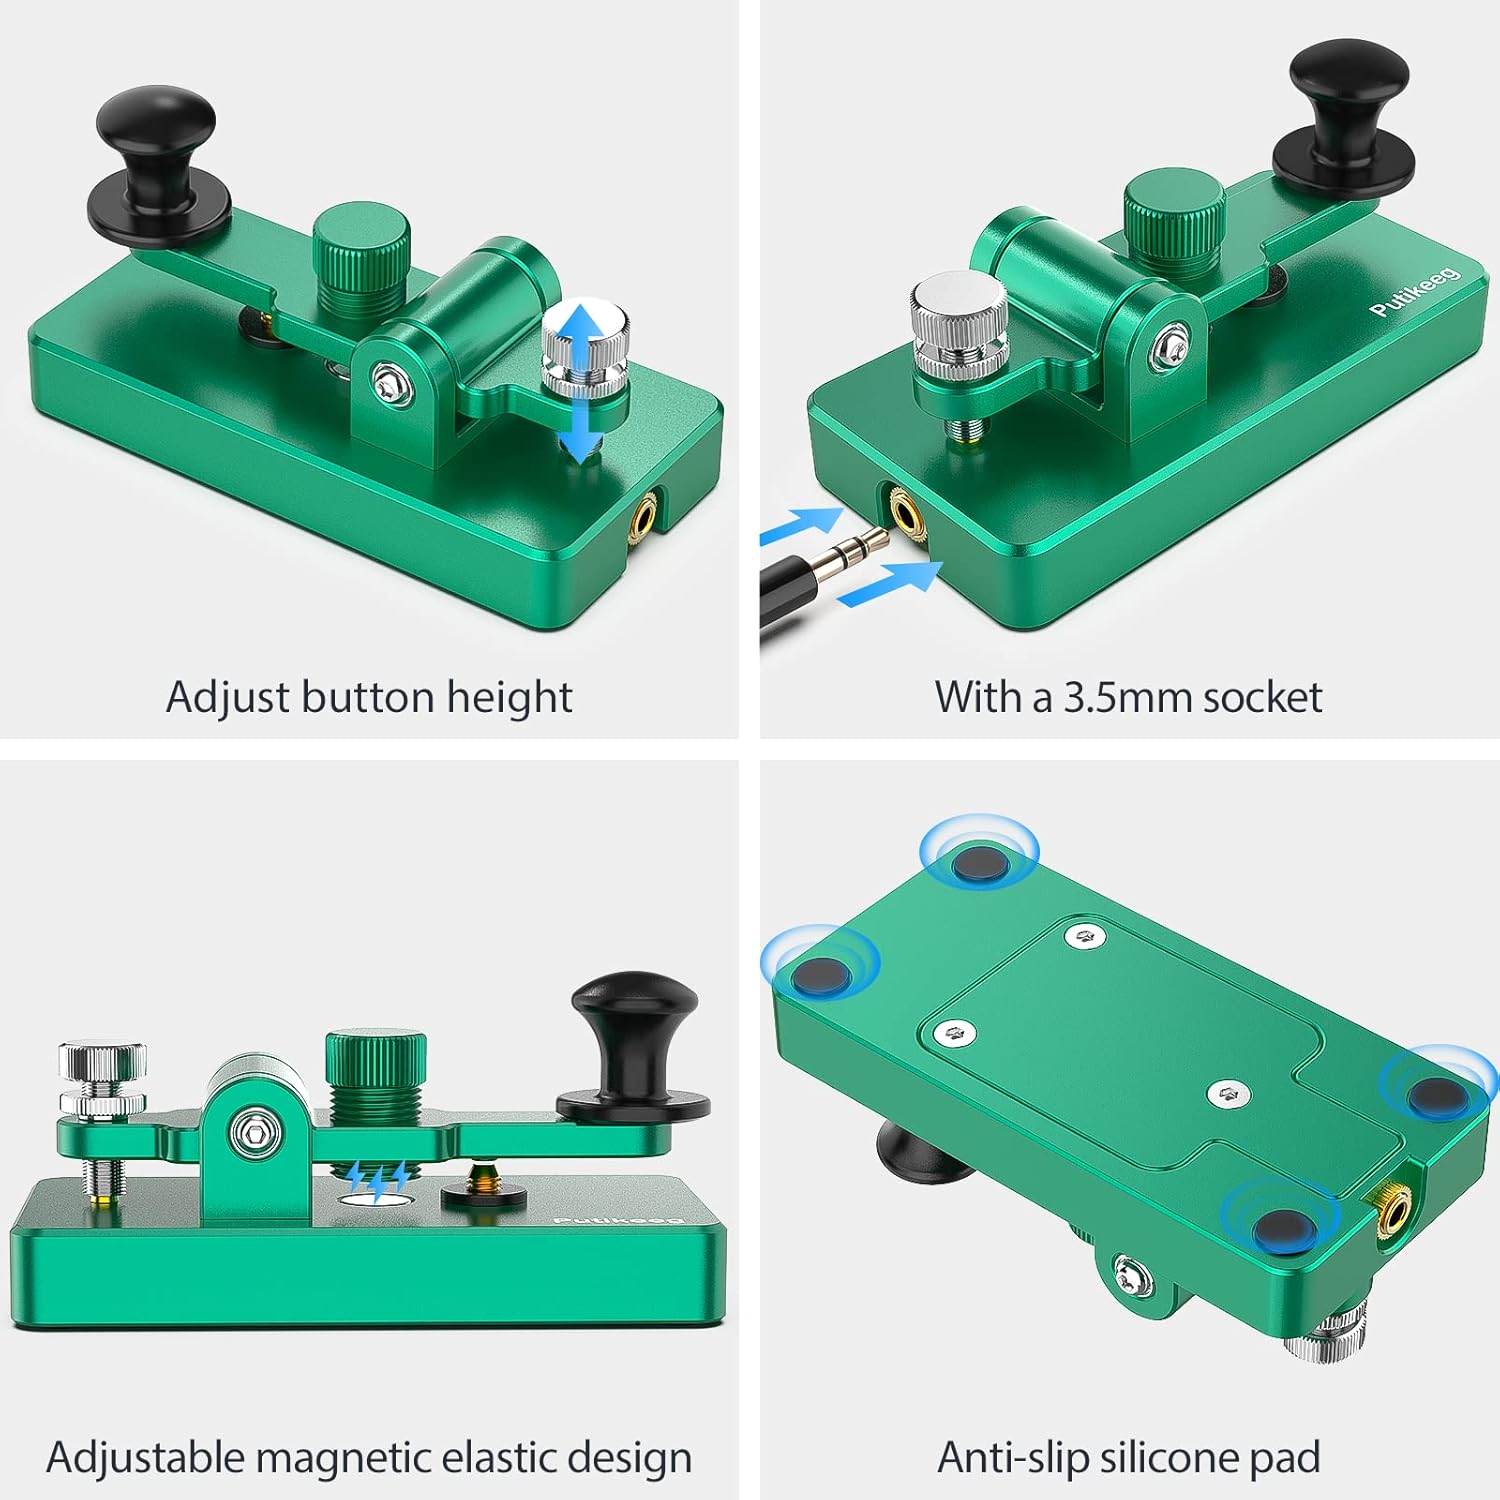
Image 3.1: Visual guide demonstrating how to adjust button height, connect the 3.5mm socket, adjust the magnetic elastic design, and highlighting the anti-slip silicone pads.
4. Operation
The Putikeeg Classical Morse Mini Code Key is designed for intuitive operation. Once connected to your radio or practice oscillator, simply press the paddle to generate Morse code signals.
- Sending Dits (Dots): Press the shorter paddle (typically on the left for right-handed users) briefly.
- Sending Dahs (Dashes): Press the longer paddle (typically on the right for right-handed users) for a slightly longer duration.
- Practice: For beginners, consistent practice is key to developing proficiency. The adjustable features of this key allow you to customize the feel for optimal learning and performance.

Image 4.1: The Morse Code Key being used in various settings, including portable operations (POTA, SOTA, LOTA) and indoor environments.

Image 4.2: The Morse Code Key used for listening to and practicing Morse code, often in conjunction with radio equipment and headphones.
5. Maintenance
To ensure the longevity and optimal performance of your Putikeeg Classical Morse Mini Code Key, follow these maintenance guidelines:
- Cleaning: Wipe the key regularly with a soft, dry cloth to remove dust and fingerprints. For stubborn marks, a slightly damp cloth can be used, followed by immediate drying. Avoid abrasive cleaners or solvents.
- Inspection: Periodically check all screws and connections to ensure they are secure. The 304 stainless steel screws are designed for durability, but occasional inspection is recommended.
- Storage: When not in use, store the key in a clean, dry environment. The compact size allows for easy storage in a portable radio device bag.
- Avoid Extreme Conditions: While the aluminum alloy construction offers corrosion resistance, avoid prolonged exposure to extreme temperatures or high humidity.
6. Troubleshooting
- Issue: Keying action feels inconsistent or sluggish.
- Solution: Check the magnetic elastic design adjustments. Ensure the paddle distance and magnetic force are set to your preferred levels. Clean any debris that might be obstructing the paddle movement.
- Issue: Key slides on the operating surface.
- Solution: Verify that the four silicone foot pads on the bottom of the key are clean and intact. Ensure the key is placed on a dry, flat surface. If pads are worn, contact support for possible replacements.
- Issue: No signal output when connected to a device.
- Solution: Confirm that the 3.5mm cable is securely connected to both the key and your radio/practice device. Test the cable with another device if possible to rule out a faulty cable. Ensure your radio or practice device is correctly configured for external key input.
7. Specifications
| Brand | Putikeeg |
| Model Number | 05 |
| Material | Aluminum, Stainless Steel |
| Item Weight | 9.6 ounces |
| Package Dimensions | 5.5 x 3 x 2.6 inches |
| Connectivity Technology | USB (Note: Product uses 3.5mm jack for audio output, USB for power/data if applicable, check device for specific connection type) |
| Compatible Devices | Radio Transceiver, Portable Radio Device |
| Keyboard Description | A Morse code keyboard with adjustable paddle distance and magnetic return force |
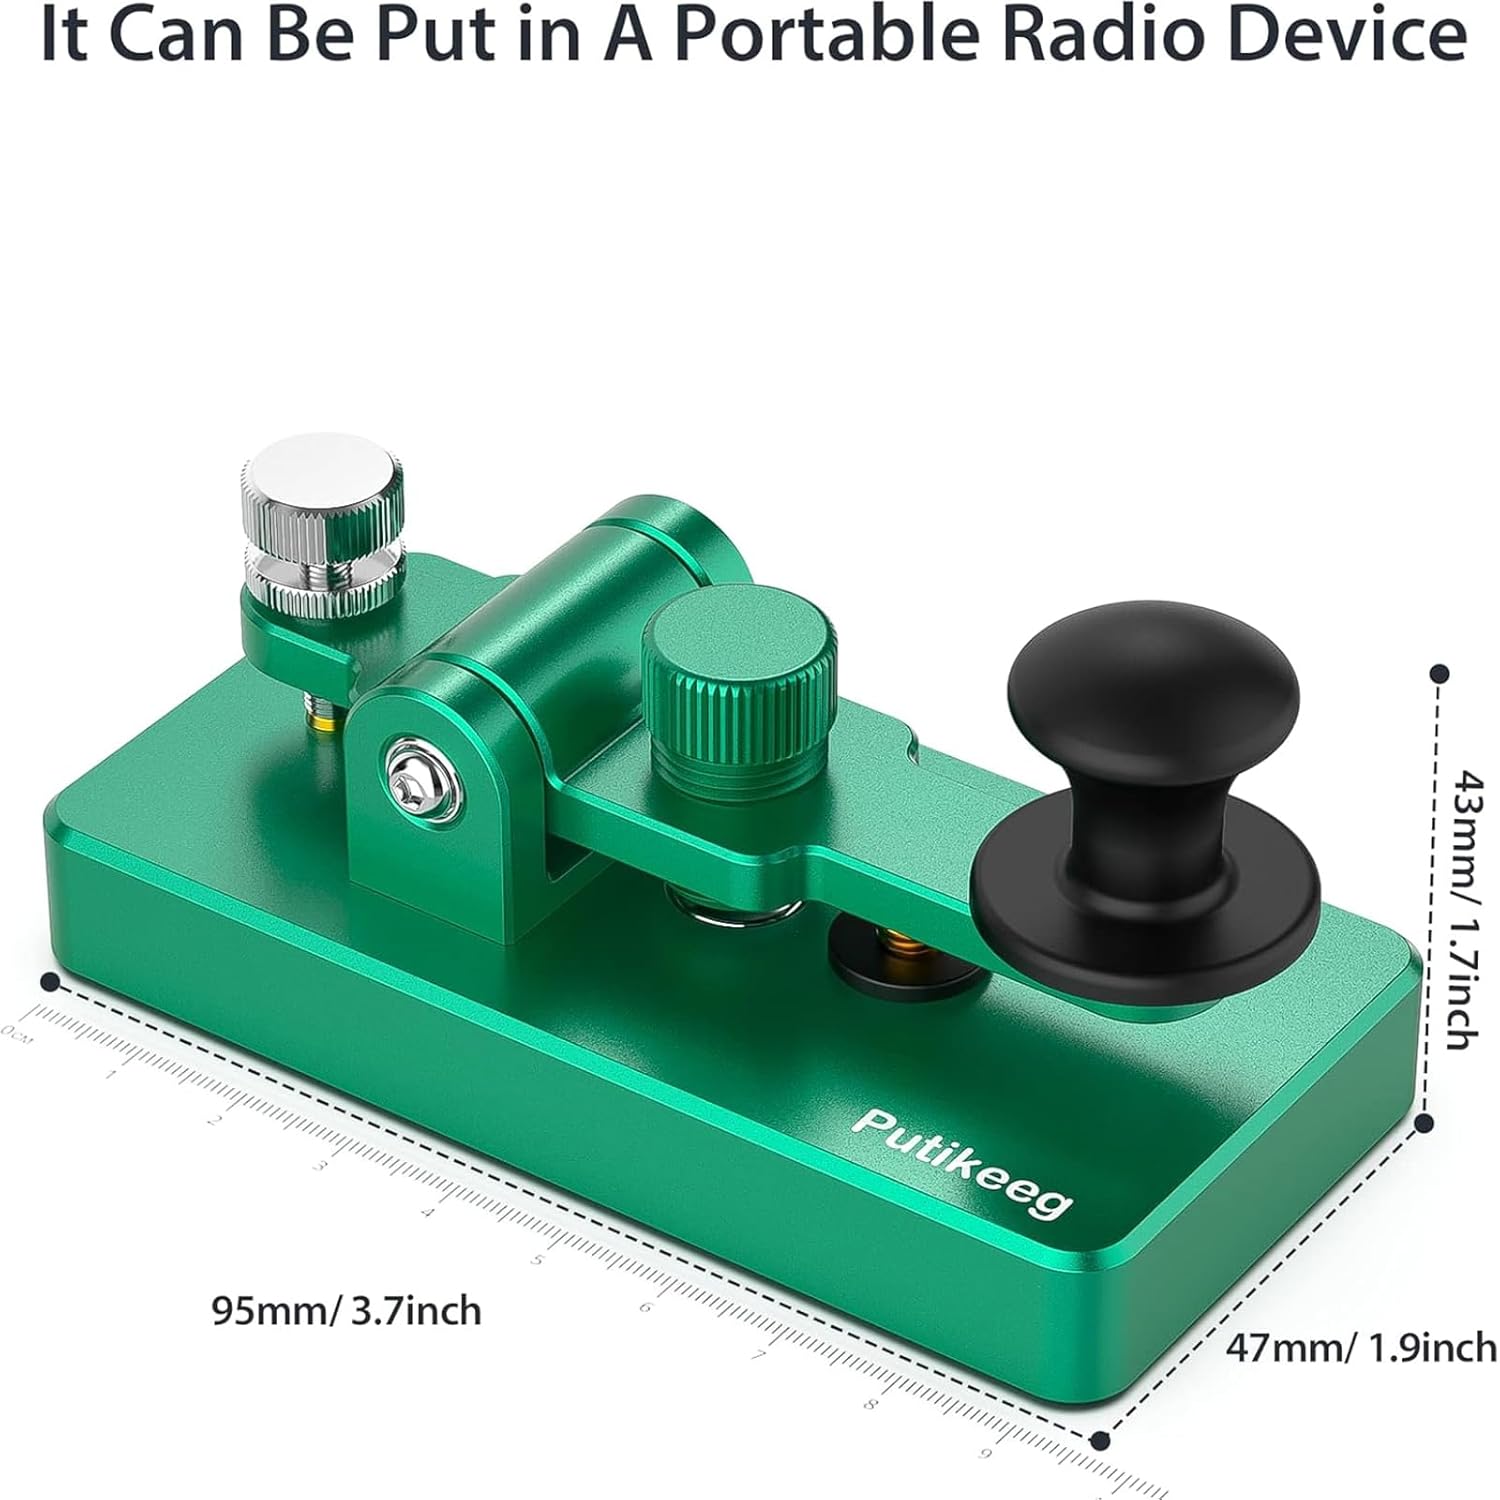
Image 7.1: Diagram showing the approximate dimensions of the Putikeeg Morse Code Key: 95mm (3.7 inches) length, 47mm (1.9 inches) width, and 43mm (1.7 inches) height.
8. Warranty and Support
For information regarding product warranty, returns, or technical support, please refer to the documentation provided at the time of purchase or contact the seller directly. Protection plans may be available for extended coverage.


