1. Introduction
The LILYGO T-Display-S3-Pro is a versatile development board featuring an ESP32-S3 microcontroller, a 2.33-inch touch display, and integrated sensors. Designed for a wide range of applications, this module combines Wi-Fi and Bluetooth connectivity with a user-friendly display interface, making it suitable for IoT projects, embedded systems, and custom user interfaces.
2. Product Features
- Display: 2.33-inch IPS TFT LCD with 222(H) x 480(V) resolution and capacitive touch.
- Microcontroller: ESP32-S3R8 Dual-core LX7 microprocessor.
- Wireless Connectivity: Wi-Fi 802.11 and Bluetooth 5 (BLE + BT mesh).
- Memory: 16MB Flash, 8MB PSRAM.
- Sensors: Integrated I2C Digital Light Sensor (LTR-553ALS-01) with ambient light and proximity sensing.
- Power Management: SY6970 chip for mobile OTG, built-in 3.8V 470mA battery, and a battery power switch.
- Expansion: Two integrated QWIIC ports, POGO pin for camera module extension, and optional MPU9250 IMU modules.
- Programming Platforms: Supports Arduino-IDE and MicroPython.
- Onboard Buttons: Boot, Reset, IO12, and IO16.
3. Package Contents
Verify that all items are present in your package:
- 1 x LILYGO T-Display-S3-Pro Development Board
- 2 x 13-pin Headers

Image: Contents of the LILYGO T-Display-S3-Pro package, showing the main board and two pin headers.
4. Hardware Overview
4.1. Device Layout and Dimensions
The T-Display-S3-Pro features a compact design with a 2.33-inch display on the front and various ports and labels on the sides and back.
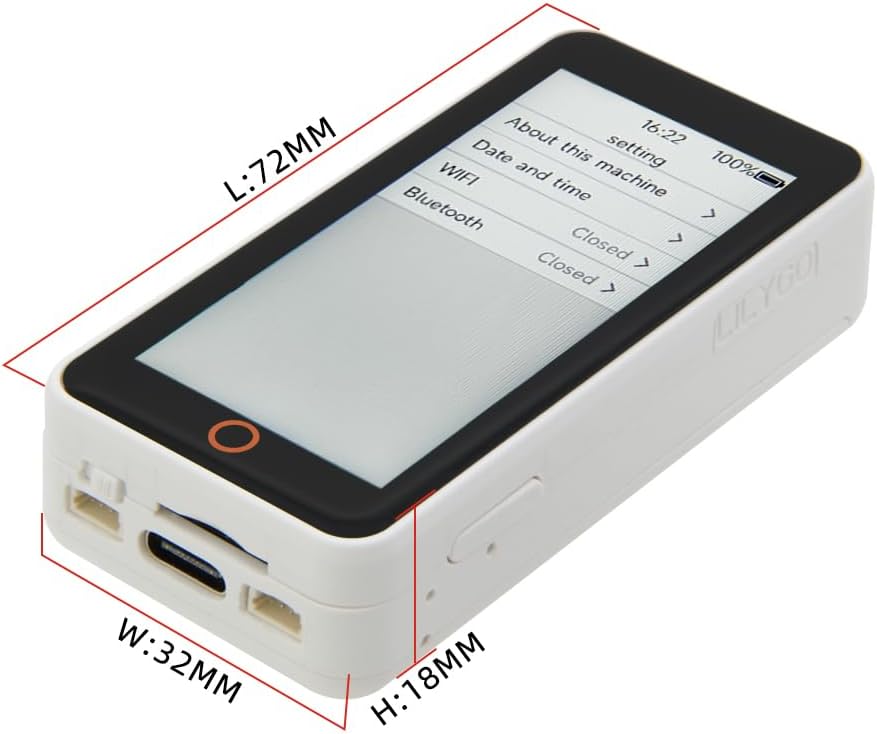
Image: Top-down view of the LILYGO T-Display-S3-Pro showing its approximate dimensions: Length (L) 72mm, Width (W) 32mm, Height (H) 18mm.
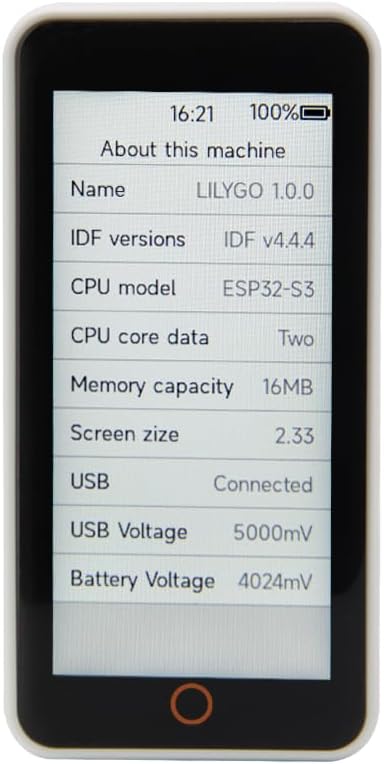
Image: Front view of the T-Display-S3-Pro with its screen displaying system information such as LILYGO 1.0.0, IDF v4.4.4, ESP32-S3 CPU, 16MB Memory, 2.33-inch screen size, USB connection status, and voltage readings.

Image: Back view of the T-Display-S3-Pro, clearly showing the FCC ID (2ASYE-T-DISPLAY-PRO) and CE certification marks, along with the model number T-Display-S3 Pro.
4.2. Pinout and Internal Components
Understanding the pinout is crucial for advanced development and connecting external modules.

Image: Detailed internal pinout diagram of the T-Display-S3-Pro, illustrating GPIO assignments, power pins (3V3, GND, BAT, USB), and connections for the display (ST7796 + CST226SE), I2C, and touch inputs. It also indicates the IPEX-1 connector for an external antenna.

Image: Pinmap for the T-Display-S3 Pro, detailing connections for the SD Card (MISO, MOSI, SCLK, CS), IPS LCD (BL, DC, RST, CS, MISO, MOSI, SCLK), I2C Light Sensor (SDA, SCL), and Capacitive Touch (SCLK, MISO, MOSI, RST, IRQ, Touch Button). It also shows the display resolution of 222x480.
5. Specifications
| Feature | Detail |
|---|---|
| Brand | LILYGO |
| Model Name | T-Display-S3-Pro |
| MCU | ESP32-S3R8 Dual-core LX7 microprocessor |
| RAM | LPDDR4 |
| Flash Memory | 16MB |
| PSRAM | 8MB |
| Display | 2.33-inch IPS TFT LCD, 222(H) x 480(V) resolution, Capacitive Touch |
| Display Driver | ST7796 |
| Wireless Type | Wi-Fi 802.11, Bluetooth 5 (BLE + BT mesh) |
| Connectivity Technology | Bluetooth, I2C, USB OTG |
| Operating System | FreeRTOS (supports Arduino-IDE, MicroPython) |
| Sensors | I2C Digital Light Sensor (LTR-553ALS-01) |
| Battery | Built-in 3.8V 470mA |
| Housing Material | ABS |
| Dimensions (L x W x H) | 72mm x 32mm x 18mm (approximate) |
6. Setup and Getting Started
6.1. Initial Connection
To begin using your T-Display-S3-Pro, connect it to your computer using a USB-C cable. The device should power on and may display a preloaded demo or system information.

Image: Angled view of the T-Display-S3-Pro, highlighting the USB-C port for power and data connection, along with the side buttons.
6.2. Development Environment Setup
The T-Display-S3-Pro is designed for development using platforms like Arduino-IDE or MicroPython. For detailed instructions on setting up your development environment and accessing example code, refer to the official LILYGO GitHub repository:
github.com/Xinyuan-LilyGO/T-Display-S3-Pro
This repository contains essential documentation, drivers, and sample sketches to help you get started with programming the device.
6.3. Battery Usage and Charging
The device includes a built-in 3.8V 470mA battery. To ensure proper charging and usage of the battery, it may be necessary to enable battery management features within your code. Consult the official GitHub documentation for specific code examples and configuration details related to battery operation.
7. Operating Instructions
The operation of the T-Display-S3-Pro largely depends on the firmware loaded onto it. The device features a capacitive touch display for user interaction and several physical buttons.
7.1. Basic Interaction
- Touch Display: Interact with on-screen elements by tapping or swiping, similar to a smartphone.
- Buttons: The onboard buttons (Boot, Reset, IO12, IO16) can be programmed for various functions within your application. The Reset button typically reboots the device.

Image: Front view of the T-Display-S3-Pro showing a settings menu on the screen, alongside a back view of the device.
7.2. Custom Applications
The primary use of this device is for custom application development. You will need to write and upload your own code to utilize its full capabilities, including Wi-Fi, Bluetooth, sensor readings, and display functionalities. Refer to the GitHub repository for programming guides and examples.
8. Maintenance
Proper maintenance ensures the longevity and optimal performance of your T-Display-S3-Pro.
- Cleaning: Use a soft, dry cloth to clean the display and housing. Avoid abrasive cleaners or solvents.
- Storage: Store the device in a cool, dry place away from direct sunlight and extreme temperatures.
- Handling: Handle the board with care to avoid damaging the sensitive electronic components or the display.
- Firmware Updates: Regularly check the official LILYGO GitHub for firmware updates and new libraries to ensure your device has the latest features and bug fixes.
9. Troubleshooting
This section addresses common issues you might encounter.
9.1. Device Not Powering On
- Ensure the USB-C cable is securely connected to both the device and a power source (computer USB port or wall adapter).
- Verify the power source is functional.
- If using the internal battery, ensure it is charged and the battery power switch is in the ON position.
9.2. Display Not Responding or Showing Blank Screen
- Perform a hard reset by pressing the Reset button.
- Ensure your uploaded code properly initializes and manages the display. Incorrect display initialization can lead to a blank or unresponsive screen.
- Verify that the display driver (ST7796) is correctly configured in your software.
9.3. Issues with Uploading Code
- Ensure you have installed the correct USB drivers for the ESP32-S3.
- Select the correct board and COM port in your Arduino-IDE or other development environment.
- Try holding down the Boot button while pressing and releasing the Reset button, then release the Boot button to enter bootloader mode for flashing.
- Consult the LILYGO GitHub repository for specific flashing instructions and troubleshooting tips related to your operating system.
9.4. Battery Not Charging or Discharging Properly
- As noted by users, proper battery charging and usage may require specific code implementation. Ensure your firmware includes the necessary code to enable and manage the SY6970 chip for battery functionality. Refer to the official LILYGO GitHub for examples.
- Check the physical battery power switch on the device.
10. Support and Resources
For the most up-to-date information, technical support, and community discussions, please refer to the official LILYGO resources:
- Official GitHub Repository: github.com/Xinyuan-LilyGO/T-Display-S3-Pro (Contains documentation, examples, and issue tracker).
- LILYGO Store on Amazon: LILYGO Store
For warranty information, please refer to the terms and conditions provided by your retailer at the time of purchase.


