
1. Safety Information
Please read and understand this entire manual before attempting to assemble, operate, or install the product. Failure to do so could lead to electric shock, fire, or other injuries.
- Ensure all electrical connections comply with local codes and ordinances, as well as the National Electrical Code (NEC).
- Consult a qualified electrician if you are unfamiliar with electrical wiring.
- Before installation, disconnect power by turning off the circuit breakers at the main fuse box.
- The fan must be mounted with a minimum of 7 feet (2.1 meters) clearance from the trailing edge of the blades to the floor.
- Do not operate the fan if any part is damaged.
- This product is designed for indoor use only.
2. Package Contents
Verify that all components are present before beginning installation. If any parts are missing or damaged, contact Bella Depot customer service.
- Ceiling Fan Unit with Integrated LED Light
- Remote Control
- Mounting Hardware Kit
- Instruction Manual

Image: The Bella Depot 24-inch low profile flower ceiling fan with integrated LED light, showcasing its modern design and airflow.
3. Installation Guide
This ceiling fan is designed for flush mount installation. Professional installation is recommended if you are not experienced with electrical wiring.
3.1 Before You Begin
- Turn off power at the circuit breaker.
- Ensure the mounting location can support the weight of the fan.
- Gather necessary tools (screwdriver, wire strippers, electrical tape, ladder).
3.2 Mounting the Fan
- Secure the mounting bracket to the ceiling junction box using the provided screws. Ensure it is firmly attached.
- Connect the electrical wires:
- Connect the black wire from the fan to the black (live) wire from the ceiling.
- Connect the white wire from the fan to the white (neutral) wire from the ceiling.
- Connect the green or bare copper wire from the fan to the green or bare copper (ground) wire from the ceiling.
Use wire nuts to secure all connections and wrap with electrical tape for added safety.
- Carefully lift the fan unit and attach it to the mounting bracket, ensuring all wires are tucked safely into the junction box.
- Secure the fan unit to the mounting bracket with the designated screws.

Image: The Bella Depot ceiling fan seamlessly integrated into a living room setting, demonstrating its flush mount design.
4. Operating Instructions
The Bella Depot ceiling fan is controlled via the included remote control. Ensure batteries are installed correctly in the remote.
4.1 Remote Control Functions
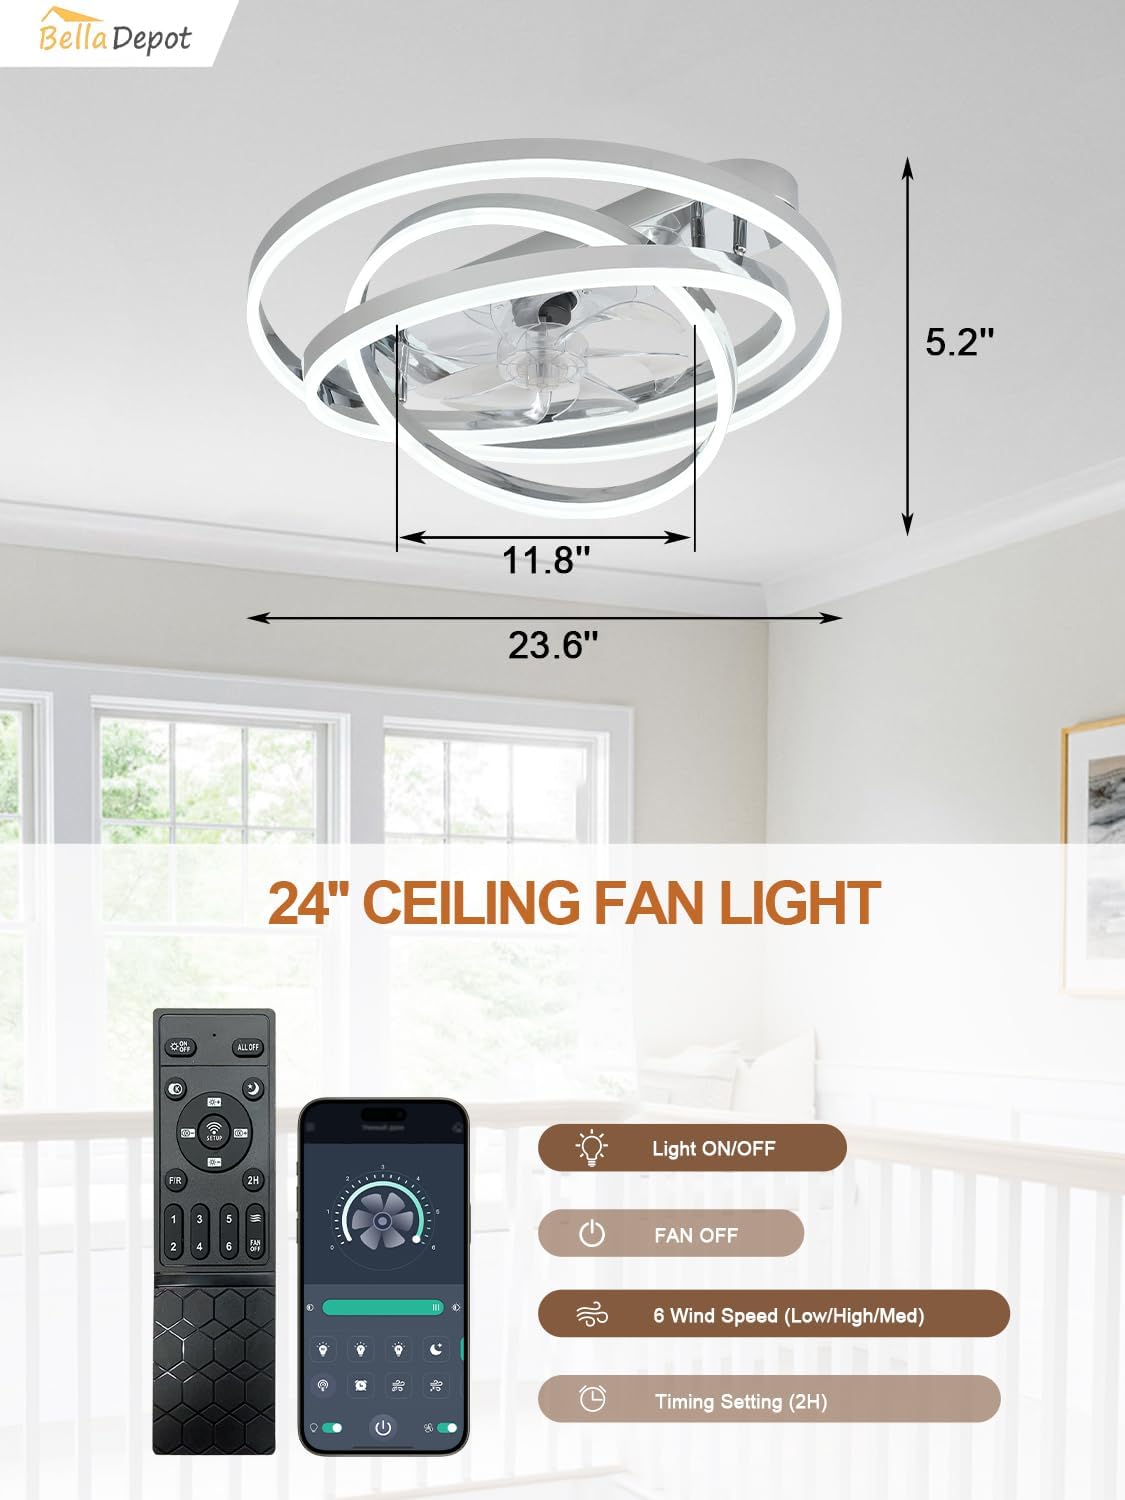
Image: The remote control unit and a visual representation of the smartphone application interface, showing controls for light, fan speed, and timer settings.
- Light ON/OFF: Press the light button to turn the LED light on or off.
- Fan ON/OFF: Press the fan button to start or stop the fan.
- Fan Speed Control: Adjust fan speed through 6 levels (Low, Medium, High) using the designated speed buttons.
- Timer Setting: Set the fan to automatically turn off after 2 or 4 hours.
- Color Temperature Adjustment: Cycle through 3000K (Warm White), 4500K (Natural White), and 6000K (Cool White) settings.
- Dimming: Adjust the brightness of the LED light from 10% to 100%.
4.2 Reversible DC Motor Function
The fan features a reversible DC motor for year-round comfort.
- Summer Mode (Forward): Blades rotate counter-clockwise, pushing air downwards to create a cooling breeze.
- Winter Mode (Reverse): Blades rotate clockwise, drawing air upwards to circulate warm air trapped near the ceiling.
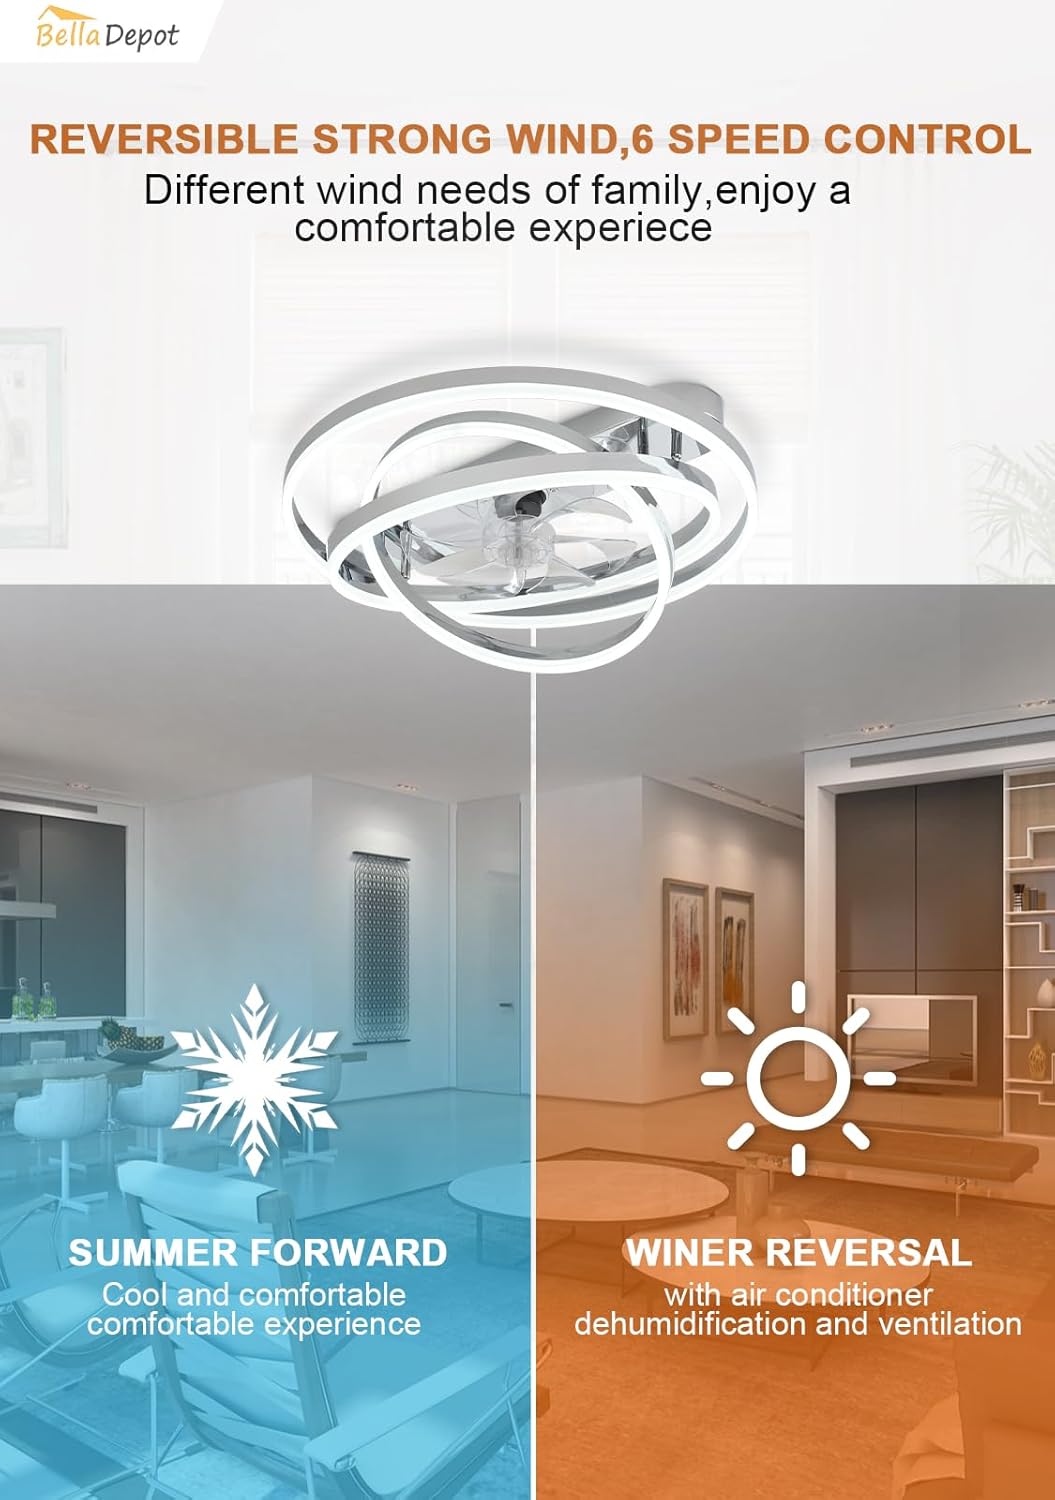
Image: A visual explanation of the fan's reversible function, illustrating how summer forward mode creates a cooling effect and winter reversal mode aids in air circulation for warmth.
4.3 Light Color and Brightness Adjustment
The integrated LED light offers customizable illumination.
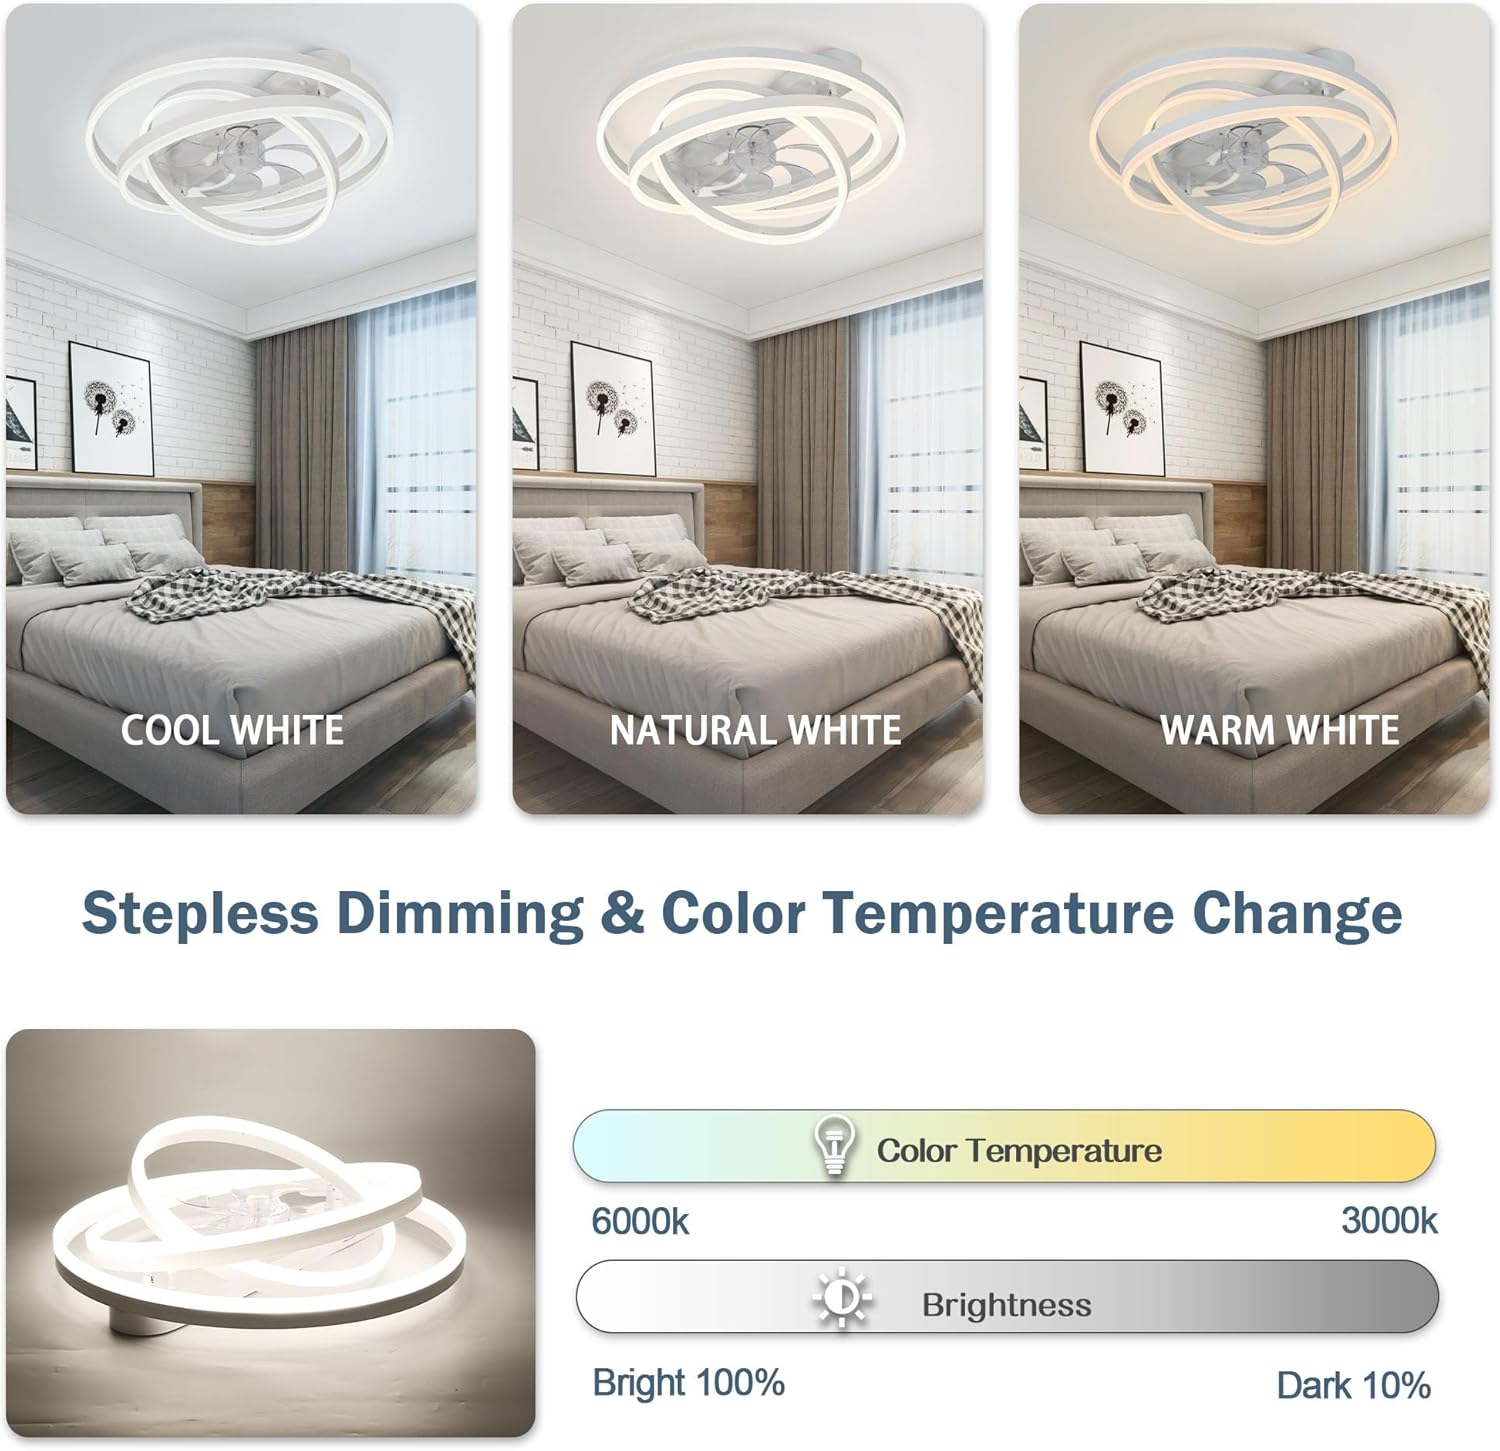
Image: A comparison of the fan's LED light at different color temperatures: Cool White (6000K), Natural White (4500K), and Warm White (3000K), along with a dimming scale.
- Press the color temperature button on the remote to switch between 3000K, 4500K, and 6000K.
- Use the dimming buttons to increase or decrease the light brightness.
5. Care and Maintenance
Regular maintenance ensures optimal performance and longevity of your ceiling fan.
- Cleaning: Use a soft, damp cloth to clean the fan and light fixture. Do not use abrasive cleaners or solvents.
- Blade Cleaning: Gently wipe the fan blades to remove dust. Ensure the fan is off and stationary before cleaning.
- Tightness: Periodically check all screws and connections for tightness. Retighten as necessary.
- Light Source: The LED light source is integrated and not user-replaceable. If the light fails, contact customer support.
Always turn off the power at the circuit breaker before performing any cleaning or maintenance.
6. Troubleshooting
If you experience issues with your fan, refer to the following common problems and solutions:
| Problem | Possible Cause | Solution |
|---|---|---|
| Fan does not start | No power to the fan; Remote control batteries are dead; Incorrect wiring. | Check circuit breaker; Replace remote batteries; Verify wiring connections. |
| Light does not work | No power to the light; Remote control batteries are dead; Integrated LED failure. | Check circuit breaker; Replace remote batteries; Contact customer support for LED issues. |
| Fan wobbles | Loose mounting screws; Unbalanced blades. | Ensure mounting bracket and fan screws are tight; Check for any obstructions. |
| Remote control not responding | Dead batteries; Remote not paired (if applicable). | Replace remote batteries; Refer to remote pairing instructions (if provided separately). |
7. Product Specifications
- Model: Bella Depot2401
- Brand: Bella Depot
- Type: Low Profile Flower Ceiling Fan with Light
- Size: 24 inches
- Dimensions (D x W x H): 23.6" x 23.6" x 5.2"
- Installation Type: Flush Mount
- Power Source: DC
- Motor: Energy-Efficient Reversible DC Motor
- Fan Speeds: 6
- Light Source: Integrated Dimmable LED
- Color Temperatures: 3000K (Warm White), 4500K (Natural White), 6000K (Cool White)
- Control Method: Remote Control
- Timer Function: 2-hour, 4-hour
- Noise Level: ≤ 35dB
- Indoor/Outdoor Usage: Indoor

Image: The Bella Depot ceiling fan providing illumination and air circulation in a bedroom environment.
8. Warranty and Customer Support
Bella Depot is committed to providing quality products and customer satisfaction. For any questions, issues, or warranty claims, please contact our customer support team.
8.1 Contacting Customer Support
If you purchased your product through Amazon, you can contact the seller directly:
- Sign in to your Amazon account.
- Go to your orders and locate the Bella Depot ceiling fan purchase.
- Click on the "Bella Depot" seller name or "Ask a question" to initiate contact.

Image: A visual guide demonstrating how to access customer support for after-sales issues through the Amazon platform, by signing in, asking a question, and starting a conversation with the seller.
Bella Depot provides 24-hour question service for customer inquiries.
8.2 Warranty Information
Specific warranty details may vary. Please refer to the product packaging or contact customer support for comprehensive warranty terms and conditions.