Introduction
The Avatto WT410-16A-B Smart Thermostat is designed to provide precise and convenient control over your electric heating system. This manual will guide you through the installation, operation, and maintenance of your new smart thermostat, ensuring optimal performance and energy efficiency.
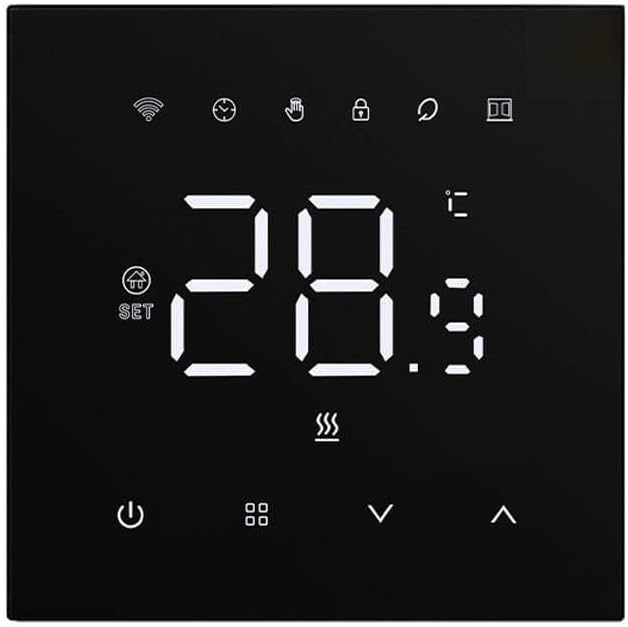
Figure 1: Front view of the Avatto WT410-16A-B Smart Thermostat, displaying its digital interface and touch controls.
Setup
Unboxing and Initial Inspection
Carefully remove all components from the packaging. Verify that all parts are present and undamaged. The package should include the thermostat unit, mounting screws, and this user manual.
Installation
Important: Installation should be performed by a qualified electrician to ensure safety and compliance with local electrical codes. Disconnect power to the heating system at the main circuit breaker before beginning installation.
- Turn off the main power supply to your electric heating system.
- Remove your old thermostat (if applicable) and identify the wiring.
- Connect the wires from your electric heating system to the corresponding terminals on the Avatto WT410-16A-B thermostat. Refer to the wiring diagram provided in the separate installation guide or on the device itself.
- Mount the thermostat securely to the wall using the provided screws.
- Restore power to the heating system.
Powering On
Once power is restored, the thermostat display will illuminate. Follow the on-screen prompts for initial setup, which may include setting the date, time, and Wi-Fi connection.
Operating Instructions
Basic Operation
The thermostat features a large LED display and touch-sensitive buttons for easy interaction. The main display shows the current ambient temperature and the set temperature. Use the up and down arrows to adjust the desired temperature.
Mode Selection
The thermostat supports four operating modes to suit various needs:
- Manual Mode: Allows you to set a constant temperature that the thermostat will maintain until changed.
- Programming Mode: Follows a pre-set weekly schedule.
- Temporary Programming Mode: Temporarily overrides the current schedule for a set period, after which it reverts to the schedule.
- Away Mode: Maintains a lower, energy-saving temperature when the premises are unoccupied.
Switch between modes using the dedicated mode button on the thermostat interface.
Temperature Adjustment and Precision
The Avatto thermostat offers high adjustment precision of up to 0.5°C, ensuring your home maintains the ideal temperature. The device displays the ambient temperature with a precision of 0.1°C. It also features a hysteresis function, allowing you to control the temperature range from 0.5°C to 10°C, which helps prevent frequent on/off cycling of your heating system.
Weekly Programming
To create an energy-efficient and comfortable environment, utilize the advanced weekly programming feature. You can define different temperatures for:
- 6 periods during the week: Customize heating schedules for different times of day (e.g., morning, daytime, evening, night) from Monday to Friday.
- 2 periods on the weekend: Set distinct heating schedules for Saturday and Sunday.
Refer to the on-screen menu or the mobile application for detailed steps on setting up your weekly program.
Display Brightness Adjustment
The brightness of the large LED screen is adjustable to enhance comfort, especially during nighttime. You can dim the display or turn off the lighting completely to avoid disturbing sleep. Access this setting through the thermostat's menu or the connected mobile application.
Wi-Fi Connectivity and App Control
The Avatto WT410-16A-B thermostat connects to your home Wi-Fi network, enabling remote control via a dedicated smartphone application. Download the Avatto app (or compatible smart home app) from your device's app store. Follow the in-app instructions to pair your thermostat. Once connected, you can:
- Adjust temperature from anywhere.
- Set and modify weekly schedules.
- Monitor energy consumption (if supported by the app).
- Integrate with popular voice assistants for hands-free control.
Maintenance
Cleaning
To maintain the appearance and functionality of your thermostat, clean it regularly with a soft, dry cloth. Do not use abrasive cleaners, solvents, or chemical sprays, as these can damage the display or casing. Ensure the device is powered off before cleaning.
Software Updates
Periodically check the Avatto mobile application for available software updates. Updates can provide new features, performance improvements, and security enhancements. Follow the in-app instructions to perform any necessary updates.
Troubleshooting
| Problem | Possible Cause | Solution |
|---|---|---|
| Thermostat display is blank. | No power supply; circuit breaker tripped. | Check the circuit breaker for your heating system. Ensure the thermostat is correctly wired and receiving power. |
| Incorrect temperature reading. | Sensor obstruction; thermostat location. | Ensure nothing is blocking the thermostat's sensor vents. Relocate the thermostat if it's in direct sunlight or near a heat source/draft. |
| Cannot connect to Wi-Fi. | Incorrect Wi-Fi password; router issues; out of range. | Verify Wi-Fi password. Restart your router. Ensure the thermostat is within range of your Wi-Fi network. Try re-pairing through the app. |
| Heating not turning on/off as expected. | Incorrect mode; programming error; wiring issue. | Check the current operating mode (Manual, Program, etc.). Review your weekly schedule for errors. If issues persist, consult a qualified electrician to check wiring. |
Specifications
- Brand: AVATTO
- Model Number: WT410-16A-B
- Voltage: 230 Volts
- Item Weight: 230 g
- Backlight: Yes
- ASIN: B0CWS6LPQM
- Date of Availability on Amazon.com.be: February 29, 2024
Warranty and Support
Your Avatto WT410-16A-B Smart Thermostat comes with a standard manufacturer's warranty. Please refer to the warranty card included in your product packaging for specific terms and conditions. For technical support, troubleshooting assistance, or warranty claims, please contact Avatto customer service through their official website or the contact information provided in your product documentation. Keep your purchase receipt as proof of purchase.