
Introduction
The Godox V1 Pro is an advanced round head TTL camera flash designed for Canon EOS cameras, offering powerful and versatile lighting solutions for professional photographers. This manual provides detailed instructions on setting up, operating, and maintaining your V1 Pro flash to ensure optimal performance and longevity.
Key features include a detachable SU-1 external flash, support for up to 100 continuous full-power flashes, 1/8000s High Speed Sync, a convenient TTL/Manual switch, and a fast 1.3-second recycle time. Its round head design ensures even and soft light distribution, while the flexible swivel and tilt angles allow for diverse lighting techniques.

Image: The Godox V1 Pro Round Head TTL Camera Flash shown with its complete set of accessories, including the main flash unit, battery, charger, USB-C cable, and a protective pouch.
Setup
1. Battery Installation and Charging
The Godox V1 Pro uses a VB30 Lithium Ion battery. Ensure the battery is fully charged before first use.
- Insert the VB30 battery into the battery compartment located on the side of the flash unit, ensuring correct polarity.
- To charge, connect the provided USB-C cable to the flash unit or use the optional VC26 charger for the battery.
- The charging indicator light will show the charging status.

Image: The Godox V1 Pro flash unit demonstrating its modern charging convenience, showing both the direct USB-C charging port on the flash and the external VC26 battery charger for the VB30 battery.
2. Attaching to Camera
Slide the V1 Pro's hot shoe mount into your camera's hot shoe. Secure it by rotating the quick release lock clockwise until it is firmly attached.
3. Detachable SU-1 External Flash
The V1 Pro features an innovative detachable SU-1 external flash component. This allows the main flash to serve as a bounce flash while the SU-1 provides fill light.
- To attach the SU-1, align it with the designated port on the V1 Pro and slide it into place until it clicks securely.
- To detach, press the release button and slide the SU-1 off.

Image: A visual representation of the Godox V1 Pro's innovative design, showing how the detachable SU-1 external flash component can be added to provide additional fill light, enhancing lighting versatility.
Operating Instructions
1. Power On/Off
Press and hold the power button to turn the flash on or off. The LCD screen will illuminate upon power-on.
2. TTL/Manual Mode Switch
Effortlessly switch between TTL (Through-The-Lens) automatic flash mode and Manual flash mode with a single dedicated button.
- Press the TTL/M button to toggle between the two modes.
- In Manual mode, you can precisely control the flash output power.

Image: A close-up view of the Godox V1 Pro's control panel, highlighting the prominent TTL/M switch button for quick and easy mode selection between automatic and manual flash control.
3. Flash Modes and Functions
The V1 Pro supports various advanced flash functions:
- High Speed Sync (HSS): Allows flash synchronization at shutter speeds faster than the camera's native sync speed (up to 1/8000s).
- Multi Flash: Fires a series of rapid flashes during a single exposure to capture multiple movements of a subject.
- First-Curtain Sync: Flash fires at the beginning of the exposure.
- Second-Curtain Sync: Flash fires just before the second curtain closes, creating a trail of light behind moving subjects.
- Flash Exposure Compensation (FEC): Adjusts the flash output level.
- Flash Exposure Bracketing (FEB): Takes three photos with different flash exposures.
- Flash Exposure Lock (FEL): Locks the flash exposure for a specific part of the scene.
4. Flexible Shooting Angle
The flash head can be swiveled and tilted to achieve various lighting effects, including direct flash and bounce flash.
- Horizontal Swivel: 0° to 330°
- Vertical Tilt: -7° to 120°

Image: Diagrams illustrating the flexible shooting angles of the Godox V1 Pro, showing its ability to rotate 0-330 degrees horizontally and tilt -7 to 120 degrees vertically for versatile light positioning.
5. Modeling Lamp
The V1 Pro includes a 10-level adjustable LED modeling lamp to assist with pre-visualization of lighting effects.
- Press the modeling lamp button (often indicated by a light bulb icon) to turn it on/off.
- Use the dial or directional buttons to adjust the brightness level.

Image: A photographer using the Godox V1 Pro flash on a camera, demonstrating the effectiveness of its adjustable LED modeling light in illuminating the subject for precise light setup before taking the shot.
6. Connecting External Power Pack
For extended shooting sessions and faster recycle times, the V1 Pro can be connected to an external power pack like the Godox PB960.
- Locate the external power port on the V1 Pro.
- Connect the appropriate cable from the power pack to this port.
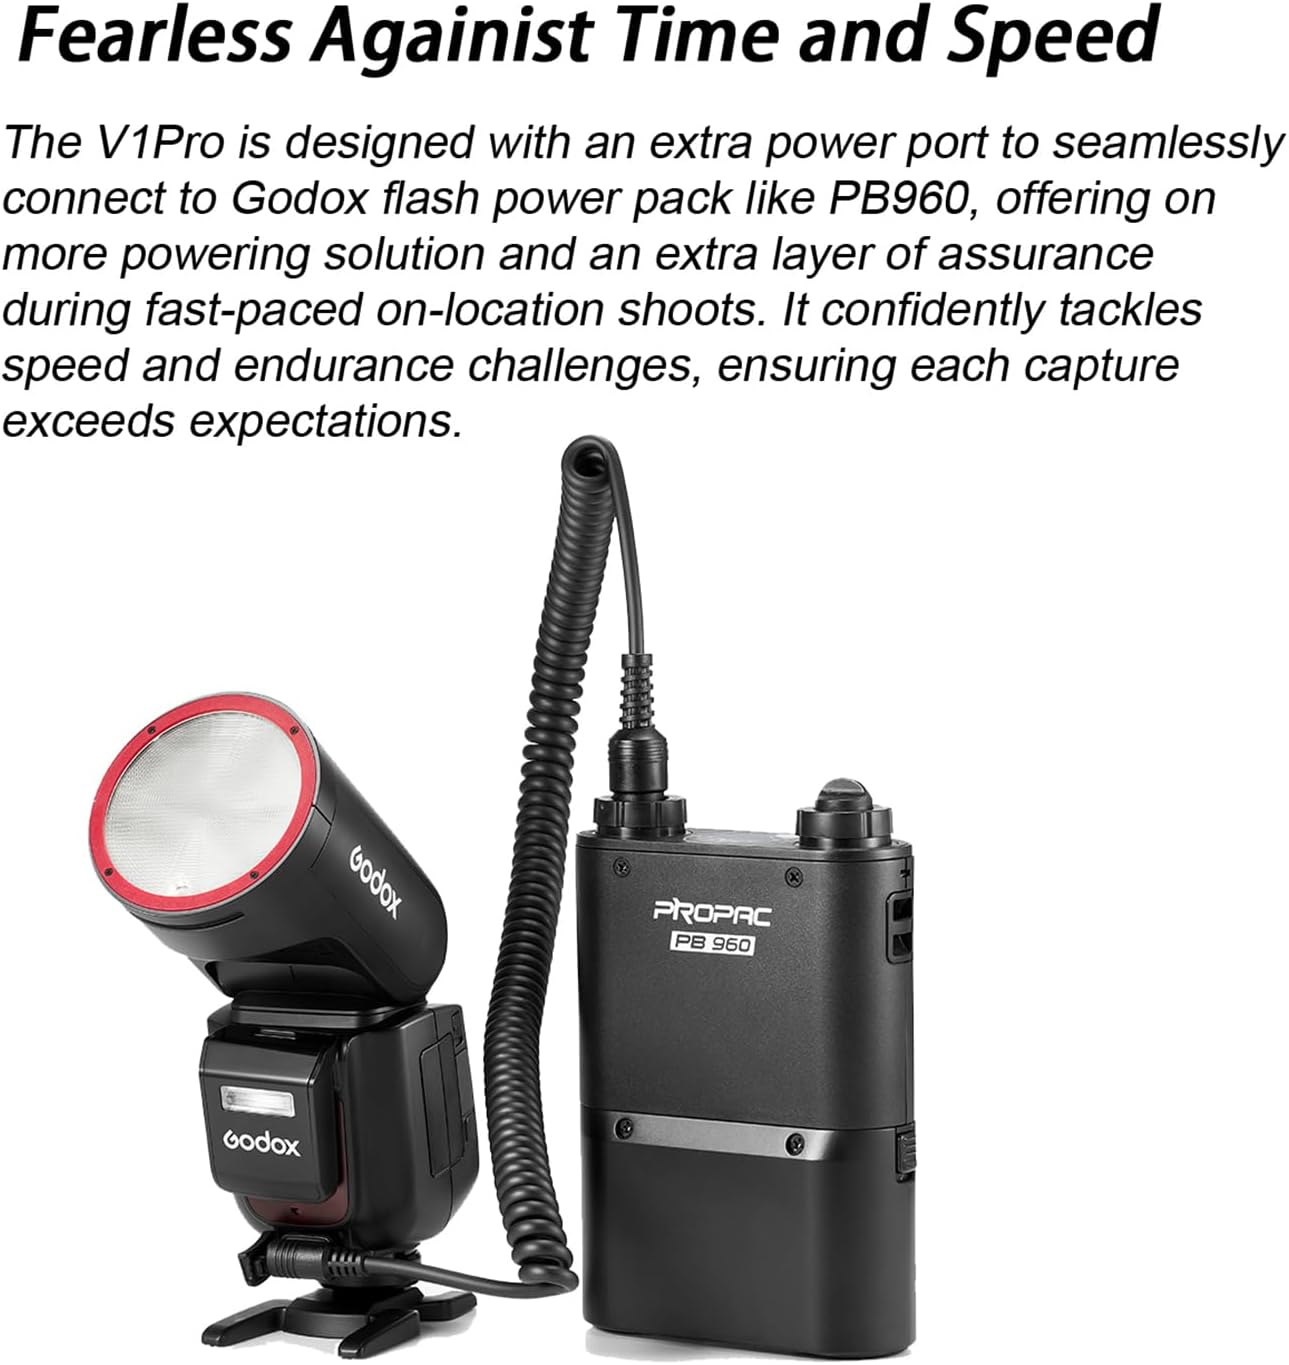
Image: The Godox V1 Pro flash unit connected via a coiled cable to an external Godox PB960 power pack, illustrating its capability for extended power and faster recycling during demanding shoots.
Maintenance
1. Cleaning
- Use a soft, dry cloth to clean the flash body.
- For the flash tube and modeling lamp, use a lens cleaning cloth and solution if necessary, ensuring no residue is left.
- Keep the hot shoe contacts clean and free of debris.
2. Battery Care
- Store the battery in a cool, dry place when not in use.
- If storing for extended periods, charge the battery to approximately 50% capacity.
- Avoid exposing the battery to extreme temperatures.
Troubleshooting
Common Issues and Solutions
| Problem | Possible Cause | Solution |
|---|---|---|
| Flash does not fire | Low battery; Flash not securely mounted; Flash in sleep mode; Camera settings incorrect. | Charge battery; Re-mount flash firmly; Press test button to wake; Check camera flash settings (e.g., external flash enabled). |
| Flash output is inconsistent | TTL metering issues; Obstruction; Overheating. | Switch to Manual mode for consistent output; Ensure clear path for light; Allow flash to cool down if used continuously. |
| Flash recycle time is slow | Low battery; High power output. | Recharge or replace battery; Reduce flash power output; Consider using an external power pack. |
| SU-1 external flash not working | Not properly attached; Damaged contacts. | Ensure SU-1 is securely attached; Clean contacts on both SU-1 and main flash. |
Specifications
| Feature | Detail |
|---|---|
| Model Number | GODV1PROC |
| Compatible Mountings | Canon |
| Flash Sync Speed | 1/8000 sec (High Speed Sync) |
| Recycle Time | Approx. 1.3 seconds (at full power) |
| Full Power Flashes | Approx. 500 times |
| Flash Coverage | 28-105mm (Auto/Manual Zoom) |
| Swivel Angle | 0° to 330° (Horizontal) |
| Tilt Angle | -7° to 120° (Vertical) |
| Power Source | VB30 Lithium Ion Battery (included) |
| Item Weight | 2.43 pounds |
| Package Dimensions | 9.3 x 7.8 x 4 inches |
Warranty and Support
Godox products are manufactured to high quality standards. For specific warranty terms and conditions, please refer to the warranty card included with your product or visit the official Godox website. Keep your proof of purchase for any warranty claims.
For technical support, service, or inquiries regarding your Godox V1 Pro flash, please contact Godox customer service or an authorized service center. Contact information can typically be found on the Godox official website or in the product packaging.
Manufacturer: Godox