Lenoxx WMF20
Lenoxx Wall-Mounted Heater & Fan User Manual
Model: WMF20
Brand: Lenoxx
1. Introduction
Thank you for purchasing the Lenoxx Wall-Mounted Heater & Fan. This versatile appliance is designed to provide year-round comfort, offering both powerful heating for colder days and refreshing fan functionality for warmer periods. Its sleek, space-saving design and convenient remote control make it an ideal addition to any room. This manual provides essential information for the safe and efficient operation of your new appliance. Please read it thoroughly before installation and use, and retain it for future reference.
2. Important Safety Information
To reduce the risk of fire, electric shock, or injury, always follow these basic safety precautions:
- Read all instructions before using this appliance.
- This appliance is for indoor use only.
- WARNING: This appliance is NOT suitable for use in bathrooms, laundry areas, or similar damp indoor locations. Do not place the heater where it may fall into a bathtub or other water container.
- Do not operate any heater with a damaged cord or plug, or after the heater malfunctions or has been dropped or damaged in any manner.
- Do not run cord under carpeting. Do not cover cord with throw rugs, runners, or similar coverings. Arrange cord away from traffic area and where it will not be tripped over.
- To disconnect heater, turn controls to OFF, then remove plug from outlet.
- Do not insert or allow foreign objects to enter any ventilation or exhaust opening as this may cause an electric shock or fire, or damage the heater.
- To prevent a possible fire, do not block air intakes or exhaust in any manner. Do not use on soft surfaces, like a bed, where openings may become blocked.
- A heater has hot and arcing or sparking parts inside. Do not use it in areas where gasoline, paint, or flammable liquids are used or stored.
- Use this heater only as described in this manual. Any other use not recommended by the manufacturer may cause fire, electric shock, or injury to persons.
- Always plug heaters directly into a wall outlet/receptacle. Never use with an extension cord or relocatable power tap (outlet/power strip).
- Ensure the appliance is securely mounted to a wall before operation.
- The appliance features overheat protection, which automatically shuts off the unit if it becomes too hot. If this occurs, unplug the unit and allow it to cool before restarting.
3. Package Contents
Please check the package contents upon opening to ensure all items are present and undamaged:
- Lenoxx Wall-Mounted Heater & Fan Unit
- Remote Control
- User Manual (this document)
- Mounting Hardware (screws, wall anchors - typically included for wall-mounted units)
4. Product Overview
Familiarize yourself with the components of your Lenoxx Wall-Mounted Heater & Fan.
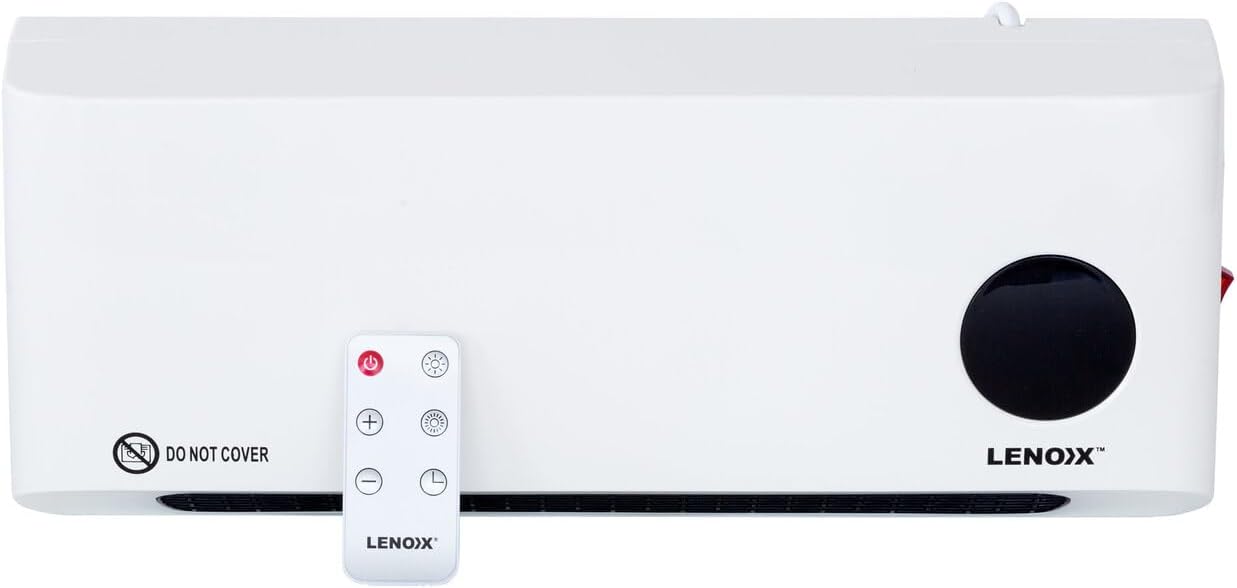
Figure 4.1: Front view of the Lenoxx Wall-Mounted Heater & Fan, showing the main unit and its remote control. The unit is white with a black air outlet grille and a circular black display area on the right. The remote control is white with red power button and other function buttons.

Figure 4.2: Close-up view of the circular LED display on the Lenoxx heater, showing the temperature setting '22' and a snowflake icon, indicating fan mode or a low temperature setting.
Unit Components:
- Air Outlet Grille: Located at the bottom front, where heated or cooled air is expelled.
- LED Display: A circular display on the front right, showing temperature, timer, and mode indicators.
- Power Switch: Located on the side of the unit (refer to Figure 4.3).
- Power Cord: Extends from the side/back for electrical connection.
- Mounting Points: Located on the rear for wall installation.

Figure 4.3: Side view of the Lenoxx Wall-Mounted Heater, highlighting the red rocker power switch and the product information label with model number WMF20 and electrical specifications.
Remote Control Functions:
The remote control provides full functionality for operating the heater and fan. Ensure batteries are correctly inserted (typically 2x AAA, not included).
- Power Button: Turns the unit ON/OFF.
- Heat Level Buttons (+/-): Adjusts temperature settings or switches between heat levels (Low/High).
- Mode Button: Cycles through fan mode, low heat, and high heat settings.
- Timer Button: Sets the auto-off timer (1-8 hours).
- Oscillation Button (if applicable): Controls oscillation function (not explicitly mentioned in product details, but common for fans).
5. Setup & Installation
The Lenoxx Wall-Mounted Heater & Fan is designed for permanent wall installation. It is recommended to have a qualified electrician or professional install the unit to ensure safety and proper function.
- Choose a Suitable Location: Select a wall location that is away from water sources, flammable materials, and direct sunlight. Ensure there is sufficient clearance around the unit for proper airflow (at least 1 meter from furniture, curtains, etc.). Remember, this unit is not suitable for bathrooms or damp areas.
- Mark Mounting Points: Hold the unit against the wall at the desired height and mark the positions for the mounting screws. Use a level to ensure it is straight.
- Drill Holes: Drill pilot holes at the marked positions. Insert wall anchors if necessary (for drywall or plaster).
- Secure the Unit: Align the unit with the drilled holes and secure it firmly to the wall using the provided screws. Ensure it is stable and cannot easily be dislodged.
- Plug In: Once securely mounted, plug the power cord into a standard 220-240V~50Hz electrical outlet. Do not use extension cords or power strips.

Figure 5.1: The Lenoxx Wall-Mounted Heater & Fan shown installed on a wall above a plant and next to a window, demonstrating its compact and discreet placement.
6. Operating Instructions
Operate your Lenoxx Wall-Mounted Heater & Fan using the remote control. The unit itself has a main power switch on the side, but most settings are controlled via the remote.
6.1 Initial Power On
- Ensure the unit is securely mounted and plugged into a suitable power outlet.
- Locate the main power switch on the side of the unit (refer to Figure 4.3) and switch it to the 'ON' position. The LED display may light up briefly.
- Press the Power Button on the remote control to turn the unit on.
6.2 Setting Temperature and Heat Levels
- Once powered on, the unit will typically start in a default mode.
- Use the Mode Button on the remote to cycle through the operating modes:
- Fan Only: Provides air circulation without heat.
- Low Heat (1000W): Provides gentle heating.
- High Heat (2000W): Provides powerful heating for faster room warming.
- To set a specific temperature (18-45°C), use the Temperature Adjustment Buttons (+/-) on the remote. The LED display will show the set temperature. The unit will automatically adjust its heating output to maintain the desired temperature.
6.3 Using the Timer Function
- Press the Timer Button on the remote control.
- Each press will increase the timer duration by one hour, from 1 hour up to 8 hours. The set time will be displayed on the LED screen.
- The unit will automatically turn off once the set time has elapsed.
6.4 LED Display Indicators
The LED display provides visual feedback on the unit's current status:
- Temperature: Displays the set temperature.
- Timer: Shows the remaining time when the timer function is active.
- Mode Icons: Icons may indicate fan mode, low heat, or high heat.
7. Maintenance
Regular cleaning and maintenance will help ensure the longevity and efficient operation of your heater and fan.
- Always unplug the unit from the power outlet and allow it to cool completely before cleaning.
- Exterior Cleaning: Wipe the exterior surfaces with a soft, damp cloth. Do not use abrasive cleaners, waxes, or polishes as these may damage the finish.
- Air Inlet/Outlet: Use a soft brush or vacuum cleaner with a brush attachment to gently remove dust and debris from the air inlet and outlet grilles. Ensure these areas remain clear for optimal airflow.
- Storage: If storing the unit for an extended period, unplug it, clean it thoroughly, and store it in a cool, dry place, preferably in its original packaging.
- Remote Control: If the remote control is not used for a long time, remove the batteries to prevent leakage.
8. Troubleshooting
If you experience issues with your Lenoxx Wall-Mounted Heater & Fan, refer to the following common problems and solutions:
| Problem | Possible Cause | Solution |
|---|---|---|
| Unit does not turn on. |
|
|
| No heat is produced. |
|
|
| Remote control is not working. |
|
|
| Unit is noisy. |
|
|
9. Specifications
| Feature | Detail |
|---|---|
| Model Number | WMF20 |
| Power | 1000W / 2000W |
| Voltage | 220-240V~50Hz |
| Colour | White |
| Measurements (L x H x D) | 42cm x 17.5cm x 10.5cm |
| Weight | 2 kg |
| Heating Element | PTC Ceramic |
| Temperature Range | 18-45°C |
| Timer | 1-8 hours |
| Special Features | LED Display, Remote Control, Overheat Protection |
10. Warranty & Support
For warranty information, please refer to the warranty card included with your product or visit the official Lenoxx website. Keep your purchase receipt as proof of purchase for any warranty claims.
If you require technical support or have questions not covered in this manual, please contact Lenoxx customer service through their official channels. Do not attempt to repair the appliance yourself.
Lenoxx is a registered trademark. All rights reserved.
Related Documents - WMF20
 |
Lenoxx ICM18 Ice Cube Maker Instruction Manual Comprehensive instruction manual for the Lenoxx ICM18 Ice Cube Maker, detailing setup, operation, cleaning, troubleshooting, and specifications. Learn how to make up to 10kg of ice in 24 hours with this household appliance. |
 |
Lenoxx EC06 Portable Evaporative Cooler User Manual Comprehensive user manual for the Lenoxx EC06 Portable Evaporative Cooler. Find detailed instructions on operation, safety, maintenance, and warranty information for your Lenoxx air cooler. |
 |
Healthy Choice Electric Egg Steamer SE70 User Manual | Lenoxx Comprehensive user manual for the Healthy Choice Electric Egg Steamer Model SE70 by Lenoxx. Includes important safety safeguards, product introduction with component descriptions, operating instructions for cooking eggs to perfection, and cleaning and maintenance guidelines. |
 |
LENOXX TR120 Wall Mount Heated Towel Rail - Product Overview Explore the LENOXX TR120 Wall Mount Heated Towel Rail. This electric towel rack features 8 heated rods, IPX4 water-resistance, fast warming up to 50°C, and durable aluminium construction. Ideal for drying towels and clothes. |
Ask a question about this manual
Ask about setup, troubleshooting, compatibility, parts, safety, or missing instructions. Manuals+ will review the question and use this page’s manual context to help answer it.