1. Introduction
The ATOMSTACK R3 Pro Rotary Roller is an advanced accessory designed to expand the capabilities of your laser engraving machine. It enables 360-degree rotary engraving on various cylindrical and irregularly shaped objects, such as cans, bottles, cups, and rings. This manual provides essential information for the safe and effective use of your R3 Pro Rotary Roller, covering setup, operation, maintenance, and troubleshooting.
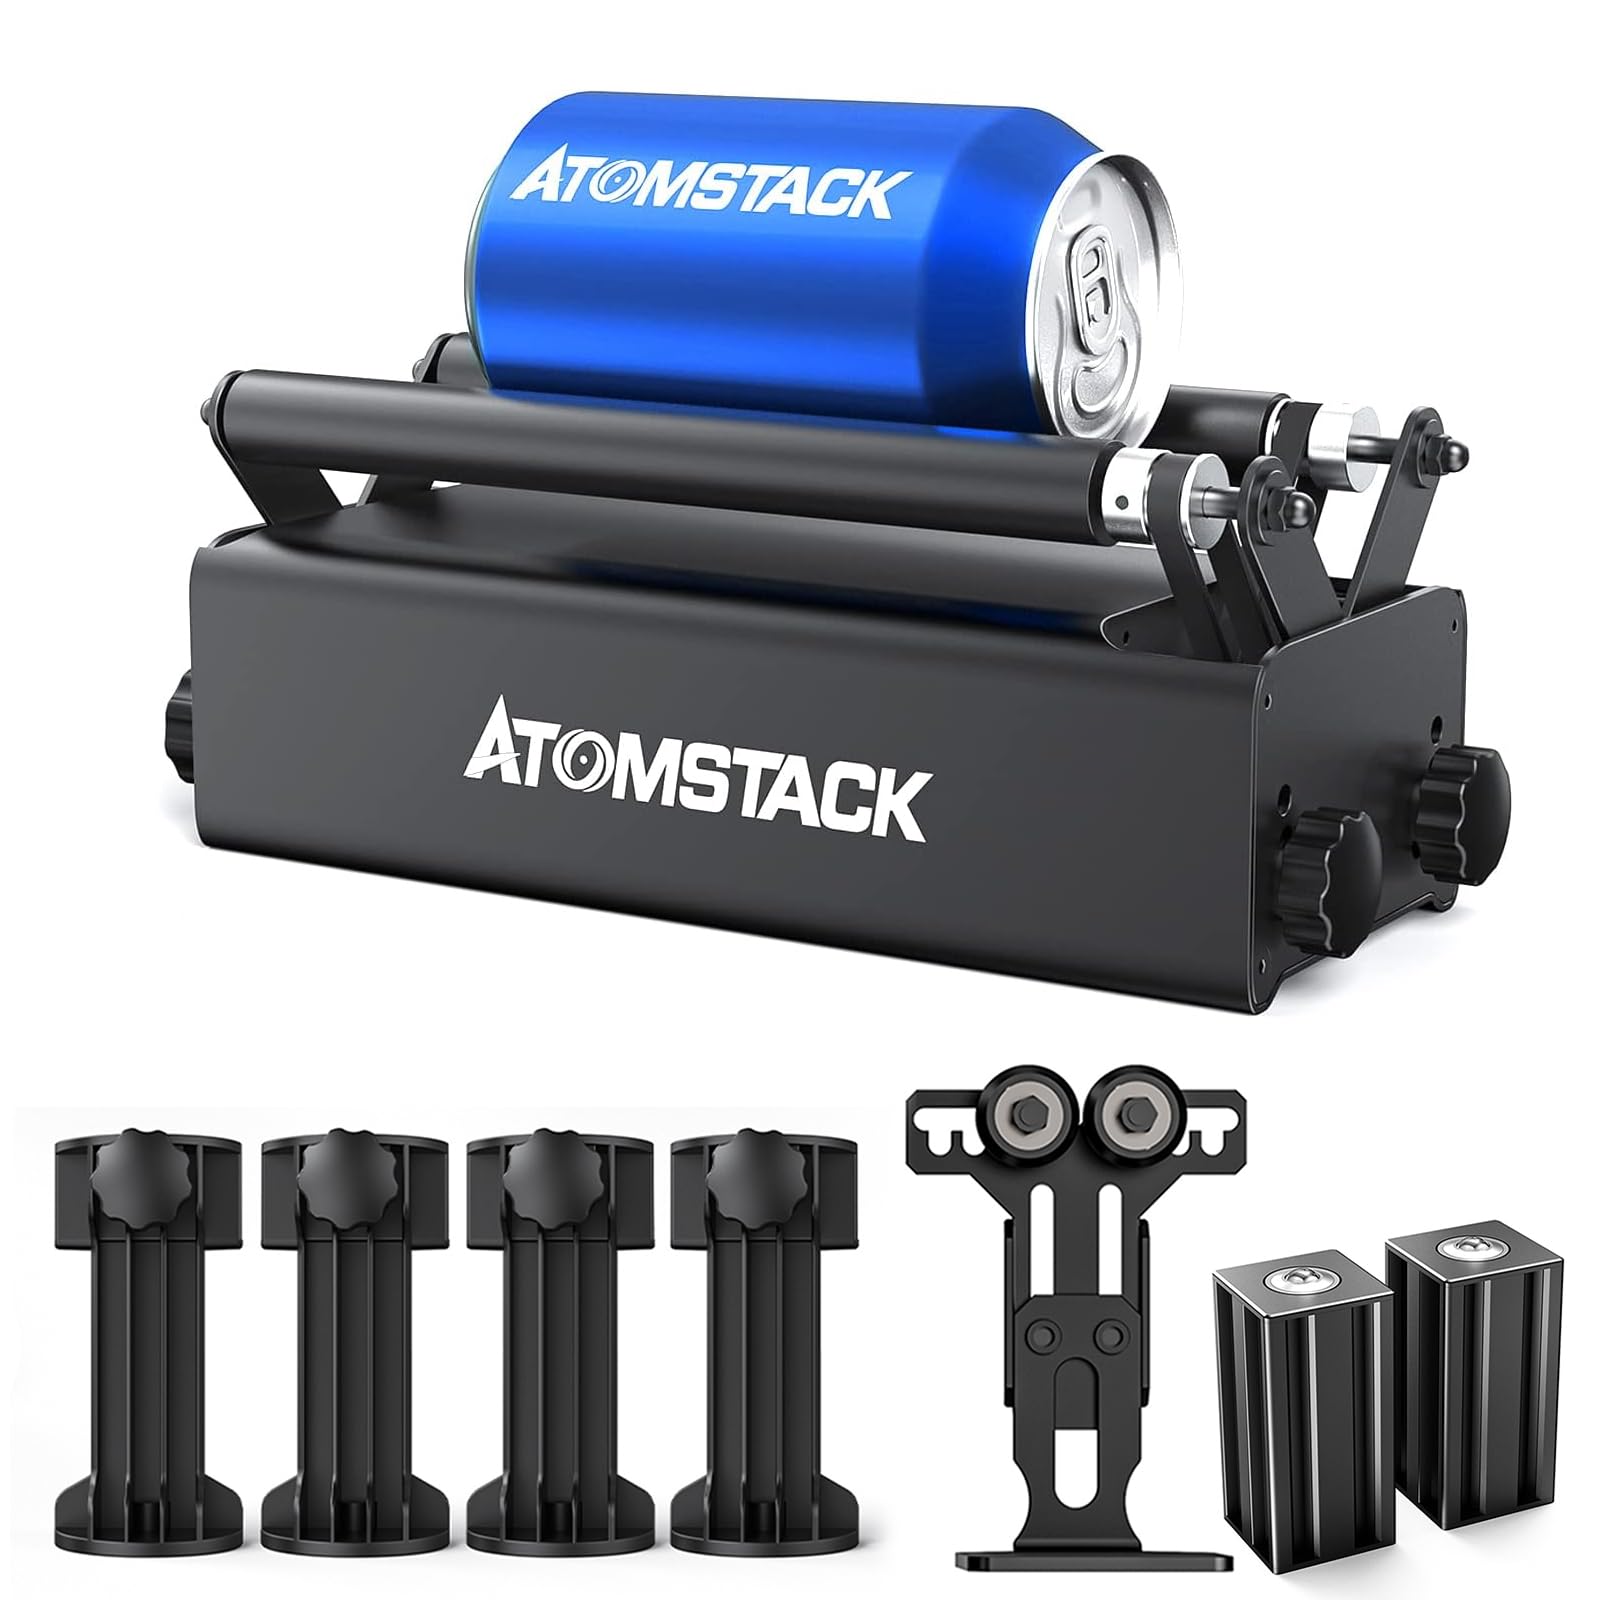
Image: The ATOMSTACK R3 Pro Rotary Roller in operation, engraving a design onto a wine glass, demonstrating its 360-degree rotary engraving capability.
3. Package Contents
Verify that all components are present in the package. If any parts are missing or damaged, contact customer support.
- 1 x Rotary Roller (Axis of rotation)
- 4 x Auxiliary Heightening Columns (Raised seats)
- 1 x Support Frame (Support seat)
- 2 x Auxiliary Support Shafts (Bull's-eye sliders)

Image: A visual representation of the ATOMSTACK R3 Pro Rotary Roller and its included accessories, such as the main roller unit, auxiliary heightening columns, support frame, and auxiliary support shafts.
4. Specifications
| Feature |
Detail |
| Model |
R3 Pro (G1-R3Pro, G59) |
| Product Dimensions |
260mm (Length) x 90mm (Width) x 105mm (Height) |
| Net Weight |
1.9 KG |
| Power |
24W |
| Material |
Aluminum alloy + 303 stainless steel + iron + silicone + plastic |
| Minimum Engraving Diameter |
4 mm / 0.16 inches |
| Adjustable Diameter Levels |
8 levels |
| Compatibility |
Compatible with 95% of laser engraving machines on the market, including Atomstack, Ortur, Neje, Sculpfun, Twotree, etc. |
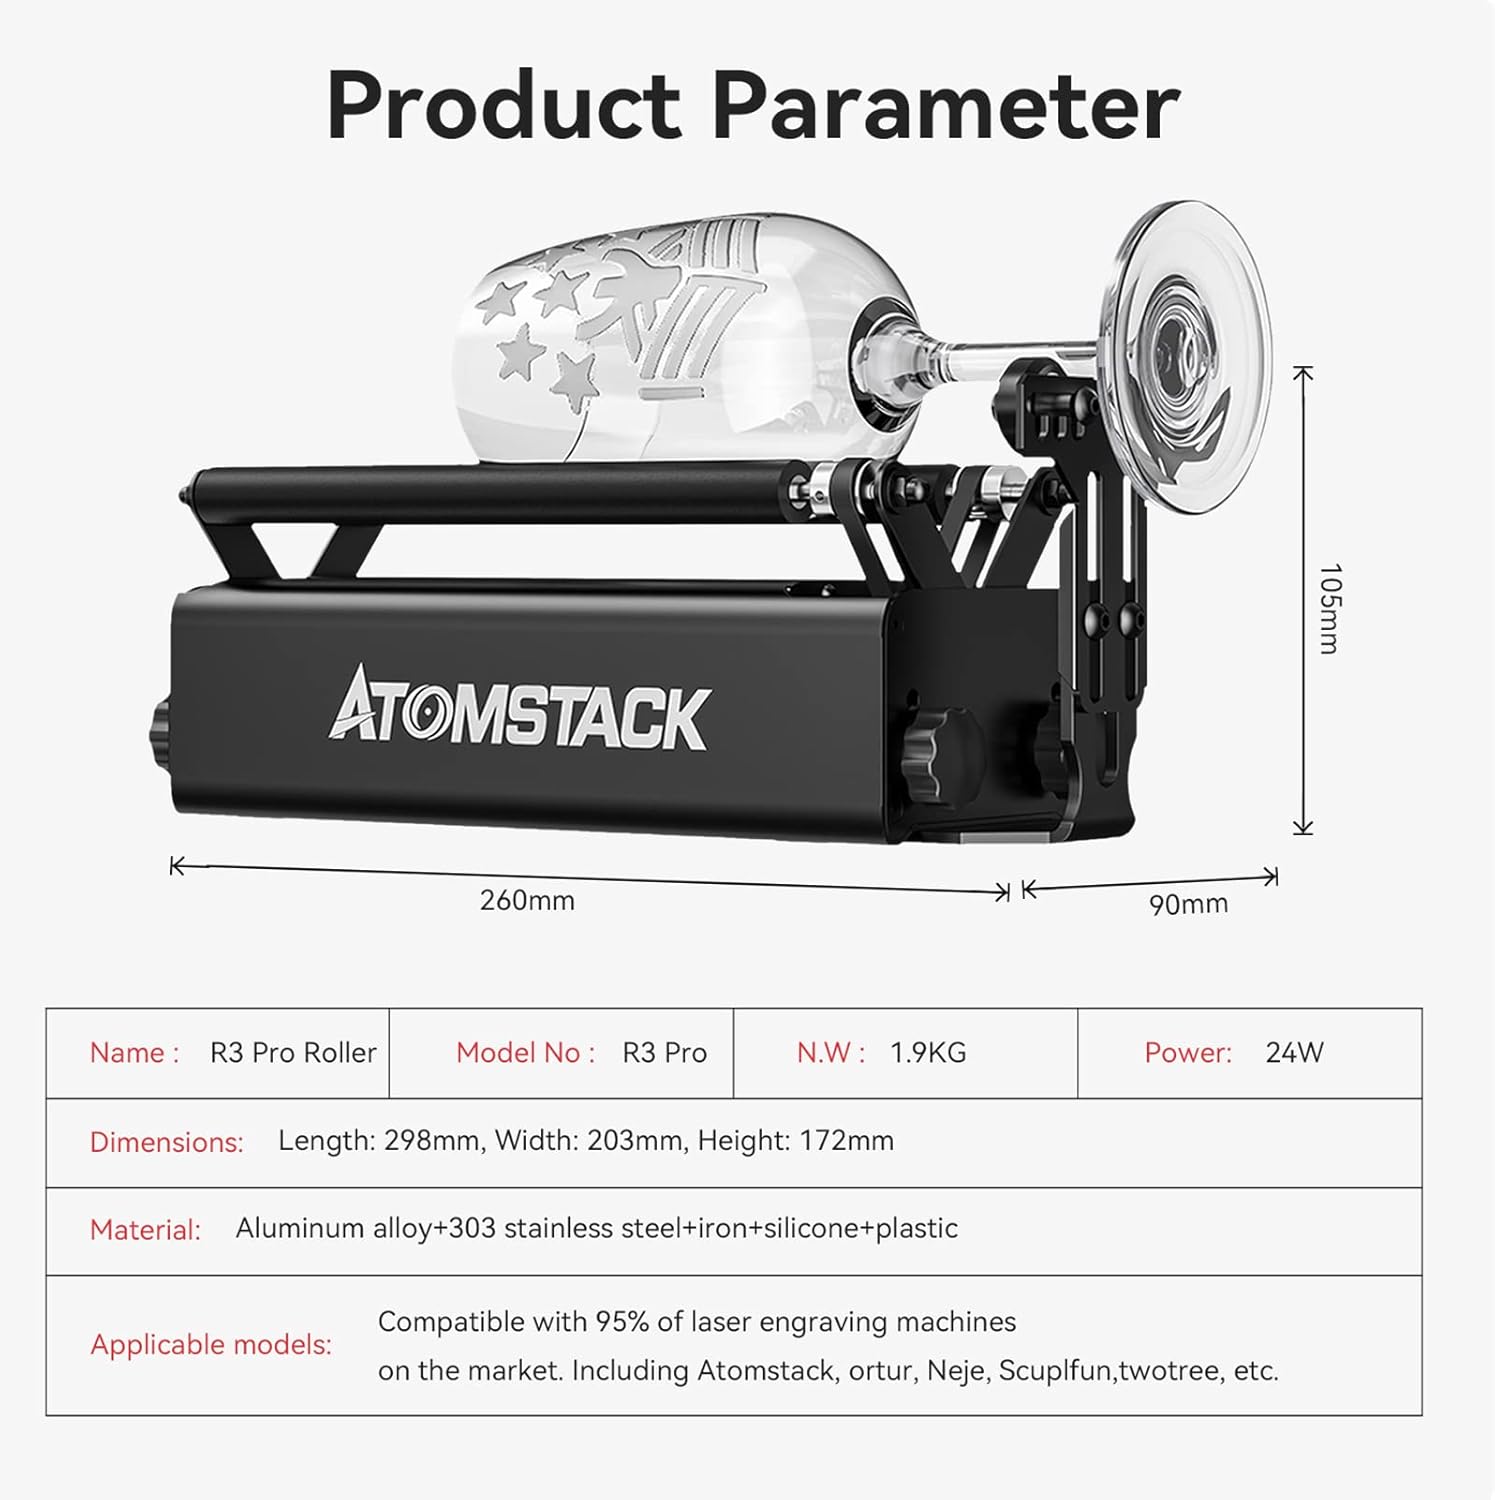
Image: A diagram illustrating the key dimensions and specifications of the ATOMSTACK R3 Pro Rotary Roller, including length, width, height, and material composition.
5. Setup Instructions
The ATOMSTACK R3 Pro Rotary Roller is designed for easy, out-of-the-box use with minimal assembly required. Follow these steps to integrate it with your laser engraving machine.
- Placement: Place the R3 Pro Rotary Roller on a stable, flat surface within the working area of your laser engraving machine. Ensure it is level and secure.
- Connecting to Laser Engraver: Connect the rotary roller to your laser engraving machine's Y-axis port using the provided cable. Refer to your laser engraver's manual for specific port locations.
- Adjusting for Object Size:
- For standard cylindrical objects, place the object directly on the main rollers.
- For objects with handles or irregular shapes, use the provided support frame and auxiliary support shafts to stabilize the object.
- For oversized objects, utilize the auxiliary heightening columns to raise the rotary roller to the appropriate height.
- Diameter Adjustment: The roller diameter is adjustable across 8 levels to accommodate various object sizes, with a minimum engraving diameter of 4mm. Adjust the rollers by rotating the knobs on the side to fit your object snugly but allowing free rotation.
- Software Configuration: Configure your laser engraving software (e.g., LaserGRBL, LightBurn) to enable rotary engraving mode. This typically involves selecting the Y-axis as the rotary axis and inputting the correct diameter of your object. Refer to your software's documentation for detailed instructions.

Image: A close-up view of the ATOMSTACK R3 Pro Rotary Roller's adjustable mechanism, showing the 8 positions for diameter adjustment to accommodate various object sizes.

Image: The ATOMSTACK R3 Pro Rotary Roller with two bull's-eye supporting columns, used for stabilizing oversized or irregularly shaped objects during engraving.
6. Operating Instructions
Once the R3 Pro Rotary Roller is set up and configured, you can begin your engraving projects.
- Prepare Your Object: Clean the surface of the object to be engraved. Ensure it is free of dust, grease, or any obstructions that could affect engraving quality.
- Place Object on Roller: Carefully place the cylindrical object onto the rotary roller. Ensure it is centered and stable, allowing it to rotate smoothly without wobbling. Use the support frame or auxiliary support shafts if needed for stability.
- Focus the Laser: Adjust the laser focus according to your laser engraving machine's instructions, ensuring the laser beam is precisely focused on the surface of the object.
- Load Design and Start Engraving:
- Load your desired design into the laser engraving software.
- Ensure rotary engraving mode is active and the object's diameter is correctly entered.
- Perform a test run or frame preview to verify the engraving path and ensure it aligns correctly with the object.
- Initiate the engraving process. Monitor the engraving closely and be prepared to stop the machine if any issues arise.
- Post-Engraving: Once engraving is complete, allow the object to cool if necessary. Carefully remove the engraved object from the rotary roller.

Image: The ATOMSTACK R3 Pro Rotary Roller demonstrating its versatility by engraving a long cylinder, a small-diameter proto-cylinder, and performing extra-length plate engraving and cutting.
7. Maintenance
Regular maintenance ensures the longevity and optimal performance of your ATOMSTACK R3 Pro Rotary Roller.
- Cleaning: After each use, gently clean the rollers and the main body of the device with a soft, dry cloth to remove any dust or debris. Avoid using abrasive cleaners or solvents.
- Inspection: Periodically inspect the rubber rollers for wear or damage. Check the belt for tension and signs of fraying.
- Storage: When not in use, store the rotary roller in a clean, dry environment, away from direct sunlight and extreme temperatures.
- Lubrication: The enclosed motor and concentric design are generally maintenance-free. Do not attempt to lubricate internal components unless specifically instructed by ATOMSTACK support.
8. Troubleshooting
If you encounter issues with your R3 Pro Rotary Roller, refer to the following common problems and solutions.
- Object Not Rotating Smoothly:
- Ensure the object is properly centered and balanced on the rollers.
- Check that the rollers are adjusted correctly for the object's diameter, providing firm but not excessive grip.
- Clean the rollers to remove any debris that might impede rotation.
- Engraving Distortion or Misalignment:
- Verify that the rotary roller is securely connected to the laser engraver's Y-axis.
- Confirm that the correct object diameter is entered in your engraving software.
- Ensure the object is not slipping on the rollers. The one-piece rubber rollers with 70A hardness are designed for strong friction.
- Check for any loose cables or connections.
- Rotary Roller Not Responding:
- Ensure the rotary roller is properly connected to the laser engraving machine and the machine is powered on.
- Verify that rotary mode is enabled in your laser engraving software.
- Restart your laser engraving machine and software.
If these solutions do not resolve the issue, please contact ATOMSTACK customer support for further assistance.
10. Customer Support
If you require technical assistance, have questions about product operation, or need to report a problem, please contact ATOMSTACK customer support through their official website or the contact information provided in your product documentation.
For software compatibility and support, ATOMSTACK laser engravers are compatible with LaserGRBL (Windows XP, 7, 8, 10, 11) and LightBurn (macOS, Linux, Windows XP, 7, 8, 10, 11).

Image: An illustration showing the software compatibility of ATOMSTACK products, including support for Windows, Mac OS, iOS, and Android operating systems.