
1. Introduction
The Mr. Dj MIC-UHF200 is a professional wireless microphone system designed for reliable audio transmission. This system includes a receiver and two handheld microphones, operating on Ultra High Frequency (UHF) bands. It features an LED digital display, 1/4" output, and XLR balanced output for versatile connectivity. This manual provides instructions for setup, operation, maintenance, and troubleshooting to ensure optimal performance of your wireless microphone system.
2. What's in the Box
Upon unpacking, please verify that all items listed below are present and in good condition.
- 1 x MIC-UHF200 Wireless Receiver
- 2 x Handheld Wireless Microphones
- 1 x Power Adapter for Receiver
- 1 x 1/4" Audio Cable
- 1 x User Manual (this document)
- Batteries for Microphones (may be included or sold separately)
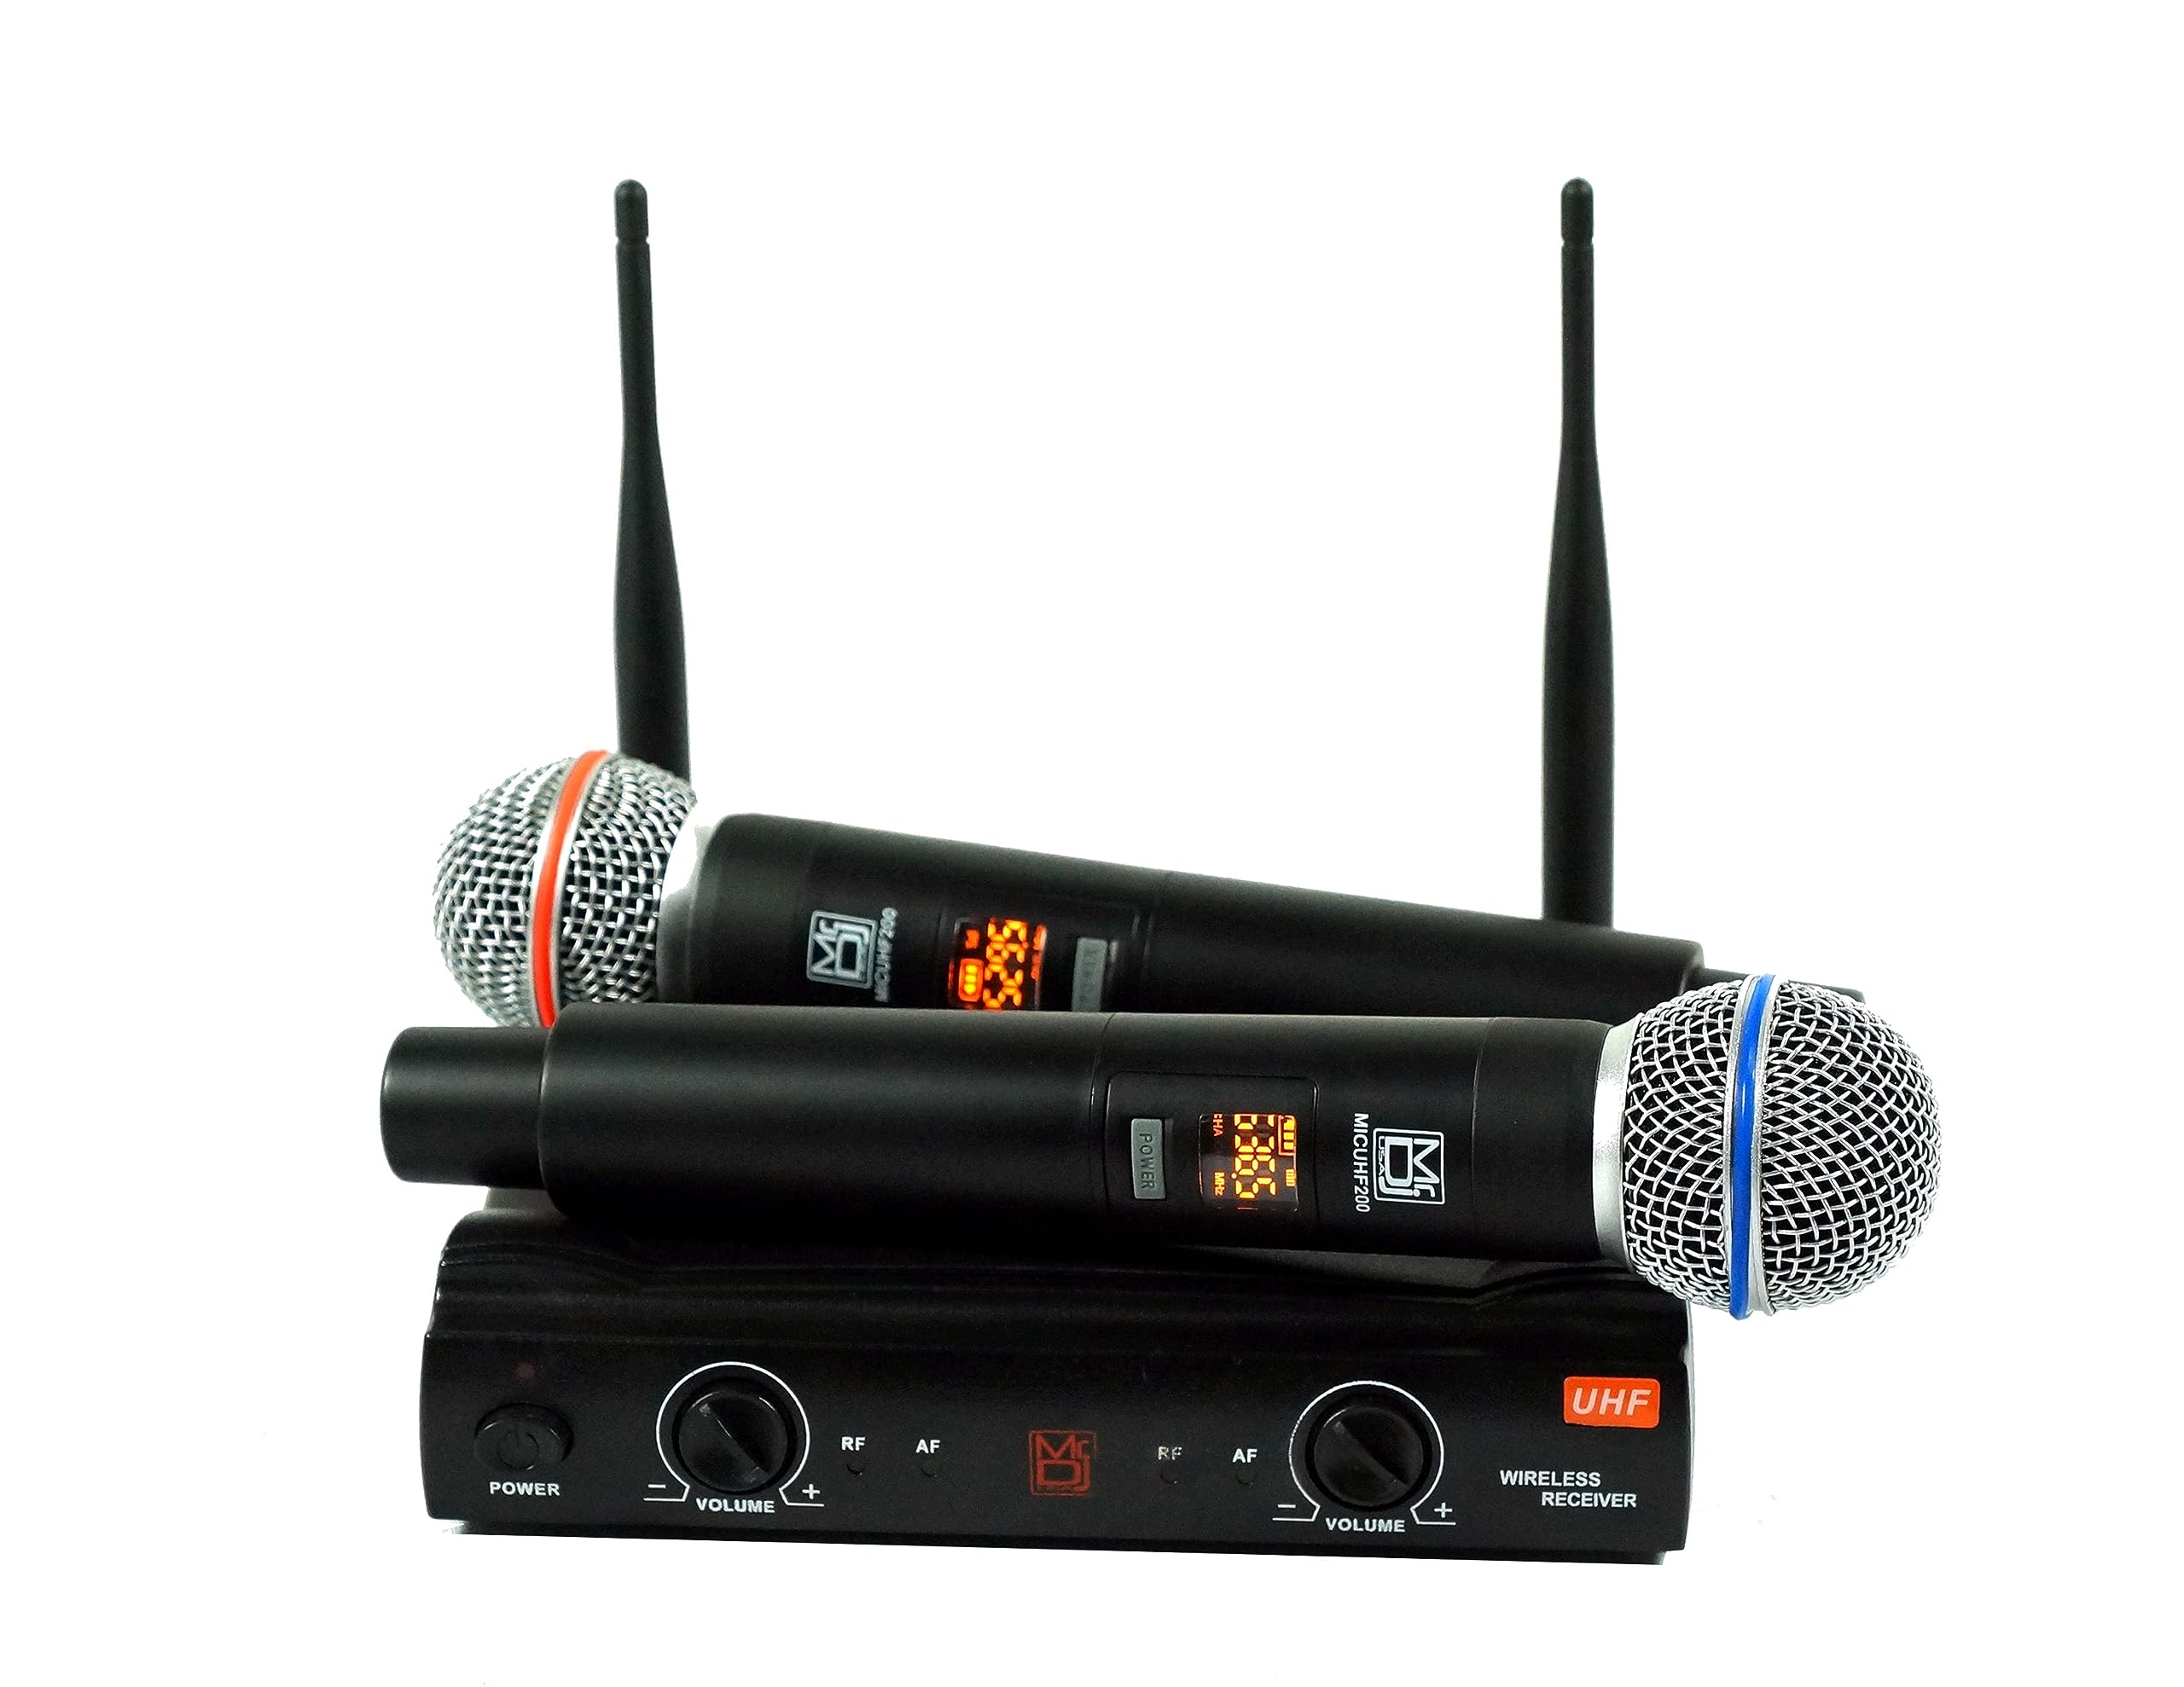
Image: The Mr. Dj MIC-UHF200 Wireless Microphone System, showing the receiver unit and two handheld microphones.
3. Setup Instructions
- Receiver Placement: Place the receiver unit on a stable, flat surface, away from potential sources of interference such as large metal objects, digital devices, or other wireless equipment. Ensure good line-of-sight to the area where the microphones will be used.
- Power Connection: Connect the provided power adapter to the DC input port on the rear of the receiver. Plug the adapter into a suitable electrical outlet. Do not power on the receiver yet.
- Audio Output Connection:
- 1/4" Output: Connect one end of the 1/4" audio cable to the 1/4" output jack on the receiver. Connect the other end to an available input on your mixer, amplifier, or sound system.
- XLR Balanced Output: For professional setups, connect an XLR cable (not included) to the XLR balanced output jack on the receiver and to an XLR input on your audio equipment.
- Microphone Battery Installation: Unscrew the bottom cap of each handheld microphone. Insert two fresh AA batteries (not included, unless specified) into each microphone, observing the correct polarity (+/-). Screw the cap back on securely.
- Power On:
- Turn on your audio equipment (mixer, amplifier) first, ensuring its volume is set to a low level.
- Press the power button on the receiver unit. The LED digital display should illuminate.
- Turn on each handheld microphone by sliding its power switch to the "ON" position. The microphone's display (if present) should light up.
- Frequency Synchronization (if applicable): The MIC-UHF200 system typically auto-synchronizes. If you experience interference or need to change frequencies, consult the "Operating" section for instructions on adjustable frequency modulation.
- Sound Check: Speak into each microphone at a normal speaking volume. Gradually increase the volume on your audio equipment until the desired sound level is achieved. Ensure the AF and RF audio transmission indicators on the receiver are active when the microphones are in use.
4. Operating Instructions
4.1 Powering On/Off
- Receiver: Press the power button on the front panel to turn the receiver ON or OFF.
- Microphones: Slide the power switch on the microphone handle to the "ON" or "OFF" position.
4.2 Volume Adjustment
The overall volume of the microphones is controlled by the volume knobs on the receiver unit (if present) and primarily by your connected mixer or amplifier. Adjust these controls to achieve the desired audio level without distortion.
4.3 Frequency Selection (32 Channels)
The MIC-UHF200 system offers 32 selectable UHF channels to minimize interference.
- To change the frequency on a microphone, typically there is a button or a menu option on the microphone itself. Refer to the microphone's specific controls.
- Once the microphone's frequency is changed, the receiver should automatically detect and synchronize with the new frequency. Observe the LED digital display on the receiver to confirm synchronization.
- If automatic synchronization does not occur, there might be a manual pairing process. Consult the receiver's controls for a "SCAN" or "SYNC" button, or refer to the manufacturer's website for detailed instructions on manual frequency pairing.
4.4 Operating Range
The system has an operating range of up to 80 meters (240 feet) under optimal conditions. Obstacles, other wireless devices, and environmental factors can reduce this range. Maintain a clear line of sight between the microphones and the receiver for best performance.
5. Maintenance
5.1 Cleaning
- Wipe the receiver and microphones with a soft, dry cloth.
- Do not use abrasive cleaners, solvents, or harsh chemicals, as these can damage the finish or internal components.
- For microphone grilles, gently remove any debris using a soft brush.
5.2 Battery Replacement
Replace microphone batteries when the low battery indicator appears on the microphone's display or when audio quality degrades. Always use fresh, high-quality AA batteries. Remove batteries if the microphones will not be used for an extended period to prevent leakage.
5.3 Storage
Store the system in a cool, dry place, away from direct sunlight, extreme temperatures, and high humidity. Keep components in their original packaging or a protective case when not in use.
6. Troubleshooting
| Problem | Possible Cause | Solution |
|---|---|---|
| No sound from microphone |
|
|
| Interference or static |
|
|
| Short operating range |
|
|
7. Specifications
| Feature | Detail |
|---|---|
| Brand | Mr. Dj |
| Model Number | MIC-UHF-200 |
| Connectivity Technology | Audio (Wireless UHF) |
| Number of Channels | 32 |
| Operating Range | Up to 80M (240') |
| Audio Output Jack | 1/4" Output, XLR Balanced Output |
| Display | LED Digital Display Readout Screens |
| Item Weight | 1 Pounds (Receiver) |
| UPC | 826843969959 |
8. Warranty Information
The Mr. Dj MIC-UHF200 Wireless Microphone System is covered by a 1-year manufacturer's warranty from the date of purchase. This warranty covers defects in materials and workmanship under normal use. It does not cover damage caused by misuse, accident, unauthorized modification, or improper installation. Please retain your proof of purchase for warranty claims.
9. Customer Support
For technical assistance, troubleshooting beyond this manual, or warranty inquiries, please contact Mr. Dj customer support. Refer to the official Mr. Dj website or your purchase documentation for current contact information.
Website: Visit the Mr. Dj Store on Amazon (for general product information)