1. Introduction
The EPOMAKER x LEOBOG Hi75 is a high-performance wired mechanical keyboard designed for both gaming and professional use. Featuring a durable aluminum alloy construction, a gasket-mounted structure for enhanced typing feel, and a versatile mode-switching knob, this keyboard offers extensive customization and reliable performance. This manual provides detailed instructions for setup, operation, and maintenance to ensure optimal use of your device.

Figure 1: Overview of the EPOMAKER x LEOBOG Hi75 Mechanical Keyboard.
2. Package Contents
- EPOMAKER x LEOBOG Hi75 Mechanical Keyboard
- USB-C Cable
- Keycap Puller
3. Setup
3.1 Connecting the Keyboard
The Hi75 keyboard uses a USB-C interface for a stable wired connection. To connect:
- Locate the USB-C port on the keyboard, typically on the rear edge.
- Connect one end of the provided USB-C cable to the keyboard.
- Connect the other end of the USB-C cable to an available USB port on your computer.
- The keyboard will be automatically recognized by your operating system.

Figure 2: Connecting the USB-C cable to the keyboard for wired operation.
3.2 Operating System Compatibility
The Hi75 keyboard is compatible with both Windows and Mac operating systems. If the WIN key or Alt key stops working properly, use the following shortcuts to switch to the correct OS mode:
- FN + Q: Android Mode
- FN + W: Windows Mode
- FN + E: Mac Mode
- FN + R: iOS Mode
4. Operating Instructions
4.1 Mode-Switching Knob
The innovative knob on the Hi75 keyboard allows for seamless transitions between different modes and provides refined control over various functions.
- Pressing the Knob: Switches between Work Mode (constant RGB glow) and Gaming Mode (dynamic RGB flashing).
- Rotating the Knob: Adjusts volume and lighting settings.
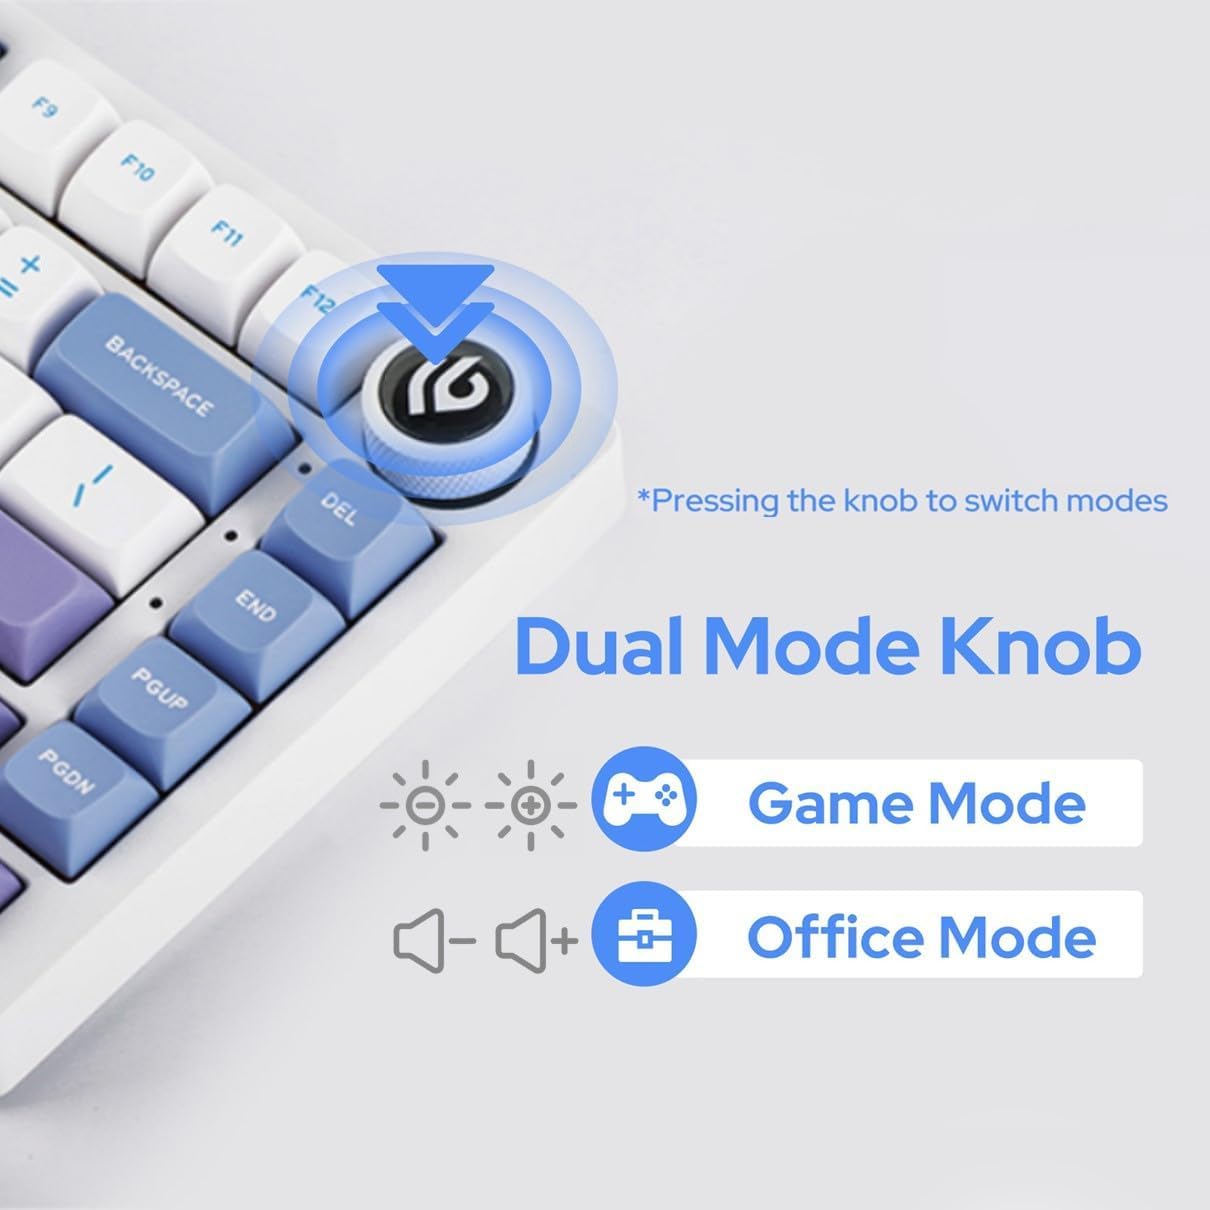
Figure 3: The multi-functional mode-switching knob for quick adjustments.
4.2 NKRO (N-Key Rollover)
The Hi75 supports N-Key Rollover, ensuring that every keypress is registered accurately, even when multiple keys are pressed simultaneously. This feature is crucial for fast typing and gaming scenarios.

Figure 4: Diagram illustrating the N-Key Rollover capability.
4.3 Advanced Gaming-Grade Chip
Equipped with a top-tier gaming chip, the Hi75 ensures rapid and responsive keystroke registration. Customize delay settings for a swift and seamless experience.

Figure 5: Illustration of the advanced gaming-grade chip.
4.4 Programming Software (VIA)
The Hi75 keyboard is programmable via VIA software, allowing for extensive customization of key assignments, macros, and lighting effects. To use VIA:
- Download the VIA software from the official EPOMAKER website or usevia.app.
- Connect your Hi75 keyboard to your computer via USB-C.
- Open the VIA software. The software should automatically detect your keyboard.
- Load the appropriate JSON definition file for your Hi75 model (usually available on the EPOMAKER website).
- Customize keymaps, create macros, and adjust lighting to your preference. Changes are applied in real-time.
Video 1: Demonstration on how to use VIA software for keyboard customization.
5. Maintenance
5.1 Cleaning
To maintain the longevity and appearance of your keyboard:
- Disconnect the keyboard from your computer before cleaning.
- Use a soft, lint-free cloth to wipe down the keycaps and case.
- For deeper cleaning, use a can of compressed air to remove dust and debris from between the keycaps.
- Avoid using harsh chemicals or abrasive materials.
5.2 Hot-Swappable Switches
The Hi75 features full key hot-swap capability, allowing you to change switches without soldering. It is compatible with most 3/5-pin mechanical switches.
- Using the provided keycap puller, carefully remove the desired keycap.
- Using a switch puller (not included, but often bundled with switches), gently grip the switch and pull it straight up to remove it.
- Align the pins of the new switch with the holes on the PCB.
- Press the new switch firmly into place until it clicks. Ensure it is seated correctly and not bent.
- Replace the keycap.

Figure 6: Demonstration of replacing hot-swappable switches.
Video 2: Comparison of different switch types, relevant for understanding hot-swappable options.
6. Troubleshooting
6.1 Keyboard Not Responding
- Ensure the USB-C cable is securely connected to both the keyboard and the computer.
- Try connecting the keyboard to a different USB port on your computer.
- Test the keyboard on another computer to rule out a computer-specific issue.
- If using a USB hub, try connecting directly to the computer.
6.2 Incorrect Key Output or Layout
- Verify the operating system mode is correctly set (FN + W for Windows, FN + E for Mac).
- Check VIA software for any custom key assignments that might be causing unexpected behavior.
- Perform a factory reset if necessary (refer to VIA software documentation for specific instructions).
6.3 RGB Lighting Issues
- Ensure the keyboard is in the correct mode (Work Mode for constant glow, Gaming Mode for dynamic flashing) using the mode-switching knob.
- Adjust brightness and effects using the knob or VIA software.
- If specific keys are not lighting up, check for any physical damage or improperly seated switches.
7. Specifications
- Product Dimensions: 12.99 x 5.31 x 1.77 inches
- Item Weight: 4.44 pounds
- Manufacturer: EPOMAKER
- Model Number: Hi75
- Connectivity Technology: USB-C
- Keyboard Description: Gaming
- Special Features: Backlit, Customizable Display Keys, Ergonomic, Hot-Swappable, Wired
- Keyboard Backlighting Color Support: RGB
- First Available Date: February 25, 2024
8. Additional Product Videos
Video 3: Overview of the EPOMAKER x LEOBOG Hi75 Aluminum Alloy Wired Mechanical Keyboard.
Video 4: Detailed look at the EPOMAKER x LEOBOG Hi75 Aluminum Alloy Wired Gaming Keyboard.
Video 5: Comparison between the Hi75 and P75 keyboards, highlighting key differences.
Video 6: Showcase of the EPOMAKER x LEOBOG Hi75 White Wired Mechanical Keyboard.
9. Warranty and Support
For warranty information and customer support, please visit the official EPOMAKER website or contact their customer service directly. Keep your purchase receipt for warranty claims.